Tuesday, December 18, 2018

Another big showdown of chocolate chip cookies

Alright, alright, I might as well give in and own it: chocolate chip cookies are my thing. Even when I have killer recipes, I can’t help but try others. And I’m not even going to apologize, because otherwise I would never have found the 36-hour cookies, even though I was (and still am) enamored with the Neiman-Marcus cookies.

So, I tried Alison Roman’s famous salted butter and chocolate chunk shortbread cookies, back when I still had lactose-free butter, and I have to say I did not care for them. Only one was nice enough to be photographed; they would have fared better without the egg wash, but still, I’m not making them again.


I took a look at what I call pan-bang cookies, which were all over the internet last fall. They looked good, but let’s face the facts: their entire draw is the fact that they end up being very flat (and have ripples), but a flat chocolate chip cookie is not what I want – I like them thick and chewy. So I’m not going to be pan-banging, or whatever the kids are calling it these days. There are still “chef recipes” I want to try, like the three on the BuzzFeed round-up, but I didn’t get around to it, and I probably need more taste tester for those.

I tried four more recipes for this round-up: the ones from Everyday Reading, which call for both butter and shortening; the ones from Tara O’Brady’s Seven Spoons, which call for melted butter; the Cook’s Illustrated version, which called for browned butter; and Broma Bakery’s cookies, which call for olive oil. Note that for all of these, I used Earth Balance sticks instead of butter, since I can’t get it lactose-free in the States anymore, but I used Challenge’s lactose-free butter spread for the Cook’s Illustrated cookies because I did have to get some sort of browning going on in there. All cookies were topped with Maldon sea salt, in the spirit of fairness, because cookies are better with salt.

I baked some of each as I made them over the past few months, of course, but I also saved some dough in the freezer for comparison purposes for today, alongside some 36-hour cookie dough made last week (gotta have something for teachers and coaches before the holidays) and some Neiman-Marcus for good measure (I had some in the freezer and they wanted to join the party).

First up, Everyday Reading cookies. They are ideal baked 10 minutes when the dough is straight from the fridge. They are delicious, crisp on the outside and chewy on the inside, but they are best served immediately – they don’t keep all that well, even if the raw dough is left in the fridge and baked on demand. I got 25 cookies from that batch.


Tara O’Brady’s cookies were easier to shape after chilling the dough; I got 32 from that batch. They also baked up in 10 minutes if they were straight from the fridge, and were actually better the next day once the dough had rested. I didn’t really have anything remarkable to say at that point, though.


The Cook’s Illustrated cookies yielded an even 24 cookies, which I measured as accurately as I could (1.25 ounces each) given that I did not own a #24 cookie scoop. They were easier to shape at room temperature, though I baked most of them cold – 12 minutes is ideal if the dough has been kept in the fridge.


Broma Bakery’s cookies yielded 18 cookies; the dough was *very* soft, so they were easier to shape once it had been chilled. They baked in 13 to 14 minutes from the fridge, but they spread in the oven and turned stiff once cooled. They were certainly not great.


Then there was today’s bake-off, where I pitted them all against one another, starting with frozen dough for every one and baking everything at 350 °F for 14 minutes, because there are limits to how finicky I will get in accommodating particular recipe variations for a total of six cookies. (And for the record, I had a nice healthy salad for lunch, and *tasted* all six cookies but did not *finish* all of them.) In each photo, they are, clockwise from top left: Everyday Reading, Tara O’Brady, Cook’s Illustrated, Neiman-Marcus, 36-hour, and Broma Bakery.


The olive oil one was eliminated immediately for its unpleasant texture (more tacky than chewy). Tara O’Brady’s cookies soon followed, for the same reason. I like Cook’s Illustrated’s cookies, but find then a bit bland, or like they are missing something, especially compared to the rest. And the cookies with shortening are taller and a bit crisper than the others, but they also taste like something is missing. Meanwhile, the Neiman-Marcus cookies are delicious, but a different beast altogether. I kept coming back to the 36-hour cookies as a “control cookie” to use when tasting, and in the end, I did prefer them as far as no-frills chocolate chip cookies go.

Conclusion: The 36-hour cookie wins again! Also, I have now purchased a #24 cookie scoop, because I’m taking this cookie-making thing a bit more seriously.

Sunday, December 16, 2018

Golden Milk


I’d been meaning to try golden milk for a while now, and with the weather getting colder, it seemed like the perfect opportunity. I first tried a recipe from Minimalist Baker. It was delicious, but I did find that using ground turmeric gave it a bit of a gritty feel. Then, when I got stuck with a lot of extra fresh turmeric, I looked around for another recipe and settled on This Healthy Table, which also yielded delicious results! That being said, I think the turmeric flavor was in fact more pronounced with the ground version (which is why the Minimalist Baker uses ground instead of fresh). So I think I would make the original recipe and pour the mixture through a fine-mesh strainer to remove any bits of turmeric powder. Alternatively, I would grate fresh turmeric and/or ginger (instead of slicing it) and put that into the mixture, and use a fine-mesh strainer anyway. My version is below. It feels like it would be good to nurse a cold, or to replace tea and coffee in the winter (for those of us who don’t typically drink either). I’m now thinking I should work on a white chocolate version…

1 ½ cups light coconut milk (I used milk from a can, but coconut milk beverage would work, too)
1 ½ cups unsweetened plain almond milk (I used unsweetened toasted coconut almond milk)
1 ½ tsp. ground turmeric (or 1-2 Tbsp. fresh, grated)
¼ tsp. ground ginger (or 1-2 Tbsp. fresh, grated)
1 whole cinnamon stick (or ¼ tsp. ground cinnamon, plus more for dusting)
1 Tbsp. coconut oil
1 pinch ground black pepper
sweetener of choice (for me this was 3 Tbsp. honey, but maple syrup would be good, too)

To a small saucepan, add coconut milk, almond milk, ground turmeric, ground ginger, cinnamon stick, coconut oil, black pepper, and sweetener of choice.

Whisk to combine and warm over medium heat. Heat until hot to the touch but not boiling, about 4 minutes, whisking frequently.

Turn off heat and taste to adjust flavor. Add more sweetener to taste or more turmeric or ginger for intense spice + flavor.

Remove the cinnamon stick and pour the mixture through a fine-mesh strainer. Serve immediately, dividing between two glasses or mugs. Dust with cinnamon.

Best when fresh, though leftovers can be stored covered in the refrigerator for 2-3 days. Reheat on the stovetop or microwave until hot.


Saturday, December 15, 2018

Corn Pancakes


Even though I now have a go-to pancake recipe, I like to try something new once in a while, especially if it has a flavor (as opposed to a plain pancake). I can tell you that red velvet pancakes were, surprisingly, not worth it. Neither were these oat flour pancakes. But then I saw this post on Symmetry Breakfast and decided to make corn custard pancakes. It’s pretty easy – just swap out half the flour for corn flour and add a tablespoon of custard powder. Delicious! I might even increase the amount of custard powder next time, because I couldn’t really tell it was there.

100 g. all-purpose flour
100 g. corn flour
1 Tbsp. baking powder
1 Tbsp. custard powder (or more, see note above)
1 pinch of salt
1 Tbsp. sugar
2 eggs
1 ¼ cups lactose-free milk

In a mixing bowl, whisk together flour, corn flour, baking powder, custard powder, salt, and sugar.

In another bowl, combine eggs and milk and whisk vigorously until eggs are foamy.

Whisk the dry ingredients into the wet ingredients until just combined. Set aside for 15 minutes.

Put a teaspoon of butter, margarine or oil in a pan and melt over medium heat. Drop a ladle-full of batter into the pan and cook until it starts to rise up and bubble; flip over and continue to cook until golden brown. Remove from the pan and keep warm while repeating with the rest of the batter, greasing the skillet again as needed.

Serve warm with syrup and fresh berries, if desired.

Product reviews

Let me start with my current favorite, Made Good soft granola bars, which I can’t recommend enough. They’re a great snack for your kids’ lunchbox or when the kids come home from school. We tried the apple cinnamon and the mixed berry granola bars as well as the chocolate chip granola minis (soft granola clusters). The Little Prince is lukewarm on the granola bars, mostly because the first one “made [him] thirsty” and, you know, they don’t have chocolate. He LOVES the chocolate chip granola minis, though, so I’ll just switch to the chocolate chip granola bars. The Fox likes them all, though I have to break the bars into pieces for him because otherwise he’d take bites that are too big. Normally I’d tell you that I like this brand because it’s kosher, vegan, and processed in a facility free from the 8 most common allergens (so totally safe for school), but here’s the best part (which my kids still don’t know): each bar or pouch of granola minis contains the nutrients of 1 serving of vegetables. What?!? They actually contain vegetable extracts, like broccoli, spinach, carrots, tomatoes, beets, and shiitake mushrooms. And I swear your kids won’t notice. Made Good products are available at Whole Foods, but you can get decent prices on Amazon too.


While at Whole Foods, I bought some Moon Cheese, in both cheddar and gouda forms. Moon Cheese is essentially dehydrated nuggets of cheese, which don’t need refrigeration. I believe the name comes from both the fact that they resemble what astronauts might eat and their appearance (like a little asteroid or moon full of tiny craters). Here’s a picture near the hand of a one-and-a-half-year-old for comparison. They are lactose-free and delicious! The downside is that these crisp bite-size pieces are very salty, even though they contain only cheese, because there’s no moisture. So I would say they are great on the go in small amounts, or accompanying something moister like fruit.


Another cheese product I tried was Folios cheese wraps, which come in parmesan, jarlsberg, and cheddar flavors. They are lactose-free and gluten-free; you can use them as is, meaning as wraps or inside wraps, or use them to make chips or edible bowls, for example. (See here for where to buy them.) I’m enjoying them!


I ordered Love Grown cereal, specifically the Fruity Sea Stars, after reading about what a good option it was for health-conscious families. The cereal is made from a blend of three beans (navy, lentil, and garbanzo beans) along with rice flour, so it’s full of protein. Plus, in the case of the Sea Stars, the colors are natural (radish juice, turmeric, and paprika). They taste like Froot Loops, though perhaps a bit more lemony. That’s actually the downside for the Little Prince, at least, because he much prefers the chocolate variety (I found the Power O’s at my local grocery store). Those are quite good too, and the chocolate flavor is more intense and less sweet than with other similar products from different brands.


I tried Miyoko’s vegan butter, which does taste more like butter than any margarine I’ve tried, but it wasn’t enough to truly make up for the fact that Green Valley Creamery isn’t making lactose-free butter anymore.


I don’t usually do this, but I’ll just steer you away from this chocolate spread, which was so bad that we threw it away. I then promptly got more Chocolate Soom and am very, very sorry I strayed.

I also tried Calavo’s chocolate mousse made with avocados, which was… meh. My homemade one is so much better that these were a big let-down for me. That being said, the Fox has never tasted my recipe, so he was all over these, and I now realize that they’d be great if you’re looking for healthy-ish chocolate puddings for your baby.

Monday, December 10, 2018

Chocolate Chip Granola Bars

This is another recipe from the Weelicious Lunches cookbook. I wasn’t sure how they’d turn out – I was afraid they might be too tough or sticky, but as it happens, they were perfect. Plus, even though the recipe yields A LOT, these bars stayed remarkably fresh at room temperature, for a few weeks even! The instructions say to wrap them individually, but I had them in an airtight container. Both my kids really liked these (though of course I broke them up into little pieces for the Fox), and I think they wouldn’t like them as much if I replaced the chocolate chips with dried fruits or nuts, so I won’t, but that’s an option. The only downside is that over the time we were eating them, I found a lot of oat flakes on the floor of the house, the way one might find Cheerios in a house with little kids. A small price to pay! The recipe was also published on the Weelicious website.

4 cups old fashioned oats
¼ cup whole wheat flour (I used white whole wheat)
½ cup shredded unsweetened coconut
1/3 cup brown sugar
1 cup chocolate chips
½ tsp. kosher salt
½ cup canola oil
1 tsp. vanilla extract
½ cup honey

Preheat oven to 325 °F.

Combine the first 6 ingredients in a bowl.

In a separate bowl, whisk together the remaining ingredients.

Pour the wet ingredients over the oat mixture and stir to combine.

Place granola mixture on a parchment lined baking sheet and shape into a rectangle, about 13 x 9 x 1 inch thick. (I did this in a 9” x 13” baking pan lined with parchment paper.)

Bake for 40 minutes.

Allow to cool completely then cut into bars 3 x 1 inch bars. Bars will keep well wrapped individually.

Castroville

I delayed on writing this post because I wanted to do a round-up of our fall outings, but it turns out there was just the one. The Little Prince moved up a level in his swim class, and weekday classes are booked solid, so now each weekend day has a swim class for one kid, plus naptime for the Fox, and of course our weekdays have school and work, so it’s harder to find the time to go anywhere. I also feel like the outing ideas I have for now would require the Fox to be a bit older, so hopefully inspiration will strike again.

In the meantime, our September outing was to the small town of Castroville, just west of San Antonio. It is named for its founder, Henri Castro, a Frenchman of Jewish Portuguese ancestry, who is credited with introducing more than 2,100 immigrants to Texas (second only to Stephen F. Austin, apparently).

Castroville is known for its Franco-German heritage. The visitor center is Steinbach Haus, which was built in Alsace from 1618 to 1648, shipped here in pieces around 1988, and reassembled by Alsatian students in 1998. It is now filled with 17th-Century antiques. You can also pick up a city guide there and use it to take a walking tour.


Just on the other side of the Medina River is the Landmark Inn Historic Site. Built in the 1840s, it was once an important stop on El Camino Real, the route from San Antonio to Mexico, being an inn as well as a mill and a trading post. Castroville itself was founded in 1844.

Don’t miss the “new” St. Louis Catholic Church, completed in 1870 (the tiny old church is a block south). There is a big festival every August. You could easily walk around the historical part of town from there, and/or shop for antiques. (That being said, because the recent rain had created enough water to engulf some sidewalks, and because I could tell the Engineer was getting crotchety, we didn’t stick around.) Some of the houses in that area are in fact reminiscent of what I’ve seen in Quebec or New England.

Our last stop before going home was Haby’s Alsatian Bakery (which is closed on Sundays). There is a vast array of breads, donuts, apple fritters, cinnamon rolls, cookies, frosted cookies (our favorites), and other assorted pastries (sleeper hit: the small chocolate-covered peanut halva with multicolor sprinkles). Prices are very reasonable, too!

Sunday, December 02, 2018

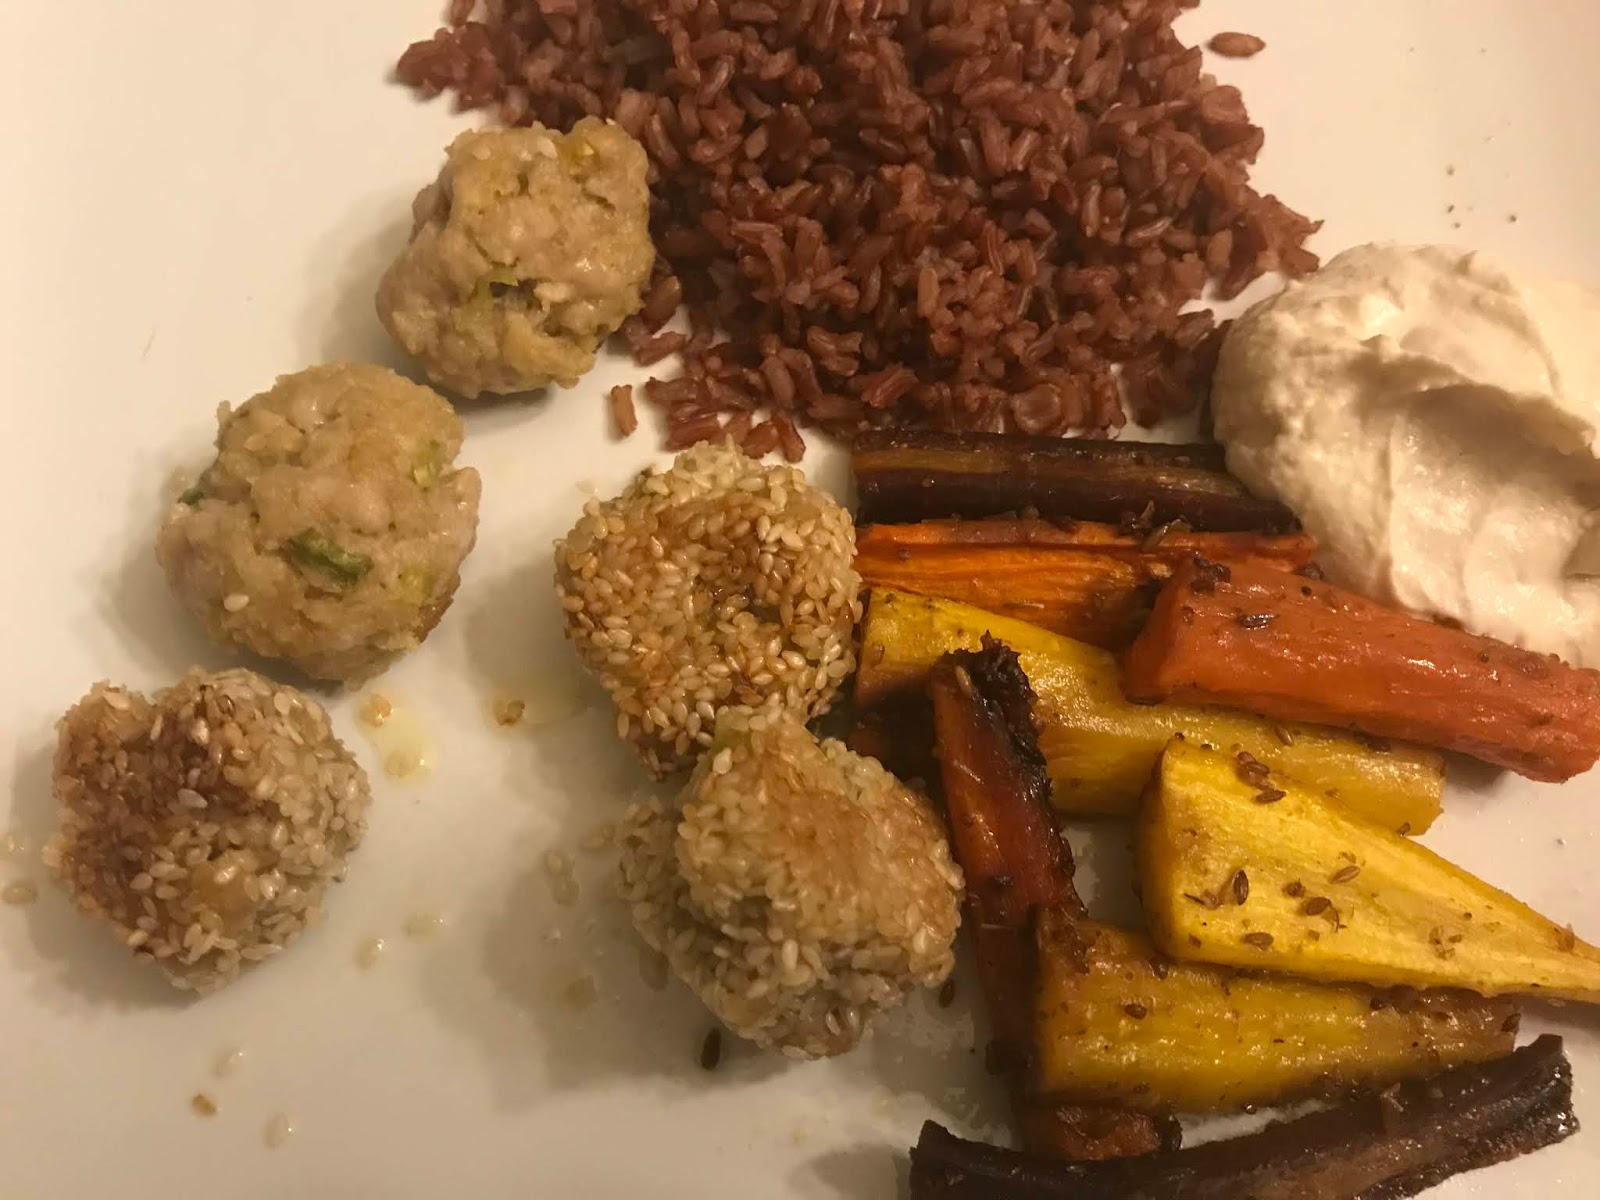
Boulettes de porc au sésame

Une autre recette copiée d’un numéro de Tellement Bon! Lu au chalet l’été dernier. Le plat avait l’air tellement bon, justement! La recette était censée donner de 12 à 16 boulettes, alors que moi je voulais nourrir 4 personnes pendant deux repas, alors j’ai doublé les quantités ci-dessous et j’ai obtenu un total de 60 boulettes. De toute évidence, j’ai donc fait mes boulettes plus petites que j’aurais dû (un peu plus petites que des balles de golf), mais c’est ce que je recommande, surtout vu le temps de cuisson. Les quantités ci-dessous vous donneront environ 30 petites boulettes.

J’ai doublé la recette, donc, mais j’ai gardé la même quantité de graines de sésame, alors la moitié de mes boulettes étaient « nues » et elles étaient délicieuses aussi! Vous pouvez donc omettre les graines de sésame si vous voulez, ou utiliser un mélange de graines noires et blanches. J’ai dû utiliser de la pâte de cari verte, car je suis allée à deux épiceries sans trouver de pâte de cari jaune. On a vraiment adoré le résultat! Tout le monde en a redemandé.

J’ai servi le tout avec du riz rouge et des carottes rôties au miel.

1 c. à soupe d’huile d’olive
1 c. à soupe de beurre
1 lb. de porc haché
3 oignons verts finement ciselés
2 c. à soupe de gingembre frais, râpé
2 c. à soupe de pâte de cari jaune (j’ai utilisé de la verte)
1/3 tasse de panko ou de chapelure nature
1 c. à thé d’huile de sésame
Sel et poivre, au goût
½ tasse de graines de sésame

Préchauffer le four à 375 °F. Tapisser une plaque è cuisson de papier parchemin.

Dans un grand bol, mélanger tous les ingrédients, sauf les graines de sésame.

À l’aide d’une (petite!) cuillère à crème glacée, façonner des boulettes (c’est beaucoup plus rapide, et les mains restent propres), puis les rouler dans les graines de sésame.

Répartir les boulettes sur la plaque et cuire au four de 20 à 25 minutes. Servir chaud.

On peut aussi faire congeler les boulettes crues; il suffit alors de les faire cuire 45 minutes à 375 °F.

Monday, November 26, 2018

Apple pancakes, two ways

I tried two different recipes for apple pancakes, in the hopes of deciding on which I would keep, and it turns out I didn’t have a favorite, and neither did anyone else in the house. The first was from Smitten Kitchen and the second was from Bon Appétit. To be clear, both are truly pancake recipes, not apple latke recipes, though those would have been good too!

What made the second one special, really, was the cinnamon butter, but that’s almost like cheating because you can serve cinnamon butter with any pancake, and it isn’t the bones of the recipe. I’d consider adding citrus zest to the first pancakes and/or serving them with cinnamon butter as well! Even then, I halved the amount of cinnamon butter and had plenty, so that’s what I’m writing below.


Smitten Kitchen’s Apple Pancakes (slightly adapted)

2 cups all-purpose flour
1 tsp. baking powder
½ tsp. salt
¼ cup sugar
1 pinch of cinnamon
1 pinch of nutmeg
2 eggs, well beaten
1 dash of vanilla
1 ½ cups of lactose-free milk or yogurt (or a mix of the two)
3 medium apples, peeled and coarsely grated (I used Honeycrisp but would consider Granny Smith)
powdered sugar, for dusting (optional)

In a small bowl, whisk the flour, baking powder, salt, sugar, and spices. Set aside.

In a large bowl, mix the eggs and vanilla with the milk or yogurt.

Combine the wet and the dry ingredients and stir in the apples.

Heat a thin layer of oil in a skillet over low to medium heat. Drop a large spoonful of batter into the pan and flatten it out a little (otherwise, you might have trouble getting them to cook in the center) and cook until golden brown underneath. Flip the pancakes and cook them for an additional two or three minutes.

Either dust with powdered sugar and serve immediately, or keep on a tray in a warmed oven until you are ready to serve them.


Bon Appétit Pancakes with Cinnamon Butter

For the cinnamon butter
¼ cup (½ stick or 2 oz.) lactose-free butter, room temperature (I used Challenge’s lactose-free butter spread)
¼ cup powdered sugar, sifted
½ tsp. cinnamon
½ tsp. grated orange peel (I used more)

For the apple pancakes
2 tsp. fresh lemon juice
1 tsp. grated lemon peel
2 medium Granny Smith apples (scant 1 lb.), peeled, halved, cored
1 2/3 cups all-purpose flour
2 Tbsp. golden brown sugar
2 ½ tsp. baking powder
½ tsp. salt
¾ cup lactose-free whole milk
2 large eggs
½ cup (1 stick) lactose-free butter or margarine, melted, divided

For the cinnamon butter
Using electric mixer, beat all ingredients in small bowl until blended.

For the apple pancakes
Combine lemon juice and peel in bowl. Coarsely grate apples into bowl, tossing to coat with juice

Whisk flour, brown sugar, baking powder, and salt in large bowl. Make well in center of dry ingredients. Whisk in milk, eggs, and ¼ cup melted butter until smooth. Stir in apple mixture. Cover and let batter stand at room temperature at least 30 minutes and up to 1 hour.

Preheat oven to 250 °F. Place baking sheet in oven. Heat heavy large nonstick griddle or skillet over medium-high heat 1 minute. Brush griddle with some of remaining ¼ cup melted butter. For each pancake, drop 1 heaping tablespoon batter onto griddle (I used closer to ¼ cup, because heavenly hots these are not), spacing pancakes apart. Cook until golden on bottom and bubbles start to form on surface, about 3 minutes. Turn pancakes over. Cook until golden on bottom, about 2 minutes longer. Transfer pancakes to baking sheet in oven to keep warm. Repeat with remaining batter, brushing griddle with butter before each batch of pancakes.

Arrange pancakes on plates. Top each with dollop of cinnamon butter and serve.

Sunday, November 25, 2018

Applesauce Bars

I tend to focus on pumpkin in the fall, but I don’t want to forget about apples! My friend Jen shared a recipe for apple bars from Inspiration Kitchen that I had to try. It turns out my kids liked it just as much as hers did, and we all wanted second helpings!

I didn’t feel like making a cream cheese frosting, and Jen had told me that she hadn’t bothered with it either, so this version is plain. Bonus: this means it’s totally acceptable for breakfast or an after-school snack, too! The amount of spices below are those I used instead of buying pumpkin pie spice (which I refuse to keep on hand because I can just make it). I used some homemade pear-applesauce I had in the freezer, but a good store-bought applesauce will do too, I’m sure. (Mine was definitely chunkier than Motts, though.) We liked it so much that I immediately made a second batch and put it in the freezer, though for next time, I might just double the amounts and bake it in a 9”x13” dish instead.

¼ cup lactose-free butter or margarine, softened
⅔ cup packed brown sugar
1 egg, room temperature
1 cup applesauce
1 cup all-purpose flour
1 tsp. baking soda
½ tsp. salt
½ tsp. cinnamon
¼ tsp. ground ginger
¼ tsp. nutmeg
1 pinch of ground cloves

Preheat oven to 350 °F. Grease an 8” square baking pan.

In a medium bowl, mix together butter, brown sugar and egg until smooth. Stir in applesauce. Combine flour, baking soda, salt and spices; stir into the applesauce mixture until well blended. Spread evenly into the prepared pan.

Bake for 25 minutes. Remove from oven and cool on a wire rack.

Saturday, November 24, 2018

Tarte à la courge

Tiens, c’est rare que j’écrive plusieurs billets d’affilée en français, mais voilà, c’est comme ça. Il s’agit ici d’une tarte à la courge de Cuisine futée, parents pressés que nous avons tous beaucoup aimée! Il faut faire sa propre purée de courge, que je fais toujours en coupant ma courge en deux sur le sens de la longueur et en la faisant rôtir à 425 °F pendant environ 1 heure ou jusqu’à ce que la chair soit tendre. Je passe ensuite la chair au robot culinaire pour obtenir une purée lisse. On pourrait remplacer par de la citrouille ou peut-être même de la patate douce. Cette version de la tarte classique n’est pas trop sucrée, et tout le monde a aimé.

Veuillez noter que la recette demande du lait en poudre, mais il est facultatif. J’avais par hasard du lait de coco en poudre, alors j’en ai utilisé et j’ai beaucoup aimé le résultat! Ça ajoute un peu de protéines, en plus. Je recommande par contre de le tamiser, pour éviter les grumeaux dans la tarte. On peut garnir la tarte de crème fouettée sans lactose ou équivalent.

Pour la croûte
2 tasses de chapelure graham (environ 12 biscuits)
⅓ tasse de beurre ou de margarine, fondu(e)

Pour la garniture à la courge
2 œufs
½ tasse de cassonade légèrement pressée
½ tasse de lait en poudre sans lactose, tamisé (facultatif; voir note plus haut)
1 c. à thé de vanille
2 tasses de purée de courge (voir note plus haut)
½ tasse de farine tout usage non blanchie
¼ c. à thé de cannelle moulue
¼ c. à thé de gingembre moulu
¼ c. à thé de piment de la Jamaïque moulu

Pour la croûte
Préchauffer le four à 350 °F. Placer la grille au centre du four.

Dans un grand bol, mélanger la chapelure graham et le beurre fondu. (J’ai fait cela dans le bol du robot culinaire, puisque j’y avais déjà fait ma chapelure graham.) Verser la préparation dans une assiette à tarte à bord amovible de 22,5 cm (9 po). Bien presser la préparation au fond du moule et sur les côtés.

Cuire au four de 10 à 15 minutes ou jusqu’à ce que la croûte soit légèrement dorée.

Pour la garniture à la courge
Dans un grand bol, mélanger les œufs, la cassonade, le lait en poudre et la vanille à l’aide d’une mixette ou d’un batteur électrique.

Ajouter la purée de courge et mélanger jusqu’à ce qu’elle soit bien intégrée.

Ajouter la farine, la cannelle, le gingembre et le piment de la Jamaïque. Verser la préparation dans la croûte cuite.

Cuire 40 minutes ou jusqu’à ce que le centre de la tarte soit bien ferme.


Filet de porc à la crème et aux poires

Ça m’a pris un peu plus de temps que je pensais pour faire ce porc de Coup de Pouce parce que, pour une raison quelconque, j’ai oublié de mettre « filet de porc » sur la liste d’épicerie! J’avais mis les poires et le cidre de poires et le lait de coco (pour remplacer la crème), et j’ai carrément oublié le porc! Alors on a mangé de la pizza ce soir-là, et je suis allée à l’épicerie le lendemain matin pour pouvoir faire mon souper comme du monde. L’attente en valait la peine! Nous avons trouvé ça délicieux. L’Ingénieur a particulièrement aimé la sauce, et le Petit Prince a fini presque toute son assiette!

À noter qu’on peut remplacer les poires par des pommes et que j’ai découpé le porc en médaillons plutôt qu’en lanières. J’ai servi le tout avec des pommes de terre à l’ail et à l’origan.

2 c. à soupe d’huile végétale
1 filet de porc coupé en lanières (1 lb./500 g.)
2 oignons coupés en lanières (je les ai coupés en deux puis tranchés)
2 gousses d’ail hachées
2 c. à soupe de farine
2 branches de romarin
1 tasse de cidre à la poire
1 tasse de bouillon de poulet à teneur réduite en sel
2 poires, le cœur enlevé, coupées en 8 quartiers (je les ai aussi pelées)
1 c. à soupe de vinaigre de vin blanc
½ tasse de crème sans lactose (ou de lait de coco)
sel et poivre, au goût

Dans une cocotte (j’ai pris une poêle à haut rebord), chauffer la moitié de l’huile à feu moyen-vif. Ajouter le porc et cuire, en brassant, pendant 3 minutes. Réserver le porc dans une assiette.

Réduire le feu et chauffer le reste de l’huile dans la cocotte. Ajouter les oignons et cuire 5 minutes ou jusqu’à ce qu’ils aient ramolli. Ajouter l’ail et poursuivre la cuisson pendant 2 minutes. Ajouter la farine et cuire, en brassant sans arrêt, pendant 1 minute. Ajouter le romarin, le cidre et le bouillon, et porter à ébullition. Laisser réduire pendant 5 minutes ou jusqu’à ce que la préparation ait épaissi. Ajouter le porc réservé́, couvrir et laisser mijoter pendant 10 minutes. Ajouter les poires, mélanger et poursuivre la cuisson pendant 8 minutes. Retirer les branches de romarin (les jeter) et verser le vinaigre et la crème dans la cocotte. Saler, poivrer et mélanger.

Friday, November 23, 2018

Galettes épicées au curcuma frais et à la courge musquée


Voici une recette bien automnale que ma mère m’a envoyée: des galettes épicées au curcuma et à la courge musquée, du supermarché Avril. Il s’agit d’une recette avec du curcuma frais. Dans mon coin, cela peut être difficile à trouver, mais quand j’ai fini par mettre la main dessus, c’était en casseaux de 6 onces, alors vous imaginez qu’il m’en reste! J’ai quand même beaucoup aimé ces galettes, qui seraient parfaites pour la boîte à lunch.

Pour peler et râper le curcuma frais, je vous recommande de porter des gants jetables (ainsi qu’un tablier, idéalement dans des teintes d’orange et de jaune!). J’ai quand même réussi à faire le tout sans me tacher, mais j’avoue que c’était un peu stressant. Je pense qu’on pourrait remplacer par du curcuma en poudre pour un résultat semblable, même s’il manquerait les beaux morceaux orange dans ces galettes.

Il a fallu que j’ajuste un peu la recette, car la pâte était beaucoup trop liquide pour des galettes; j’ai rajouté de la farine, et les quantités ci-dessous sont les miennes. Les galettes étaient tout de même délicates, alors je recommande de les décoller du silpat avec une spatule. La prochaine fois, je les ferais plus petites que celles que vous voyez sur les photos (j’en avais un maximum de 9 par plaque, pour un total de 14).

1 tasse de farine d’épeautre entière
1 tasse de flocons d’avoine à cuisson rapide
½ c. à thé de bicarbonate de soude
1 c. à table de poudre à pâte (j’en mettrais moins, mais je n’ai pas testé)
½ c. à thé de sel
1/8 de c. à thé de poivre noir
¼ de c. à thé de muscade moulue
¼ de c. à thé cardamome moulue
1 c. à thé de curcuma frais, pelé et râpé
1 tasse de courge musquée, en purée
¼ de tasse d’huile d’olive
½ tasse de miel
2 œufs

Préchauffer le four à 350 ᵒF.

Dans un grand bol, mélanger les ingrédients secs : la farine d’épeautre, les flocons d’avoine, le bicarbonate de soude, la poudre à pâte, le sel, le poivre, la muscade et la cardamome. Réserver.

Dans un autre bol, mélanger les ingrédients humides : le curcuma, la purée de courge, l’huile, le miel et les œufs.

Verser les ingrédients humides sur les ingrédients secs et mélanger jusqu’à ce que la préparation soit simplement humectée.

Tapisser une plaque à biscuits de papier parchemin. Y répartir 16 boulettes de pâte. (C’est là où j’ai eu de la difficulté, car j’ai fait un total de 14 boulettes sur 2 plaques, mais je n’aurais pas pu en mettre plus que 9 par plaque. Je les ferais donc de la taille de biscuits normaux, peu importe la quantité totale.)

Mettre au four et cuire 15 minutes. Laisser refroidir et déguster!

Tuesday, November 20, 2018

One-Pot Tomato Chickpea Orzo


I’ve said it before, I’ll say it again: One-pot meals are great! They free me from having to think of a side, and they tend to be relatively easy, so it’s a win-win. I tried a one-pot cheesy taco pasta, which was pretty good (though I recommend that you NOT double the recipe, because the yield is in fact quite generous as it is). But the one that’s really worth writing home about is this one-pot tomato chickpea orzo dish. It was a lot more involved than the “15 minutes” advertised in the original post, and thankfully I read ahead and foresaw the time crunch; I made it during the day and then, when we walked in the door at a quarter to six after dentist appointments for both kids, on a cold day, I just warmed it up, topped it with basil and parm and we sat down to a wonderful, restorative dinner. This really hit the spot for me and I loved it. The Engineer was quite fond of it; the Little Prince thought there were too many chickpeas for his liking, so he ate around them. The Fox, though, was a bottomless pit when it came to this pasta, and on leftover day, I had to cut him off after three bowls! I’ll be making this one again.

2 Tbsp. olive oil
1 small yellow onion, diced
1 lb. dried orzo pasta (about 2 ½ cups)
2 cloves garlic, minced
kosher salt
freshly ground black pepper
4 cups low-sodium chicken or vegetable broth
1 (28-oz.) can crushed tomatoes or tomato purée
2 (15-oz.) cans chickpeas, drained and rinsed (about 3 cups total)
½ cup finely grated parmesan cheese, plus more for serving
¼ cup loosely packed chopped fresh basil leaves, for serving

Heat the oil in a large Dutch oven or pot over medium-high heat until shimmering. Add the onion and sauté until softened and fragrant, about 3 minutes. Add the orzo and garlic, season with salt and pepper, and sauté until fragrant, about 1 minute.

Stir in the broth, tomatoes, and chickpeas and bring to a boil. Cover, reduce to a simmer, and cook, stirring frequently so that the orzo doesn’t stick, until most of the liquid is absorbed and the pasta is al dente, about 10 minutes or according to package instructions. (If the pasta isn’t completely cooked at this point, add another splash or two of broth or water to the pot and continue to simmer until it has.)

Stir in the parmesan cheese. Taste and season with salt and pepper as needed. Garnish with the chopped basil and additional grated cheese, if desired.

Saturday, November 17, 2018

Squash, ginger, and coconut muffins

If you’re anything like me, you might occasionally be stuck with half a squash that you didn’t use up in a recipe, but you don’t feel like roasting it or puréeing it or freezing it and you just don’t know what to do with it. Enter these muffins, in which the squash is simply grated, a bit like a carrot in carrot cake. I had plenty of flesh using the hollowed-out bottom half of a medium squash, which I grated in the food processor. I made a few changes, like omitting the nuts and reducing the baking time, and we all loved this recipe! (The Little Prince was hesitant to try them, because they don’t contain chocolate, but once he had a bit of them, he immediately asked for a whole muffin.) I think I’ll actually have to go buy more squash to make another batch. They freeze well, too.

2 cups flour
2 tsp. baking powder
¼ tsp. baking soda
1 tsp. ground cinnamon
1 tsp. salt
2 large eggs
10 Tbsp. lactose-free butter or margarine, melted
2/3 cup buttermilk (lactose-free milk with a splash of lemon juice)
2 tsp. grated peeled ginger (from a 2” piece)
2/3 cup plus 2 Tbsp. light brown sugar
2 cups grated peeled butternut squash (9 oz., from roughly ¼ of a large squash)
¾ unsweetened shredded coconut

Preheat oven to 375 °F. Line a standard 12-cup muffin pan with liners. (I had a total of 14 muffins.)

Whisk flour, baking powder, baking soda, cinnamon, and salt in a large bowl. Set aside.

Whisk eggs, butter, buttermilk, ginger, and 2/3 cup brown sugar in a medium bowl.

Mix egg mixture into dry ingredients with a wooden spoon or rubber spatula until just combined. Mix in squash and coconut.

Divide batter among muffin cups, using about ½ cup batter per muffin. Sprinkle remaining 2 Tbsp. brown sugar on top.

Bake muffins, rotating pan halfway through, until golden brown and a tester inserted into the center comes out clean, about 20 minutes. Let cool in pan 5 minutes, then transfer muffins to a wire rack and let cool completely.

Friday, November 16, 2018

Panko-Crusted Roast Chicken with Mustard and Thyme

Breaded and baked chicken is nothing new, admittedly (though if you like them breaded in crushed in cereal and are tired of the typical Corn Flakes, lemme recommend Cap’n Crunch – you’re welcome). The recipe below was created by Jenny Rosenstrach for Bon Appétit, so it’s a great family meal. Plus, it’s all cooked on a sheet pan, very hands-off. I used boneless, skinless chicken breast because that’s what we prefer, and it turned out great. And I’m glad to report that not only was this delicious, but both kids ate their entire plate (and the Little Prince did so even though there was no ketchup to go with his chicken!).

¾ cup panko (Japanese breadcrumbs)
4 Tbsp. lactose-free butter or margarine, at room temperature
¼ cup Dijon mustard
2 Tbsp. thyme leaves, plus 3 sprigs
8 skin-on, bone-in chicken thighs, patted dry (I used boneless, skinless chicken breasts)
kosher salt, freshly ground pepper
1 lb. medium carrots, scrubbed, cut into 3-inch pieces, halved lengthwise if thick
2 Tbsp. extra-virgin olive oil

Place a rack in highest position in oven (I did second highest); preheat to 450 °F. Place panko in a small bowl. Mash butter, mustard, and thyme leaves in another small bowl with a fork (it will be a little lumpy). Season chicken thighs on both sides with salt and pepper. Arrange skin side up a rimmed baking sheet and smear all over skin side of thighs. Working with 1 piece at a time, firmly press chicken, skin side down, into panko so crumbs adhere. Place back on baking sheet skin side up.

Arrange carrots and thyme sprigs around chicken and drizzle with oil; season with salt and pepper. Toss to coat and bake until carrots are tender and chicken is cooked through, 25–30 minutes.

Heat broiler. Broil chicken and carrots just until panko is golden brown and carrots are tender and browned in spots, about 2 minutes. Transfer to a platter and pour pan juices over top.

Bostock

I love the idea of morning buns on the weekend, but I rarely make them, in part because they can be a lot of work and in part because I’m easily disappointed. Take these chocolate coconut almond sticky buns, which were so underwhelming that I actually threw almost half of them away. But then I tried bostock.

Bostock is essentially an almond brioche. I’ve seen versions online where day-old brioche is brushed with almond simple syrup before being baked, which would make it similar to French toast, but this version has you make brioche and spread it with almond cream (lactose-free in my version). I’ll admit I had trouble working with this dough, as it was incredibly soft, almost liquid (“a blob of dough” would be the correct term). I recommend letting it rest in the fridge overnight before working with it. I mean, the instructions did say to chill it, but without specifying a length of time, and the few hours for which I chilled it were blatantly insufficient. (To give you an idea, my actual notes from when I made it are “WTF?”) Once I got it in the pan, of course, the dough stuck together, so I ended up slicing it like cake instead of pulling it apart like buns. That being said, it was absolutely delicious!

You could also consider making another dough instead of the one below. I really enjoyed Julia Turshen’s raspberry jam buns, though it wasn’t a brioche dough, and admittedly that characteristic is important here. Maybe the dough from my chocolate babka would be a good substitution?

For the brioche
¾ cup lukewarm water
2 ¼ tsp. yeast
2 ¼ tsp. salt
4 eggs
¼ cup honey
¾ cup (1 ½ sticks) lactose-free butter or margarine, melted
3 ¾ cups flour

For the almond cream
½ cup almond paste (this is roughly 3/4ths to 4/5ths of a tube)
4 Tbsp. lactose-free butter or margarine, at room temperature
¼ cup all-purpose flour
1 egg
¼ tsp. almond extract

For the topping
¼ cup sugar
zest from half an orange
½ cup sliced almonds

For the brioche
Mix the salt, yeast, eggs, honey and melted butter with the water in a large bowl. Mix in the flour without kneading; the dough will be loose but will firm up when chilled. Cover the dough with plastic wrap and allow to rest a room temperature for 2 hours, then chill in the fridge overnight before trying to work with it.

For the almond cream
Cream together the butter, almond paste, flour, egg and almond extract in a food processor (or by hand if you are brave) until smooth and set aside.

Dust the surface of the refrigerated dough with flour and quickly shape into a ball. Roll the dough out into a long rectangle (about ¼-inch thick), using enough flour to prevent it from sticking to the counter. Spread the almond cream evenly over the rectangle and roll the dough up like a jelly roll, starting at the long end. Chill the log in the freezer for about 15 minutes.

Meanwhile, grease an 8-inch round cake pan with butter and sprinkle liberally with sugar.

Cut the chilled dough into 8 equal pieces. Place them evenly in the cake pan so the swirled edge is facing upward. Allow the dough to rest in the pan for an hour; 20 minutes before baking time, preheat the oven to 350 °F.

Just before baking, combine the sugar, orange zest and almonds and sprinkle over the brioche. Bake for about 40 minutes or until golden and well set in the center.

When you remove the brioche from the oven, run a knife around the inside of the pan to release the bread from the sides and invert it onto a large plate (it could stick to the pan otherwise). Eat while warm.

Thursday, November 15, 2018

The best traditional-style pumpkin pie

This pie from Modern Honey is right up there with my pumpkin chiffon pie, except you could pass it off as just a really good version of a traditional pumpkin pie. I say this is traditional-style because that’s really what it tastes like, but it is non-traditional in the sense that instead of evaporated milk, it contains cream cheese and melted butter (or margarine, in this case). And yet it wasn’t at all like cheesecake, it was just rich and a bit creamy, but I wouldn’t even have guessed that there was cream cheese in there! This is going to be one of repertoire from now on. It would be perfect for your Thanksgiving table next week!

For the pie crust, I used a store-bought one, but you could make a half-recipe of this one. Note that I also changed up the spices a bit; the ones below are my mixture.

pie dough for a 9-inch pie pan (homemade or store-bought)
an 8-oz. package of lactose-free cream cheese, softened
a 15-oz. can of pumpkin purée
½ cup lactose-free butter or margarine, melted
2 tsp. vanilla
3 eggs
3 ¼ cups powdered sugar, sifted
½ tsp. cinnamon
½ tsp. nutmeg
½ tsp. ground ginger
½ tsp. ground cloves
¼ tsp. allspice
¼ tsp. salt
lactose-free whipped topping, for serving (optional)

Make pie crust recipe according to recipe directions and place it in a deep-dish pie pan.

Preheat oven to 400 °F and place an oven rack in the lowest position.

In a mixing bowl, whip cream cheese for 5 minutes until light and fluffy, scraping down the sides often with spatula. Add pumpkin and mix for another 5 minutes. Add melted butter and vanilla and mix for 1 minute. Add eggs one at a time, mixing well after each addition. Add powdered sugar, spices, and salt.

Pour pumpkin pie filling into pie crust and place pie plate on baking sheet. (Depending on the size of your pie pan, you may have some extra filling.)

Bake for 15 minutes. Lower the temperature of the oven to 350 °F and bake for an additional 42 to 48 minutes. Watch the crust carefully to make sure it isn't becoming too brown. Cover with pie cover or foil to prevent browning if needed. This wasn’t an issue in my case, but I did leave the pie in there for an additional 30 minutes because the center was still a bit too jiggly.

Once baked, let chill in refrigerator for 4 hours.

Top with your whipped topping of choice, if using.

Petits pains de viande à la dinde avec purée de patate douce

Par temps froid, ça fait du bien d’avoir un bon plat chaud. J’avais essayé des plats de type casserole (tout-en-un), mais avec peu de succès. Les haricots à la pizza avec pain à l’ail n’avaient pas été vendeurs, malgré leur nom et même si j’avais omis le chou frisé et utilisé du cheddar. Ou encore le pouding au pain à la courge et aux poireaux, où j’avais remplacé la crème par du lait de coco. C’était bon, mais peut-être un peu trop riche, alors il faudrait essayer avec moins de lait de coco et plus de lait, sans doute.

J’ai donc tenté une recette de petits pains de viande à la dinde avec de la purée de patate douce. Je sais que j’ai déjà fait une recette semblable, mais que voulez-vous, on avait tellement aimé! Dans ce cas-ci, c’est tiré d’un numéro de feu Tellement bon!, qui n’est plus en ligne, alors je transcris la recette ci-dessous. J’ai fait cuire les patates douces à la vapeur au lieu de les faire bouillir, c’est ce que je recommande, et j’ai fait cuire mes petits pains de viande plus longtemps parce que j’avais mis 2 livres de dinde au lieu de 1 ½; c’est également ce que je transcris ci-dessous, puisque la dinde hachée est vendue par paquets de 1 livre ici. Tout le monde a adoré! Nous étions 4 mangeurs très satisfaits – les enfants ont même mangé la purée!

2 patates douces, épluchées et coupées en cubes
sel et poivre, au goût
2 c. à soupe de beurre sans lactose
½ oignon haché
1 gousse d’ail hachée
1 branche de céleri hachée
1 c. à thé de gingembre frais râpé
2 lb. de dinde hachée
2 c. à thé de cari en poudre
1 pincée de muscade
2 œufs battus
½ tasse de chapelure

Préchauffer le four à 350 °F. Huiler 12 moules à muffins.

Faire cuire les patates douces à la vapeur jusqu’à ce qu’elles soient tendres.

Dans un poêlon à feu moyen, faire fondre le beurre. Ajouter l’oignon, l’ail, le céleri et le gingembre et cuire, en brassant, 2 minutes. Laisser refroidir. Verser dans un bol et ajouter le reste des ingrédients. Bien mélanger. Remplir les 12 moules à muffins de la préparation et cuire au four environ 25 minutes (j’ai utilisé un thermomètre pour vérifier la cuisson).

Entre-temps, au robot culinaire, réduire les patates douces en une purée lisse. À l’aide d’une poche à pâtisserie, garnir les petits pains de viande de purée.

Tuesday, November 13, 2018

Gnocchi

You know how making gnocchi from scratch is technically very simple, and yet so many things can go wrong that it often ends badly and leaves the cook very frustrated? Well, count on Cook’s Illustrated to make the process foolproof! I made their gnocchi recipe and loved it. The keys are to bake the potatoes instead of boiling them and peel the immediately, thus removing extra moisture; to rice the potatoes instead of mashing them, thereby preventing lumps; and to weigh the amount of riced potatoes used and then add the appropriate amount of flour so that there’s no guesswork. It is not a fast process, to be sure, but it was actually quite simple. And the resulting gnocchi were so good! Flavorful and fluffy and just perfect. I still need to work on my shaping technique, so I’ll look up a video for that next time.

I made this with a brown butter sauce because I had one last stick of lactose-free butter in the freezer and this seemed like the perfect use for it (since it’s not going to work with margarine). You could also make a tomato sauce for them and/or top them with parmesan.

Note that this makes a relatively small amount of gnocchi, perhaps enough for 2-3 adult servings (which we made into a meal for 2 adults and 2 children). I made them during the day and left them in the fridge until I was ready to boil them at dinner time.

For the gnocchi
2 lbs. russet potatoes
1 large egg, lightly beaten
4 oz. all-purpose flour, plus more for the counter
1 tsp. plus 1 Tbsp. salt

For the brown butter sauce
4 Tbsp. lactose-free butter, cut into 4 pieces
1 small shallot, minced
1 tsp. minced fresh sage
1 ½ tsp. lemon juice
¼ tsp. salt (omit this if your butter is salted)

For the gnocchi
Adjust an oven rack to the middle position and preheat the oven to 450 °F. Using a paring knife, poke each potato 8 times over the entire surface. Microwave the potatoes until slightly softened at the ends, about 10 minutes, flipping the potatoes halfway through cooking. Transfer the potatoes directly to the oven rack and bake until a skewer glides easily through flesh and the potatoes yield to gentle pressure, 18 to 20 minutes.

Holding each potato with a potholder or kitchen towel (silicone oven mitts are great here), peel with a paring knife (I used a vegetable peeler, because I never mastered the art of peeling with a paring knife). Process the potatoes through a ricer or food mill onto a rimmed baking sheet. Gently spread the potatoes into an even layer and let cool for 5 minutes.

Transfer 16 ounces of warm potatoes to a bowl (the rest can be used for something else). Using a fork, gently stir in the egg until just combined. Sprinkle the flour and 1 teaspoon of salt over the potato mixture. Using a fork, gently combine until no pockets of dry flour remain. Press the mixture into a rough ball, transfer to a lightly floured counter, and gently knead until smooth but slightly sticky, about 1 minute, lightly dusting the counter with flour as needed to prevent sticking.

Line 2 rimmed baking sheets with parchment paper and dust liberally with flour. Cut the dough into 8 pieces. Lightly dust the counter with flour. Gently roll a piece of dough into a ½-inch-thick rope, dusting with flour to prevent sticking. Cut the rope into ¾-inch lengths. Holding a fork with tines facing down in one hand, press each dough piece cut side down against the tines with the thumb of the other hand to create an indentation. Roll the dough down the tines to form ridges on the sides. If the dough sticks, dust thumb or fork with flour. Transfer the formed gnocchi to sheets and repeat with remaining dough.

For the sauce
Melt the butter in a 12-inch skillet over medium-high heat, swirling occasionally, until butter is browned and releases a nutty aroma, about 1 ½ minutes. Off heat, add shallot and sage, stirring until shallot is fragrant, about 1 minute. Stir in lemon juice and salt; cover to keep warm.

Bring 4 quarts of water to boil in a large pot. Add the remaining 1 tablespoon of salt. Using parchment paper as a sling, gently lower gnocchi from 1 sheet into water and cook until firm and just cooked through, about 90 seconds (gnocchi should float to surface after about 1 minute). Using a slotted spoon, transfer cooked gnocchi to skillet with sauce. Repeat with remaining gnocchi. Gently toss gnocchi with sauce and serve.

Saturday, November 10, 2018

Pouding au chocolat ultra-crémeux


Il s’agit ici de la deuxième recette du spécial Coup de Pouce Cuisine sur le chocolat que le Petit Prince me réclamait après que sa grand-mère lui eut montré la photo. « Maman, can you make the chocolate pudding with the hearts? » Et j’ai pédalé un peu, parce que je me suis rendu compte que même si je faisais ledit pouding, si j’avais le malheur de le servir sans les cœurs dessus (comme sur la photo du livre), le Petit Prince allait être déçu. Mais les cœurs sont faits avec de la crème fouettée teinte en rose, et je n’ai pas de crème sans lactose ici… J’ai donc fouetté de l’aquafaba avec un peu de poudre de betterave avant de servir. Soyez quand même avertis que ce mélange se conserve mal même avec l’ajout de crème de tartre, alors c’est bon pour le premier soir, mais pas pour le suivant. Heureusement, le pouding avait déjà fait sa première impression (excellente, d’ailleurs), alors ce n’était pas grave.

Je vous le dis tout de suite, c’était tellement bon! Je me demande même s’il faudrait que j’en fasse ma recette habituelle. Je vous donne ci-dessous les ingrédients que j’ai utilisés pour la rendre sans lactose. J’ai trouvé le pouding peut-être un tantinet trop sucré – j’avais utilisé du chocolat 50 %, alors je crois que la prochaine fois, soit je réduirais la quantité de sucre, soit je la laisserais telle quelle mais j’utiliserais du chocolat 60 %, voire 70 %.

¾ tasse de sucre (voir note plus haut)
3 c. à soupe de fécule de maïs
2 c. à soupe de cacao (tamisé)
1 ¾ tasse de lait de coco (soit 1 boîte de conserve)
1 ¼ tasse de lait sans lactose
1 c. à soupe de beurre sans lactose ou de margarine
2 c. à thé de vanille
¼ c. à thé de sel
8 oz. de chocolat mi-amer, haché (voir note plus haut)

Dans une grande casserole, mélanger le sucre, la fécule de maïs et le cacao. À l’aide d’un fouet, incorporer le lait de coco et le lait. Cuire à feu moyen, en remuant de temps à autre, jusqu’à ce que la préparation soit bouillonnante et ait épaissi. Retirer du feu.

Dans la casserole, ajouter le beurre, la vanille, le sel et le chocolat et bien mélanger. Verser le pouding dans 8 ramequins d’une capacité de ¾ tasse. Couvrir directement la surface du pouding d’une pellicule plastique et réfrigérer 3 heures ou jusqu’à ce que le pouding ait refroidi. Servir garni de crème sans lactose fouettée ou équivalent (si désiré).

Nigella Lawson's Scones


I made Nigella Lawson’s scones from How To Be A Domestic Goddess. I’m going to assume that these are typical British scones, because Nigella Lawson is British (and she pronounces “scone” to rhyme with “gone” instead of “cone”, but let’s not get into that). I found them to be very light and similar to American biscuits (say, these), and not like the heartier scones I am used to for breakfast – this is probably more the type of scone one has with tea. I made the cherry and orange variation, adding 75 grams of dried cherries and the zest of a mandarin (instead of half an orange), and I took the liberty of sprinkling some sugar on top of the egg wash. They were great with orange marmalade, but I think that the cream of tartar gave then a strong acidic taste (like baking powder would have), so I wouldn’t recommend them plain. Hence Nigella Lawson’s clotted cream and treacle serving suggestion, I suppose!

They were incredibly fast to make, especially since I used the food processor. They are best the same day, so I froze some of my batch. I got a total of 14 scones.

500 g. plain flour
1 tsp. salt
2 tsp. baking soda
4½ tsp. cream of tartar
4 Tbsp. cold lactose-free butter, diced (I used margarine)
2 Tbsp. vegetable shortening, in teaspooned lumps (or use another 2 Tbsp. butter)
300 milliliters of lactose-free milk
1 large egg (beaten, for egg-wash)

Preheat the oven to 425 °F.

Sift the flour, salt, baking soda and cream of tartar into a large bowl. Rub in the fats till it goes like damp sand (I did this in the food processor, as always). Add the milk all at once, mix briefly - briefly being the operative word - and then turn out onto a floured surface and knead lightly to form a dough.

Roll out to about 3-cm thickness. Dip the cutter into some flour, then stamp out at least 10 scones. You get 12 in all from this, but may need to reroll for the last 2. Place on the baking tray very close together - the idea is that they bulge and stick together on cooking - then brush the tops with the egg-wash. (Confession: I totally forgot to cluster them together.) Put in the oven and cook for 10 minutes or until risen and golden.


Wednesday, November 07, 2018

Grilled Pork Tenderloin with Peach-Mustard Sauce

I got this recipe from an article on barbecuing in Bon Appétit. Except, well, you know me and grills, so I decided to put the pork in a 350 °F oven for 40 minutes. This was a really big hit! In the photos in the magazine, the sauce has a gorgeous yellow-orange shade, but mine turned out on the reddish side of pink. It contains ketchup, which probably explains both the shade and the fact that the Little Prince liked it so much! That being said, I’d consider making it without ketchup, and I even wonder whether the magazine used any in the first place – it’s a recipe from a restaurant called B’s Cracklin’ Barbeque in Georgia, so if anyone has been there, feel free to comment! The photo they have on their menu also has bright yellow sauce. The recipe was supposed to make 1 cup of sauce, but I got a little over 2 cups, presumably because I had big peaches.

I served the pork with broccoli slaw on the side.

For the peach-mustard sauce
2 large ripe peaches
¼ cup ketchup (see note above)
3 Tbsp. Dijon mustard
1 tsp. light brown sugar
½ tsp. freshly ground pepper
½ tsp. (or more) kosher salt

Purée peaches, ketchup, mustard, brown sugar, pepper, and ½ tsp. salt in a blender until mixture is smooth and creamy. Taste sauce and season with more salt if needed.

For the pork tenderloins
2 pork tenderloins (about 1 lb. each)
4 tsp. kosher salt
1 tsp. freshly cracked black pepper
Vegetable oil, for the grill (see note above)
½ cup peach preserves (I used apricot because I already had some on hand)

Sprinkle pork with salt and pepper and rub all over. Let sit at room temperature 1 hour (yeah, I didn’t do that). Meanwhile, prepare a grill for medium heat and brush grate with oil.

Brush pork with some preserves. Grill, turning every 4 minutes or so and brushing with any remaining preserves, until charred on all sides and an instant-read thermometer inserted into the thickest part registers 130°, 10–12 minutes. Transfer to a cutting board and let rest 10 minutes. Slice ½" thick. (I put the pork in a 350 °F oven for 40 minutes and I aim closer to an internal temperature of 165 °F; I had put apricot preserves on it before putting it in the oven and I added a bit more once it was done.)