Sunday, February 27, 2011

Fennel Molasses Cookies


The original version of this recipe, Spicy Molasses Cookies, was published in David Leite’s The New Portuguese Kitchen. This version, however, was adapted by Gluten-Free Girl. I decided to change the name because they’re not really spicy – at least, not with the heat I associate with gingerbread, for example – but the taste of fennel is prominent. I had been patiently collecting ingredients for this recipe over the course of several weeks, because the list is quite long and we didn’t have things like sorghum flour or xanthan gum lying around. While this recipe calls for a lot of flours, substitutions could be made. (About xanthan gum and guar gum: Shauna James Ahern now says that they are not necessary for gluten-free baking after all and that they can be omitted if you wish, since some people don’t react well to them.)

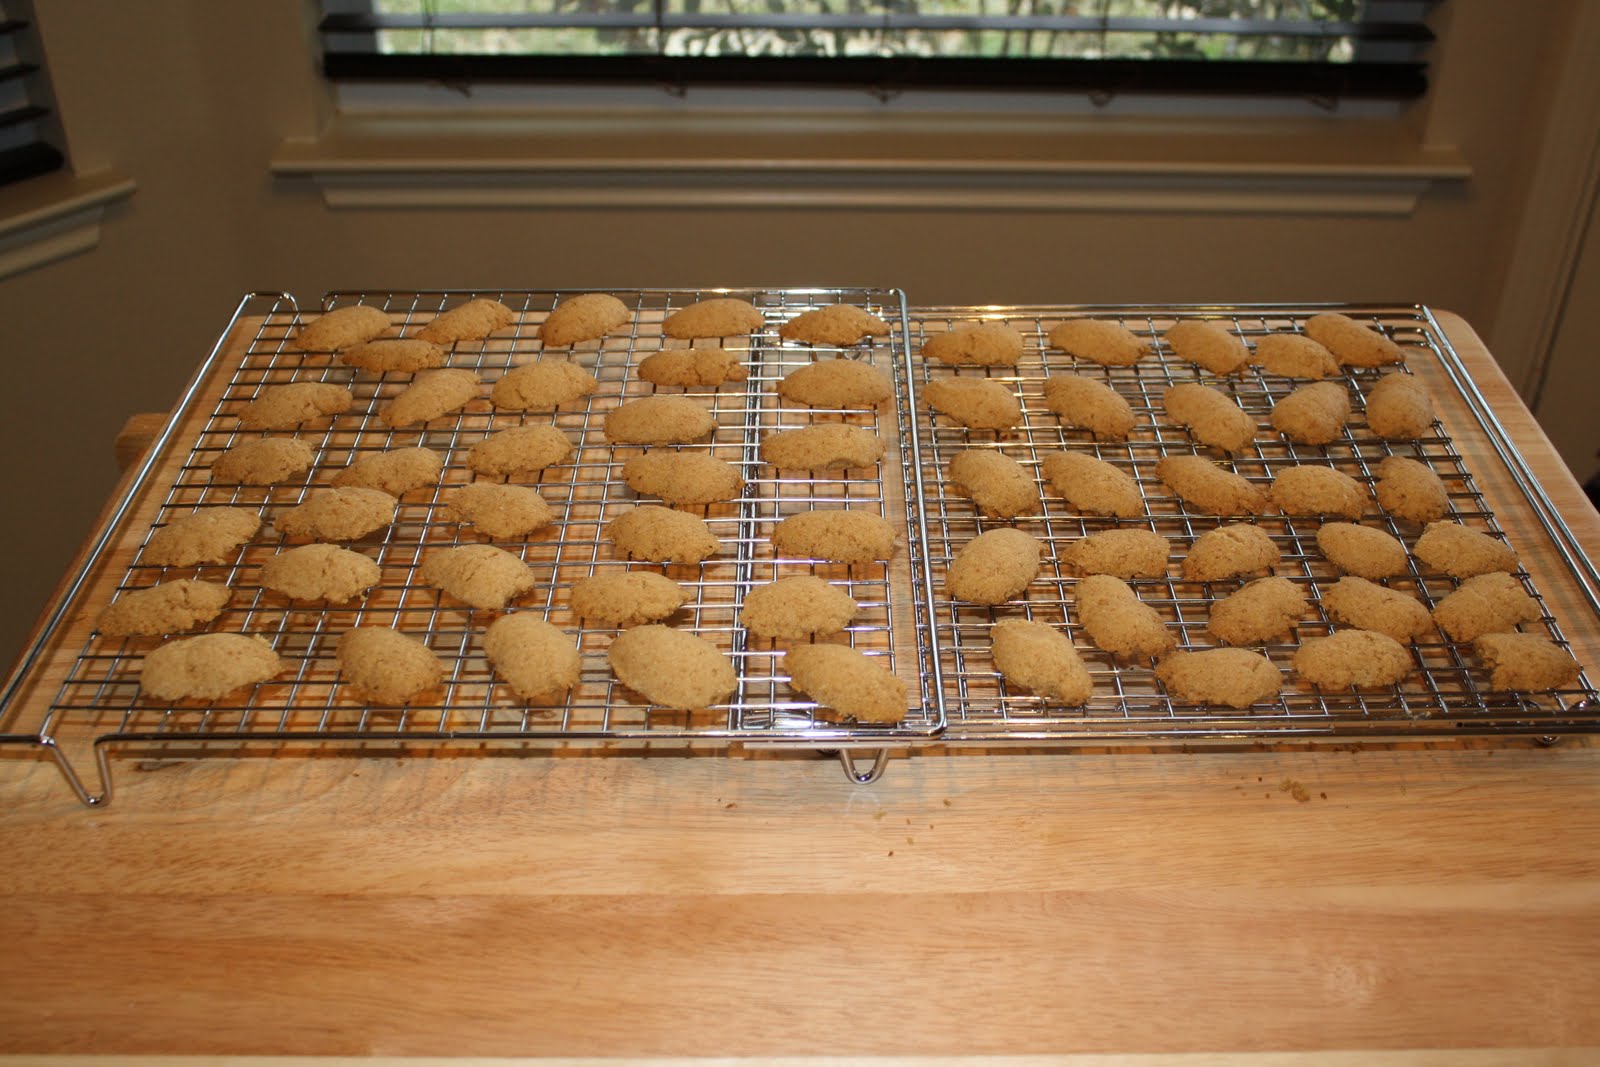
I was surprised to see a gluten-free recipe with measurements in volume rather than weight, but I gave it a go anyway with dry level measuring cups and a small ice cream scoop to portion the batter onto the baking sheet. While my cookies did not turn out like they did in the pictures on Gluten-Free Girl, I was extremely happy with them. They were plump and very light, tasting of fennel and molasses but not saturating you with it. If anything, they might be too light, in the sense that it’s easy to just keep eating one after another! The crumb was great, too, so much so that the Engineer didn’t know (and will only find out when he reads this) that they were gluten-free. You see, as I’ve said before, some people see a lack of gluten as a handicap, before they’ve even tasted the food. The Engineer basically feels that since neither one of us is gluten-intolerant, and since the recipes for most baked goods are based on the presence of gluten, we really shouldn’t deprive ourselves of something that is so good. I think he’s biased because the only things he bakes are straight from the pages of Baking Illustrated, which I’ve jokingly called The Big Book of Gluten. As for me, I feel like there are so many baked goods out there that are gluten-free and delicious! I love baking with all these new grains and flours (well, new to me, anyway). So I just presented them as “cookies”, not as “gluten-free cookies”, and I will continue to do so from now on.

¾ cup sorghum flour
½ cup tapioca flour
1/3 cup potato starch
¼ cup sweet rice flour
1/3 cup cornstarch
2 tsp xanthan gum
½ tsp guar gum
1 ¾ tsp ground cinnamon
1 tsp ground fennel seeds
¼ tsp ground cloves
½ tsp baking powder
½ tsp baking soda
½ tsp kosher salt
1 cup (2 sticks) unsalted butter, softened (I used cold vegan margarine)
½ cup dark brown sugar
½ cup white sugar
2 large eggs
¼ cup dark molasses

Whisk together the sorghum flour, tapioca flour, potato starch, sweet rice flour, and cornstarch in a large bowl. Add the xanthan and guar gum, the spices, baking powder, baking soda, and salt. Whisk them together. Set aside.

Using a stand mixer (if possible), combine the softened butter and sugars. Mix them together well until they have nuzzled together to become one. Do not beat them for longer than 1 minute or so, because over-creaming the butter and sugar can cause cookies to spread. Beat in the eggs, one at a time, and then drizzle in the molasses. When everything is incorporated, stop the mixer.

Add the flour mixture to the butter and sugar, ½ cup at a time, mixing on low between additions. Refrigerate the dough for at least 1 hour before baking. Overnight is best.

When you are ready to bake the cookies, preheat the oven to 350 °F. Line a sheet tray with parchment paper or a Silpat.

Roll dough about the size of a tablespoon between your palms and place about 2inches from each other on the baking sheet (I used a small ice cream scoop). Bake until the edges have browned and the centers are firm but still yield a bit to the touch, about 15 minutes. Transfer the cookies to a cooling rack and allow to them to cool for at least 15 minutes before eating.

Makes about 24 to 30 cookies.


Wednesday, February 23, 2011

"Better Than Cheesecake" - Baked Vegan Cheesecake


I used to love cheesecake. I baked plain cheesecakes, some with classical pairings like strawberry, raspberry or chocolate, and I enjoyed more unusual flavours like pumpkin-ginger or apple-thyme. Unfortunately, I can’t really have them anymore, as I find it very hard to dose Lactaid properly. Almost two years ago, I found this recipe for a vegan cheesecake. I was elated, until I realized that it called for a package of Tofutti’s Better Than Cream Cheese. It’s not that we don’t have this in Canada, but certainly not in the grocery stores near our place. Now, however, it is readily available to me. And if I ever move someplace where it isn’t, I’ll beg the grocery store to start carrying it (as I’m doing now for Damafro’s Elite lactose-free goat cheese, which I sorely miss).

So I finally got to make this recipe. It calls for a premade vegan crust, but I used a recipe I already had for a graham cracker crust, which I think is great with cheesecake. Keep in mind that graham crackers usually contain honey, so they are not vegan. You can make your own, though, and you can even make them gluten-free. Of course, you could use the crust of your choice. I used a 9-inch pie plate, but a springform pan would have been more appropriate (a tart pan might be too shallow).

The first time I tasted the cheesecake (after it had spent several hours in the fridge), I could taste the soy – though this was less apparent the second day – but it was very good. It was creamy and had the right consistency. I decided it would be a great base to recreate those flavoured cakes I used to make. The next day, it was even better, and it was hard to stop after only one piece. It graduated from “very good” to “fantastic”. The Engineer doesn’t usually like cheesecake, but even he loved this one, so it’s better than cheesecake!

Out of curiosity, I wanted to use a recipe analyzer to compare the calorie count and fat content to that of a typical cheesecake of the same size; unfortunately, I couldn’t find the Tofutti as an ingredient. If anyone knows of a better recipe analyzer, please share!

For the crust
1 ½ cups graham cracker crumbs (about 9 cookies)
¼ cup sugar
¼ cup margarine, melted

For the cake
1 14-oz package firm silken tofu
1 8-oz package Tofutti’s Better than Cream Cheese
2/3 cup sugar
¼ cup lemon juice (from 1 big lemon)
½ tsp almond extract (artificial if nut allergies are a concern)
2 Tbsp cornstarch


For the crust
Preheat the oven at 350 °F. Mix the ingredients and press into a 9-inch springform pan, covering the bottom and the sides. Bake for 10 minutes.

For the cake
Preheat oven to 350 °F (if you haven’t done so already for the crust).

Place silken tofu and vegan cream cheese in the food processor. Process for 1 minute, then add sugar. Process until smooth and no sugar granules remain, 3-5 minutes.

In a small bowl, combine lemon juice and almond extract. Whisk in cornstarch. Pour mixture into the food processor and process until very smooth. Pour into prepared crust and bake for 45 minutes.

Allow to cool at room temperature for 2 hours, then refrigerate at least several hours (ideally overnight).


Tuesday, February 22, 2011

Darwin's homemade treats

Even though I cook and bake a lot, I had never made anything specifically for our dog, Darwin. His first birthday was earlier this month, so I decided to make him treats that day. I stuck to a roundup of treats posted on The Kitchn. My criteria were that the recipe had to make a reasonable number of treats (i.e., up to two dozen, as opposed to six dozen) and that the ingredients must currently be in my pantry (it was bursting at the seams, and buying yet another kind of flour was out of the question). So I adapted the cinnamon bun bites, without the icing – you should know that adult dogs are usually lactose-intolerant, so feeding them cream cheese is probably not a good idea.

They looked so good that the Engineer actually tried one, without knowing it was meant for Darwin. The ingredients are all things that I would eat, so I knew there was nothing disgusting about it! I expected him to say something along the lines of “Sweetie, I think you forgot the sugar”, but no, his first thought was that they were a little dry (Darwin sure didn’t seem to mind). I couldn’t look at him without bursting into laughter, so I confessed. I then tasted them myself for good measure. Darwin got the first one as a freebie, but I did make him work for the rest (spread out over several days, of course).

2 cups whole wheat flour
1 tsp baking powder
¼ tsp salt
½ cup water or lactose-free milk
¼ cup canola oil
1 large egg
2 Tbsp honey
1 tsp cinnamon

Preheat oven to 350 °F.

In a large bowl, combine flour, baking powder and salt. In a small bowl stir together water, oil and egg. Add to the dry ingredients and stir just until you have a soft dough.

On a lightly floured surface, roll or pat the dough into a rectangle that measures roughly 8×14 inches. Drizzle with honey and sprinkle with cinnamon. Starting from a long edge, roll up jelly-roll style and pinch the edge to seal. Using a sharp serrated knife or (even better) dental floss, slice half an inch thick and place slices cut side down on a cookie sheet covered with parchment paper. Bake for about 15 minutes, until springy to the touch.

Makes about 2 dozen biscuits. Store extra in a tightly covered container of freeze.


For the dog days of next summer, here are also some frozen treats you can make.

Friday, February 18, 2011

Vosges chocolate, Part 2

I wanted to do a quick follow-up to my previous post about Vosges chocolate. I’ve since tried three new flavours: Peanut Butter Bonbon (which is organic), Blood Orange Caramel Bar and Woolloomooloo.


The Blood Orange Caramel made me think of a very fancy Caramilk, because a thin layer of caramel is sandwiched between two even thinner layers of dark chocolate. The caramel itself has notes of hibiscus flowers and Campari on top of the blood orange. The taste of alcohol was a little to present for me, and the bar could be messy to eat. I liked it, but I didn’t love it.

The Woolloomooloo is by far the bar with the funniest name. It has roasted and salted macadamia nuts, Indian coconut, hemp seeds and a mix of milk and dark chocolate. I really liked the salt, but not the texture of the nuts. The hemp seeds are really what made this bar special. I’d definitely buy this again.

The clear winner, however, was the Peanut Butter Bonbon. It’s like a Reese’s Peanut Butter Cup for grown-ups. Between two layers of deep milk chocolate (45% cocoa) is a thin layer of organic peanut butter, and the bar also has two kinds of salt (Himalayan pink salt and Maldon sea salt). This was absolutely delicious! Unfortunately, the general population seems to have caught on, because the store was always out when we returned. I’ll be keeping an eye out for that, because along with the Black Pearl Bar, it’s my new favourite! I’m keeping an eye out for the Black Salt Caramel Exotic Candy Bar, though, because that one looks right up my alley.

Pain Perdu with Lavender Roasted Kumquats and Soy Vanilla Cream


This is the third recipe I try from Love, Eric, the vegan macrobiotic dessert cookbook I got last year (I also tried the Satsuma tangerine chiffon cakes and the Meyer lemon tart. This pain perdu – or French toast – is great both for dessert or breakfast. I had more kumquats than the recipe called for, so I increased the amount of syrup with which they are roasted, but they were still too bitter for our taste. The lavender, however, was genius. I also used rice milk instead of soy milk, since that’s what I had left over from the Meyer lemon tart, and I used half a vanilla bean instead of only a quarter. The consistency of the sauce was perfect. One of the problems with this book, though, is that the proofreading was done too quickly; sometimes, the list of ingredients mentions rice syrup, but the directions then call for maple syrup, or the ingredients are presented in the wrong order. I’ve corrected that in the recipe I give below.

So while the kumquats were too bitter, the pain perdu with rice cream was absolutely delicious. The quality of French toast that I thought was attributable to eggs is actually present in this recipe, even though it’s vegan! The consistency was great, and I’m sure you could use berries instead of the kumquats. It’s more of a hassle than regular French toast, but if you’re looking for a vegan alternative, this is fantastic!

For the Lavender Roasted Kumquats
12 kumquats
2 Tbsp rice syrup
1 tsp organic lavender flowers
2 Tbsp water

For the Soy Vanilla Cream
2 cups soy milk
½ cup rice syrup
½ vanilla bean, split in half lengthwise
1 Tbsp kuzu
1 pinch sea salt

For the Pain Perdu
4 slices of 2-inch thick sourdough bread
6 oz firm tofu
1 cup soy milk
¼ cup maple syrup
¼ cup safflower oil
½ tsp ground cinnamon
1 pinch sea salt

For the Lavender Roasted Kumquats
Preheat the oven to 350 °F.

Add 2 Tbsp of water to a small oven-proof dish. Combine the kumquats, rice syrup and lavender flowers in the dish. Bake for about 15 minutes, basting occasionally with the liquid. Set aside.


For the Soy Vanilla Cream
Combine the vanilla bean and soy milk in a saucepan and simmer for 5 minutes. With a slotted spoon, remove the vanilla bean. Scrape the seeds from the bean and pour the seeds back into the soy milk, along with the rice syrup and sea salt.

Dissolve the kuzu with 1 Tbsp of water and whisk into the soy milk mixture. Cook over a low flame for 1 minute (do not boil).

Transfer the mixture to a container and refrigerate.

For the Pain Perdu
Combine the tofu, maple syrup and soy milk in a blender and process until smooth. Add the remaining ingredients and blend for a few more minutes. Transfer to a large bowl.

Soak the slices of sourdough bread in the mixture for a few minutes.

Bring a sauté pan to medium heat and oil the bottom.

Remove any excess mixture from the bread slices and cook until golden brown, about 1 minute on each side.


To serve
Place each slice of Pain Perdu on a plate and top with the Lavender Roasted Kumquat and its cooking juices. Pour the soy vanilla cream over the Kumquat as desired and sprinkle with lavender flowers. (I pour the cream on first, then topped with kumquats, because that’s what was done in the pictures in the book.)

Wednesday, February 16, 2011

Braised White Beans


This is the second recipe I made from Gluten-Free Girl and the Chef. This recipe is perfect for a light lunch or as a side dish. It’s simply white beans cooked in olive oil over low heat, with some Parmesan, rosemary, thyme and garlic for flavour. The beans get crunchy on the outside and are soft on the inside, though mine didn’t turn out as plump as those described in the book. I used the tip of a piece of Parmesan instead of the rind, and on the last day of serving the beans, I ate it – it was simply the best. I prefer the beans warm, so I didn’t let them cool before eating them, and I probably should have put in the herbs and garlic earlier. This makes 4 small servings (or 2 big ones if they are eaten as lunch).

1 cup dried cannellini beans, soaked overnight in cold water
1 small nub of Parmesan cheese rind (about the size of half a thumb)
3 cups olive oil (mild to peppery, not fruity)
3 cloves garlic, peeled
2 sprigs fresh rosemary
4-5 sprigs fresh thyme
salt and freshly ground black pepper

Drain the beans. Pour the beans into a large saucepan along with the Parmesan cheese rind. Cover the beans with the oil and set over medium-high heat. When the oil starts to bubble, turn the stove to its lowest possible setting. Allow the beans to simmer, with only the occasional bubble rising to the surface, until they are soft and tender, 1 ½ to 2 hours.

Throw the garlic, rosemary and thyme into the saucepan. Season with salt and pepper and stir everything in. Grab a spoon full of beans, drain the oil from the spoon, taste the beans, and season with more salt and pepper, if necessary. Take the saucepan off the heat and allow the herbs to mingle with the beans as the oil cools down. Allow the beans and oil to fully cool before you eat them, about 1 hour (I didn’t do this, and I stand by my choice). When you serve the beans, drain them from the oil. Reserve the oil and store any uneaten beans in the oil in the refrigerator. (If you want them warm, just warm up the saucepan full of oil again.)


Quick Carrot-Ginger Dressing


This recipe is from Real Simple. It was really easy to make, and absolutely delicious – just the flavours I was craving! The inspiration is Japanese, but you can serve it with a very simple salad of lettuce, tomatoes and green onions.

1 cup sliced carrots (about 2 large)
1 small shallot, sliced
1 2-inch piece fresh ginger, peeled and sliced
¼ cup white miso
2 Tbsp rice vinegar
¾ tsp toasted sesame oil
1/3 cup canola oil

Place the carrots, shallot, ginger, miso, vinegar, and sesame oil in a food processor. Blend, scraping down the sides as necessary, until very finely chopped, about 1 minute.

Add the canola oil and blend until nearly smooth, about 30 seconds. If necessary, thin the dressing with up to 2 Tbsp water. The dressing will keep in the refrigerator for up to 3 days.

Kettle Brand Baked Potato Chips

I’ve always been sceptical about baked potato chips, because Lord knows I’ve had my fair share of failed versions. Most of what’s on the market bear no resemblance to their fried counterparts, so I don’t enjoy eating them, And if you’re going to have chips, you should enjoy it, otherwise what’s the point? Enter Kettle Brand. I really like their regular fried chips, and I like the wide variety of flavours. But I recently saw some of their bags of baked chips, so I decided to give them a try. And I’m really glad I did, because these are perfect. You couldn’t tell that the chips have been baked instead of fried, by looking OR tasting them. It completely satisfies any chip craving you might have, but with 65% less fat than the fried version. We tried the sea salt, but I look forward to trying more flavours. The only problem is that I find the bags a bit small, so the chips do disappear quite quickly. But they’re the best baked chips on the market!

Spoon Cookies


This recipe is from Orangette, They’re called spoon cookies because they are shaped in the bowl of a spoon. Molly Wizenberg recommends using an antique spoon, as those usually have better bowls than most modern spoons. My first thought was “But I only have modern spoons!”, and then I realized that’s not true. We inherited silverware from the Engineer’s grandmother, so I did use an antique silver spoon after all. The number of cookies depends on the size of your spoon: I ended up with 29 sandwich cookies, and 4 broken shells. I’d say you can expect about 30 sandwich cookies in all.

This was my first time making brown butter, and it wasn’t hard – you just have to keep an eye on it. I used real butter here, because Lord knows what different types of margarine would do if I tried to brown them! So it wasn’t lactose-free, but because I exercised near-irreproachable portion control, I didn’t suffer any ill effects. I actually felt like quite the domestic goddess when the Engineer called home in the middle of the afternoon and asked what I was doing (“Oh, just browning some butter. How is your day?”). I was surprised, though, that I had to put the saucepan directly from the stovetop into a sink full of cold water. Isn’t that what all the cookware instructions say not to do? To avoid that rapid change in temperature at all times? But Molly Wizenberg said to do it, and she has Calphalon pans like I do, so I followed the recipe – the pan doesn’t look any worse for wear, though you wouldn’t catch me doing that with my Le Creuset.

It’s true that these cookies are pretty long to make, as they involve several steps, but they are well worth it. The result is a buttery, sandy cookie with a thin layer of preserves. I think they would also be delicious with some chocolate ganache instead of preserves, or perhaps some warmed Nutella. They look distinguished, the sort of thing one might expect at high tea, but they’re only as fancy as you let them be. When he tasted the first cookie, the Engineer said that it was “butter than expected” *ba-da-bump!*, but by the third, he declared I had opened Pandora’s Box. I think he’s right – these look unassuming, but they are fantastic.

1 cup cold unsalted butter (not margarine), cut into cubes
¾ cup granulated sugar
2 tsp vanilla extract
2 cups unbleached all-purpose flour (scant, if anything)
1 tsp baking soda
1/8 tsp. salt, slightly rounded
heaping 1/3 cup fruit preserves (I used black cherry, but strawberry or raspberry would be great too)

To make the dough
Fill the kitchen sink with about 2 inches of very cold water.

In a medium heavy saucepan, melt the butter over moderate heat and cook, stirring occasionally, until the butter turns golden and smells nutty and flecks on the bottom of the pan turn a rich caramelly brown, about 10 to 12 minutes. (Butter will initially foam a bit, then dissipate. A thicker foam will appear and cover the surface just before the butter begins to brown; stir more frequently once this occurs.) Remove the pan from the heat and place it in the sink to stop the butter from cooking further. Cool, stirring occasionally, about 4 minutes. Remove the pan from the sink, and stir in the sugar and vanilla.


In a medium bowl, whisk together the flour, baking soda, and salt. Add to the butter mixture and stir until a dough forms. (It will smell mouthwateringly good.) Shape the dough into two balls and wrap in plastic wrap. Set aside at room temperature for 1 to 2 hours to allow the flavors to develop. (Alternatively, chill dough balls until you’re ready to use them. Allow the chilled dough to soften at room temperature for at least one hour before shaping into cookies and baking.)


To shape and bake the cookies
Set an oven rack in the middle position, and preheat the oven to 325°F.

Choose a teaspoon with a deep bowl. Pinch off a small bit of dough from one of the balls and press it into the bowl of the spoon, flattening the top. The dough will feel crumbly, but as you press and mold it, it will become cohesive. Pressing gently, slide the shaped dough out of the spoon and place it, flat side down, on an ungreased baking sheet. (I lined mine with a silicon liner for easy clean-up.) Continue forming cookies and arranging them on the sheet pan; you should be able to fit about 16 cookies. Bake the cookies until just pale golden, about 8 to 15 minutes (10 minutes was right for my cookies). Cool them on the sheet pan on a wire rack for 5 minutes; then transfer them to the rack and cool completely. Meanwhile, continue shaping and baking more cookies until all the dough is gone. You should be able to make about 60 to 70 cookies in all (I had 62).


To assemble the cookies
While the cookies cool, heat the preserves in a small saucepan over low heat until just runny. Pour and scrape through a sieve into a small bowl to remove seeds and solids. Cool completely. (I stuck mine in the fridge for a few minutes.)

Working with one cookie at a time, spread the flat side with a thin layer of preserves. Sandwich with the flat side of a second cookie. Continue with the remaining cookies and preserves. Let the finished cookies stand until the jam is set, about 45 minutes.


Transfer cookies to an airtight container and wait 2 days - really! - before eating to allow the flavor to develop. Alternatively, they can be frozen. (In my case, I compromised with the Engineer and we waited 1 full day before tasting them, though one cookie mysteriously disappeared overnight. As good as they were, the flavors really did improve with time.)


Friday, February 11, 2011

Premières étapes de jardinage

Le climat hivernal ici, c’est vraiment quelque chose. Autant l’été et l’automne, chaque jour était pareil, autant maintenant, si on n’aime pas le temps qu’il fait, il suffit d’attendre au lendemain. Vendredi dernier, le 4 février 2011, il a neigé pour la première fois depuis 1985. Il y avait à peine 1 cm de neige, mais sous cela il y avait une fine couche de glace. Sans pneus d’hiver et sans équipement pour déneiger ou épandre du sel ou du sable, les autorités ont dû tout fermer, y compris les autoroutes et les routes en ville. Les rares automobilistes qui défiaient l’ordre de fermeture restaient enlisés ou finissaient dans le fossé. Tout le monde avait congé d’école et de bureau. Alors qu’il n’y avait aucune voiture en vue, je n’ai pourtant jamais vu tant de monde en faisant ma promenade matinale avec Darwin : tout un chacun était sorti marcher, jouer et photographier la neige. Mais déjà, en après-midi, il n’en restait plus grand-chose.

Dimanche suivant, le 6 février, il faisait tellement chaud que l’Ingénieur et moi étions dehors en manches courtes, dans le jardin. Cela faisait des années que j’avais hâte d’avoir mon propre terrain pour pouvoir jardiner un peu. Mais notre cour arrière est en fait déjà aménagée et compte de belles plantes ornementales. Cependant, la maison était vide pendant quelques mois avant notre arrivée, et jusqu’à maintenant nous nous sommes plutôt concentrés sur l’aménagement intérieur et les boîtes à défaire. De plus, les anciens propriétaires n’ont laissé aucune instruction quant à l’identification des plantes ou aux soins à leur donner. La fin de semaine dernière, nous avions donc un beau mélange de plantes désirables mortes, de plantes désirables en dormance, de plantes désirables en bon état mais non identifiées et de mauvaises herbes, parfois difficiles à démêler les unes des autres. J’étais donc un peu paralysée devant tout le travail à faire et je ne savais pas où donner de la tête. Tout cela me semblait insurmontable.

J’ai reçu, pour mon anniversaire, deux livres sur le jardinage au Texas. J’ai donc commencé par me familiariser un peu avec le climat (du moins, la théorie) et je me suis créé une liste de plantes que j’aimerais cultiver, appelons-la ma liste de souhaits. Je veux commencer en douceur, avec des herbes et des fleurs cette année; on verra ensuite pour les fruits et les légumes. J’ai décidé de me lancer en attaquant le problème un morceau à la fois. D’abord, la plate-bande près de la porte arrière, qui contenait : une pompe à eau qui n’avait pas fonctionné depuis environ 8 mois, un buisson jadis fort joli mais déclaré non désirable car toujours rempli de guêpes, une plante araignée et une autre plante que je crois être du genre Liriope (elle porte des floraisons vertes). L’Ingénieur et moi avons donc enlevé le buisson et la plante araignée, vidé et nettoyé la pompe, désherbé puis tué bien des fourmis avec un insecticide au chrysanthème. (J’ignore de quelle espèce de fourmis il s’agit, mais c’est bien la première fois de ma vie que je me suis fait mordre comme ça!)


Un échantillon du buisson jadis fort joli.


On a nettoyé une des trois mangeoires à oiseaux et on l’a remplie de graines. L’une des deux autres mangeoires est pour attirer des colibris, qui je crois seront là plus tard dans la saison.


J’ai également acheté des graines pour commencer des semis à l’intérieur : basilic, coriandre, origan, thym, romarin, lavande et pois de senteur pour l’arrière. Ma liste de souhaits comprend également, pour cette plate-bande et les deux pots qui seront placés à côté, de la menthe, de l’ail, du gingembre, des fraises et des clématites. On verra si je peux compléter tout ça ce printemps. Sinon, puisque l’été est trop chaud pour permettre d’entretenir certaines plantes, je pourrai continuer à l’automne.


Notre plan est de continuer à faire le ménage dans la cour, un coin à la fois, jusqu’à ce que ce soit fini. Nous identifions les plantes en même temps, dans la mesure du possible, et ajustons les soins que nous leur portons. Je ne planterai rien avant au moins la mi-mars, car il y a des risques de gel avant cela. Le mercredi 9 février était d’ailleurs la première fois qu’il fait encore sous zéro en après-midi, même en comptant le jour de neige!