- I finished my online course titled Indigenous Canada, and then followed that up with The KonMari Method when it was on sale – maybe someday I’ll make it to one of the seminars and work my way up to being a consultant (more on that below).
- I finally started working again. As some of you might know, I am (was?) a translator by trade, until we moved to the States and I had to stop working because I didn’t have the right visa for it, and then I chose to be a stay-at-home mom. Now a friend hooked me up with a small translation project, which involves translating about two dozen recipes (among other texts), and it makes me really happy not just to work again, but to marry translation and recipes, both of which are “my thing”.
- I kept at my decluttering project – getting rid of 365 items in one year. I only got rid of 5 items over the summer (since I wasn’t home and all), but I’ve made a lot more progress since, mainly in my closet. That being said, a surprising amount of things had to be replaced this year: suitcase, backpack, toiletry bag, electric toothbrush, umbrella, towels, light fixtures, prescription eyeglasses… Obviously none of those objects made it into my tally, since they followed the one-in-one-out rule, but it still felt like a lot of purging.
I got rid of my toaster oven, which was a BFD because there was a time in my life when it was indispensable. But all of a sudden, I had enough clarity to see that I hadn’t used it in years, and most probably wouldn’t need it again, and so I was able to let it go. It freed up a fair amount of space in the pantry, but all of that space was taken over by “lunchables” (not the brand, but containers and snacks and such that I now use for the Little Prince every school day). So even though it was a win, it still felt a bit like I’m barely keeping my head above water in that area, because the pantry is still fuller than I’d like. I think I’ll have to further whittle down the number of staples I keep on hand even though, again, I’m not counting food as items for the purposes of this project.
I also closed a Canadian bank account that I wasn’t using. The account itself is intangible, but it allowed me to get rid of a stack of papers as well as a card from my wallet, in addition to eliminating all my dealings with that bank, and I feel like it frees up so much mental space that I’m counting it as one item.
I decided on counting sets of baby items as single items (example: set of two dozen cloth diapers and doublers = 1 item), and I’m counting papers as items only if I also get rid of the folder in which they were stored (so when I got rid of all the papers in one folder, but decided to keep the folder itself for now because it will be useful to store my genealogy papers, I didn’t count any objects in the tally). As of the moment I’m writing these lines, I have gotten rid of 381 items (breakdown: 60 CDs/cassette tapes; 29 books; 1 movie; 55 baby items; 125 items of clothing, many of which were maternity wear or things that no longer fit post-pregnancy; and 111 miscellaneous items – komono, to use KonMari terminology).
You know what, though? It doesn’t make as big of a difference as I was hoping. Apart from the music collection, most things appear the same at a glance. Well, I did improve the entrance by buying a shoe rack and limiting each member of the household to 3 pairs of shoes at the front door, but if anything, that added an item (although it’s definitely both more functional and aesthetically pleasing). I think that most other items were out of sight. Like, sure, my closet and dresser drawers are less crowded, and my bras in particular are now beautifully displayed, but it’s still not a capsule wardrobe. And yes, we got rid of A LOT of baby items, but those were mostly in the nursery closet, behind a closed door, so I know they’re gone, but it doesn’t show. I got rid of dozens of books, and now at least every book has space to be stored vertically, but all three bookcases are still needed (and I don’t want to change that). And I didn’t get around to editing our movie collection, mostly because I know the same thing would happen again – it’s like I need an end goal. When I was paring down the music collection, it was so that we would get rid of a piece of furniture and put everything that remained in a single storage unit. But that’s not an option for our movies, and an end goal of sparser shelves doesn’t appeal much to me. So everything in the house is just a little bit better, but there were no major makeovers.
- All of this has put me on a path I hadn’t quite expected: I’m getting so much joy from downsizing (when possible) and especially organizing (all the time) that I’ve decided to be a professional organizer – you heard it here first. I’m in a preparation phase right now; I’ll be dealing with classes, accreditation, banking, insurance, accounting, branding, etc., in the spring, but it all seems very doable for me. And if I make it to one of Marie Kondo’s seminars (tough because of limited availabilities and the fact that I am needed at home), I could work my way to being a KonMari consultant, for which there is a lot of demand.
I took a third online course, about minimalism, not for motivation so much as for “market research”. This was very helpful because it became obvious that there are situations that many, many people are faced with that just don’t happen in my house. Like, I was aware of jokes or memes about these things, but I honestly didn’t realize that so many people really experienced these things (as evidenced by photos and posts in a private Facebook group). Example: tons of clutter kept in the car; piles of mail that goes unopened (including bills and claims and checks, all of which expire); cupboards crammed with Tupperware lids with no matching containers; baskets full of single socks. Honestly, I think I have lost a sock once in my life, when I was doing a load of laundry to prepare for the Little Prince’s arrival – the Engineer found the sock three years later, and it turns out it had fallen between the washing machine and the wall, in the back. The Fox got to wear the pair instead. Seriously, how do you truly lose socks (assuming they’re not stuck flat against the tub of the washer/dryer or inside a pant leg or still in the hamper)? I guess I’ll have to figure out a reasonable amount of time for my clients to keep said basket of single socks…
I remember reading Joel Stein’s Time article (Stuff and Nonsense, August 6, 2012) about Life at Home in the Twenty-First Century, a UCLA project led by Jeanne Arnold, who studied the homes of 32 middle-class families from Southern California. Arnold says that the best predictor of clutter within the house is the fridge – she’s only seen two that had nothing on them, and that’s because they were not magnetized. The average family has 52 items on their fridge. (I had to go check ours: we only have things on one side, as the front is stainless steel; we have 22 things if you count both magnets and paper held by magnets, plus a growing, soon-to-be-12 magnet mosaic from a subscription the Little Prince has. Still more than I had thought.) She also says that 78% of families have a television in their bedroom (we don’t); 53% of families have a second fridge (well, we have a miniature fridge in the garage, which we’ve used to store beverages when we had guests, but it’s not currently plugged in); 75% use their garage solely for storage (guilty, though in our defense, our two-car garage has two separate doors, which means that parking a car there will prevent you from opening the door on one side because it’s so close to the wall – inconvenient for one driver, but impossible for a family with two kids in car seats; factor in the giant trash and recycling bins that we store in there, plus a lawn mower, some outdoor furniture, our rooftop carrier for the summer road trips, gardening items, a newly-acquired hand-me-down wagon, a tricycle and a kid’s bicycle, and yeah, there’s really only room for one car if we need to bring it indoors to avoid freezing rain, for example). Other interesting numbers, though I’m not comparing just now: the average family has 438 books and magazines, 212 CDs, 90 DVDs and VHS tapes, 139 toys, 39 pairs of shoes, and a backyard with a grill, although 75% of families don’t actually carve out any time to spend outdoors (guilty of that too).
If you want to find out more about that project, there’s a great video here. It also explains how clutter is affecting (and burdening) women in particular.
- I’m also going to open an Etsy store, but I’ll tell you more about that once it’s set up.

Showing posts with label organization/organisation. Show all posts
Showing posts with label organization/organisation. Show all posts
Wednesday, December 19, 2018


Tuesday, April 10, 2018
Housekeeping
The title of this post works on more than one level, as you’ll see below, though I didn’t mean it as a pun when I wrote it…
- On a whim, I decided to take a free online course at the University of Alberta titled Indigenous Canada, after reading about it here. It’s supposed to be a 12-week course requiring 3 to 5 hours a week, and I honestly don’t know where I’m going to find the time, but technically I’ve got 180 days to complete it and I really wanted to learn more about Canada’s First Nations, so there we are.
- I’ve had my genetic profile done on 23andMe.com. Most of it confirms what I already know, though I had more British/Irish DNA than I thought. I also have some Iberian DNA I did not know about (a chromosome 12, basically). What I particularly enjoy are the comparisons between my DNA relatives and the average 23andMe customer. For example, I am 67% less likely to drink instant coffee and 49% less likely to drink espresso drinks (I don’t drink coffee at all), but 23% more likely to think that cilantro tastes like soap (not true, I actually love cilantro). I am 50% less likely to be a vegetarian – technically true, though this doesn’t say anything about flexitarianism. I am 22% more likely to own a dog (I did have one and will probably have another eventually), and 21% more likely to have hair that becomes frizzy in humid weather (so true).
Another cool thing about 23andMe is that it can put you in touch with distant relatives. I found one who, after some digging, I identified as my third cousin twice removed (which means that he and my grandmother share a set of great-great-grandparents).
- Another thing that I really wanted was a digital way to create my family tree and preserve it online. I had pieces of paper with various branches of my family tree, but I wanted it all in one place, organized in a uniform manner, and viewable online. My friend Jen, who’s a bit of an expert at these things (see Jenealogy), recommended FamilySearch.Org, and I LOVE it! It’s a free service, which is important to those of us who are just dabbling in genealogy to begin with. There’s an option to add photos of ancestors if you have them, and you can write life sketches, add important dates and alternate names and job titles, etc. The really awesome thing, though, is that if one of your deceased ancestors is already in the database, you can just add him/her to your tree and then all their data, including *their* ancestors, gets added automatically! I was able to go back to the 1100s on one branch and the 1300s on another, and if that’s not amazing I don’t know what is. Granted, I have an advantage in that the Catholic Church in Quebec was very good about keeping records (birth, marriage, death), and Canada has enough census data to fill in some gaps. Plus, my ancestors were mostly from France and Great Britain/Ireland, whose records are usually searchable.
- I’ve been on a decluttering kick lately. The Engineer and I finally whittled down our CD collection so that we could get rid of his CD tower and put all of our CDs in my bookcase (a short three-shelf Billy bookcase from Ikea with their CD inserts, which are now discontinued), thereby saving a bit of space. It made me think of people who are so minimalist that they own only 100 things. I had linked to this article several years ago (it explores the correlation between minimalism and happiness), though I think the process as it is mainstreamed today (the 100 things challenge) was popularized by David Bruno. Let me tell you right now: I don’t believe this is achievable for me. Maybe millennials have an easier time if they haven’t come of age at a time when people bought physical copies of media items like music, movies and books, if they only ever had digitals copies of those to begin with. Maybe if the Engineer and I were childless and lived in a small studio apartment in New York City where we never entertain, we could do 100 things each, but even then it would be a struggle. Add the fact that we live in a suburban house with a yard and two-car garage, that we have kids, that I’m sentimental about (too) many things… It’s just not realistic. What *would* be realistic, though, would be GETTING RID of 100 things. I figured I could get rid of 100 things in the first 100 days of the year.
Except, as I said, I had already started decluttering my music collection, and I had a bunch of CDs in my “maybe” pile (as in, “maybe I’ll be able to let it go once I make a digital copy of it” or “maybe if I listen to it again I’ll realize I don’t like it that much anymore” – only a handful of those made it back into my collection). I hadn’t counted how many items were in that pile, but I knew that given those, it wouldn’t be a big challenge getting rid of 100 things (I ended up getting rid of an even 60 CDs and cassette tapes). So I’m now trying to get rid of 365 things this year. It’s more of a goal than a resolution, and I’m hoping not to make myself crazy with the exact number when it comes down to it. (Some people do recommend doing the challenge without counting.)
I’ve decided that I am not counting food items, toiletries, anything meant to be single-use/disposable, digital files, or monthly magazines from subscriptions. I am also not counting things that I am replacing. (So, for example, if I get rid of a sweater because I’m decluttering, then I’ll count it, but if I buy a new sweater and end up getting rid of an old sweater to make room for it, I won’t count it. Fair?) There are some things I’m not sure how I’ll count – like if I get rid of a bunch of papers I’d been holding on to for years, is each sheet of paper one item? Or is a collection of papers a single item, regardless of how much I whittle it down? I’ll figure it out when I get there, I guess. I am counting sets as single items, though. I’m also not sure how to count baby clothes. In theory, those are baby items, not mine, but I’m sure you’ll agree that my baby doesn’t yet feel any sense of ownership over onesies he’s outgrown! Those are really my responsibility, so it seems like they should count. But a single onesie being one item makes it too easy – I might make sets to sell or donate and count each set as a single item.
So anyway, without counting any of the baby clothes, on this 100th day of the year, I have gotten rid of 124 items (though some are on eBay, Nextdoor, or Vinted and haven’t sold yet, or are in a bag that I have yet to take to my chosen donation center). This fall I’ll tackle my books (because the Engineer wants me to make room for more of his in the bookcase, as more than half of the titles there are mine – he says it isn’t fair, I say he knew what he was getting into when he married me, but I can compromise because that’s what partners do). I’ll also do another big clean out of my closet, because by then I’ll be out of the maternity clothes for good, and I have to say I’m really looking forward to getting my “real” clothes back. I’ll report back on my progress later in the year.
- On a whim, I decided to take a free online course at the University of Alberta titled Indigenous Canada, after reading about it here. It’s supposed to be a 12-week course requiring 3 to 5 hours a week, and I honestly don’t know where I’m going to find the time, but technically I’ve got 180 days to complete it and I really wanted to learn more about Canada’s First Nations, so there we are.
- I’ve had my genetic profile done on 23andMe.com. Most of it confirms what I already know, though I had more British/Irish DNA than I thought. I also have some Iberian DNA I did not know about (a chromosome 12, basically). What I particularly enjoy are the comparisons between my DNA relatives and the average 23andMe customer. For example, I am 67% less likely to drink instant coffee and 49% less likely to drink espresso drinks (I don’t drink coffee at all), but 23% more likely to think that cilantro tastes like soap (not true, I actually love cilantro). I am 50% less likely to be a vegetarian – technically true, though this doesn’t say anything about flexitarianism. I am 22% more likely to own a dog (I did have one and will probably have another eventually), and 21% more likely to have hair that becomes frizzy in humid weather (so true).
Another cool thing about 23andMe is that it can put you in touch with distant relatives. I found one who, after some digging, I identified as my third cousin twice removed (which means that he and my grandmother share a set of great-great-grandparents).
- Another thing that I really wanted was a digital way to create my family tree and preserve it online. I had pieces of paper with various branches of my family tree, but I wanted it all in one place, organized in a uniform manner, and viewable online. My friend Jen, who’s a bit of an expert at these things (see Jenealogy), recommended FamilySearch.Org, and I LOVE it! It’s a free service, which is important to those of us who are just dabbling in genealogy to begin with. There’s an option to add photos of ancestors if you have them, and you can write life sketches, add important dates and alternate names and job titles, etc. The really awesome thing, though, is that if one of your deceased ancestors is already in the database, you can just add him/her to your tree and then all their data, including *their* ancestors, gets added automatically! I was able to go back to the 1100s on one branch and the 1300s on another, and if that’s not amazing I don’t know what is. Granted, I have an advantage in that the Catholic Church in Quebec was very good about keeping records (birth, marriage, death), and Canada has enough census data to fill in some gaps. Plus, my ancestors were mostly from France and Great Britain/Ireland, whose records are usually searchable.
- I’ve been on a decluttering kick lately. The Engineer and I finally whittled down our CD collection so that we could get rid of his CD tower and put all of our CDs in my bookcase (a short three-shelf Billy bookcase from Ikea with their CD inserts, which are now discontinued), thereby saving a bit of space. It made me think of people who are so minimalist that they own only 100 things. I had linked to this article several years ago (it explores the correlation between minimalism and happiness), though I think the process as it is mainstreamed today (the 100 things challenge) was popularized by David Bruno. Let me tell you right now: I don’t believe this is achievable for me. Maybe millennials have an easier time if they haven’t come of age at a time when people bought physical copies of media items like music, movies and books, if they only ever had digitals copies of those to begin with. Maybe if the Engineer and I were childless and lived in a small studio apartment in New York City where we never entertain, we could do 100 things each, but even then it would be a struggle. Add the fact that we live in a suburban house with a yard and two-car garage, that we have kids, that I’m sentimental about (too) many things… It’s just not realistic. What *would* be realistic, though, would be GETTING RID of 100 things. I figured I could get rid of 100 things in the first 100 days of the year.
Except, as I said, I had already started decluttering my music collection, and I had a bunch of CDs in my “maybe” pile (as in, “maybe I’ll be able to let it go once I make a digital copy of it” or “maybe if I listen to it again I’ll realize I don’t like it that much anymore” – only a handful of those made it back into my collection). I hadn’t counted how many items were in that pile, but I knew that given those, it wouldn’t be a big challenge getting rid of 100 things (I ended up getting rid of an even 60 CDs and cassette tapes). So I’m now trying to get rid of 365 things this year. It’s more of a goal than a resolution, and I’m hoping not to make myself crazy with the exact number when it comes down to it. (Some people do recommend doing the challenge without counting.)
I’ve decided that I am not counting food items, toiletries, anything meant to be single-use/disposable, digital files, or monthly magazines from subscriptions. I am also not counting things that I am replacing. (So, for example, if I get rid of a sweater because I’m decluttering, then I’ll count it, but if I buy a new sweater and end up getting rid of an old sweater to make room for it, I won’t count it. Fair?) There are some things I’m not sure how I’ll count – like if I get rid of a bunch of papers I’d been holding on to for years, is each sheet of paper one item? Or is a collection of papers a single item, regardless of how much I whittle it down? I’ll figure it out when I get there, I guess. I am counting sets as single items, though. I’m also not sure how to count baby clothes. In theory, those are baby items, not mine, but I’m sure you’ll agree that my baby doesn’t yet feel any sense of ownership over onesies he’s outgrown! Those are really my responsibility, so it seems like they should count. But a single onesie being one item makes it too easy – I might make sets to sell or donate and count each set as a single item.
So anyway, without counting any of the baby clothes, on this 100th day of the year, I have gotten rid of 124 items (though some are on eBay, Nextdoor, or Vinted and haven’t sold yet, or are in a bag that I have yet to take to my chosen donation center). This fall I’ll tackle my books (because the Engineer wants me to make room for more of his in the bookcase, as more than half of the titles there are mine – he says it isn’t fair, I say he knew what he was getting into when he married me, but I can compromise because that’s what partners do). I’ll also do another big clean out of my closet, because by then I’ll be out of the maternity clothes for good, and I have to say I’m really looking forward to getting my “real” clothes back. I’ll report back on my progress later in the year.
Thursday, November 17, 2016
Batch of links - Decluttering, with some help from Marie Kondo
You wouldn’t believe how long I’ve been meaning to write this post – I haven’t added anything to the “organization” side of the blog in forever! Since I had too many links, I broke it down into three parts – you can read the first one, about clutter in general, here, and I’ll try to post the third one in the coming days.
It took me a while to read The Life-Changing Magic of Tidying Up by Marie Kondo, but I did get around to it almost a year ago (so it took me a while to write about it, too!). I was interested as soon as it came out, but was waiting to whittle things down in my nightstand pile of books to read (and I say this with no irony whatsoever). What seemed interesting to me about her approach is that she seems to say the opposite of what I am used to hearing from professional organizers. For example, they’ll usually say “Just declutter one room at a time, do as much as you can in one sitting and keep doing it until you finish that room.” But Marie Kondo says that it must all be done in one go, and not room by room, but theme by theme (all the clothes, then all the books, the papers, miscellaneous items and, finally, sentimental items). This does have the advantage of letting you see just how much stuff you have in total, instead of only getting a piecemeal view. Organizers usually say not to physically handle any object about which you’re on the fence, because the act of handling it will cause you to form a deeper attachment to it and then you’ll keep it; Marie Kondo says you must in fact handle everything, because only then can you truly decide to let it go and make your peace with it. I actually like that, because I couldn’t bear to throw out a whole armload of things without looking at each one individually to make sure I’m not accidentally disposing of something irreplaceable! Organizers say to only keep what is useful, but Marie Kondo says to only keep what sparks joy – and this is surprisingly helpful in whittling down your possessions, even though she sometimes takes it too far (I’ll get back to that). There’s a great article here that explores similarities and differences between the KonMari approach and that of most North American professional organizers.
Another example of the difference between Marie Kondo’s approach and that of an organizer like Peter Walsh would be that she would say that if you have 10 gold necklaces and they truly spark joy, you should keep all 10, but Peter Walsh might instead say to keep only your 5 favorite. I’d fall somewhere in the middle: keep them as long as you have space to store them (or display them) properly. If they’re in the bottom of a drawer, tangled up and tarnished and never get worn, either get rid of them or keep them but store them in a more appropriate way (which, granted, may mean getting rid of necklaces that you actually don’t like as much as the gold ones in order to make room for them).
Marie Kondo and Peter Walsh appeared together on Rachael Ray’s show to discuss folding and storing clothes and accessories. Their approach wasn’t very different, really, but it was interesting to note that even though she had an interpreter to translate what she said, Marie Kondo didn’t have the benefit of having what Peter Walsh said translated back to her. This is probably due to the format of the show and the short time allotted for the segment, but she had no opportunity to comment on what Peter Walsh said at all, while he commented on her methods. And on the subject of language, I might as well say it now: I disagree with the word “tidying” in the way that it is used in the translation of Marie Kondo’s book. I obviously can’t compare it to the original Japanese, but to me, tidying is something you do before someone comes over to your house; it’s a task that always or periodically needs doing, though it’s more like straightening up than cleaning. But the way she uses it, it means a once-in-a-lifetime major purging of your possessions so as to declutter your life once and for all. Admittedly, “purging” might sound too brutal for a book title, but you see what I mean!
If you want just a taste of her book, try 7 life-changing organizing lessons we learned from Marie Kondo or read an excerpt here. On that note, here’s how one person applied the KonMari philosophy to her kitchen (with a follow-up here). Forbes also had a great interview with her; here are parts 1 and 2. Plus, how one woman used the KonMari method to let go of her late mother’s things. (Spoiler: “There is a noticeable lightness to my apartment now and extra space in my closet. But it’s not the absences I notice most; it’s the sense of fullness imbued in each object I’ve chosen to keep, objects I hadn’t fully appreciated until I undertook Kondo’s project to face each individually.”) And this article is about a reporter using the KonMari method on her closet, then expanding to other areas in her home. Finally, here’s a podcast where the hosts question the KonMari method.
As I was telling a friend earlier this year, my main criticisms of Marie Kondo’s book are that a) she advocates a much more radical philosophy than I am willing to executes at this point, and b) some of it is woo. What I mean by the latter is that she’ll say something like (I’m paraphrasing), “If you keep your socks balled up in your drawer, I can see that they are sad even when you wear them.” That’s a bit too animistic for my taste, though obviously she has a different background than I do. That being said, I kept reading and understood what she meant to say, which is roughly that storing clothes improperly can damage the fibers of their fabric, so that they won’t look as good when you do wear them and won’t last as long as they could otherwise. It is better to take proper care of your belongings, and to appreciate the ones you keep, which happens almost naturally if you have fewer. Another way to phrase it would be to let go of things that no longer serve you, so that you more fully appreciate the things you have left.
As for keeping only things that spark joy, Marie Kondo takes it too far in my opinion. She has said that she has gotten rid of things like her screwdriver because it did not spark joy. But on the day that she needed a screwdriver, she used a plastic ruler instead (luckily for her it was a flathead screw!), but broke the ruler and was then sad because the ruler had truly sparked joy for her. So my philosophy would be closer to the quote by William Morris, “Have nothing in your house that you do not know to be useful or believe to be beautiful.” I’d also be afraid of getting rid of too many things, like this woman whose purging brought more sadness than relief.
A corollary to only keeping things that make you happy is that you ideally end up having only things you love, and then it’s always a pleasure to open a closet or drawer and see those things – or wear them! It’s the basic principle of the capsule wardrobe. (For more on the latter, see this awesome explanation, as well as parts 1, 2, and 3 of this Apartment Therapy post.) Most people who have capsule wardrobes report that not only is it easier to get dressed in the morning, but because they only have things that they love and that look great on them, they get more compliments (or at least, more compliments like “You look good” instead of “Nice shoes”).
So, I didn’t get rid of all my clothes that don’t spark joy yet, but I’ve made some great progress. I’ve let go of things I had been hanging on to for years for all the wrong reasons and to which I had grown very attached (there are still some that I haven’t let go yet, but past experience has shown me that if I revisit them in a year or two, I’ll be more open to getting rid of them). Basically, I let go of some things that sparked more guilt that joy. Guilt because they were expensive, guilt because they no longer fit me, guilt because someone else had given them to me, guilt because I no longer wear them (I no longer like them, they no longer fit my lifestyle, etc.). And I must admit that it’s really satisfying to look into a sparser closet and see fewer guilt-inducing clothes!
Selling what I could has helped me let go of certain things, mainly because I feel like then they are not wasted. I mean, obviously donating them isn’t necessarily wasting them, but when you drop off clothing at a second-hand store, you never know if it’s going to be bought by someone or if the store will end up having them recycled – or worse, throw them away – because turnover is too slow. When you sell an item, though, you know it’s going to someone who will love that piece more than you do. (For this reason, I also love what I call targeted donating – donating business attire to an organization like Dress for Success, for example.) Some stores, like H&M, will also let you bring in used clothes (any brand) for an in-store discount. Here’s an easy chart to help you figure out what to do with old clothes. And on the plus side, of course, you make a bit of money that can help you buy pieces that are more appropriate for your taste. (Because that can be an issue for many: at this point, I am hanging on to some pieces not just because I am still too attached to them, but because of the sunk cost fallacy OR because I would have literally nothing with which to replace them right now and I can’t afford to rebuild my entire wardrobe all at once. It’s a work in progress.)
My two favorite places to sell gently used clothing (both women’s and children’s clothing) are Vinted and ThredUp. On Vinted, you create a user profile and upload pictures of your clothes, for which you write a description and set a price. Users can then buy directly from you, with or without bargaining, and pay you for clothing and shipping through the website. Vinted takes a cut of the profits. (And obviously, this can be a good place to score some deals yourself!) As for ThredUp, it’s easier in the sense that you just mail your clothes to them (for free, with the bag they will send you upon request), and they give you a cut of the profits. But that means you don’t set the price yourself, and since they only take certain brands, they might not accept all your clothes, even if those in great condition – which, obviously, they insist upon. (BUT, that works in your favor if you’re buying from ThredUp, because you know each piece has been inspected and fits their criteria. If you’re interested in buying from ThredUp to find pieces that work with your new vision for your wardrobe, click on this affiliate link to get $10 off your first order – I’ve made two orders so far and I love it!)
If you need help getting started on decluttering your closet, here are 9 simple tips to help you thin out your closet (with another KonMari source here as well), plus an article titled How to (finally) streamline your closet.
Of course, you can only do this process for your own belongings, not anyone else’s! On that note, here’s why the KonMari method doesn’t work for parents (I can certainly relate, and it’ll be interesting to hear what Marie Kondo herself thinks once her new baby is a toddler), as well as some tips on dealing with a messy partner. That being said, I believe that I am organized enough that my items are already grouped by theme. By which I mean, all my clothes are in the same place: my bedroom (be it my dresser or my closet). The only clothes I have elsewhere are outerwear, which I keep in the closet near the front door, because that is where they will be most useful. I know some people have clothes in various rooms of their house, but the clothes I wear really are all in one room. (Full disclosure: I have old clothes of mine in the sewing room, and those are earmarked for some sewing projects, for example reusing them to make a shirt for the Little Prince or a dress for Dear Niece. I sometimes go through all of them to prune the pile, but I don’t count them as part of my wardrobe because I know I’ll never wear them again.) One thing I did change after reading Marie Kondo’s book, though, is that I now fold the clothes differently in my dresser and store them upright in my drawers – that way, they are all visible at a glance. I had seen this advice online before reading the book, and I hadn’t applied it because I thought my shirts wouldn’t possibly stay upright if I put them that way, but it turns out they do. Also, doing this has allowed me to see how monochromatic and dark my palette had become, so that’s something I’m working on. For the visual learners out there, or those who are just curious, here is a video guide on Marie Kondo’s method of folding clothes. Also, her latest book apparently explains it in much more detail.
The most important point, here, is that once you’ve done this exercise of decluttering, you have a much clearer vision of what you want for yourself. You tend to reduce the amount of useless stuff that comes into your home, and you are pickier about what does come in. This strategy can be applied to rebuilding your wardrobe. On that note, I came across a really great worksheet titled Never buy the wrong thing again. It’s designed to “help you pinpoint your shopping likes, dislikes and needs”, by asking questions such as finding common threads (sorry!) between your favorite items – color, shape, fabric, image they project, comfort, etc. – and between those you dislike in a way that helps you analyze those likes and dislikes. Once you have a clear idea of everything, you’ll be better at buying clothes that work for you and at avoiding those that don’t. If you have time for a longer exercise, there’s the Wardrobe Architect series that is a wonderful tool as well.
Real Simple magazine had a series of articles on that topic recently. One was titled The Closet Audit (written by Sarah Stebbins for the January 2016 issue, though it only appears in part online). The two most useful parts, in my opinion, were how to decide whether to keep an item or get rid of it (using more practical criteria than the KonMari method, but honestly, it might be just different ways of coming to the same conclusion), as well as the easy chart to which I linked earlier, to help you figure out what to do with old clothes. And for a great example with practical solutions, here is a a beautiful closet makeover, worth a look both for the physical closet and for its contents.
I also enjoyed an article titled On the heartbreaking difficulty of getting rid of books, because I could absolutely relate. Let me quote some of it here: “It occurred to me that part of the reason why tackling the ‘books’ stage of the Full Kondo seems so daunting is that to many of us our books don’t really belong in the category she has assigned. They are not impersonal units of knowledge, interchangeable and replaceable, but rather receptacles for the moments of our lives, whose pages have sopped up morning hopes and late-night sorrows, carried in honeymoon suitcases or clutched to broken hearts. They are mementos, which she cautions readers not to even attempt to contemplate getting rid of until the very last.” It is true that the books Marie Kondo named as examples were all of the academic/educational variety, not meaningful novels or memoirs or poetry collections. And also this: “Kondo argues emphatically and in bolded text that the right time to read a book is when it first comes into your possession. But throwing out every unread book on your bookshelf just because you’re not reading it right now makes about as much sense as throwing away all the perfectly good food in your refrigerator and pantry just because you don’t plan on eating it for your next meal. Only you can gauge your appetite.” I couldn’t agree more with that!
Books are one of the only categories of items that I intentionally don’t keep all in the same spot, which Marie Kondo wouldn’t like, but it’s what makes sense to me. The Engineer and I have a big built-in bookcase in which we keep the vast majority of our books. I also have a small bookcase near my desk for reference books, and a bookcase in the kitchen for cookbooks. As for unread books, they reside on my nightstand, and the pile waxes and wanes according to what I read and purchase. Only once I’ve read a book does it earn a place in our big bookcase, and I periodically weed out old books to make room for the new ones. I do notice, however, that there are some books that I was adamant about keeping years ago that I am now ready to let go, so this method really works well for me at this point (keep in mind that I had already done a big purge when we had said bookcase built).
I’m going to follow up this post with one about fashion recommendations, for those of you who were inspired (or who are in the process of pruning your wardrobe) and who could now use a few pointers in rebuilding it.
It took me a while to read The Life-Changing Magic of Tidying Up by Marie Kondo, but I did get around to it almost a year ago (so it took me a while to write about it, too!). I was interested as soon as it came out, but was waiting to whittle things down in my nightstand pile of books to read (and I say this with no irony whatsoever). What seemed interesting to me about her approach is that she seems to say the opposite of what I am used to hearing from professional organizers. For example, they’ll usually say “Just declutter one room at a time, do as much as you can in one sitting and keep doing it until you finish that room.” But Marie Kondo says that it must all be done in one go, and not room by room, but theme by theme (all the clothes, then all the books, the papers, miscellaneous items and, finally, sentimental items). This does have the advantage of letting you see just how much stuff you have in total, instead of only getting a piecemeal view. Organizers usually say not to physically handle any object about which you’re on the fence, because the act of handling it will cause you to form a deeper attachment to it and then you’ll keep it; Marie Kondo says you must in fact handle everything, because only then can you truly decide to let it go and make your peace with it. I actually like that, because I couldn’t bear to throw out a whole armload of things without looking at each one individually to make sure I’m not accidentally disposing of something irreplaceable! Organizers say to only keep what is useful, but Marie Kondo says to only keep what sparks joy – and this is surprisingly helpful in whittling down your possessions, even though she sometimes takes it too far (I’ll get back to that). There’s a great article here that explores similarities and differences between the KonMari approach and that of most North American professional organizers.
Another example of the difference between Marie Kondo’s approach and that of an organizer like Peter Walsh would be that she would say that if you have 10 gold necklaces and they truly spark joy, you should keep all 10, but Peter Walsh might instead say to keep only your 5 favorite. I’d fall somewhere in the middle: keep them as long as you have space to store them (or display them) properly. If they’re in the bottom of a drawer, tangled up and tarnished and never get worn, either get rid of them or keep them but store them in a more appropriate way (which, granted, may mean getting rid of necklaces that you actually don’t like as much as the gold ones in order to make room for them).
Marie Kondo and Peter Walsh appeared together on Rachael Ray’s show to discuss folding and storing clothes and accessories. Their approach wasn’t very different, really, but it was interesting to note that even though she had an interpreter to translate what she said, Marie Kondo didn’t have the benefit of having what Peter Walsh said translated back to her. This is probably due to the format of the show and the short time allotted for the segment, but she had no opportunity to comment on what Peter Walsh said at all, while he commented on her methods. And on the subject of language, I might as well say it now: I disagree with the word “tidying” in the way that it is used in the translation of Marie Kondo’s book. I obviously can’t compare it to the original Japanese, but to me, tidying is something you do before someone comes over to your house; it’s a task that always or periodically needs doing, though it’s more like straightening up than cleaning. But the way she uses it, it means a once-in-a-lifetime major purging of your possessions so as to declutter your life once and for all. Admittedly, “purging” might sound too brutal for a book title, but you see what I mean!
If you want just a taste of her book, try 7 life-changing organizing lessons we learned from Marie Kondo or read an excerpt here. On that note, here’s how one person applied the KonMari philosophy to her kitchen (with a follow-up here). Forbes also had a great interview with her; here are parts 1 and 2. Plus, how one woman used the KonMari method to let go of her late mother’s things. (Spoiler: “There is a noticeable lightness to my apartment now and extra space in my closet. But it’s not the absences I notice most; it’s the sense of fullness imbued in each object I’ve chosen to keep, objects I hadn’t fully appreciated until I undertook Kondo’s project to face each individually.”) And this article is about a reporter using the KonMari method on her closet, then expanding to other areas in her home. Finally, here’s a podcast where the hosts question the KonMari method.
As I was telling a friend earlier this year, my main criticisms of Marie Kondo’s book are that a) she advocates a much more radical philosophy than I am willing to executes at this point, and b) some of it is woo. What I mean by the latter is that she’ll say something like (I’m paraphrasing), “If you keep your socks balled up in your drawer, I can see that they are sad even when you wear them.” That’s a bit too animistic for my taste, though obviously she has a different background than I do. That being said, I kept reading and understood what she meant to say, which is roughly that storing clothes improperly can damage the fibers of their fabric, so that they won’t look as good when you do wear them and won’t last as long as they could otherwise. It is better to take proper care of your belongings, and to appreciate the ones you keep, which happens almost naturally if you have fewer. Another way to phrase it would be to let go of things that no longer serve you, so that you more fully appreciate the things you have left.
As for keeping only things that spark joy, Marie Kondo takes it too far in my opinion. She has said that she has gotten rid of things like her screwdriver because it did not spark joy. But on the day that she needed a screwdriver, she used a plastic ruler instead (luckily for her it was a flathead screw!), but broke the ruler and was then sad because the ruler had truly sparked joy for her. So my philosophy would be closer to the quote by William Morris, “Have nothing in your house that you do not know to be useful or believe to be beautiful.” I’d also be afraid of getting rid of too many things, like this woman whose purging brought more sadness than relief.
A corollary to only keeping things that make you happy is that you ideally end up having only things you love, and then it’s always a pleasure to open a closet or drawer and see those things – or wear them! It’s the basic principle of the capsule wardrobe. (For more on the latter, see this awesome explanation, as well as parts 1, 2, and 3 of this Apartment Therapy post.) Most people who have capsule wardrobes report that not only is it easier to get dressed in the morning, but because they only have things that they love and that look great on them, they get more compliments (or at least, more compliments like “You look good” instead of “Nice shoes”).
So, I didn’t get rid of all my clothes that don’t spark joy yet, but I’ve made some great progress. I’ve let go of things I had been hanging on to for years for all the wrong reasons and to which I had grown very attached (there are still some that I haven’t let go yet, but past experience has shown me that if I revisit them in a year or two, I’ll be more open to getting rid of them). Basically, I let go of some things that sparked more guilt that joy. Guilt because they were expensive, guilt because they no longer fit me, guilt because someone else had given them to me, guilt because I no longer wear them (I no longer like them, they no longer fit my lifestyle, etc.). And I must admit that it’s really satisfying to look into a sparser closet and see fewer guilt-inducing clothes!
Selling what I could has helped me let go of certain things, mainly because I feel like then they are not wasted. I mean, obviously donating them isn’t necessarily wasting them, but when you drop off clothing at a second-hand store, you never know if it’s going to be bought by someone or if the store will end up having them recycled – or worse, throw them away – because turnover is too slow. When you sell an item, though, you know it’s going to someone who will love that piece more than you do. (For this reason, I also love what I call targeted donating – donating business attire to an organization like Dress for Success, for example.) Some stores, like H&M, will also let you bring in used clothes (any brand) for an in-store discount. Here’s an easy chart to help you figure out what to do with old clothes. And on the plus side, of course, you make a bit of money that can help you buy pieces that are more appropriate for your taste. (Because that can be an issue for many: at this point, I am hanging on to some pieces not just because I am still too attached to them, but because of the sunk cost fallacy OR because I would have literally nothing with which to replace them right now and I can’t afford to rebuild my entire wardrobe all at once. It’s a work in progress.)
My two favorite places to sell gently used clothing (both women’s and children’s clothing) are Vinted and ThredUp. On Vinted, you create a user profile and upload pictures of your clothes, for which you write a description and set a price. Users can then buy directly from you, with or without bargaining, and pay you for clothing and shipping through the website. Vinted takes a cut of the profits. (And obviously, this can be a good place to score some deals yourself!) As for ThredUp, it’s easier in the sense that you just mail your clothes to them (for free, with the bag they will send you upon request), and they give you a cut of the profits. But that means you don’t set the price yourself, and since they only take certain brands, they might not accept all your clothes, even if those in great condition – which, obviously, they insist upon. (BUT, that works in your favor if you’re buying from ThredUp, because you know each piece has been inspected and fits their criteria. If you’re interested in buying from ThredUp to find pieces that work with your new vision for your wardrobe, click on this affiliate link to get $10 off your first order – I’ve made two orders so far and I love it!)
If you need help getting started on decluttering your closet, here are 9 simple tips to help you thin out your closet (with another KonMari source here as well), plus an article titled How to (finally) streamline your closet.
Of course, you can only do this process for your own belongings, not anyone else’s! On that note, here’s why the KonMari method doesn’t work for parents (I can certainly relate, and it’ll be interesting to hear what Marie Kondo herself thinks once her new baby is a toddler), as well as some tips on dealing with a messy partner. That being said, I believe that I am organized enough that my items are already grouped by theme. By which I mean, all my clothes are in the same place: my bedroom (be it my dresser or my closet). The only clothes I have elsewhere are outerwear, which I keep in the closet near the front door, because that is where they will be most useful. I know some people have clothes in various rooms of their house, but the clothes I wear really are all in one room. (Full disclosure: I have old clothes of mine in the sewing room, and those are earmarked for some sewing projects, for example reusing them to make a shirt for the Little Prince or a dress for Dear Niece. I sometimes go through all of them to prune the pile, but I don’t count them as part of my wardrobe because I know I’ll never wear them again.) One thing I did change after reading Marie Kondo’s book, though, is that I now fold the clothes differently in my dresser and store them upright in my drawers – that way, they are all visible at a glance. I had seen this advice online before reading the book, and I hadn’t applied it because I thought my shirts wouldn’t possibly stay upright if I put them that way, but it turns out they do. Also, doing this has allowed me to see how monochromatic and dark my palette had become, so that’s something I’m working on. For the visual learners out there, or those who are just curious, here is a video guide on Marie Kondo’s method of folding clothes. Also, her latest book apparently explains it in much more detail.
The most important point, here, is that once you’ve done this exercise of decluttering, you have a much clearer vision of what you want for yourself. You tend to reduce the amount of useless stuff that comes into your home, and you are pickier about what does come in. This strategy can be applied to rebuilding your wardrobe. On that note, I came across a really great worksheet titled Never buy the wrong thing again. It’s designed to “help you pinpoint your shopping likes, dislikes and needs”, by asking questions such as finding common threads (sorry!) between your favorite items – color, shape, fabric, image they project, comfort, etc. – and between those you dislike in a way that helps you analyze those likes and dislikes. Once you have a clear idea of everything, you’ll be better at buying clothes that work for you and at avoiding those that don’t. If you have time for a longer exercise, there’s the Wardrobe Architect series that is a wonderful tool as well.
Real Simple magazine had a series of articles on that topic recently. One was titled The Closet Audit (written by Sarah Stebbins for the January 2016 issue, though it only appears in part online). The two most useful parts, in my opinion, were how to decide whether to keep an item or get rid of it (using more practical criteria than the KonMari method, but honestly, it might be just different ways of coming to the same conclusion), as well as the easy chart to which I linked earlier, to help you figure out what to do with old clothes. And for a great example with practical solutions, here is a a beautiful closet makeover, worth a look both for the physical closet and for its contents.
I also enjoyed an article titled On the heartbreaking difficulty of getting rid of books, because I could absolutely relate. Let me quote some of it here: “It occurred to me that part of the reason why tackling the ‘books’ stage of the Full Kondo seems so daunting is that to many of us our books don’t really belong in the category she has assigned. They are not impersonal units of knowledge, interchangeable and replaceable, but rather receptacles for the moments of our lives, whose pages have sopped up morning hopes and late-night sorrows, carried in honeymoon suitcases or clutched to broken hearts. They are mementos, which she cautions readers not to even attempt to contemplate getting rid of until the very last.” It is true that the books Marie Kondo named as examples were all of the academic/educational variety, not meaningful novels or memoirs or poetry collections. And also this: “Kondo argues emphatically and in bolded text that the right time to read a book is when it first comes into your possession. But throwing out every unread book on your bookshelf just because you’re not reading it right now makes about as much sense as throwing away all the perfectly good food in your refrigerator and pantry just because you don’t plan on eating it for your next meal. Only you can gauge your appetite.” I couldn’t agree more with that!
Books are one of the only categories of items that I intentionally don’t keep all in the same spot, which Marie Kondo wouldn’t like, but it’s what makes sense to me. The Engineer and I have a big built-in bookcase in which we keep the vast majority of our books. I also have a small bookcase near my desk for reference books, and a bookcase in the kitchen for cookbooks. As for unread books, they reside on my nightstand, and the pile waxes and wanes according to what I read and purchase. Only once I’ve read a book does it earn a place in our big bookcase, and I periodically weed out old books to make room for the new ones. I do notice, however, that there are some books that I was adamant about keeping years ago that I am now ready to let go, so this method really works well for me at this point (keep in mind that I had already done a big purge when we had said bookcase built).
I’m going to follow up this post with one about fashion recommendations, for those of you who were inspired (or who are in the process of pruning your wardrobe) and who could now use a few pointers in rebuilding it.
Wednesday, July 03, 2013
Nursery décor
After what I told you about the dresser I refinished for Baby, I know some of you want to see the rest of the nursery, so here it is! (This is just about the stuff in the actual nursery; see the post Baby gear for more stuff.)
For the wall color, I’d always loved gray (for bedrooms, nurseries, living rooms, bathrooms, you name it), so that’s what I went with. I made sure to bring a sample of the carpet and baseboards to the store to pick a few shades of gray that worked with the rest of the room, then used samples to get a better idea of the shade I wanted (it’s actually Valspar’s Aspen Gray; I used two gallons, at $30.98 a gallon, plus supplies). It turns out that Nate Berkus approves of my choice color, as you can see in this segment that aired on Rachael Ray’s show last January (I had already painted by then, but felt validated that he recommended gray as a gender-neutral color). Apart from the white trim and furniture, I’ve got a few pops of turquoise for color, but I could easily go with just about any accent color at this point.


Along the top edge of three walls, we hung an alphabet I made using fleece and fabric scraps from various projects, sewed to a ribbon. It really wasn’t expensive, and I feel it livens up the place a lot. I also made a project inspired by images found on Pinterest, tracing the Quebec fleur-de-lys and the Texas lone star with puff paint and then painting over the whole thing; those are hanging over the crib (high enough that there’s no way the baby could reach them before being school-aged).
I tend to be an organized person, but in this case, I’ve decided to let go of some of my perfectionism. This is our first baby, so I don’t know how useful certain things will be; I’ve decided to just to my best to have an orderly and functional nursery and to adjust as we go. I do really like this nursery, though! On to the furniture.

Crib
My main concern here was that many cribs on the market are so massive that they look like wrecked ships, beached in a baby’s room. Not to mention the fact that they can easily cost several hundred to several thousand dollars! I wanted something very simple, with clean lines, white so it could go with everything, and for not too much money. I had eyed the Davinci Jenny Lind crib, which has an antique feel, but it’s metal (I prefer wood), the casters are brass (why?), and reviews do mention unsightly warning stickers that are near impossible to remove. Then we read a lot of positive reviews about Ikea cribs (see here for example), so we ended up going with the Hensvik, which is a nice wooden crib for under $100, white so it goes with almost anything, AND it turns into a toddler bed. We also got the mattress from Ikea, since all their mattresses fit their cribs and it was just one less headache. Plus, because it was Ikea, assembly instructions were very clear and it was almost disappointingly easy to put together!
The important thing to keep in mind, I think, is that any crib that you buy brand new will be safe for your baby. You are free to buy one used, but then the onus is on you to see if it has been affected by any recalls.
To pre-emptively answer any questions: the stuffed animals in the top right corner are my first doll and the Engineer’s first stuffed animal; the ones in the left are a stuffed bear I melted over and a homemade bunny. I also made a crib rail guard based on this tutorial, and it happened to be great practice for making buttonholes! We’re still on the fence about a mobile. They’re more for parents than babies anyway, and must be removed once the baby is about 4 months old, so we’re not sure we’ll bother. Then again, we got a simple metal frame that we could hang from the ceiling high enough to leave in place when the baby is older, so I might make a few things to hang on it with fabric scraps if I get around to it. I’m focusing on knitting first, and I might see about sewing when I’m done with that (unless someone can get me a knitting pattern for this awesome mobile, in which case you’d have a hard time stopping me from making it).

Rocking chair
This isn’t a necessity, according to some parents, but I really wanted one. I had been drooling over the Joya rocker, by Monte, for months, but there’s no place for me to try sitting in it in real life (the closest store that carries it in Texas is in Dallas, though it is available in Montreal and Toronto). Since I won’t buy an armchair I haven’t sat in, and since it was above our price range anyway, we decided to look closer to home. We looked at a bunch, and tried some in person (mainly at Babies “R” Us), but all I found were rocking chairs that I did not hate, instead of rocking chairs that I liked. I almost settled for one of them, but luckily I found better! We got the Charleston chair from Pottery Barn Kids on sale (teamed up with a coupon and, mostly, a gift from my parents). We tried it out in San Marcos and really liked it, and it looks fantastic in the nursery. We also got legs to turn it into a stationary armchair down the road, though I love rocking in it. I’m really happy with our choice! As a bonus, it’s pretty much the only seat in the house where I can relax without feeling any pelvic pain these days.


Changing table / Low dresser
We went the easy way and got a low dresser on Craigslist for $60, then added a changing pad with curved edges on top of that. Easy-peasy. Except that since we’re planning on using washcloths more than wipes, and we might be using a spray nozzle attached to the toilet for pretreating the cloth diapers, we’ve now decided to just put the changing pad on the bathroom counter and make that the changing station. We’ve got a hamper fitted with a wet bag in there for the cloth diapers; the lid shouldn’t be necessary as long as the baby is breastfed if we launder every other day. The changing table itself is far from useless, though, as it now houses linens and various baby essentials.
Note that I did not paint this white like the other furniture, because then the blinds and nursing stool would have been the only dark wood item in the room, and I was afraid they’d stick out like a sore thumb. This way, the low dresser is the same color as the blinds, so the choice looks intentional (I didn’t choose the blinds, but am not replacing them either).
The changing pad cover is something I made using this tutorial and using a longer elastic. I love the idea of having a designated spot for the head of the baby! I also made the storage baskets using this tutorial, though there are more options here. With cotton at $4.90 a yard and batting at $2.80, it was a really good deal!


The frame currently propped up on the dresser is actually the guest book from the Very-Hungry-Caterpillar-themed virtual baby shower our friend Jen organized (since all our friends are in Montreal, basically). It was a really great idea and worked perfectly! She put a lot of effort into it and even hand-painted the cookies below –aren’t they the best? So a big thank you to Jen, as well as to the good people at Pinterest and Skype, for making this possible.


Tall dresser and bookcase
The dresser is something I found on Craigslist, also for $60. I measured it to make sure it fit in the closet (since we won’t be hanging much in it for a baby, and there isn’t that a lot of space in the room), then I painted it, along with the bookcase ($36 in a second-hand furniture store). The top shelves house my childhood stuffed animals, most of which are not safe for infants, but I had no place else to put them! The bottom shelves of the bookcase are intentionally empty, because we expect to fill them with books and toys. (We won’t insist on handmade organic wooden toys, but hopefully we won’t receive too much cheap plastic crap or character effigies – I hope our relatives know us well enough to steer clear of anything with batteries, at least. I’m dreaming of a little kitchen set with felt produce… We plan on using an online wish list when the baby is a little older, but sometimes grandparents just can’t help themselves!)

Light fixture
Well, we didn’t do anything there after all. I really wanted to make a drum light fixture using this tutorial, but when I realized how thin embroidery hoops are, I decided I could not solidly install screws into it without coming out the other side. I haven’t found any nice light fixture within our limited budget, either, so I’ll have to make do with what’s already there. I’m a little bummed about it, because Lord knows I hate every light fixture in our house and I wanted to take this opportunity to change one, but on the bright side, the baby won’t care.
For the wall color, I’d always loved gray (for bedrooms, nurseries, living rooms, bathrooms, you name it), so that’s what I went with. I made sure to bring a sample of the carpet and baseboards to the store to pick a few shades of gray that worked with the rest of the room, then used samples to get a better idea of the shade I wanted (it’s actually Valspar’s Aspen Gray; I used two gallons, at $30.98 a gallon, plus supplies). It turns out that Nate Berkus approves of my choice color, as you can see in this segment that aired on Rachael Ray’s show last January (I had already painted by then, but felt validated that he recommended gray as a gender-neutral color). Apart from the white trim and furniture, I’ve got a few pops of turquoise for color, but I could easily go with just about any accent color at this point.


Along the top edge of three walls, we hung an alphabet I made using fleece and fabric scraps from various projects, sewed to a ribbon. It really wasn’t expensive, and I feel it livens up the place a lot. I also made a project inspired by images found on Pinterest, tracing the Quebec fleur-de-lys and the Texas lone star with puff paint and then painting over the whole thing; those are hanging over the crib (high enough that there’s no way the baby could reach them before being school-aged).
I tend to be an organized person, but in this case, I’ve decided to let go of some of my perfectionism. This is our first baby, so I don’t know how useful certain things will be; I’ve decided to just to my best to have an orderly and functional nursery and to adjust as we go. I do really like this nursery, though! On to the furniture.

Crib
My main concern here was that many cribs on the market are so massive that they look like wrecked ships, beached in a baby’s room. Not to mention the fact that they can easily cost several hundred to several thousand dollars! I wanted something very simple, with clean lines, white so it could go with everything, and for not too much money. I had eyed the Davinci Jenny Lind crib, which has an antique feel, but it’s metal (I prefer wood), the casters are brass (why?), and reviews do mention unsightly warning stickers that are near impossible to remove. Then we read a lot of positive reviews about Ikea cribs (see here for example), so we ended up going with the Hensvik, which is a nice wooden crib for under $100, white so it goes with almost anything, AND it turns into a toddler bed. We also got the mattress from Ikea, since all their mattresses fit their cribs and it was just one less headache. Plus, because it was Ikea, assembly instructions were very clear and it was almost disappointingly easy to put together!
The important thing to keep in mind, I think, is that any crib that you buy brand new will be safe for your baby. You are free to buy one used, but then the onus is on you to see if it has been affected by any recalls.
To pre-emptively answer any questions: the stuffed animals in the top right corner are my first doll and the Engineer’s first stuffed animal; the ones in the left are a stuffed bear I melted over and a homemade bunny. I also made a crib rail guard based on this tutorial, and it happened to be great practice for making buttonholes! We’re still on the fence about a mobile. They’re more for parents than babies anyway, and must be removed once the baby is about 4 months old, so we’re not sure we’ll bother. Then again, we got a simple metal frame that we could hang from the ceiling high enough to leave in place when the baby is older, so I might make a few things to hang on it with fabric scraps if I get around to it. I’m focusing on knitting first, and I might see about sewing when I’m done with that (unless someone can get me a knitting pattern for this awesome mobile, in which case you’d have a hard time stopping me from making it).

Rocking chair
This isn’t a necessity, according to some parents, but I really wanted one. I had been drooling over the Joya rocker, by Monte, for months, but there’s no place for me to try sitting in it in real life (the closest store that carries it in Texas is in Dallas, though it is available in Montreal and Toronto). Since I won’t buy an armchair I haven’t sat in, and since it was above our price range anyway, we decided to look closer to home. We looked at a bunch, and tried some in person (mainly at Babies “R” Us), but all I found were rocking chairs that I did not hate, instead of rocking chairs that I liked. I almost settled for one of them, but luckily I found better! We got the Charleston chair from Pottery Barn Kids on sale (teamed up with a coupon and, mostly, a gift from my parents). We tried it out in San Marcos and really liked it, and it looks fantastic in the nursery. We also got legs to turn it into a stationary armchair down the road, though I love rocking in it. I’m really happy with our choice! As a bonus, it’s pretty much the only seat in the house where I can relax without feeling any pelvic pain these days.


Changing table / Low dresser
We went the easy way and got a low dresser on Craigslist for $60, then added a changing pad with curved edges on top of that. Easy-peasy. Except that since we’re planning on using washcloths more than wipes, and we might be using a spray nozzle attached to the toilet for pretreating the cloth diapers, we’ve now decided to just put the changing pad on the bathroom counter and make that the changing station. We’ve got a hamper fitted with a wet bag in there for the cloth diapers; the lid shouldn’t be necessary as long as the baby is breastfed if we launder every other day. The changing table itself is far from useless, though, as it now houses linens and various baby essentials.
Note that I did not paint this white like the other furniture, because then the blinds and nursing stool would have been the only dark wood item in the room, and I was afraid they’d stick out like a sore thumb. This way, the low dresser is the same color as the blinds, so the choice looks intentional (I didn’t choose the blinds, but am not replacing them either).
The changing pad cover is something I made using this tutorial and using a longer elastic. I love the idea of having a designated spot for the head of the baby! I also made the storage baskets using this tutorial, though there are more options here. With cotton at $4.90 a yard and batting at $2.80, it was a really good deal!


The frame currently propped up on the dresser is actually the guest book from the Very-Hungry-Caterpillar-themed virtual baby shower our friend Jen organized (since all our friends are in Montreal, basically). It was a really great idea and worked perfectly! She put a lot of effort into it and even hand-painted the cookies below –aren’t they the best? So a big thank you to Jen, as well as to the good people at Pinterest and Skype, for making this possible.


Tall dresser and bookcase
The dresser is something I found on Craigslist, also for $60. I measured it to make sure it fit in the closet (since we won’t be hanging much in it for a baby, and there isn’t that a lot of space in the room), then I painted it, along with the bookcase ($36 in a second-hand furniture store). The top shelves house my childhood stuffed animals, most of which are not safe for infants, but I had no place else to put them! The bottom shelves of the bookcase are intentionally empty, because we expect to fill them with books and toys. (We won’t insist on handmade organic wooden toys, but hopefully we won’t receive too much cheap plastic crap or character effigies – I hope our relatives know us well enough to steer clear of anything with batteries, at least. I’m dreaming of a little kitchen set with felt produce… We plan on using an online wish list when the baby is a little older, but sometimes grandparents just can’t help themselves!)

Light fixture
Well, we didn’t do anything there after all. I really wanted to make a drum light fixture using this tutorial, but when I realized how thin embroidery hoops are, I decided I could not solidly install screws into it without coming out the other side. I haven’t found any nice light fixture within our limited budget, either, so I’ll have to make do with what’s already there. I’m a little bummed about it, because Lord knows I hate every light fixture in our house and I wanted to take this opportunity to change one, but on the bright side, the baby won’t care.
Nate Berkus, this is your legacy
I’ve mentioned Nate Berkus on this blog before. I loved him on Oprah, I loved his show, I love his books – Home Rules and The Things That Matter – and I love his stuff at Target. (You can read more about him here and about the latest book here.) And you know, after watching makeovers on his show for a while, I became obsessed with the idea of buying second-hand furniture and refinishing it. (If you don’t know what I mean, please see 10 ways to transform a dresser, which has great examples.) I held off for a certain time, as I didn’t have anywhere to put new furniture, but then late last summer we decided to get started on the nursery. This was before I was pregnant, but our reasoning was as follows: pregnant women can’t carry heavy furniture up a set of stairs and they aren’t supposed to be dealing with paint and primer and products that could give off fumes anyway, so it only made sense that I would do this before conceiving. Plus, we’d been trying for so long that it was getting depressing looking at that empty room. (Also, I’m a planner and did not want to leave it all for the last few months of pregnancy.) I realize that some of you will say that it’s bad luck to plan a nursery before one is well into the second trimester, but here’s my rebuttal: a) planning for a baby’s arrival before conception does not reduce my odds of getting pregnant or of having a live birth; b) I thought about it, and if I had gotten pregnant and had subsequently miscarried, it would not have made me any less sad to think, “Oh well, thank heavens at least I didn’t have the nursery ready.” So we started early.
First things first: I visited second-hand furniture stores (we bought a $36 bookcase at Hats Furniture Haus in New Braunfels, but the Salvation Army had nice stuff, too). I went to yard sales, for which I recommend the Yard Sale Treasure Map: enter your address at the end of the week, and it will tell you about the yard sales near you that weekend (keep in mind that the best pieces tend to go early Saturday morning). And I lurked on Craigslist, where I eventually found a dresser which we got for $60 (down from $100). Architectural salvage yards are also a good option if you are lucky enough to have some near you.
Before any painting, here’s some real-life advice, so that my experience can benefit others. Once we got the dresser home, I noticed an unpleasant smell coming from the top drawer: the previous owner had spilled perfume in it, and the smell was really strong (but none of the other drawers were affected). I looked up how to get rid of smells in wood dressers and found links like this and that (though many tips were for getting a moldy smell out, which involves killing the mold, but that really wasn’t the issue here). I also solicited advice from friends on That Social Network. I started by scraping off the varnish where the perfume had been spilled, I let the drawer air out in the sun, I scrubbed with baking soda, with vinegar, with OxiClean, then left a bowl of vinegar in the drawer for several days. I tried wetting the wood and spreading salt on it to absorb the water and the smell, with no luck. I tried ammonia, diluted and straight, plus tea tree oil and eucalyptus oil, and finally, Febreeze. For the record: vinegar, ammonia, eucalyptus oil and Febreeze all seemed very promising at first, but as soon as their own smell dissipated, the smell of perfume came back. In the end, the Engineer used several coats of Varathane polyurethane sealant in the drawer, which worked perfectly. (Once I was done with all that, someone swore by Nilodor, which I will try next time, but at this point my best recommendation to you is still the sealant.)


I’d never painted a piece of finished wood furniture before, so I looked up various tutorials online. I really recommend the ones on Centsational Girl, such as How To Paint Furniture, The Boy’s Dresser, and Painting A Kitchen Table. There’s also a good tutorial on Make It & Love It, plus tips on The Cerniks, and as a bonus, how to remove paint from hardware without nasty chemicals. In a nutshell, what you need to do is sand, prime, paint (adding Floetrol to the paint, which makes it more liquid to minimize the appearance of brush strokes and paint drops), and polish (if the piece will be high traffic, like a table top, but I didn’t bother for these two pieces). Those links I gave you are to paint a piece of furniture; if you are interested in refinishing the wood instead, try this tutorial from The Brick House; if you want to stain it, here’s a tutorial from Frugal With A Flourish. I also bought new handles for the dresser ($11.84 in all), because I really didn’t like the original ones, then I put on my big girl pants and, for the second time in my life, used a power drill for the precision work of drilling the new holes (plus wood putty to fill the old ones, before sanding the piece). I love the result! I also used cute wrapping paper to line the drawers ($3.99 for one roll, which was sufficient); it’s a small detail that really makes a big difference.


So the end result is a nice-looking dresser, which fits right in the closet and matches the trim and closet doors. The truth is that I’m much happier with it than with anything I could have bought ready-made in a store. I also used the same technique to refinish the bookcase, then we nailed it to the wall so it wouldn’t tip over. In the end, I’m incredibly happy with the look of things and the fact that both pieces were very budget-friendly, so I’d like to thank Nate Berkus for the inspiration!
First things first: I visited second-hand furniture stores (we bought a $36 bookcase at Hats Furniture Haus in New Braunfels, but the Salvation Army had nice stuff, too). I went to yard sales, for which I recommend the Yard Sale Treasure Map: enter your address at the end of the week, and it will tell you about the yard sales near you that weekend (keep in mind that the best pieces tend to go early Saturday morning). And I lurked on Craigslist, where I eventually found a dresser which we got for $60 (down from $100). Architectural salvage yards are also a good option if you are lucky enough to have some near you.
Before any painting, here’s some real-life advice, so that my experience can benefit others. Once we got the dresser home, I noticed an unpleasant smell coming from the top drawer: the previous owner had spilled perfume in it, and the smell was really strong (but none of the other drawers were affected). I looked up how to get rid of smells in wood dressers and found links like this and that (though many tips were for getting a moldy smell out, which involves killing the mold, but that really wasn’t the issue here). I also solicited advice from friends on That Social Network. I started by scraping off the varnish where the perfume had been spilled, I let the drawer air out in the sun, I scrubbed with baking soda, with vinegar, with OxiClean, then left a bowl of vinegar in the drawer for several days. I tried wetting the wood and spreading salt on it to absorb the water and the smell, with no luck. I tried ammonia, diluted and straight, plus tea tree oil and eucalyptus oil, and finally, Febreeze. For the record: vinegar, ammonia, eucalyptus oil and Febreeze all seemed very promising at first, but as soon as their own smell dissipated, the smell of perfume came back. In the end, the Engineer used several coats of Varathane polyurethane sealant in the drawer, which worked perfectly. (Once I was done with all that, someone swore by Nilodor, which I will try next time, but at this point my best recommendation to you is still the sealant.)


I’d never painted a piece of finished wood furniture before, so I looked up various tutorials online. I really recommend the ones on Centsational Girl, such as How To Paint Furniture, The Boy’s Dresser, and Painting A Kitchen Table. There’s also a good tutorial on Make It & Love It, plus tips on The Cerniks, and as a bonus, how to remove paint from hardware without nasty chemicals. In a nutshell, what you need to do is sand, prime, paint (adding Floetrol to the paint, which makes it more liquid to minimize the appearance of brush strokes and paint drops), and polish (if the piece will be high traffic, like a table top, but I didn’t bother for these two pieces). Those links I gave you are to paint a piece of furniture; if you are interested in refinishing the wood instead, try this tutorial from The Brick House; if you want to stain it, here’s a tutorial from Frugal With A Flourish. I also bought new handles for the dresser ($11.84 in all), because I really didn’t like the original ones, then I put on my big girl pants and, for the second time in my life, used a power drill for the precision work of drilling the new holes (plus wood putty to fill the old ones, before sanding the piece). I love the result! I also used cute wrapping paper to line the drawers ($3.99 for one roll, which was sufficient); it’s a small detail that really makes a big difference.


So the end result is a nice-looking dresser, which fits right in the closet and matches the trim and closet doors. The truth is that I’m much happier with it than with anything I could have bought ready-made in a store. I also used the same technique to refinish the bookcase, then we nailed it to the wall so it wouldn’t tip over. In the end, I’m incredibly happy with the look of things and the fact that both pieces were very budget-friendly, so I’d like to thank Nate Berkus for the inspiration!
Friday, April 19, 2013
Batch of links - Organizing meals and recipes
I think I’ve talked about this before, but I used to get confused when making shopping lists and cooking meals for the week. There was a time when I didn’t really plan a meal for each day, just bought things “for the week or so”, then ended up pacing the kitchen after classes, wondering what to eat. Then I started planning meals in advance, but I have so many recipes to try that I would on occasion have all the ingredients ready to go and, for the life of me, couldn’t remember what I had meant to make with them! Now, I’ve simplified my life with a weekly menu (using a template from here). While I still have to put some effort into deciding what to eat the coming week (and in case you’re wondering, that’s usually what I’m doing on Friday mornings), I love having it all organized later in such a way that I always know what I’m supposed to be making on what day, and I can include instructions on which foods to pull out of the freezer a day in advance, or which meal I should make first so that various ingredients don’t go bad.
A lot of people struggle trying to organize their recipes, though. There are online tools to help manage your bookmarks, like Delicious or Plan to Eat (though the latter works with a paid membership), plus Pinterest and Evernote, of course. You can always email recipes to yourself in Gmail so that you can later search them not just by title, but by ingredient. Plus, there are tons of suggestions here and here. There’s also a new app called Paprika that might be helpful to some. (All this presupposes, of course, that you use some kind of electronic device, mobile or not, to browse various food sites, but most people do. The Engineer and I do not own a smartphone at this point, so I can’t comment on any mobile apps; all I have to contribute is that I would love an iPhone, though I probably wouldn’t use it enough to justify the monthly fees, and I usually don’t fall for the newer-is-better mindset out there.)
What is working for me so far is a system where I have bookmarks organized by type of recipe to try (mains, side dishes, desserts, etc.), plus a pile of recipes torn out of magazines, and cookbooks with post-it tabs for bookmarks. I pick some of them each week, and once I make them and decide to keep them, I produce an 8.5x11 paper of them (meaning I print it out or punch holes in the magazine page, depending on the situation, and change the cookbook bookmark from a vertical to a horizontal orientation – I’m very anal about it, what can I say), along with any modifications, and put that in organized binders (I used to write them out by hand in notebooks before, and while I still have those, I prefer the flexibility of binders). My meal binders are organized by type of dish, plus a whole section for vegetarian dishes. It gets confusing, unless you’re me, but I like having one spot – my kitchen bookshelf – to look up tried and true recipes, as opposed to having some on paper and some online. Plus, I’ve been in a situation before where I couldn’t access some recipe because there was a power failure, thus no internets. I have several binders, because I couldn’t find any big enough for all the recipes, though I admit I’m envious of the one on 71 toes!
As for grocery shopping apps, some people might find OurGroceries helpful, as it will sync up between two devices (so you can update the list in real time with your smartphone if you run errands without your partner, or your partner can add something to it after you’ve left for the store), plus it has a recipe feature that allows you to pull up all the ingredients for a recipe you like.
It can still be hard to come up with inspiration, though, even when you have recipes all bookmarked and piled up. Here are some suggestions to find fresh inspiration, including reading a restaurant menu. I have to admit I’m often in a rut these days.
There’s also a website that I fnd wonderful in theory: Eat Your Books, n which you create a paid profile (free for 5 books, and for unlimited books it’s something like $25 for one year or $50 for a lifetime – I’d totally pay the latter!) and enter the cookbooks you own. Then, you can enter a few ingredients that you have lying around, and the program will tell you which recipes in your cookbooks call for those ingredients! It sounds awesome, but last time I checked, they were still building a library, and they didn’t have enough of the cookbooks I own for me to want to sign up. I’m still keeping that in mind, though, as I hope they’ll expand the list of titles they cover!
A lot of people struggle trying to organize their recipes, though. There are online tools to help manage your bookmarks, like Delicious or Plan to Eat (though the latter works with a paid membership), plus Pinterest and Evernote, of course. You can always email recipes to yourself in Gmail so that you can later search them not just by title, but by ingredient. Plus, there are tons of suggestions here and here. There’s also a new app called Paprika that might be helpful to some. (All this presupposes, of course, that you use some kind of electronic device, mobile or not, to browse various food sites, but most people do. The Engineer and I do not own a smartphone at this point, so I can’t comment on any mobile apps; all I have to contribute is that I would love an iPhone, though I probably wouldn’t use it enough to justify the monthly fees, and I usually don’t fall for the newer-is-better mindset out there.)
What is working for me so far is a system where I have bookmarks organized by type of recipe to try (mains, side dishes, desserts, etc.), plus a pile of recipes torn out of magazines, and cookbooks with post-it tabs for bookmarks. I pick some of them each week, and once I make them and decide to keep them, I produce an 8.5x11 paper of them (meaning I print it out or punch holes in the magazine page, depending on the situation, and change the cookbook bookmark from a vertical to a horizontal orientation – I’m very anal about it, what can I say), along with any modifications, and put that in organized binders (I used to write them out by hand in notebooks before, and while I still have those, I prefer the flexibility of binders). My meal binders are organized by type of dish, plus a whole section for vegetarian dishes. It gets confusing, unless you’re me, but I like having one spot – my kitchen bookshelf – to look up tried and true recipes, as opposed to having some on paper and some online. Plus, I’ve been in a situation before where I couldn’t access some recipe because there was a power failure, thus no internets. I have several binders, because I couldn’t find any big enough for all the recipes, though I admit I’m envious of the one on 71 toes!
As for grocery shopping apps, some people might find OurGroceries helpful, as it will sync up between two devices (so you can update the list in real time with your smartphone if you run errands without your partner, or your partner can add something to it after you’ve left for the store), plus it has a recipe feature that allows you to pull up all the ingredients for a recipe you like.
It can still be hard to come up with inspiration, though, even when you have recipes all bookmarked and piled up. Here are some suggestions to find fresh inspiration, including reading a restaurant menu. I have to admit I’m often in a rut these days.
There’s also a website that I fnd wonderful in theory: Eat Your Books, n which you create a paid profile (free for 5 books, and for unlimited books it’s something like $25 for one year or $50 for a lifetime – I’d totally pay the latter!) and enter the cookbooks you own. Then, you can enter a few ingredients that you have lying around, and the program will tell you which recipes in your cookbooks call for those ingredients! It sounds awesome, but last time I checked, they were still building a library, and they didn’t have enough of the cookbooks I own for me to want to sign up. I’m still keeping that in mind, though, as I hope they’ll expand the list of titles they cover!
Friday, April 12, 2013
Batch of links - On Pinterest and possessions
- I’ve been meaning to share this Apartment Therapy article on eliminating most clutter, but still making peace with a little mess. It reminded me of another article on roughly the same topic, Fighting the feeling of “should” (things that we feel we “should” own). It contains suggestions that I use in my everyday life, and I have to admit that Pinterest has helped with that – when I see something I really like, but can’t justify owning, I often pin it to one of my boards and feel content.
- On a related note, here are 25 items you can replace with your stand mixer (I’m still trying to justify buying the pasta-making attachments and the meat grinding/sausage stuffing ones, but don’t have the space for them).
- Here’s a New York Times article on why we love beautiful things, or more precisely, certain design proportions.
- To get back to Pinterest, I enjoyed reading this other New York Times article about the trouble with curation, because it rightly points out that Pinterest isn’t about the objects that are longed for, it’s about the feeling of longing.
- Some people experience a downside with Pinterest, though: feelings of inadequacy. I personally see the pictures and tips as something detached from myself, in the sense that I certainly don’t expect to have the time or the energy to do it all, even as a stay-at-home wife, so it’s not some standard against which I measure myself (otherwise, I’d drive myself insane). It’s just inspiration.
- On a related note, here are 25 items you can replace with your stand mixer (I’m still trying to justify buying the pasta-making attachments and the meat grinding/sausage stuffing ones, but don’t have the space for them).
- Here’s a New York Times article on why we love beautiful things, or more precisely, certain design proportions.
- To get back to Pinterest, I enjoyed reading this other New York Times article about the trouble with curation, because it rightly points out that Pinterest isn’t about the objects that are longed for, it’s about the feeling of longing.
- Some people experience a downside with Pinterest, though: feelings of inadequacy. I personally see the pictures and tips as something detached from myself, in the sense that I certainly don’t expect to have the time or the energy to do it all, even as a stay-at-home wife, so it’s not some standard against which I measure myself (otherwise, I’d drive myself insane). It’s just inspiration.
Friday, August 12, 2011
Brown-bagging it
This year, the Engineer has resolved to pack lunches to go to work, in an effort both to eat better and to save some money. He says he would be happy with a plain old sandwich every day, but I know that wouldn’t do it for me. So I decided to round up all the links I had saved for packing lunches – a lot of them are from The Kitchn, but I’ve got a few other sites, too. I’ll use this post as a reference for lunch ideas as well as gear like lunch boxes and thermoses. Don’t hesitate to leave your own tips and ideas in the comments!
Food
For starters, here is a link with 10 healthy lunch recipes that happen to be vegan: bean dips and spreads, a chickpea sandwich, noodle salads, lentil salads, couscous, stews and vegetable rolls. The Kitchn also has five complete lunches under 400 calories, for those of you watching your weight, as well as a photo gallery of inspiration for lunches. Lentil salads are particularly convenient, because you can make them ahead of time, freeze them and just let them thaw in your lunchbox – they’ll be just right by lunchtime.
This article is also extremely useful to help you make lunches that don’t need to be refrigerated! Keep in mind that certain herbs, like basil, keep very well at room temperature and can be added to your lunches when you’re ready to eat. There are more ideas here and here, in the comments especially. And if you can’t reheat your lunch, try one of these 15 salads (meat, grain, pasta and bean salads, not lettuce salads, though those work too). If you want to bring dinner leftovers to lunch, remember that they should be easy to reheat or good cold, easy to eat (think chicken pieces instead of a whole chicken breast) and easy to pack. Here are 10 ideas to get you started. There are also various things you can cook ahead of time on the weekend and use in your lunches that week, like rice, beans, quinoa and more.
For snacks, check out these 15 ideas (like granola, yogurt, roasted chickpeas or nuts), if you're bored with fruits and veggies.
If you are looking for healthy lunches that your kids will actually eat, please read this great post on The Kind Life. It’s full of tips and ideas, such as making sure your child is involved in choosing what goes in the lunch, making the food fun (cutting the sandwich in different shapes, for example), giving a variety of tastes and textures, and having an adequate lunch box. There are also ideas for meals and snacks. I have to mention bento boxes as well, though I wouldn’t have the patience to pack those. If you’re making sandwiches for lots of people and want a way to streamline your morning routine, make yourself a prep station!
Lunch bags and accessories
As far as interesting gizmos go, I really like the idea of the Toastabag: it’s a reusable (and dishwasher-safe) bag in which you slip a sandwich, then you put the bag in the toaster and get a grilled sandwich, without a mess! This is great when you don’t have a stovetop at work (or don’t want to go through the trouble of using it). As a bonus, for anyone eating gluten-free, it prevents the bread from coming in contact with crumbs of gluten in a shared toaster. I also like the Fit & Fresh Salad Shaker, which keeps your salad and dressing separate and has a cooling pack right in the lid.
For those of you who want to minimize the amount of trash at each lunch, here are a few resources for reusable straws that aren’t plastic. Obviously, take reusable utensils with you! To replace disposable sandwich bags, take a look at this post on The Kitchn, which has tons of options; there are also reusable bags on Etsy (like these, to name just one) or, if you’re crafty, you can make them yourself (here, for example, but use Google to get dozens more tutorials). There are also 18 resources here. Plus, there’s a neat container designed to keep your sandwich from getting soggy: it separates the contents from the bread until you are ready to eat the sandwich, but still makes it super easy to actually make the sandwich. Be sure to watch the video!
Lunch boxes can be hard to find for adults, but check out the Zojirushi lunch jars, which are both stylish and extremely practical! They come in a variety of sizes and are insulated. OM Goods makes great tiffins out of stainless steel, which is both hygienic and eco-friendly. I also like the Planet Box and especially the Goodbyn, both of which have compartments for your main course, snacks and dessert. Oots has a lunch box with nestling containers that looks sturdy enough for kids, but could be used by adults. And Built has some great lunch totes. The Container Store also has lunch boxes and containers.
Other tips
This is a fun video from two of my favourite stores that has both lunch ideas and resources for specialized carrying containers. Unclutterer also has some tips – and don’t forget to read the comments. I hope this was useful to those of you who have kids starting school soon and to those who were looking for new inspiration.
Food
For starters, here is a link with 10 healthy lunch recipes that happen to be vegan: bean dips and spreads, a chickpea sandwich, noodle salads, lentil salads, couscous, stews and vegetable rolls. The Kitchn also has five complete lunches under 400 calories, for those of you watching your weight, as well as a photo gallery of inspiration for lunches. Lentil salads are particularly convenient, because you can make them ahead of time, freeze them and just let them thaw in your lunchbox – they’ll be just right by lunchtime.
This article is also extremely useful to help you make lunches that don’t need to be refrigerated! Keep in mind that certain herbs, like basil, keep very well at room temperature and can be added to your lunches when you’re ready to eat. There are more ideas here and here, in the comments especially. And if you can’t reheat your lunch, try one of these 15 salads (meat, grain, pasta and bean salads, not lettuce salads, though those work too). If you want to bring dinner leftovers to lunch, remember that they should be easy to reheat or good cold, easy to eat (think chicken pieces instead of a whole chicken breast) and easy to pack. Here are 10 ideas to get you started. There are also various things you can cook ahead of time on the weekend and use in your lunches that week, like rice, beans, quinoa and more.
For snacks, check out these 15 ideas (like granola, yogurt, roasted chickpeas or nuts), if you're bored with fruits and veggies.
If you are looking for healthy lunches that your kids will actually eat, please read this great post on The Kind Life. It’s full of tips and ideas, such as making sure your child is involved in choosing what goes in the lunch, making the food fun (cutting the sandwich in different shapes, for example), giving a variety of tastes and textures, and having an adequate lunch box. There are also ideas for meals and snacks. I have to mention bento boxes as well, though I wouldn’t have the patience to pack those. If you’re making sandwiches for lots of people and want a way to streamline your morning routine, make yourself a prep station!
Lunch bags and accessories
As far as interesting gizmos go, I really like the idea of the Toastabag: it’s a reusable (and dishwasher-safe) bag in which you slip a sandwich, then you put the bag in the toaster and get a grilled sandwich, without a mess! This is great when you don’t have a stovetop at work (or don’t want to go through the trouble of using it). As a bonus, for anyone eating gluten-free, it prevents the bread from coming in contact with crumbs of gluten in a shared toaster. I also like the Fit & Fresh Salad Shaker, which keeps your salad and dressing separate and has a cooling pack right in the lid.
For those of you who want to minimize the amount of trash at each lunch, here are a few resources for reusable straws that aren’t plastic. Obviously, take reusable utensils with you! To replace disposable sandwich bags, take a look at this post on The Kitchn, which has tons of options; there are also reusable bags on Etsy (like these, to name just one) or, if you’re crafty, you can make them yourself (here, for example, but use Google to get dozens more tutorials). There are also 18 resources here. Plus, there’s a neat container designed to keep your sandwich from getting soggy: it separates the contents from the bread until you are ready to eat the sandwich, but still makes it super easy to actually make the sandwich. Be sure to watch the video!
Lunch boxes can be hard to find for adults, but check out the Zojirushi lunch jars, which are both stylish and extremely practical! They come in a variety of sizes and are insulated. OM Goods makes great tiffins out of stainless steel, which is both hygienic and eco-friendly. I also like the Planet Box and especially the Goodbyn, both of which have compartments for your main course, snacks and dessert. Oots has a lunch box with nestling containers that looks sturdy enough for kids, but could be used by adults. And Built has some great lunch totes. The Container Store also has lunch boxes and containers.
Other tips
This is a fun video from two of my favourite stores that has both lunch ideas and resources for specialized carrying containers. Unclutterer also has some tips – and don’t forget to read the comments. I hope this was useful to those of you who have kids starting school soon and to those who were looking for new inspiration.
Tuesday, March 08, 2011
Spice storage
Ever since I started cooking, I’ve been looking for a good solution to storing spices. In my first real kitchen (second apartment, but first with a truly functional kitchen), I wanted a spice rack that showed off the colors of the spices in their jars. Before you say anything, I know that spices should not be exposed to light. Ideally, I’d want them in a very narrow built-in cabinet, like the ones with foldable ironing boards in old homes (for those of you who don’t know what I’m talking about, check out this link). I did have such a board, but I was using it, so the space was off-limits to spices. I like the colors of spices and want to look at pretty things, and it’s my kitchen, so there. But I couldn’t find anything: most racks were revolving stands that showed just the cap of the spice jars, or they came with jars that were too small, or the space for jars was insufficient (if you’re only using a dozen spices, then you don’t need a rack in the first place, sorry). I ended up building my own spice rack, with plywood that I had precut and then painted white. At the time, I had 24 spice jars, and left room to grow in that rack to 30 jars.
By the time I was in my more permanent apartment (the one in which I lived when I met the Engineer, started this blog, and where we will be summering), that spice rack was overflowing. I had a spice basket next to it, and more spices in the pantry and on the countertop, all in different containers (plastic bags, plastic boxes, tins, glass jars from several different brands, etc.). Once again, I had an old foldable ironing board. I didn’t use that one, but I had put a bookcase in front of it, so once again it wasn’t a good space for the spices. I might remedy that next summer by rearranging the furniture in that apartment (since there’s a lot less of it now), but I just lived with it until we moved.

Now that we’re settled in our house and that we’ve got the pantry in order, it was time to store those spices properly. I looked through the webpages I had bookmarked over the years (as this was by no means a spur-of-the-moment decision). There was The Traveler’s Lunchbox, whose author stored her spices in little metal tins in an old typesetter’s tray. That is absolutely beautiful, and I even had some of those tins. But they’re too small to hold the contents of most store-bought spice jars, and I don’t want to end up with a “presentation” spice rack and another leftover stash that holds the other half of spices, so I had to rule that out. That, as well as price, is why I didn’t go the whole tin-on-a-magnetic-board route. And I didn’t have the wall space to make racks again, despite nice tutorials like this.
I thought of a hanging rack for the inside of the pantry door (or I could have mounted one), but again I didn’t find anything that seemed like it would hold all of the spices. I’m keeping in mind, of course, the fact that we haven’t quite rebuilt our spice collection since we moved: we now have 30 spices, plus bay leaves, salts and extracts, but I know we’ll be buying more. We did get bleacher stands, which were put in an accessible space, but they looked completely mismatched, and labels were sometimes hard to read on the top tiers. Many people put their spices in a drawer with labels on top of the jars, but you can’t see the spices as much – and we certainly don’t have a drawer for that. Besides, I wanted to keep the bleacher stands.
It was when I saw this picture, however, that I was convinced of the necessity of matching containers. But not like the ones shown, because most spice jars on the market have an opening too narrow to insert measuring spoons (I even had a commercial jar too narrow for the ¼ tsp, which is tiny!). It’s fine if all I need is a sprinkle or a pinch, but most times, I want something more substantial. Pouring the contents of a spice jar into a measuring spoon never ends well. So I needed something with a wide mouth and, as stated before, something big enough to hold the contents of most commercial jars. The latter is the main reason why I didn’t pounce on the SpiceCare system when I saw it profiled on The Kitchn over a year ago. It’s beautiful and looks quite practical – as long as you have a lot of spices that fit in 2-oz containers. (You can always deviate from the sets and buy medium or large jars individually, but the cost really adds up, which is the other reason I didn’t go this route.) Most online round-ups I found on the subject had the usual advice, but nothing new or specific enough for my needs.
The author of Smitten Kitchen once wrote a post on the subject; while I love her spice jars, I think that the potential mess when uncapping them would get to me. I finally had my answer after a really great post on Tea & Cookies about how the author organized her spice collection. The jars she used were actually not designed for spices, which is probably why I had never come across them before. They’re from the Sunburst Bottle Company, and at $18.75 for a case of 24 4-oz glass bottles with black caps, they are by far the most reasonably priced! I got enough to fit all of our spices, and we still have extra jars to expand our collection. The bleacher stands expand as well, so that shouldn’t be a problem.

You’ll notice that all the jars are short enough that they don’t hide the ones on the rear shelves. The mouth of each jar is wide enough for a tablespoon to be levelled without spilling anything. Everything looks perfectly uniform, and looking at them makes me deliriously happy. Off to the side are the bay leaves (too big for the jars), the vanilla extract and vanilla bean paste, as well as the almond extract and coconut extract.


By the time I was in my more permanent apartment (the one in which I lived when I met the Engineer, started this blog, and where we will be summering), that spice rack was overflowing. I had a spice basket next to it, and more spices in the pantry and on the countertop, all in different containers (plastic bags, plastic boxes, tins, glass jars from several different brands, etc.). Once again, I had an old foldable ironing board. I didn’t use that one, but I had put a bookcase in front of it, so once again it wasn’t a good space for the spices. I might remedy that next summer by rearranging the furniture in that apartment (since there’s a lot less of it now), but I just lived with it until we moved.

Now that we’re settled in our house and that we’ve got the pantry in order, it was time to store those spices properly. I looked through the webpages I had bookmarked over the years (as this was by no means a spur-of-the-moment decision). There was The Traveler’s Lunchbox, whose author stored her spices in little metal tins in an old typesetter’s tray. That is absolutely beautiful, and I even had some of those tins. But they’re too small to hold the contents of most store-bought spice jars, and I don’t want to end up with a “presentation” spice rack and another leftover stash that holds the other half of spices, so I had to rule that out. That, as well as price, is why I didn’t go the whole tin-on-a-magnetic-board route. And I didn’t have the wall space to make racks again, despite nice tutorials like this.
I thought of a hanging rack for the inside of the pantry door (or I could have mounted one), but again I didn’t find anything that seemed like it would hold all of the spices. I’m keeping in mind, of course, the fact that we haven’t quite rebuilt our spice collection since we moved: we now have 30 spices, plus bay leaves, salts and extracts, but I know we’ll be buying more. We did get bleacher stands, which were put in an accessible space, but they looked completely mismatched, and labels were sometimes hard to read on the top tiers. Many people put their spices in a drawer with labels on top of the jars, but you can’t see the spices as much – and we certainly don’t have a drawer for that. Besides, I wanted to keep the bleacher stands.
It was when I saw this picture, however, that I was convinced of the necessity of matching containers. But not like the ones shown, because most spice jars on the market have an opening too narrow to insert measuring spoons (I even had a commercial jar too narrow for the ¼ tsp, which is tiny!). It’s fine if all I need is a sprinkle or a pinch, but most times, I want something more substantial. Pouring the contents of a spice jar into a measuring spoon never ends well. So I needed something with a wide mouth and, as stated before, something big enough to hold the contents of most commercial jars. The latter is the main reason why I didn’t pounce on the SpiceCare system when I saw it profiled on The Kitchn over a year ago. It’s beautiful and looks quite practical – as long as you have a lot of spices that fit in 2-oz containers. (You can always deviate from the sets and buy medium or large jars individually, but the cost really adds up, which is the other reason I didn’t go this route.) Most online round-ups I found on the subject had the usual advice, but nothing new or specific enough for my needs.
The author of Smitten Kitchen once wrote a post on the subject; while I love her spice jars, I think that the potential mess when uncapping them would get to me. I finally had my answer after a really great post on Tea & Cookies about how the author organized her spice collection. The jars she used were actually not designed for spices, which is probably why I had never come across them before. They’re from the Sunburst Bottle Company, and at $18.75 for a case of 24 4-oz glass bottles with black caps, they are by far the most reasonably priced! I got enough to fit all of our spices, and we still have extra jars to expand our collection. The bleacher stands expand as well, so that shouldn’t be a problem.

You’ll notice that all the jars are short enough that they don’t hide the ones on the rear shelves. The mouth of each jar is wide enough for a tablespoon to be levelled without spilling anything. Everything looks perfectly uniform, and looking at them makes me deliriously happy. Off to the side are the bay leaves (too big for the jars), the vanilla extract and vanilla bean paste, as well as the almond extract and coconut extract.


Monday, March 07, 2011
There's a choir of angels in my kitchen...
... and it’s coming from my pantry. You see, my pantry was pretty full. I’ve talked about it before, but we had accumulated even more things (like various flours, nuts, dried fruit, pasta, rice, etc.), and things had gotten out of hand, especially on the middle shelf.


Enter OXO containers to the rescue! We already had two that we took with us from Montreal, so we knew the quality of these babies. And we had a coupon to help reduce the price. I measured the shelf, counted the bags and boxes of flour, and made the purchase.

And now look! A place for everything, and everything in its place. This system also keeps me from buying any more gluten-free flours with which to experiment until I empty one of the containers we already have. Not only does everything look awesome and organized, but the flours also stay fresh longer in the airtight containers. I don’t have any more torn bags spilling their contents everywhere, and no more packages are getting lost at the back, under a pile of other stuff. This system works really well for us, and I’m extremely pleased with it.

As for the three jars in which we had flour before (barely visible at the back of the original picture, on the left-hand side), I’ve now used them for confectioners’ sugar, granulated white sugar and brown sugar, so the top shelf looks better too!


Enter OXO containers to the rescue! We already had two that we took with us from Montreal, so we knew the quality of these babies. And we had a coupon to help reduce the price. I measured the shelf, counted the bags and boxes of flour, and made the purchase.

And now look! A place for everything, and everything in its place. This system also keeps me from buying any more gluten-free flours with which to experiment until I empty one of the containers we already have. Not only does everything look awesome and organized, but the flours also stay fresh longer in the airtight containers. I don’t have any more torn bags spilling their contents everywhere, and no more packages are getting lost at the back, under a pile of other stuff. This system works really well for us, and I’m extremely pleased with it.

As for the three jars in which we had flour before (barely visible at the back of the original picture, on the left-hand side), I’ve now used them for confectioners’ sugar, granulated white sugar and brown sugar, so the top shelf looks better too!
Monday, December 06, 2010
Transformation de vêtements : Encadrement
Dans mon dernier billet, je vous ai parlé de recyclage/transformation de vêtements, et notamment d’encadrement de t-shirt. Voici quelques exemples concrets. D’abord, j’avais un t-shirt dont j’aimais beaucoup la couleur et le pictogramme, mais il était devenu trop petit. Je ne pouvais donc plus le porter, mais je n’arrivais pas à m’en défaire. J’ai décidé de l’encadrer. Cependant, dans ce cas-ci, ce n’était pas simple, car la forme du pictogramme ainsi que son emplacement (près du col) faisaient en sorte qu’il me fallait un cadre d’environ 7"x7", ce que je ne trouvais pas en magasin. J’ai fini par trouver un cadre de 8"x8" pour quelques dollars à l’Armée du Salut, et il était de la même couleur dorée que le dessin sur mon t-shirt. Je l’ai donc acheté, puis démonté. J’ai remplacé l’image par mon t-shirt, découpé de la bonne dimension (l’image est quand même décalée vers le haut du cadre, puisque celui est un peu trop grand). C’était un peu compliqué, car j’ai dû agrafer le tissu sur un morceau de carton de la bonne taille, mais j’aime beaucoup le résultat final.


Pour la plupart des t-shirt, un cadre 8"x10" trouvé dans tout bon magasin suffit. C’est également plus simple à assembler, car il suffit de ciseaux pour découper l’avant du t-shirt de la bonne taille, et le tour est joué. Il s’agit ici d’un t-shirt que m’avait offert mon amie la Maman des Zigotos. Encore une fois, il était devenu trop petit, et très usé à force d’être porté. J’ai donc choisi un cadre blanc et j’ai encadré le dessin, qui fera sûrement très bien dans une chambre de bébé un jour.


Voici aussi le résultat final de deux autres projets, ainsi que mes premiers cadres du genre.


Les cadres du commerce qui sont composés de deux vitres dans un cadre de bois, ainsi que les boîtes-cadres, sont également parfaits pour encadrer un petit vêtement entier, comme un vêtement de bébé, sans avoir à le découper.


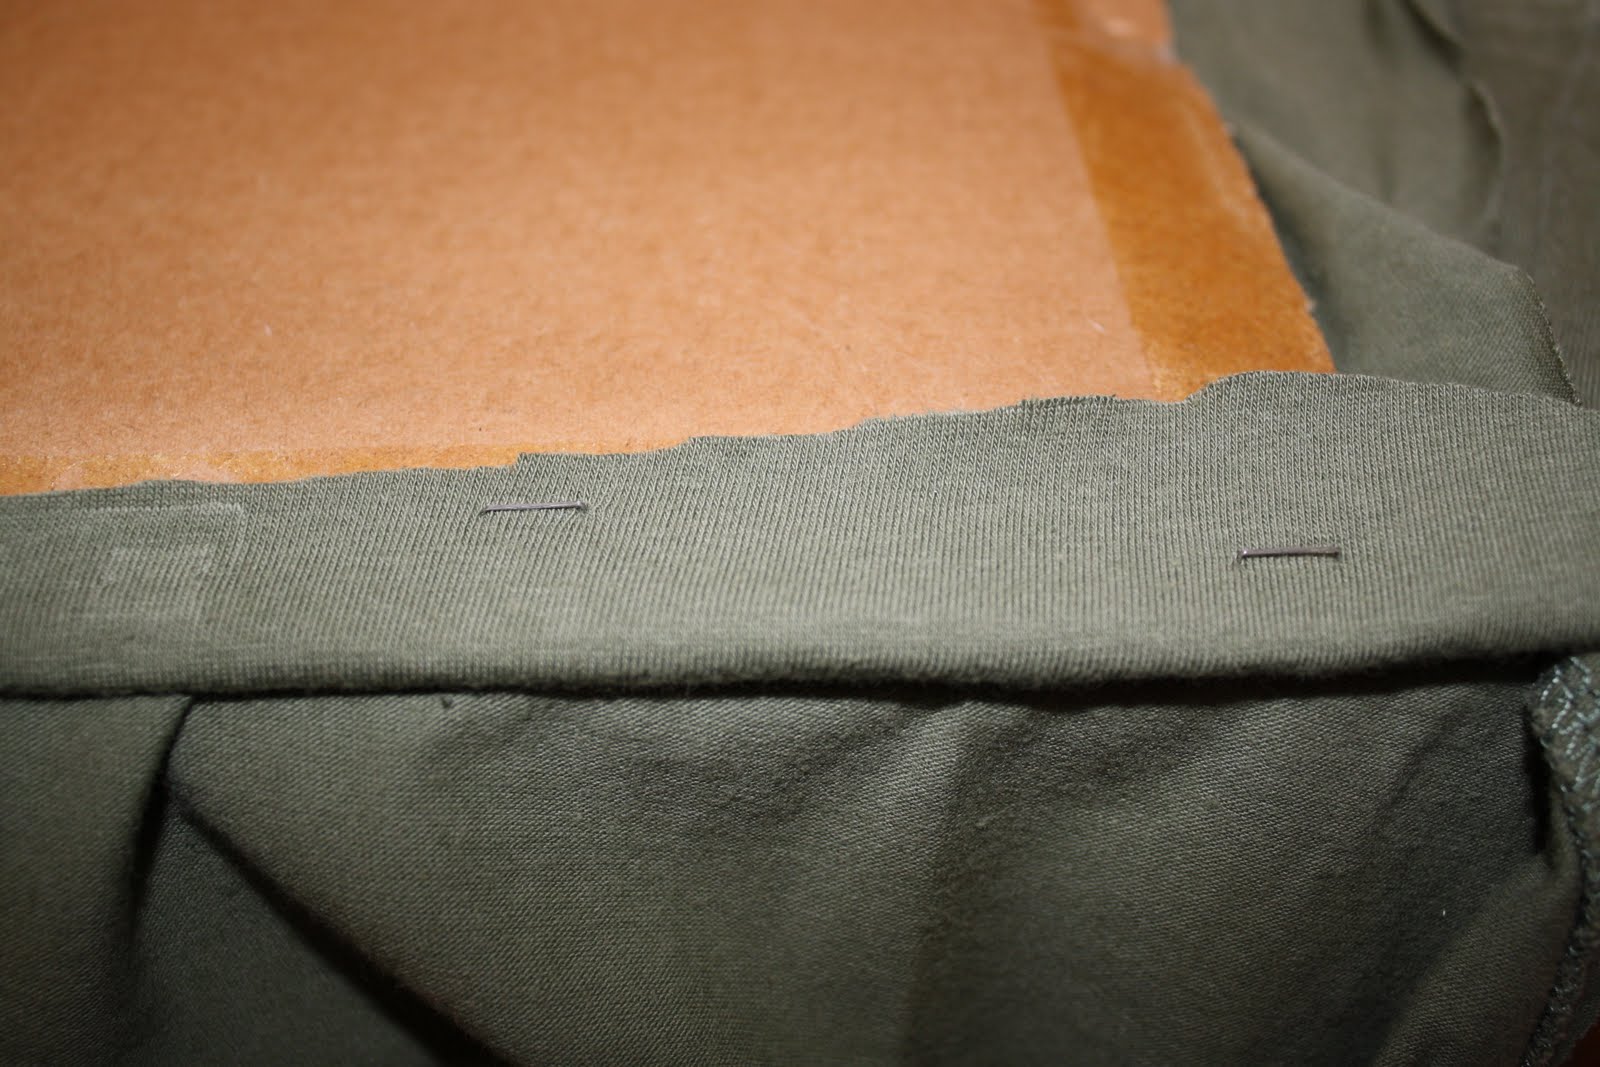


Pour la plupart des t-shirt, un cadre 8"x10" trouvé dans tout bon magasin suffit. C’est également plus simple à assembler, car il suffit de ciseaux pour découper l’avant du t-shirt de la bonne taille, et le tour est joué. Il s’agit ici d’un t-shirt que m’avait offert mon amie la Maman des Zigotos. Encore une fois, il était devenu trop petit, et très usé à force d’être porté. J’ai donc choisi un cadre blanc et j’ai encadré le dessin, qui fera sûrement très bien dans une chambre de bébé un jour.


Voici aussi le résultat final de deux autres projets, ainsi que mes premiers cadres du genre.


Les cadres du commerce qui sont composés de deux vitres dans un cadre de bois, ainsi que les boîtes-cadres, sont également parfaits pour encadrer un petit vêtement entier, comme un vêtement de bébé, sans avoir à le découper.
Subscribe to:
Posts (Atom)