Sunday, May 31, 2020

Carrot Apple Coconut Mini Muffins


I tried oatmeal carrot muffins that my mother had recommended; I made them without raisins simply because I did not have any. I liked them, but the kids didn’t – the Fox actually refused to taste them. You see, for months now, he’s been insisting that he only likes green muffins and chocolate muffins. But then I found another muffin recipe containing carrots that I just had to try.

These carrot apple coconut mini muffins are from Weelicious and were absolutely delicious! We all LOVED them, including the Fox this time, who somehow decided to taste these and then wanted more and more! Note that the recipe makes 30 mini muffins or 10 standard size muffins. My mini muffin pan makes 24 at a time, so I made 24 mini muffins and 2 standard muffins which I baked longer. That being said, the mini muffins were in fact better than the bigger ones. Scaling this recipe back by 20% doesn’t seem easily feasible, so I decided to try baking them in 2 batches, leaving the leftover batter on the counter until the pan was ready again. And since I just happened to have one last apple in the crisper drawer and couldn’t think of a better use for it, I tried it – as you can see in the picture below, the muffins baked later were domed higher, but everything worked out! And once again the Fox was all over them. These are a new family favorite – I cannot recommend them enough!


1 ½ cups all-purpose flour (I used white whole wheat)
1 tsp. baking powder
½ tsp. baking soda
½ tsp. kosher salt
½ cup unsweetened coconut flakes (I used fine macaroon coconut)
2 carrots, peeled and grated (about 1 cup)
1 apple, peeled and grated, about ½ cup
2 large eggs
1 tsp. vanilla extract
1/3 cup lactose-free milk
¼ cup vegetable oil
½ cup honey

Preheat oven to 350 °F. Grease a mini muffin tin (the recipe makes 30 mini muffins; see note above).

Combine the first 7 ingredients in a bowl (the dry ingredients plus the coconut, carrot, and apple).

In a separate bowl, combine the remaining ingredients.

Slowly add the dry ingredients into the wet and stir to combine.

Place the batter in the greased mini muffin tins. (I do this with my smallest scoop, so I have maybe 1 heaping tablespoon in each cavity.)

Bake for 15-20 minutes, until a toothpick inserted in the middle comes out dry.

Saturday, May 30, 2020

Salted Buckwheat Chocolate Chunk Cookies


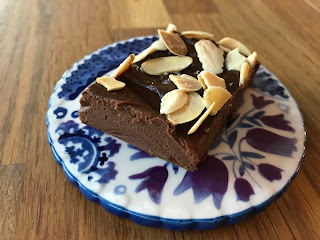
Bon Appétit recently published a sort of guide to better baking, and without trying to pick up new techniques or anything, I looked through it for recipes. I first tried these tahini billionaire bars because I thought they would be less sweet than the original millionaire bars, but they were still way too sweet for me and not enjoyable at all. I also tried their chocolate-almond fridge fudge (perhaps it wasn’t from the same issue), which was definitely not too sweet and was even borderline healthy. It’s made with almond butter, maple syrup, and half an avocado along with the chocolate. I would have preferred it without the almonds on top, actually, but I wasn’t keen enough on it to make it again (FWIW, the kids liked it well enough, and it was the Engineer who decided to not even bother having any).


There were also these salted buckwheat chocolate chunk cookies. I didn’t expect them to be better than the famous 36-hour cookies, but I decided to try them anyway. I used light buckwheat flour from Bouchard Family Farms, and while I’m not going to make you buy that specific brand, I would strongly recommend that you stick to light buckwheat flour for this recipe. The original recipe said to bake the cookies 5 at a time, meaning 1 in each corner of the baking pan and 1 in the middle. Mine were ever-so-slightly smaller than recommended (I got 22 instead of 16 to 18) and I could easily fit 6 on a 12”x17” sheet.

These cookies were indeed very good, but I think the technique that I might keep from this recipe is to put a few chocolate chips (or chunks) right on top of each ball of cookie dough before it’s baked, because it does make for a more visually appealing cookie!

Also, pro tip: Even though Green Valley Organics is not currently making its lactose-free butter, there is still some to be found on the market, even though it’s not specifically marked as such. You have to make sure the nutrition label says “0 g sugar” (NOT “<1 g sugar”, that’s still too much lactose for many of us). You’ll have better luck with cultured butter – I’ve used some from Vermont Creamery and Vital Farms.

½ cup (1 stick) lactose-free butter, cut into 8 pieces
1 cup (125 g) all-purpose flour
½ cup (63 g.) light buckwheat flour
½ tsp. baking powder
½ tsp. baking soda
1 ¼ tsp. Diamond Crystal or ¾ tsp. Morton kosher salt, plus more for sprinkling
6 oz. bittersweet chocolate bars or wafers (disks, pistoles, fèves, etc.)
2/3 cup (133 g) light brown sugar
½ cup (100 g) granulated sugar
1 large egg
2 large egg yolks
1 tsp. vanilla extract

Heat butter in a small saucepan over the lowest heat possible until melted (you don’t want it to sputter or brown), about 5 minutes.

Meanwhile, whisk flour, buckwheat flour, baking powder, baking soda, and salt in a medium bowl. Set aside.

Coarsely chop bittersweet chocolate bars, if using, or take out your chocolate wafers. Set a handful aside in a small bowl.

Scrape butter in a large bowl and add light brown sugar and granulated sugar. Whisk vigorously until butter has been absorbed into the sugar and no big lumps remain, about 30 seconds. (I think I used the stand mixer for this, but you can absolutely do it by hand.)

Add egg and egg yolks, one at a time, whisking until fully combined after each addition. Whisk in vanilla. At this point, your mixture should look much lighter in color and be smooth, almost creamy.

Add dry ingredients and use a rubber spatula or wooden spoon to stir until just incorporated and almost no dry streaks remain. Add chopped chocolate (but not the chocolate you reserved in the small bowl) to the batter. Gently mix just to distribute. Cover bowl with an airtight bowl cover, a kitchen towel, or plastic wrap and chill 2 hours. (If you’re crunched for time, 1 hour will do, but cookies will be best after 2.)

Place racks in upper and lower thirds of oven; preheat to 375 °F. Using a tablespoon measuring spoon, scoop out scant 2-Tbsp. portions of dough (or, if you have a scoop, this is a leveled-off #30 or a heaping #40) until you have 10 portions divided between 2 parchment-lined baking sheets (you want five per sheet—these will spread a bit!). Roll portions into balls and gently press a piece or 2 of reserved chocolate into each one. It’s okay to cram the chocolate on there—some pieces can even be vertical. Cover and chill any remaining dough (I personally find it useful to shape all the cookies before putting things away – they keep just as well covered in the fridge, and then you can do dishes).

Bake cookies, rotating baking sheets top to bottom and front to back halfway through, until edges are golden brown and centers are puffed, 8–10 minutes. (Pull at 8 if you like your cookies softer and want to guarantee they’re still soft the next day!)

Working one at a time, pull baking sheets out of the oven and tap lightly on the stovetop to deflate cookies. Sprinkle with salt (I used Maldon salt flakes; the recipe says that Diamond Crystal kosher salt is fine, but Morton kosher salt flakes are too large so if that’s all you have, skip it). Let cookies cool on baking sheets 5 minutes, then transfer to a wire rack and let cool completely. Let baking sheets cool. Repeat process with remaining dough, dividing evenly between baking sheets, to make 6–8 more cookies (I got a total of 22 cookies, and I put 6 on a sheet without a problem.)

Chickpea Tuna Salad

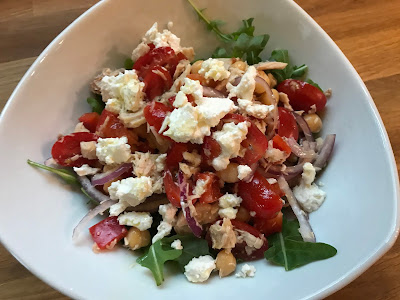
This recipe for chickpea tuna salad makes for a great, hassle-free and healthy lunch. Unfortunately, in our case, the cucumber went bad in the fridge before I got to make the salad, so I omitted it entirely. I do think it would have been better with cucumber, especially given that it’s basically the only element in there that the Little Prince likes… Even though the kids weren’t keen on it, I recommend it because I really liked it.

This salad will keep well in the fridge as long as the arugula and dressing are added only before serving.

For the salad
½ small red onion (or a shallot), thinly sliced
1 15-oz. can chickpeas, rinsed and drained
1 pint cherry or grape tomatoes, halved
1 large seedless English cucumber, peeled if desired, halved lengthwise and cut into ¼” slices
1 red bell pepper, cored, cut into ¼” strips, then cut into bite-size pieces
12 oz. solid pack albacore tuna in water
3 cups arugula
¼ cup parsley, finely chopped
¼ cup lactose-free feta cheese or chèvre

For the dressing
¼ cup freshly squeezed lemon juice (from about 1 large lemon)
3 Tbsp. extra virgin olive oil
1 small clove garlic
1 tsp. kosher salt
½ tsp. ground black pepper

Place the red onion in a small bowl and cover with cold water. Let sit while you prepare the rest of the salad (this preserves its flavor but takes off some of the harshness...and the continual red onion aftertaste).

To a large mixing bowl, add the chickpeas, tomatoes, cucumber, and bell pepper. Drain the tuna and flake into the bowl. Add the arugula.

In a small bowl or measuring cup, stir together the lemon juice, olive oil, garlic, salt and pepper. (You can also shake them all together in a mason jar with a tight-fitting lid). Drizzle enough over the salad to moisten it, then toss to coat. Sprinkle the feta and parsley over the top, then toss lightly again. Taste and add additional salt, pepper, or dressing as desired.

Friday, May 29, 2020

Biscuits craquelés à la lime et à la noix de coco


Voici une recette de biscuits à la lime et à la noix de coco tirée de Coup de Pouce. Nous avons tous beaucoup aimé ces biscuits! Ils se gardent bien dans un contenant hermétique. J’ai obtenu environ 24 biscuits plutôt que les 40 annoncés.

2 ½ tasses de farine
1 c. à thé de poudre à pâte
½ c. à thé de sel
½ tasse de beurre sans lactose ou de margarine, à la température de la pièce
1 tasse de sucre
½ tasse de flocons de noix de coco râpée
2 œufs
1 c. à soupe de zeste de lime râpé
1 ½ c. à soupe de jus de lime
½ tasse de sucre glace, tamisé

Dans un bol, à l’aide d’un fouet, mélanger la farine, la poudre à pâte et le sel. Réserver.

Dans un grand bol, à l’aide d’un batteur électrique, battre le beurre avec le sucre et la noix de coco jusqu’à ce que le mélange soit homogène. Incorporer les œufs, un à la fois, en battant bien après chaque addition. Incorporer le zeste et le jus de lime. En battant à faible vitesse, ajouter petit à petit les ingrédients secs réservés jusqu’à ce que la pâte soit homogène. Réfrigérer 30 minutes.

Préchauffer le four à 350 °F. Tapisser deux plaques à biscuits de papier parchemin.

Étendre le sucre glace dans une grande assiette. À l’aide d’une petite cuillère à crème glacée, façonner la pâte en boules (environ 1 ½ c. à soupe), puis déposer les boules dans l’assiette. Rouler les boules dans le sucre glace pour bien les enrober. Déposer les boules de pâte sur les plaques à biscuits, en les espaçant de 2 po (5 cm) et en les aplatissant légèrement.

Cuire au four de 14 à 16 minutes ou jusqu’à ce que les biscuits soient gonflés et fermes au toucher sur le pourtour. Mettre les plaques sur des grilles et laisser refroidir 5 minutes. Déposer les biscuits sur les grilles et laisser refroidir complètement.

Liens de la semaine

- Des trucs pour réussir vos brownies. Avec le bémol qu’on dirait que ce sont tous des trucs pour un brownie « fudgy », alors que moi je les préfère moelleux (« chewy » mais pas tout à fait comme du gâteau).

- Tout ce que vous avez toujours voulu savoir sur la pomme de terre!

- Excellents exemples de collections de livres de cuisine.

- J’ignore pourquoi je n’avais pas encore partagé cet article montréalais sur la nourriture juive.

- Voici un bon article pour contrer le gaspillage alimentaire. Et ça m’a amenée au blogue Chic Frigo Sans Fric, où il y a (entre autres) des conseils pour organiser son frigo de manière à minimiser le gaspillage.

- Des trucs sur la préparation alimentaire (« meal prep » en anglais), qui est le fait de préparer certains éléments d’un repas à l’avance, sans nécessairement planifier les repas.

- Je vous ai parlé de l’excellent documentaire The Biggest Little Farm. Quelques mois après la sortie du film, j’avais vu une série d’articles comme Agriculture : soigner les causes, pas les symptômes (et, pour les curieux, La confusion sexuelle des papillons comme exemple). Ça rejoint les valeurs prônées par l’agriculture régénératrice.

- Un court article écrit par un ancien ami d’université, sur la manière dont les Amish choisissent d’adopter, ou pas, les nouvelles technologies. En gros, ils se questionnent d’abord sur les conséquences de la technologie sur leur communauté : est-ce que ça va les éloigner les uns des autres ou pas? Si oui, ils ne l’adoptent pas. Ce n’est pas un modèle viable pour une grande société diverse, mais on peut très bien appliquer ce principe à l’échelle de notre propre famille, par exemple.

- J’ai beaucoup aimé cet épisode du podcast Bain Libre, où il est question de la perte d’autonomie des personnes âgées et de comment aborder la question avec ses parents. Il dure une quarantaine de minutes, mais il m’a fallu toute la journée pour finir de l’écouter parce que, comme dit Janette Bertrand, je devais attendre que ma journée commence.

- Un article du début de l’année : les prénoms uniques ne sont plus chose rare.

- Un article intéressant sur la conciliation travail-famille quand la mère est en tournée.

- Et enfin, une mise en garde sur les vidéos éducatives que regardent tant d’enfants aujourd’hui.

Thursday, May 28, 2020

Perfect Blueberry Muffins

I found this recipe in a Smitten Kitchen cookbook, but it’s also on the blog. This is Deb Perelman’s perfect blueberry muffins, and she has tested a whole lot of variations to get there! The top is crunchy thanks to the turbinado sugar, and the blueberries don’t sink to the bottom (and there are LOTS of delicious blueberries). We absolutely loved them over here; the only downside is that the recipe makes 9 muffins, so they are gone pretty quickly. I’d consider making a double batch and freezing some.

5 Tbsp. lactose-free butter or margarine
½ cup sugar
finely grated zest from ½ lemon
¾ cup lactose-free plain yogurt or sour cream
1 large egg
1 ½ tsp. baking powder
¼ tsp. baking soda
¼ tsp. fine sea or table salt
1 ½ cups (195 g) all-purpose flour (I used white whole wheat)
1 ¼ to 1 ½ cups (215 to 255 g) blueberries, fresh or frozen
3 Tbsp. turbinado sugar

Heat oven to 375 °F. Line a muffin tin with 9 paper liners or spray each cup with a nonstick spray.

Melt butter in the bottom of a large bowl and whisk in sugar, zest, yogurt, and egg until smooth. Whisk in baking powder, baking soda and salt until fully combined, then lightly fold in flour and berries. (I confess that I decided to start by whisking together the dry ingredients, then stirred them into the wet and folded in the blueberries) Batter will be very thick, like a cookie dough. Divide between prepared muffin cups and sprinkle each with 1 teaspoon turbinado sugar (this seems like a lot, but trust me).

Bake for 25 to 30 minutes, until tops are golden and a tester inserted into the center of muffins comes out clean (you know, except for blueberry goo). Let cool in pan for 10 minutes then the rest of the way on a rack.

Tuesday, May 26, 2020

Hotdish

During the last democratic primaries, all 196 candidates were trying to stand out one way or another. I’m not going to say who I would have voted for (I wasn’t eligible to vote anyway), but I’ll admit it wasn’t Amy Klobuchar. That being said, it came to my attention on Twitter that she published her recipe for hotdish as part of her campaign, and I was like, “What’s hotdish? And why does it pass spell check?” According to Wikipedia, in the Midwest, hotdish is “a casserole that typically contains a starch, a meat, and a canned or frozen vegetable mixed with canned soup.” It doesn’t necessarily sound appetizing said like that, but I’m assuming that people might think the same about pâté chinois, so I decided to try it.

This version had ground beef and tater tots; I replaced the pepper jack cheese with sharp cheddar cheese and made my own cream of chicken and cream of mushroom to keep think lactose-free. I also increased the amount of beef a bit, so the ratio below may be off from… what God intended? Anyways, the boys LOVED it! And by “boys” I mean both my kids as well as my husband. Next time, though, I would consider just doubling the amount of cream of chicken and omitting the cream of mushroom, to greatly simplify prep for those of us who are lactose-intolerant.

A can of “cream of whatever soup” is typically 10.5 ounces, so roughly 1 ¼ cups in volume. In order to substitute for the can of cream of mushroom, I made this recipe. Of course, it makes a whole pot of soup, but it was thick enough that I decided it was a fine substitute. And then it felt like at least my hotdish had *some* kind of vegetable in it? I could have used 2 ½ cups and omitted the cream of chicken, I guess, but my cream of chicken substitute is simple to make (more so than I remembered, even), so you could just double THAT instead of making cream of mushroom. As you wish. It should go without saying that hotdish is not a naturally photogenic dish.


For the lactose-free cream of chicken (equivalent to 1 can)
3 Tbsp. lactose-free butter or margarine
3 Tbsp. all-purpose white flour
½ cup chicken broth
½ cup lactose-free milk
salt and pepper, to taste

Melt the butter in a small saucepan, then add the flour. Cook, whisking constantly, until the mixture thickens. (You’re making a roux.)

Add the chicken broth and whisk until the mixture is blended, then add milk. Simmer, whisking constantly, until the mixture thickens. Turn off heat; add salt and pepper to taste.


For the hotdish
2 lbs. ground beef
1 small onion, diced
2 cloves of garlic, minced
1 can cream of mushroom (see note above)
1 can cream of chicken (see above)
salt and pepper, to taste
8 oz. sharp cheddar cheese, shredded
1 package tater tots (mine was 28 oz.)

Preheat oven at 450 °F.

Brown the ground beef, then set aside and drain off the fat. Sauté the onion and garlic in the same pan.

In a large bowl, mix together beef, onion, garlic, both cans of soup, salt, and pepper.

Spread evenly into a greased 9”x13” baking dish. Cover with half the shredded cheese, then place tater tots in one layer over the entire pan.

Bake for 30 minutes, or until the taters are crisp. Cover with remaining cheese and bake until cheese melts, about 5 minutes.

Cream of Mushroom Soup

I honestly didn’t think I’d be sharing this recipe. I made it as a means to an end, because I had another recipe that called for cream of mushroom soup as an ingredient (more on that later). This recipe looked like my best-tasting option and made a lot more than I needed, so I decided to serve it for lunch. And lo and behold, my kids REALLY LIKED it. They BOTH asked for seconds! So, here it is, a way to get your kids to enjoy mushrooms.

I made a lactose-free version. The onions, garlic and herbs give it flavor, but don’t be afraid to really cook down the mushrooms. They basically can’t be overcooked (unless they get burnt on heat that is too high, but they can’t cook too long is my point). This would be great served with garlic bread!

4 Tbsp. lactose-free butter or margarine
1 Tbsp. oil
2 onions, diced
4 cloves garlic, minced
1 ½ lbs. (750 g) fresh brown or cremini mushrooms, sliced
4 tsp. chopped fresh thyme, divided
½ cup Marsala wine (any dry red or white wine, really)
6 Tbsp. all-purpose flour
4 cups low-sodium chicken broth
1 or 2 tsp salt, to taste (I used less because my broth was salted)
½ to 1 tsp cracked black pepper, to taste
2 beef bouillon cubes, crumbled (I used beef bouillon paste)
1 cup lactose-free cream or half-and-half (I used evaporated soy milk)
chopped fresh thyme and parsley, to serve

Heat butter and oil in a large pot over medium-high heat. Sauté onion for 2 or 3 minutes. Add garlic and cook until fragrant, 1 minute.

Add mushrooms and 2 teaspoons thyme; cook for 5 minutes (or more; see note above). Pour in wine and allow to cook for 3 minutes.

Sprinkle mushrooms with flour, mix well and cook for 2 minutes. Add stock, mix again, and bring to a boil. Reduce heat to medium-low, season with salt and pepper, and add crumbled bouillon cubes.

Cover and allow to simmer for 10 to 15 minutes, stirring occasionally, until thickened.

Reduce heat to low, stir in cream, and allow to gently simmer (do not boil, or the cream might curdle). Adjust salt and pepper to taste.

At this point, my soup was not looking as good as the original, and moreover, I felt like it wasn’t really a cream of mushroom soup. I could have added a cornstarch slurry, but I instead decided to use my stick blender to blitz everything together.

Mix in parsley and remaining thyme and serve.

Monday, May 25, 2020

Hawaiian Puff-Wheels

Shortly before the pandemic, I bought two more cookbooks about lunches for kids (but I’m waiting to cook more recipes out of them before actually recommending either). In one of them is a recipe for these Hawaiian puff-wheels that’s really easy to make and turned out to be a crowd pleaser all-around (though it should be said that my kids and husband are the kind of people who like pineapple on their pizza). I baked them longer than the recommended 10-12 minutes, and even then they weren’t quite golden-brown yet so I could have gone a bit longer. They were good warm from the oven, but would also be fine in a lunchbox, either cold or at room temperature by lunchtime. The recipe is also online. I got 15 rolls from this.

¾ cup sliced deli ham, finely chopped
13-oz package of puff pastry sheets, thawed
1 ¼ cup shredded sharp cheddar cheese
½ cup crushed pineapple, well drained

Preheat oven to 375 °F. Cover a baking sheet with parchment paper.

On a lightly floured surface, unroll pastry dough sheets. Spread deli ham and crushed pineapple evenly over both sheets. Sprinkle with shredded cheddar.

Carefully roll the dough, starting with a long side, so that you end up with a long log.

Cut the filled dough into 1-inch thick pieces (mine were a bit narrower) and place on the baking sheet. Bake for about 20 minutes until they are golden and have risen.

Remove from oven and let cool a bit before serving.

Sunday, May 24, 2020

Easter Cupcakes


This is another recipe I made for Easter: carrot cupcakes! But, like, the most adorable carrot cupcakes ever. I came across these while scrolling through Easter brunch menus and just couldn’t resist! Carrot cake cupcakes, with cream cheese frosting and chocolate crumb “dirt”. They did take a while to make, and honestly, I’m not sure I’d make them on the same day as hot cross buns every year… But hey, no regrets – they’re super cute! I got a total of 9 cupcakes instead of the 12 promised, which is a pretty important variation, so just be aware of that. And since I couldn’t find chocolate wafers anywhere, I got chocolate teddy grahams instead and crushed them in the food processor. I used gel food coloring, but even then I had to add a bit of cornstarch to thicken the orange frosting (I didn’t want to add any more powdered sugar). The reason it’s a cream cheese frosting is because that’s more traditional with carrot cake, but honestly, you could make a lactose-free buttercream instead. And if you don’t like carrot cake, make chocolate cupcakes instead. Also, if you run out of mint, or if it wilts before you serve the last cupcake, I can tell you that they also look good with parsley and, presumably, with cilantro, dill or small basil leaves.

For the cupcakes
1 ½ cups sifted cake flour, spooned and leveled
¾ cup granulated sugar
¾ tsp. ground cinnamon
¾ tsp. ground ginger
½ tsp. kosher salt
½ tsp. baking soda
½ tsp. baking powder
¼ tsp. ground nutmeg
½ cup vegetable oil
2 large eggs
¾ tsp. pure vanilla extract
1 ½ cups grated carrots (from 2 medium carrots)

For the frosting and decorations
8 oz. lactose-free cream cheese, at room temperature
½ cup (1 stick) lactose-free butter or margarine, at room temperature
1 tsp. kosher salt
1 lb. powdered sugar, sifted
1 tsp. pure vanilla extract
¼ tsp. orange gel paste food coloring
1/3 cup cocoa powder
¾ cup crushed chocolate wafer cookies (from 12 cookies)
12 small mint sprigs (see note above)


For the cupcakes
Preheat oven to 350 °F. Line 12 standard muffin cups with liners.

Whisk together flour, granulated sugar, cinnamon, ginger, salt, baking soda, baking powder, and nutmeg in a bowl.

Add oil and beat with an electric mixer on medium speed until combined, 30 to 45 seconds. Add eggs, one at a time, beating until incorporated after each addition. Beat in vanilla. Stir in grated carrots.

Transfer batter to prepared pan, dividing evenly. Bake until a toothpick inserted incenter comes out clean, 20 to 25 minutes. Transfer cupcakes to a wire rack and cool completely.

For the frosting
Beat cream cheese, butter, and salt with an electric mixer on medium speed until creamy, 1 to 2 minutes. Gradually beat in confectioners' sugar. Beat in vanilla. Beat until fluffy, 1 to 2 minutes.

Transfer ¾ cup frosting to a bowl; add food coloring and stir until combined. Transfer to a piping bag fitted with a ¾-inch piping tip.

Sift cocoa over remaining frosting and beat on medium speed until combined, 1 to 2 minutes.

Using a melon baller or small measuring spoon (I used an apple corer, with which I don’t even core apples, FWIW), create a hole in center of each cupcake about ¾“-wide and ½“-deep. Spread chocolate frosting on cupcakes, leaving hole unfrosted. Roll in crushed cookies (you can also sprinkle the crushed cookies on top, but your coverage won’t be as good).

Pipe orange frosting into holes, extending ½ to 1 inch above tops of cupcakes. Insert mint sprigs in "carrots." Be delighted with yourself and serve.

Saturday, May 23, 2020

Hot Cross Buns


These are the hot cross buns I made for Easter. I’m still looking for dishes to create what will eventually be my standard Easter menu, where I won’t have to rack my brain each year for something special, and these buns make the cut. I didn’t make deviled eggs this year, since eggs were so scarce, but this was a very worthwhile use of those I had! These buns are closer to the European version of hot cross buns, where a sort of custard dough is piped onto the buns before baking, instead of the American version, where the baked buns are glazed with icing once cooled. They appealed to me more, and everyone liked them! Even the Little Prince, who will always pick raisins and dried cranberries out of his baked good, ate the tiny currants without any trouble.

The recipe is from The Kitchn and my modifications are below. (For example, I used honey instead of golden syrup, because it was a last-minute menu and I just didn’t have time to source golden syrup.) I included photos of the process, because it’s so much clearer to me when I can see what I’m supposed to be doing, especially for the crossing part! The recipe yields 24 buns; they keep well for a few days in an airtight container, but you could also freeze some of them. Calculate about 3 hours start-to-finish to make them, and don’t be put off by the length of the recipe – they’re worth it!

For the buns
1 ¼ cups lactose-free milk
2 (¼-oz) packets of active dry yeast (4 ½ tsp.)
¾ cup plus 1 tsp. granulated sugar, divided
3 cups bread flour
2 cups all-purpose flour, plus more for dusting
2 tsp. finely grated fresh lemon zest (from 1 lemon)
2 tsp. finely grated fresh orange zest (from 1 orange)
1 tsp. ground cinnamon
1 tsp. salt
¼ tsp. ground nutmeg, or 6 to 10 scrapes from a whole nutmeg
1 ½ sticks (6 oz or ¾ cup) lactose-free butter, melted and cooled slightly
4 large eggs
2 large egg yolks
1 tsp. vanilla extract or vanilla bean paste
1 cup dried currants or raisins

For the crossing mixture
1 cup all-purpose flour
1/3 cup granulated sugar
¼ tsp. salt
1 large egg, lightly beaten
5 Tbsp. lactose-free milk
¼ tsp. vanilla extract

For the egg wash
1 large egg
1 tsp. water

For the glaze
1/3 cup Lyle's Golden Syrup, or apple or apricot jelly (I used honey)
2 Tbsp. water


For the buns
Place the milk in a small saucepan over low heat until warm to the touch but not hot (between 105 °F and 115 °F on an instant-read thermometer), about 6 minutes. Transfer to the bowl of a stand mixer fitted with the paddle attachment.

Add the yeast and 1 teaspoon of the sugar. Mix on low speed until just combined, about 20 seconds. Let stand in the bowl until the mixture is foamy, frothy, smells distinctly like yeast, and is beige in color, 5 or 6 minutes.

Meanwhile, place the bread flour, all-purpose flour, lemon and orange zest, cinnamon, salt, nutmeg, and remaining ¾ cup sugar in a large bowl and whisk until combined.

Add half of the flour mixture to the yeast mixture and mix on low speed until just combined, about 1 minute. Add the butter, whole eggs, egg yolks, and vanilla, and mix on low speed to combine, about 1 minute. Add the remaining flour mixture and mix on low speed to combine, about 1 minute.

Switch from the paddle attachment to the dough hook attachment. Mix on medium speed until the dough comes together, is smooth, and can be easily scraped down with a dough scraper, about 5 or 6 minutes; it won’t completely clear the side of the bowl and will remain just a little sticky. (I had to add a little flour here to help things along.)

Add the currants and mix on low speed until evenly distributed throughout the dough, about 1 minute.

Scrape the dough into a large, clean bowl. Cover with plastic wrap or a kitchen towel; let rise in a warm, draft-free spot until the dough has almost doubled in size, 1 to 1 ½ hours (I like to do this in the microwave, with the door slightly ajar).


Meanwhile, line a 13”x18” rimmed baking sheet with parchment paper (mine was 12”x17”); set aside. Lightly flour a work surface.

When the dough is ready, transfer it to the work surface and divide it into 24 pieces (about 2 ½ ounces or a heaping ¼ cup each). Roll 1 piece of dough into a ball (if the dough is too sticky, dust your hands very lightly with flour) and place on the prepared baking sheet, about ¾” from the edge. Repeat with the remaining dough, placing balls ¾” apart, making 4 rows across and 6 rows down the length of the sheet. Flatten the balls with lightly floured fingers so that they are each about 2” in diameter.

Spray 2 large sheets of plastic wrap with cooking spray and place them side by side over the buns, sprayed-side down. Set aside in a warm place to let the buns rise until they are just barely touching, 40 minutes to 1 hour (obviously, at this point they no longer fit in my microwave, but I left them on the stovetop with the plastic wrap on).

For the crossing mixture
Meanwhile, place the flour, sugar, and salt in a medium bowl and whisk to combine. Add the egg, milk and vanilla and stir into a smooth, thick paste. Transfer into a piping bag fitted with a plain small tip with a ¼” opening (you can also use a resealable plastic bag from which you snip a tiny corner). Pro tip: prop up your pastry bag in a tall glass in order to fill it without making a mess!


About 20 minutes before the end of the second rise, arrange a rack in the center of the oven and preheat it to 350 °F.

Uncover the buns. Using a ruler as a guide if necessary, run a sharp knife down the center of each row and column of buns, slashing the tops about 1/8” deep. When finished, each bun should have a cross from end to end.


Squeeze a line of the crossing mixture into the slashes on each bun, following the grooves from bun to bun and edge to edge, so that the top of each bun has a filled cross. You may have some leftover filling.


For the egg wash
Whisk the egg and water together in a small bowl. Gently but thoroughly brush the buns with the egg wash, avoiding brushing the filling.

Bake the buns until they are deep golden brown and an instant-read thermometer inserted in the middle registers between 195 °F and 200 °F, about 20 minutes.


For the glaze
Meanwhile, place the syrup and water in a small saucepan and heat over medium-low heat, stirring occasionally, until the jelly is fully dissolved and the mixture is warm (this can also be done in a microwave-safe bowl heated about 30 seconds; stir the mixture until thoroughly combined). Set aside.

Place the baking sheet on a wire rack. Immediately use a clean pastry brush to coat the buns well with the glaze.


Let the buns sit in the pan and cool at least 30 minutes before serving.

Friday, May 22, 2020

Stromboli


Up to recently, if you had asked me about the word “Stromboli”, the only thing that would have come to mind would have been the bad guy in Disney’s Pinocchio (so scary that it’s one of the few things I remember about our family trip to Disneyland when I was six). But, of course, it’s also the name of a volcanic island, as well as a type of food: “a turnover in the pizza family” invented by Italian-Americans. I decided to try my hand at it when I saw this easy recipe on The Kitchn. The Engineer somewhat inadvertently got the kids excited about it days in advance, to the point where even though neither one had ever tasted it before, just because they knew it was basically pizza, they were convinced it was one of their favorite foods and couldn’t wait for dinner that night. And yes, we all loved it! It was worth the wait, and I’ll have to make it again.

I decided that the original recipe called for a baking temperature that was too high, so I reduced it a bit below. I used cheeses that were lactose-free (check that the nutrition label says 0 g sugar) and what meats I could find. The important thing here isn’t that you make sure everything is “authentic”, just that it’s good *to you*. If you only have two kinds of each, it’ll be delicious anyway! Keep in mind that cold cuts tend to be salty, so it would be fine to substitute something with less sodium. My stromboli was delicious, but a bit too salty for my taste! Perhaps that’s where dipping in marinara sauce comes in handy. I’d also serve it with a green salad next time.

The amounts below make 1 stromboli, which is enough for 4 servings. I doubled the recipe to make 2 strombolis. I used 1 pound of store-bought pizza dough for each one; I prepped both of the same night, but wrapped the second one right on a parchment-lined baking sheet and refrigerated it until the next day, at which point I unwrapped it and put it directly in the oven at 400 °F for 30 minutes. The photos below show the first one raw and the second one baked, because those are the nicest specimens of their kind.

about ¼ cup all-purpose flour, for rolling
1 ½ lb. pizza dough (see note above), at room temperature
4 oz thinly sliced prosciutto
4 oz thinly sliced provolone cheese
4 oz thinly sliced genoa salami
¼ cup finely shredded parmesan cheese
4 oz pepperoni slices
4 oz shredded or torn fresh mozzarella cheese
¼ cup finely chopped fresh parsley leaves
¼ tsp. red pepper flakes (or to taste)
1 large egg, lightly beaten
marinara sauce, for serving

Preheat the oven to 400 °F and arrange a rack in the middle of the oven. Line a baking sheet with parchment paper.

Sprinkle the counter with a little flour, then stretch out the dough to a rectangle roughly 12”x18”. You can use your hands to stretch out the dough, or a rolling pin, or both. The goal is a dough that is evenly thick, not a perfect rectangle.

Layer the meats and cheeses on the pizza dough, starting about a quarter of the way down from the top edge. Start with the prosciutto, then continue in the order in which they were presented (provolone, salami, parmesan, pepperoni, mozzarella). Try to keep things as flat as possible and keep some empty space near the edges. Layering the meats and cheeses helps prevent the meat slices from moving around.

Add the parsley and red pepper flakes.

Starting at the long edge closest to you, roll the Stromboli up, tucking in the fillings as tightly as possible as you roll. When you’re about halfway rolled up, fold the sides inward before you continue rolling. Brush the top edge of the pizza dough with some beaten egg before sealing tightly. Carefully, but decisively, lift it and place it on the parchment paper, seam-side down.

Use a sharp knife to make a few slits along the top of the stromboli. Brush the outside with more egg, and sprinkle with extra parmesan cheese if desired.

Bake for 25-30 minutes, until golden brown and the vent holes are bubbly with cheese. (You can also test for doneness with an instant-read thermometer – a finished Stromboli should hit 200 °F in the thickest part.)

Cool the stromboli for 10 minutes before slicing with a bread knife and serving with marinara sauce for dipping.

Product reviews

- Tarder Joe’s Rhubarb &Strawberry Soda: I love that this has natural ingredients, but even though it’s sweetened with cane sugar, I found it too dry for my taste, and a bit bland. Sadly, I won’t be buying this again.


- I tried Lavva plant-based yogurts. I really wanted to like this – it’s got probiotics, it’s vegan, there’s no added sugar, and it’s full of “superfoods”. But it was disgusting! I strongly disliked the strawberry flavor, and I threw away the raspberry flavor about halfway through because I couldn’t take it anymore. I’m not buying those again!

- But that’s not the case for all vegan yogurts, because I also had a raspberry So Delicious coconut yogurt and *that* was delicious!

- I tried Sorbabes sorbet in Pistachio & Caramel. I thought it would be creamy, because it’s made with nut butter, but the first ingredient is water, so the sorbet is too hard for my liking and a bit bland as well. The raspberry with chocolate looked good too, but I’m afraid it’ll have the same issues.

- I finally got to try some Nada Moo vegan ice cream! Nada Moo is a scoop shop in Austin, but their pints are making their way into local grocery stores. I tried the Marshmallow Stardust flavor and loved it! It has confetti sprinkles, a raspberry jam swirl, and marshmallow flavor, all in a coconut milk base. Plus, the purple is colored with ube powder! They have lots of interesting flavors and it’s a really nice treat.


- I tasted two of Trader Joe’s non-dairy mini-mochis, the chai tea flavor and the mango flavor. The chai really wasn’t for me, the flavors were too strong and there was something unpleasant about it. We ended up throwing most of it away. (I know that Trader Joe’s actually offers refunds on products you don’t like if you bring them back, but both the Engineer and I were uncomfortable doing that!) The mango flavor is great, though! It’s essentially a bite-size piece of mochi surrounding mango sorbet, and it’s a nice treat. I can’t find a link to them, but someone else reviewed them here.


- I’m always on the lookout for easy after-school snacks that don’t have too much sugar, so I tried Taos Bakes bars. While it’s true that they have natural ingredients and kept me full longer than regular snack bars, my kids didn’t like them, so I won’t buy them again (even though I personally liked them).

- I also really like The New Primal’s Snack Mates chicken and maple meat sticks (see here to buy 40 sticks at a good price; they are also sold at Whole Foods in packages of 5). It’s a great snack with protein and few calories. The only caveat is that the recipe has changed over time, as evidenced in the photos below – oldest to newest from left to right (I had open packages in the pantry, diaper bag, and carry-on travel bag, and cleaned up all at once). I like the softer, plumper ones, but all the ones I ate were good.


- Sometimes, I put chicken nuggets in my kid’s lunch for school (the most healthy-looking ones I can find, and it’s an occasional treat for him). That being said, we recently tried little vegetable nuggets by Dr. Praeger’s (the broccoli and the sweet potato varieties), and he liked them both! I also made them for an at-home lunch, and the Fox and I can confirm that they are delicious. They are available at Whole Foods.


- I have also come to love Old El Paso’s Mini Soft Tortilla Taco Bowls, because they are perfect for a lunchbox! Just the right size for the main compartment of a typical container, and most importantly, they stay upright, are easy to hold, and keep their fillings! Great for dinners at home, too.

- Finally, there’s a company called 88 acres that makes seed products (think: butters, granola, granola bars) that are not cross-contaminated with nuts. My friend Jen had mentioned that she liked them, but then I heard about one of their products in a magazine: watermelon seed butter. I mean, I was obviously intrigued, but it was all-the-more timely given that the Little Prince had decided that he was sick of sunflower seed butter, and I don’t want to send him to school with peanut or nut butter. I ended up ordering a variety pack of their seed butters to taste all seven kinds they make (including sunflower butter flavored with maple, cinnamon or chocolate as well as their pumpkin seed butter) without committing to a whole jar. It turns out we love this! Watermelon seed butter is pale in color, tastes nothing like watermelon (the same way that pumpkin seeds don’t taste like pumpkin), has the same consistency as other natural seed butters, and is really good. It’s actually more neutral than pumpkin seed or sunflower seed butter. If I’m going to eat it plain on toast, I like the one I linked to, but there’s also an unsweetened version, which actually might work better in a seed and jam sandwich.


Thursday, May 21, 2020

Cakes à la pistache


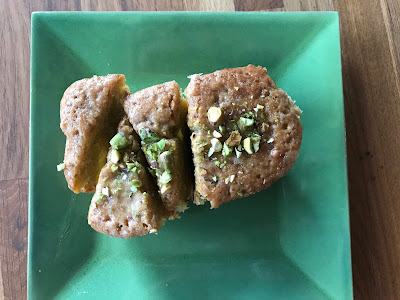
Toujours dans mes recettes de pistaches… J’ai fait un moelleux à la pistache qui était assez bon. J’ai trouvé le gâteau spongieux, mais un peu sec et pas moelleux, donc. Je pensais réécrire la recette, juste parce que les ingrédients sont dans le désordre et c’était un fouillis total, mais en fait, il y a une autre recette que j’ai trouvée meilleure, alors c’est celle-là que je vais partager aujourd’hui.


Les cakes à la pistache, donc, je les ai trouvés sur le blogue Christelle is Flabbergasting; elle-même a adapté une recette du livre de cuisine des Touilleurs (dont la boutique est située sur l’avenue Laurier Ouest à Montréal), et elle était à l’origine écrite par Stéphanie Labelle de Pâtisserie Rhubarbe (ouf!). Bon, j’ai dû faire mes modifications moi aussi, alors on s’éloigne de la recette d’origine, mais je recommande fortement! (Même que je vais en faire d’autres cet après-midi pour les congeler, histoire de finir la pâte de pistache.)

Premièrement, je n’ai pas de moules de la taille demandée, parce que ce n’est pas une taille standard je crois (c’est même plus petit qu’un moule à cake). J’avais calculé que chacun des moules demandés contenait environ 1 tasse de pâte, mais en fin de compte, ça ne doit pas être ça, parce qu’il y en avait beaucoup plus! J’ai utilisé un moule à 6 cavités, chacune mesurant environ 4.5"x2.5"x1.75". Ça a fonctionné seulement parce que mon papier parchemin créait une structure un peu plus haute et que la consistance de la pâte était telle qu’elle tenait dedans. Donc tout a fonctionné et je peux recommander les mêmes moules, tant que votre papier est positionné comme le mien. Sinon, ça fonctionnerait sans doute dans un moule standard 9"x5"x3" (le genre pour faire un pain aux bananes), mais il faudrait ajuster le temps de cuisson en conséquence. Dites-le-moi si vous essayez!

De plus, je n’avais aucune envie de faire un genre de pralin aux pistaches pour ensuite le réduire en pâte dans le robot. J’ai plutôt acheté de la pâte de pistaches non sucrée (comme du beurre de pistaches en fait, comme celle-ci) à laquelle j’ai ajouté du sucre en poudre. Rapide, efficace, délicieux! Mes proportions étaient de ¼ tasse de pâte de pistache + 2 à 4 c. à soupe, selon votre goût et la consistance de votre pâte de pistaches. J’ai aussi réduit la quantité de sirop à la fleur d’oranger et je n’ai pas mis de pistaches dans la pâte, seulement sur le dessus des gâteaux. La version ci-dessous reflète mes changements.

Pour le sirop à la fleur d’oranger
½ tasse de sucre
3 c. à soupe d’eau
1 c. à soupe d’eau de fleur d’oranger

Pour la pâte de pistache (voir note)
½ tasse de sucre
150 g (1 tasse) de pistaches blanchies et pelées
huile de pistache
(je recommande quand même la pâte de pistache du commerce, additionnée de sucre en poudre – il m’a fallu ¼ tasse de chaque – c’est tellement plus rapide!)

Pour les cakes
1 tasse (2 bâtons) de beurre sans lactose ou de margarine, à la température de la pièce
1 ½ tasse (250 g) de sucre en poudre
2/3 tasse (100 g) de poudre d’amandes
5 œufs, jaunes et blancs séparés
¼ tasse (50 g) de pâte de pistache
¼ tasse (50 g) de sucre granulé
1 tasse (130 g) de farine tout-usage
3 c. à soupe de lait sans lactose
3 c. à soupe de pistaches blanchies, pelées et concassées (facultatif)

Pour la garniture
3 c. à soupe de pistaches moulues


Pour le sirop à la fleur d’oranger
Dans une casserole, porter le sucre, l’eau et l’eau de fleur d’oranger à pleine ébullition pendant 30 secondes. Réserver. (Le sirop se conserve dans un contenant hermétique au réfrigérateur.)

Pour la pâte de pistaches
Dans une casserole, cuire le sucre en remuant de temps en temps jusqu’à l’obtention d’un caramel de couleur ambrée. Ajouter rapidement les pistaches en une seule addition et remuer à l’aide d’une cuillère de bois.

Verser sur une toile de pâtisserie (silpat) et laisser durcir à température ambiante.

Déposer les morceaux de pralin dans la tasse du robot. Pulser par touches successives pour bien concasser sans surchauffer.

Faire tourner le mélange en continu et détendre avec l’huile de pistache jusqu’à l’obtention d’une pâte ayant la texture et la consistance de la pâte d’amandes. Selon la force de votre robot, vous obtiendrez une texture plus ou moins lisse. (La pâte de pistache se conserve au réfrigérateur. Vous en obtiendrez plus qu’il en faut pour la recette.)

Moi, j’ai fait la version facile : j’ai mélangé ¼ tasse de pâte de pistache du commerce (qui était plutôt du beurre de pistache) avec ¼ tasse de sucre en poudre, pour obtenir la bonne consistance. Et voili voilà.

Pour les cakes
Préchauffer le four à 300 °F. Préparer 6 moules rectangulaires de 4.5"x2.5"x1.75" en les graissant, puis en les chemisant avec du papier parchemin. Réserver.

Dans un bol, crémer le beurre à l’aide d’un malaxeur (ou d’un batteur sur socle) pendant 2 minutes. Ajouter le sucre et battre 2 minutes.

Ajouter la poudre d’amandes et battre 30 secondes. Ajouter les jaunes d’œufs un à un et battre 30 secondes entre chaque addition. Ajouter la pâte de pistache dans le mélange et mixer à l’aide d’une spatule en caoutchouc pour bien disperser la pâte dans le mélange (j’ai fait ça dans le batteur sur socle).

Ajouter la moitié de la farine et la moitié du lait et mélanger à l’aide d’une spatule en caoutchouc. Ajouter le reste de la farine, le reste du lait et les pistaches concassées. Mélanger de nouveau avec la spatule.

Dans un autre bol, monter les blancs d’œufs en neige en y additionnant le sucre granulé petit à petit, jusqu’à l’obtention de pics mous.

Plier délicatement le tiers de la meringue dans le mélange. Ajouter ensuite le reste de la meringue et plier. (Comme les cakes ne contiennent pas de levure, plier la meringue délicatement permettra de bien aérer la pâte et d’avoir un cake moelleux.)

Répartir le mélange dans chacun des moules. Cuire au centre du four pendant environ 45 minutes. Laisser tiédir à température ambiante.


Pour garnir
Badigeonner le dessus des cakes de sirop à la fleur d’oranger. Parsemer de pistaches moulues.