Friday, May 28, 2021

Black and White Popcorn


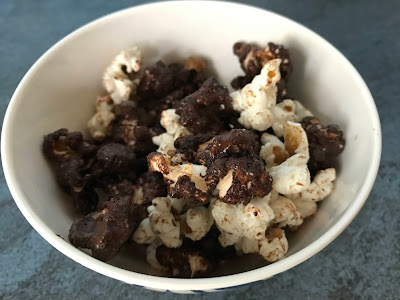
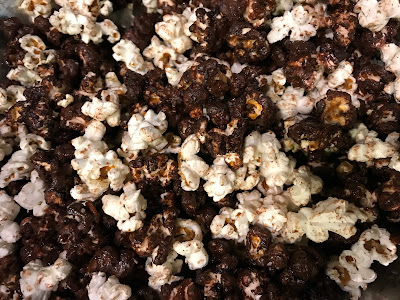
This recipe is from Ashley Rodriguez’s Let’s Stay In. Half the popcorn is white (flavored with brown butter and salt) and half is chocolate. It’s beautiful, though I should warn you that it WILL make your hands dirty as you eat, so it’s perhaps not the best thing to serve if you’re watching a movie on the couch. That being said, if you did want to watch a movie, I can’t help but recommend one with Two-Face (either Batman Forever or The Dark Knight, depending on the age of the viewers). Maybe it would also be good for the upcoming Cruella? Anyway, we all really liked it! 

I added a method for popping the corn, since none was provided; I know I’ve also made some in the microwave in a brown paper bag, without any oil, but couldn’t remember how and googling a random method was faster than looking it up. 

4 Tbsp. coconut oil 
½ cup popcorn kernels (about 6 cups popped) 
½ cup (1 stick) lactose-free butter 
¼ cup brown sugar 
2 Tbsp. cocoa powder, sifted 
½ tsp. sea salt, plus more to finish (I used small crystals) 
¼ tsp. baking soda 
¼ cup (40 g) finely chopped chocolate 

Heat the oil in a 3-quart thick-bottomed saucepan on medium-high heat. Put 3 or 4 kernels into the oil and wait for them to pop before adding the rest. Once you’ve added all the kernels, shake the saucepan a bit to get them in an even layer, then cover the pot, ideally leaving the lid slightly ajar to prevent too much steam from accumulating. Remove from the heat for about 30 seconds (this lets the kernels heat evenly in the hot oil), then put the saucepan back on the heat. The corn should start popping quickly. As it does, give the saucepan a shake every once in a while. Once the popping slows to several seconds between pops, turn off the burner and pour the popcorn out into a large bowl. In the case of this recipe, I recommend letting it cool and then doing your best to remove the unpopped kernels. 


Split the popcorn evenly between 2 large bowls. Preheat the oven to 250 °F. Line a sheet pan with parchment paper or a silpat and set aisde. 

Melt the butter in a small saucepan over medium-high heat until bubbling and frothy. When the milk solids start to caramelize and the butter smells nutty, transfer 2 tablespoons to a small bowl and set aside. To the rest of the butter, add the brown sugar, cocoa powder, ½ teaspoon sea salt, and baking soda. Bring back to a boil, then cook, whisking continuously, until sugar dissolves, about 1 minute. 

Pour this mixture over one of the bowls of popcorn. Stir to coat well. Dump the popcorn mixture onto the prepared sheet pan, then bake for 30 to 40 minutes, stirring every 10 minutes. (You’re essentially making popcorn granola here, getting the popcorn dry.) 

Remove the popcorn from the oven, then transfer the chocolate popcorn back to its bowl and quickly stir in the chopped chocolate. (If your chocolate is not so roughly chopped or if you wait too long, the chocolate won’t melt completely – if that’s what you’re going for, that’s fine too.) Let the chocolate cool on the popcorn, about 20 minutes (or put the bowl in the refrigerator to speed things up.) 

 Meanwhile, add the remaining 2 tablespoons brown butter to the plain popcorn (if the butter has hardened, just put it in the microwave a few seconds). Season the plain popcorn with sea salt to taste. 

Combine both popcorns in a large bowl and serve. Keep any leftovers in an airtight container for up to a few days.


Batch of links

- The Engineer brought these gorgeous bell peppers home the other day and I just had to share. They are called Aloha peppers and I just love them! 


- I love the idea of s’mores, but hate when the chocolate isn’t melty. Which is why I’m delighted by Stuffed Puffs, marshmallows that are stuffed with melty chocolate. They look great for microwave s’mores, too! 

- The latest issue of Bon Appétit had a great article about food waste. On a side note, I am getting more and more serious about trying home composting. (The city of San Antonio actually started a food waste collection program, but we live just outside city limits, in a place where they don’t even recycle glass anymore, so I don’t see it extending here anytime soon.) 

- There’s a new online retailer of Asian groceries called Umamicart! They don’t deliver everywhere just yet, but are still expanding. 

 - You know how sometimes, you buy a new-to-you condiment thinking that you’re going to use it on everything and it’s going to change your life, but then you just don’t use it? You’re not alone. 

- There’s a reason why women often get cold faster than men in air-conditioned office buildings. 

- Did you know that 4th graders can get an annual family pass to all national parks – for free? See here for details. I hope this is still active when the Little Prince is in 4th grade! You could hit all 47 continental national parks in one epic road trip (the article was written before the pandemic, though).

Thursday, May 27, 2021

Croustade au cacao et aux petits fruits


Ça fait longtemps que cette recette de Mitaine Écarlate est dans mes signets – à en juger par la date de son billet, ça doit faire presque neuf ans? J’ai décidé que c’était fini le niaisage, je faisais la croustade. Et donc, je fis. J’ai pris un moule carré de 8 pouces (ce que j’ajoute dans la recette ci-dessous), que j’ai recouvert de papier parchemin juste au cas (ce n’était peut-être pas nécessaire). J’ai beaucoup aimé! Enfin, l’Ingénieur n’est pas grand amateur de petits fruits, le Petit Prince aurait aimé que ce soit juste des framboises, et le Renard aimait davantage les fruits avant la cuisson. Mais moi j’ai trouvé ça délicieux, et ça fait changement des croustades « nature ». Je recommande! 

2 tasses de flocons d'avoine 
1 tasse de farine de blé entier 
¾ tasse de cassonade 
¼ tasse de cacao 
1 c. à thé de bicarbonate de soude 
1 pincée de sel 
2/3 tasse d'huile de canola 
3 tasses de petits fruits rouges frais ou décongelés (j’avais des framboises, des mûres et des bleuets) 
le jus et le zeste d'une orange (j’avais une clémentine) 
1/3 tasse de sucre 

Préchauffer le four à 375°F. Graisser un moule carré de 8 pouces (j’avais également utilisé du papier parchemin dans mon moule, mais je ne suis pas certaine que c’était nécessaire). 

Dans un bol, bien mélanger les flocons d'avoine, la farine, la cassonade, le cacao, le bicarbonate de soude et le sel. Incorporer l'huile et bien mélanger de nouveau. Étendre les 2/3 de la préparation dans le moule. Bien presser et réserver. 

Dans un second bol, mélanger les petits fruits, le zeste et le jus d'orange, et le sucre. Répartir ce mélange sur la croûte. Recouvrir avec le reste de la préparation aux flocons d'avoine. Bien presser. 

Faire cuire pendant 30 minutes. Laisser refroidir et réfrigérer quelques heures avant de servir (j’ai laissé le mien à la température de la pièce).


Easy Sausage Casserole

I tried a sausage casserole for which I used sausage crumbles, a red bell pepper, and hidden vegetables in the form of cauliflower Veggie Tots. Somehow, it wasn’t as good as I thought it would be, and the kids were both totally over it after one serving over lunch – even though I had made it with them in mind. Several weeks later, I tried a different one, in which the vegetables are NOT hidden, and… not only did it taste much better, but the kids were more into it as well! (To be fair, they did pick out most of the vegetables, but at least they were interested in having it again the next day.) 

I used Eckrich smoked sausage (their Polska Kielbasa specifically), which we all love over here. It’s a great addition here not only because it’s full of flavor, but also because it is already cooked. Keep those attributes in mind if you substitute. 

I served it with a side salad topped with silan tahini vinaigrette. This casserole made for a great dinner, but would also be good for breakfast, brunch, or lunch. I’ll have to make it again! 

1 package (13 oz.) Eckrich smoked sausage, sliced and chopped 
1 Tbsp. butter
½ red onion, chopped 
1 red bell pepper, chopped 
1 green bell pepper, chopped 
1 ¼ cup mushrooms, chopped 
1 tsp. salt ½ tsp. pepper 
2 cups spinach, roughly chopped 
1 cup cherry tomatoes, halved 
12 eggs 
1/3 cup lactose-free milk 
¾ cup lactose-free shredded mozzarella cheese 

Preheat oven to 375 °F and grease a 9”x13” casserole dish. 

Chop all veggies into bite-sized pieces. 

Heat a large skillet over medium heat, add butter and then add onions and bell peppers. Let cook for 3 minutes and then add smoked sausage, mushrooms, salt and pepper. Cook for 3 more minutes and then remove from heat and stir in spinach and sliced tomatoes. Pour into the prepared dish. (If you want to prep the dish ahead of time, stop at this step and refrigerate until you are ready to continue.) 

In a separate bowl, put all your eggs and milk and whisk together. (You can add extra cheese into this mixture if you would like, but I didn’t.) 

Pour egg mixture into the casserole dish, gently stir to make sure the eggs are spread out, top with cheese, and bake for 45 minutes. Serve warm!


Wednesday, May 26, 2021

Saffron Cake with White Chocolate Ganache


This saffron cake with white chocolate ganache was really something! I highly recommend it. 

I do recommend changing a few things, though. The recipe makes about 4 cups of batter, and since I don’t have a bundt pan that small, I used an 8” springform pan; I changed the directions below, since I prefer using standard-size pans, but feel free to look for another equivalent here

The original recipe also called for a ganache made with 1.8 ounces of white chocolate and ¼ cup of coconut milk. In my book, that’s more of a glaze, and I wanted something thicker. I used 3 ounces of white chocolate, but it was still much too liquid for me. Much of it sank into the cake, and I added more on top after colling it in the fridge. Next time, I’d make a proper ganache with a ratio more like 1 cup of chopped chocolate (closer to 150 g) to ¼ cup coconut milk. (Come to think of it, I also had this issue with Bon Appétit’s spiced chocolate pumpkin cake with spiced pumpkin glaze, even though I halved the amount of liquid in that one. I don’t know if the recipe is flawed, my taste is skewed, or there’s something going on with the humidity in San Antonio or the way the stars are aligned.) 

Make sure to check the dairy content of your white chocolate if lactose is an issue. 

For the cake
0.5 g (approximately ¼ tsp.) saffron 
1 tsp. granulated sugar 
1 Tbsp. dark rum (or warm water) 
7 oz. (1 ¾ sticks) lactose-free butter 
2/3 cup coconut milk 
240 g (1 2/3 cups) all-purpose flour 
2 tsp. baking powder 
¼ tsp. salt 
2 large eggs 
250 g (1 ¼ cups) granulated sugar 

For the ganache (see note above) 
50 g (1.8 oz) white chocolate, finely chopped 
¼ cup coconut milk 
1 pinch of salt 
¼ tsp. vanilla powder (vanilla or vanilla bean paste are also acceptable)r 
powdered sugar, for dusting (optional, I didn’t use it) 

For the cake 
Grind the saffron with 1 teaspoon of sugar and put in a small jar. Add dark rum and cover with a lid or plastic wrap and leave it at room temperature for at least one hour. 

Preheat oven to 350 °F. Grease and flour an 8” springform pan (or another pan of your choice, knowing that the recipe makes roughly 4 cups of batter; adjust the baking time as needed). 

Melt the butter in a saucepan. Add the coconut milk and saffron mixture and set aside. 

Whisk together flour, baking powder and salt in a medium bowl. Set aside. 

Beat together the eggs and sugar until light and fluffy, about 2-3 minutes. Add the butter mixture and stir until combined. Add the dry ingredients and stir until batter is smooth. 

Pour batter into the prepared pan and bake on the bottom rack of the oven for 40-45 minutes or until a cake tester comes out clean (it was 45 minutes in my case, and my oven tends to run hot). Leave the cake to cool in its pan for 15 minutes before inverting it onto a cooling rack to cool completely (I let it cool completely in the pan). 

For the ganache 
Put the finely chopped chocolate in a small bowl. Heat the coconut milk in a saucepan until hot, but not boiling. Pour the hot coconut milk over the chocolate and let stand for 30 seconds. 

Stir with a small spoon until chocolate is melted and ganache is smooth. Add the salt and vanilla. Leave to cool until slightly thickened (it won’t thicken a lot, though). Dust cake with powdered sugar and drizzle with ganache.


Baked Eggs in Bread Bowls


I made this recipe for lunch and it was a hit! The Fox typically likes eggs, though whether or not he’ll eat the yolk is hit-or-miss, and the Engineer loves anything in a bread bowl. I halved the amounts to make only 4 and I used whole wheat unsplit burger buns because they seemed like the only ones the right size at the bakery. 

8 crusty dinner rolls 
8 large eggs 
¼ cup chopped mixed herbs, such as parsley, chives, or tarragon 
salt and pepper 
4 Tbsp. grated parmesan 

Preheat oven to 350 °F. Slice off top of each dinner roll and gently remove some bread until there is a hole large enough to accommodate an egg. Arrange rolls on a rimmed baking sheet. Reserve tops. 

Crack an egg into each roll, then top with some herbs and a bit of cream. Season with salt and pepper. Sprinkle with parmesan. 

Bake until eggs are set and bread is toasted, 20 to 25 minutes. After eggs have cooked for 20 minutes, place bread tops on baking sheet and bake until golden brown (so I did this for the last 5 minutes of baking). Let sit 5 minutes. Place tops on rolls and serve warm.


Tuesday, May 25, 2021

Lemon Pound Cake Donuts


I tried a few new donut recipes in the past months. These buttermilk red velvet donuts looked fantastic on the original post, but turned out to be a complete disaster. The batter was too loose, it baked up shapeless, and the confections (I can’t call them donuts) completely fell apart coming out of the pan. Luckily, I was able to salvage a dessert out of it because I still had vegan buttercream left over from the Fox’s birthday – I always keep leftover icing in the fridge for a while even if I have no plans for it, and every so often it comes in handy! So I piled some red velvet cake crumbs in each plate, topped them with a dollop of buttercream and some rainbow sprinkles, and saved the day. If I’d had candy melts and more time, I would totally have made cake pops with it! And then these ”healthy” vanilla donuts were… just not worth it. 

All’s well that ends well, though, because eventually I came across these lemon pound cake donuts on Weelicious and they were just what we’re looking for. The Engineer actually said that these were his favorite donuts of all those I’ve made. I used lemon juice to make the glaze, but next time I would use coconut milk to make a thicker, more opaque white icing, and I’d also double the quantities. I felt like these donuts stuck to the pans a bit more than regular donuts, but I was also using a new brand of oil spray to grease the tins, so it could have been that. They were still in decent shape, especially with the icing! 

For the donuts 
1 cup granulated sugar 
1 stick (½ cup) lactose-free butter, softened
3 large eggs 
½ tsp. vanilla extract 
1 ½ cups all-purpose flour 
½ tsp. baking soda 
¼ tsp. kosher salt 
½ cup lactose-free sour cream (I used Greek yogurt) 
¼ cup lemon juice 
1 tsp. lemon zest 

For the glaze (consider doubling this; see note above) 
1 cup powdered sugar, sifted 
1-2 tsp. lemon juice, milk OR lactose-free cream or coconut milk (to make the icing white) 

Preheat oven to 325 °F. Grease 18 donut pans (I mean, pans for 18 donuts; I used 3 pans that make 6 donuts each). 

Using a standing mixer or electric mixer, cream the butter and sugar until light and fluffy, about 5 minutes. 

Add the eggs one at a time, making sure to incorporate each one. 

In a separate bowl, whisk together the flour, baking soda, and salt and set aside. 

Whisk the vanilla, sour cream, lemon juice and lemon zest in a separate bowl. 

Add the flour and sour cream alternately to the egg mixture one half at a time, until combined. 

Spoon or pipe the batter into greased donut pans and bake for 18-20 minutes, until a toothpick inserted in the center comes out clean. Allow the doughnuts to cool completely before glazing. 

Mix together the glaze ingredients until smooth. Glaze the donuts (I like to dip them in the glaze).


Egg Muffins


This recipe is adapted from The Kitchn and it turned out to be a really good choice for my son’s lunchbox! The recipe says these will “come right out” of the muffin cups if you grease them well, but my luck with baking eggs in tin cups has been abysmal, so I used paper liners and greased the liners, and that’s certainly what I recommend. 

1 ½ cups shredded sweet potato (from about 1 medium potato) 
1 cup (4 oz.) shredded sharp cheddar cheese 
6 strips bacon, cooked and crumbled 
10 large eggs 
2 Tbsp. lactose-free milk 
1 tsp. kosher salt (½ tsp. if using Morton brand) (I’d actually use a bit less) 
¼ tsp. freshly ground black pepper 

Arrange a rack in the middle of the oven and heat to 400 °F. Generously coat a 12-well standard muffin tin with cooking spray or olive oil (see note above – I strongly recommend using paper liners and greasing them). 

Divide the shredded sweet potato, cheese, and bacon evenly between the muffin wells. 

Place the eggs, milk, salt, and pepper in a large bowl and whisk until the eggs are completely incorporated. 

Pour into the muffin liners, filling each ½ to ¾ full. Bake until the muffins are set and lightly browned around the edges, 12 to 14 minutes (it was 14 minutes for me, and my oven runs hot). Place the pan on a wire rack and let cool for 2 to 3 minutes (my muffins deflated at this point). Run a butter knife around each cup to the loosen the muffins before removing them from the pan if necessary; carefully peel paper liner. Serve warm or cool completely on a wire rack before refrigerating or freezing.


Monday, May 24, 2021

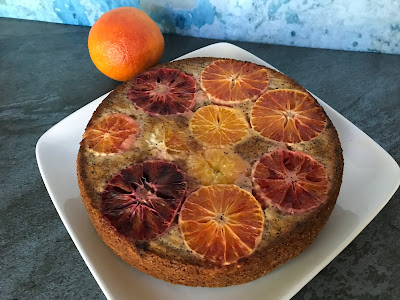
Blood-Orange Poppy-Seed Upside-Down Cake


Is that enough hyphens for you? This cake recipe is (slightly) adapted from Ashely Rodriguez’s Let’s Stay In. I used blood oranges, but other types of oranges would be great too, and she even recommends rhubarb or stone fruit. This cake is as beautiful as it is delicious! I’ll have to make it again. 

2 blood oranges 
2 tsp. grated orange zest (from the oranges) 
½ cup (1 stick) lactose-free butter 
1 cup sugar 
1 large egg 
1 Tbsp. vanilla 
1 ½ cups (210 g) all-purpose flour 
¾ tsp. baking powder 
½ tsp. baking soda 
3 Tbsp. poppy seeds 
1 tsp. sea salt (I used Maldon sea salt and would reduce the amount a tad) 
1 cup lactose-free sour cream or yogurt 

Preheat the oven to 350 °F, with a rack in the middle position. Butter a 9- or 10-inch cake pan and line the bottom with paper. 

Zest 1 orange (or both) to get 2 tsp of zest. With a paring knife (I used a small serrated blade), remove the pith and peel of the oranges. Thinly slice the oranges and line the bottom of the prepared cake pan with the orange slices. 

In the bowl of a stand mixer fitted with the paddle attachment, cream the butter, sugar, and orange zest until light and fluffy, 3 to 5 minutes. Add the egg and vanilla and mix well to combine. 

In another bowl, whisk together the flour, baking powder, baking soda, poppy seeds, and salt. 

With the mixer on low speed, add half the sour cream to the butter mixture, then add half of the flour mixture. Repeat. 

Dump the thick batter on top of the oranges, carefully spreading it out so as not to disturb the oranges too much. Bake the cake 45 to 55 minutes, or until the cake springs back in the middle when gently pressed. 

Remove from the oven and set the cake pan on a wire rack for 10 minutes (I waited longer) before inverting onto a serving platter.


Fusilli with Minty Pea Pesto


I made a few dishes of pasta with a green pesto over the past months, such as roasted broccoli pasta salad and ramen noodles with miso pesto. But my favorite, and the one that is most appropriate for spring, was definitely this fusilli with minty pea pesto. I just loved the subtle mint in here, and the toasted pine nuts to top it off! You could use fresh peas if you have them. This makes 4-6 servings, depending on everyone’s appetite (it was fine for two meals for our family of 4, since the kids ate less).

12 oz. fusilli or other short pasta 
½ cup packed fresh flat-leaf parsley leaves 
¼ cup packed fresh mint leaves 
2 oz. lactose-free pecorino romano cheese, shredded (about ½ cup), plus more for serving 
2 cloves garlic 
2 cups frozen peas (from a 10-oz. pkg.), thawed, divided 
½ cup toasted pine nuts, divided 
¼ cup olive oil 
½ tsp. kosher salt, plus more for water 
½ tsp. freshly ground black pepper 

Cook pasta in a large pot of generously salted water according to package directions for al dente. Reserve 1 cup cooking water. Drain pasta; return it to pot. 

Meanwhile, place parsley, mint, cheese, garlic, 1½ cups peas, and ¼ cup pine nuts in a food processor. Pulse until finely chopped. With processor running, drizzle in oil; process until pesto is smooth, about 1 minute. 

Add pesto, salt, pepper, ½ cup reserved cooking water, and remaining ½ cup peas to pasta in pot. Cook over medium, stirring constantly, until pasta is fully coated and warmed through, about 2 minutes. Add more reserved cooking water, 1 tablespoon at a time, to loosen sauce to desired consistency. Serve topped with remaining ¼ cup pine nuts and cheese.

Friday, May 21, 2021

Petits pots de butterscotch


J’ai fait de petits pots de pouding au butterscotch (caramel écossais) récemment, et tout le monde a aimé ça! C’était une recette de Famille futée 3, où j’ai changé un petit peu la méthode pour la caramélisation des noix. 

La recette ci-dessous donne 4 portions; je l’ai doublée. 

Pour le pouding au butterscotch 
¼ tasse de beurre sans lactose 
½ tasse de cassonade légèrement tassée 
1 ½ tasse de lait sans lactose 
2 c. à soupe de fécule de maïs 
2 c. à thé d'extrait de vanille pure 

Pour les noix caramélisées (facultatif) 
¼ tasse de noix de Grenoble hachées 
2 c. à soupe de cassonade 
¼ tasse d'eau fleur de sel 


Pour le pouding 
Dans une casserole moyenne, faire fondre le beurre à feu doux. Ajouter la cassonade et fouetter pour bien intégrer. 

En même temps, dans une grande tasse à mesurer (ou un bol à bec verseur), mélanger le lait, la fécule de maïs et la vanille. Réserver. 

Lorsque la cassonade est bien intégrée au beurre, verser lentement le mélange de lait en fouettant vigoureusement. 

Poursuivre la cuisson 5 minutes à feu moyen ou jusqu'à épaississement, en fouettant à quelques reprises pour obtenir la consistance d'un pouding. 

Verser la préparation dans 4 petits ramequins et réfrigérer. 

Pour les noix caramélisées 
Préparer une plaque à biscuits en la recouvrant d’un silpat ou de papier parchemin. 

Dans un petit poêlon antiadhésif, mélanger la cassonade et l'eau. Porter à ébullition à feu vif en remuant constamment. 

Lorsque la préparation bout à gros bouillons et devient sirupeuse, retirer du feu, ajouter les noix et bien mélanger. Étaler les noix sur la plaque à biscuits, ajouter une pincée de fleur de sel et laisser refroidir. 

Au moment de servir, garnir les petits pouding de noix caramélisées.


Thursday, May 20, 2021

Asian Cucumber Salad


I saw this simple cucumber salad with Asian flavors and decided to make it – it’s got vegetables I enjoy, and the Little Prince likes cucumbers as long as they’re peeled, so I thought of it as a gateway salad. It wasn’t very popular with the kids, but I loved it! The original post suggests adding (or substituting) red cabbage, green onions, orange or yellow bell peppers, broccoli, or sugar snap peas would be great too! 

I halved the dressing and still thought it was too much; the amounts below are mine, but feel free to reduce them a bit. I served this salad with the everyday pork meatballs from the Keepers cookbook. 

For the salad 
2 cucumbers, peeled and thinly sliced 
1 red bell pepper, cut into small pieces 
1 carrot, shredded 
1 cup shelled edamame 
toasted sesame seeds, for garnish 

For the dressing (see note above) 
6 Tbsp. rice vinegar 
2 Tbsp. water 
1 Tbsp. sugar 
½ tsp. kosher salt 
1 Tbsp. fresh chopped cilantro 

In a large bowl, mix together all the pre-cut vegetables and edamame. 

In a small bowl (I use a jar), mix together all the dressing ingredients, then pour over the vegetables and toss to coat. 

Refrigerate for at least an hour and toss again before serving. Garnish with toasted sesame seeds.

Wednesday, May 19, 2021

Irish Scones with Kumquat Marmalade

I know I posted a scone recipe very recently, but then I realized that I had one which calls for homemade kumquat marmalade as a side, and I had to make it while there were still some kumquats to be had! It’s an Irish scone recipe published by Zoë François (of Zoë Bakes). I used a newly purchased hexagonal biscuit cutter, which helps reduce dough scraps produced with round cutters. (I mean, I could just slice everything in squares at that point, but it wouldn’t be as nice, right?) 

The only change I’d make would be to slice the kumquats more finely. It would make for a more pleasant (to me) texture than to just cut them in half, and it would allow for more thorough removal of seeds. Also, when the recipe says to cook until it is the consistency of honey, I think it means *warm* honey – I cooked it a bit longer, but I think I’d have been happier with a slightly thinner consistency in the end. 

I believe Zoë François served these with clotted cream in her blog post; I used the last of a container of SoDelicious CocoWhip, but it is entirely optional. 


For the scones 
4 cups (520 g) all-purpose flour 
1 Tbsp. baking powder 
½ tsp. baking soda 
¼ tsp. salt 
3 Tbsp. sugar, plus more for the tops (the topping is optional) 
4 oz (113 g) lactose-free butter, cool but not quite hard, so you can easily work it into the flour 
2 cups lactose-free buttermilk (2 Tbsp. vinegar or lemon juice, topped with lactose-free milk) 
egg wash for brushing top (optional) 

For the kumquat marmalade (I halved these amounts) 
1 lb. kumquats, cut in half lengthwise (I’d slice and seed them) 
1 pinch salt 
1 ½ cups sugar 
3 Tbsp. corn syrup (optional, but it keeps the marmalade from crystalizing) 

For the scones 
Preheat oven to 400 °F, place the oven rack in the middle of the oven. line a baking sheet with parchment paper. 

In a large bowl, whisk together the flour, baking powder, soda, salt, and sugar. 

Cut the butter into small pieces and add to the bowl of dry ingredients. With your fingers, rub the butter into the flour mixture until it resembles corn meal (I always do this in the food processor). The flour should be fully coated with the butter and it will turn creamy in color. 

Gently add enough of the buttermilk to create a moist dough that still holds its shape; you may not use all of the buttermilk. There should be a few dry patches at the bottom of the bowl as you are mixing in the buttermilk. 

Turn the scone dough out onto the work surface and fold the dough with a bench scraper, so you are pressing any dry flour into the dough and folding it as you go. This kneads the dough gently. Do this about 6 times. 

On a lightly floured surface, pat the dough into an inch-thick rectangle. Use a 3-inch biscuit cutter to press the scones into shape. Very gently press the scraps together and cut out more circles. 

Place the scones at least two inches apart on the prepared baking sheet. Brush the scones with egg wash and sprinkle with a little bit of sugar. 

Bake until they are golden brown and set, about 18-20 minutes. 

For the kumquat marmalade 
Put the kumquats into a pot and cover with water and add the salt. Bring to a simmer. 

Strain the kumquats. Add the kumquats, sugar, corn syrup (if using) and enough water just to cover the fruit. Simmer on medium low until the syrup is the consistency of honey (I’d say slightly warm honey). 

Pour into a jar and allow it to cool. The kumquat marmalade will thicken as it cools. It can be refrigerated for a week.



Tuesday, May 18, 2021

Raspberry Rose Pudding


I love rosewater, so I jumped at the chance to use it in this recipe. It’s a dairy-free pudding that is essentially like a fruit curd. The color is gorgeous, it wasn’t too sweet, and I absolutely loved it. (The Engineer doesn’t like raspberries, the Little Prince decided it was too intense for him, and the Fox refused to taste it, though for the record both kids love fresh raspberries. More for me!) 

The original recipe recommended ½ to 1 teaspoon rosewater; I used the greater amount, obviously, but I could barely taste it, so I’d use 2 teaspoons next time – I amended the ingredients below. 

¼ cup cornstarch 
¼ tsp. salt 
1 cup cold water 
2 large egg yolks 
20 oz. raspberries, fresh OR frozen and thawed, plus more to serve 
½ cup sugar 
1 lemon, juiced (about 3 Tbsp.) 
1-2 tsp. rosewater 
vegan whipped cream, to serve (optional) 
white chocolate shavings, to serve (optional) 

Whisk the cornstarch and salt together in a medium bowl. Slowly pour in 1 cup water, whisking constantly until smooth. Whisk in the egg yolks. 

Purée the raspberries with the sugar and lemon juice in a blender until smooth and liquefied. Pour through a fine-mesh sieve into a 3-quart saucepan. Use a spoon to press as much liquid as possible out of the raspberry pulp (you should have about 3 cups total). Turn the heat onto high and bring the fruit to a simmer, stirring frequently. Turn off the heat. 

Whisk about half of the hot raspberry mixture into the bowl with the cornstarch and egg yolks. Pour this slowly back into the pan, counting to 10 as you do and whisking vigorously. 

Turn the heat back on to medium. Bring the pudding to a full boil, whisking frequently; this will take 2 to 5 minutes. Large bubbles will rise up very slowly, making a noise like gloop or plop. Simmer for 2 minutes, whisking frequently. Turn off the heat and whisk in the rosewater. 

Immediately pour the hot pudding into a shallow container. (If you notice lumps, you can pour the pudding though a fine-mesh sieve to make it smoother.) Place plastic wrap or buttered wax paper directly on the surface of the pudding to cover it. Put a lid on the dish and refrigerate. Chill for 2 hours, or until completely cold, before eating. Best eaten within 3 days. 

 Serve in dessert cups or champagne glasses. Top with vegan whipped cream, white chocolate shavings, and fresh raspberries if desired.


Monday, May 17, 2021

Rigatoni with Tomato, Basil, and Mozzarella


I got this recipe in Annabel Karmel’s Real Food Kids Will Love. This really hit the spot! The sauce has bell pepper in addition to the tomatoes, it’s vegetarian, and best of all, I realized that it’s possible to find lactose-free mozzarella pearls! Just double-check that the nutrition label says “0 g sugar” (and at worst, get a bigger ball of lactose-free fresh mozzarella or mozzarella substitute and cut it into small pieces). 

The quantities below make 4 servings, but I doubled them. This dish also freezes well, apparently. 

2 Tbsp. olive oil 
½ red bell pepper, seeded and finely diced 
1 onion, finely diced 
2 cloves garlic, crushed 
¾ cup (600 g) canned chopped tomatoes 
1 Tbsp. tomato purée 
1 tsp. honey 
3 Tbsp. fresh basil, chopped 
2 Tbsp. mascarpone (I used lactose-free cream cheese) 
40 g lactose-free parmesan cheese, grated 
2 cups (150 g) rigatoni 
¼ cup (50 g) mozzarella pearls 
salt 

Heat the oil in a saucepan over medium heat. Add the onion and bell pepper and fry for 10 minutes, until softened. Add the garlic and fry for 30 seconds, then add the tomatoes, tomato purée, and honey and bring up to the boil. Reduce the heat and simmer for 10 minutes, then remove from heat and purée until smooth (I used my immersion blender). Add the basil, mascarpone, and half of the parmesan cheese. 

Cook the pasta according to the packet instructions. Drain and add to the sauce. Mix well and add the mozzarella. 

Spoon into a baking dish or individual dishes. Sprinkle with the remaining parmesan. Place under a hot broiler for 5 minutes until cheese is bubbling (I skipped that last part because I was short on time and didn’t want the dish to be so hot anyway, given that my kids are always complaining about their food being too hot as it is). Enjoy!


Friday, May 14, 2021

Crêpes fines sans grumeaux

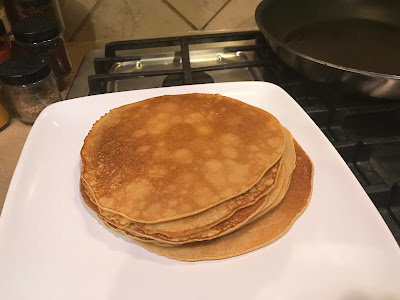
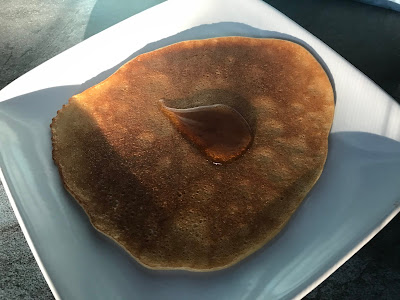
 Mes enfants ont beau me parler souvent de pancakes et de gaufres, reste qu’ils disent que ce sont les crêpes, leur déjeuner préféré. Et j’ai l’impression que chaque fois que j’en fait, je me dis que je n’en fais pas assez souvent. Alors voilà, j’ai trouvé les crêpes sans grumeaux de Christelle, où j’ai appris deux choses. Un, pour éviter les grumeaux, il faut d’abord mélanger la farine avec le lait, et *ensuite* ajouter les œufs. Et deux, pour éviter le temps de repos (durant lequel la farine absorbe le lait), on peut faire tiédir le lait d’abord. Les crêpes étaient délicieuses! J’en ai servi surtout avec du sirop d’érable, mais j’en ai aussi servi quelques-unes avec du tahini au chocolat. On a adoré! 

Les quantités ci-dessous m’ont donné 8 ou 9 crêpes. 

1 ½ tasse (190 g) de farine tout usage 
1 ½ tasse de lait sans lactose ou de lait végétal (tiède, pour éviter le temps de repos) 
3 c. à soupe d’eau froide 
3 gros œufs 
1 c. à soupe de sucre 
1 pincée de sel 
1 c. à thé d’extrait de vanille pur (ou 1 bouchon d’eau de fleur d’oranger) 
2 c. à soupe d’huile de canola, et un peu pour la poêle 

Dans un grand bol, verser la farine, le lait, et l’eau. À l’aide d’un fouet, bien mélanger jusqu’à ce que la pâte soit lisse. 

Ajouter les œufs, le sucre, le sel, la vanille, l’eau de fleur d’oranger ou le rhum. Mélanger. Ajouter l’huile et mélanger de nouveau. Laisser reposer au moins 30 minutes à 1 h. 

Cuire les crêpes dans une poêle antiadhésive ou une poêle à crêpes légèrement huilée. Servir accompagné des garnitures de son choix.


Wednesday, May 12, 2021

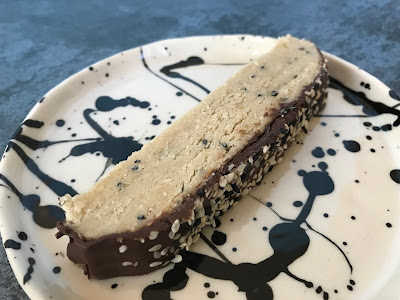
Halva with Salted Chocolate


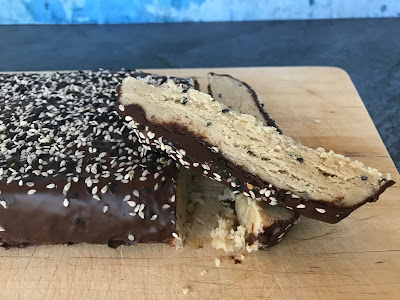
I was a little intimidated at first to make halva, given that the process is more like making candy than like making cake, but it was worth it. I definitely recommend a candy thermometer here! I would only make one change, which is to reduce the amount of sesame seeds on top – I was supposed to use 2 tablespoons, but I used 1 1/3 tablespoons and, even then, I felt it was a bit too much. I’d say no more than 1 tablespoon, and even that is optional; I’ve made the change below. That being said, this was absolutely delicious! It was a big hit with our family, and I’ll have to make it again. 

1 ½ cups tahini 
¼ tsp. kosher salt 
3 Tbsp. black and white sesame seeds, divided 
1 ½ cups sugar 
½ cup water 
4 oz. bittersweet chocolate 
¼ cup dried edible flowers (such as cornflowers and/or roses; optional, and I did not use them) 
flaky sea salt 

Lightly coat an 8½x4½" loaf pan with nonstick spray and line with parchment paper, leaving a 2" overhang on both of the long sides. 

Mix tahini, kosher salt, and 2 Tbsp. sesame seeds in a medium, heat-resistant bowl to combine; set tahini mixture aside. 

Cook sugar and water in a small saucepan over low heat, stirring with a heatproof rubber spatula, until sugar is dissolved, about 4 minutes. Increase heat to medium-high and fit pan with candy thermometer. Cook syrup, brushing down sides of saucepan with a wet pastry brush as needed to dissolve any crystals that form, until thermometer registers 250°, 7–10 minutes. Immediately remove syrup from heat and gradually stream into reserved tahini, mixing constantly with spatula. Continue to mix just until halva comes together in a smooth mass and starts to pull away from the sides of bowl (less than a minute). Be careful not to overmix or halva will be crumbly. (I think I may have overmixed by one or two turns of the spoon, but it did was still great.) Working quickly, scrape into prepared pan and let cool. 

Melt chocolate in a heatproof bowl set over a pan of simmering water (do not let bowl touch water), stirring often. Remove from heat. Invert halva onto a wire rack set inside a parchment-lined rimmed baking sheet (honestly, I would just reuse the parchment from the pan here, after inverting the halva out of it); peel away and discard parchment. Pour chocolate over halva and sprinkle top with flowers (if using), sea salt, and remaining sesame seeds. Let sit until chocolate is set before serving, about 30 minutes. (Halva can be stored at room temperature, tightly wrapped, for a few days.)