Showing posts with label sewing/couture. Show all posts

Friday, February 22, 2019

So I'm on Etsy...

… and my shop is called Squee Knits.

I had been thinking for years that someday, when I had time, I would knit baby cardigans and sell them on Etsy, maybe even write a few patterns and sell those too. But about a year ago, I made something for the Fox that helped me so much, I decided to open an Etsy store now and sell it.

You see, when he as 8 or 9 months old, the Fox decided that whenever I would put him on the changing table, he would rapidly flip from his back onto his stomach and try to crawl away. Because it’s hilarious, don’tcha know. This made changing him near impossible – I would have needed three hands, so I had to go back and forth between pinning him down a bit and removing his dirty diaper and pinning him down and cleaning his butt and bringing him back and pinning him down and putting the clean diaper on. Some of you out there know what I mean. But I had, what, another two years of changing his diapers?

So I thought, “Okay, fine! I’ll cave and get a Hulabye – after all, that’s why I saved the link for so long, in case I needed it.” But it turns out I couldn’t find one anywhere: the website is closed, there were none second-hand on eBay, and I got no response after contacting the Facebook page, which hadn’t been updated in forever (I got a reply two weeks later, saying they don’t make the Hulabye anymore, but – spoiler alert – I had solved my problem by then). So I turned to Google to find something similar. And… there wasn’t anything. I mean, I saw the Hug’n’Hold, but it’s sold out. The baBsafe went nowhere on Indiegogo. I even looked at patents (like this, that, and the other), but as far as I can tell, none of these devices are being manufactured. The only restraint systems that ARE being sold wrap around the waist only, which would do nothing to prevent my baby from rolling over – he needed to be restrained at the shoulders. After all, changing pads already come with a waist strap.


And so I decided to make my own. I came up with something suitable, sewed it, and used it. It was a game-changer, and it was really exactly what I been looking for. I also got a lot of positive feedback from people (like friends who saw this photo, or my parents who also changed the Fox’s diaper over that summer). So I decided to perfect the pattern (which took so much more work than I had thought, hence my absence here in the past weeks) and open a store on Etsy to sell it. It’s the only item in the store for now, but since I do plan on selling knits and knitting patterns eventually, I’m calling it Squee Knits.

To be clear, the idea for a restraint system for the changing table is not mine – a search through patents will reveal that dozens of people have thought of it before me for decades now. The idea for a vest, specifically, is not mine either. But THE PATTERN is mine, and as far as I can tell, nobody else is selling ready-made changing vests (if they were, I would have bought one myself!). So please share the link, and if you make one and like it, please leave me a review on Etsy!

Tuesday, January 22, 2019

Last knits of 2018

I had decided to knit for myself a bit more, so I made a quick project: Mira’s Cowl (a free pattern). It calls for a fingering-weight yarn, so I went with Malabrigo Sock Yarn in Ravelry Red (it appears darker on that page than in real life – the color here is more accurate). What I didn’t like is that once you’ve knit your cowl, you have to block it very aggressively, so I’m not sure why I have to use fingering-weight to cast on so few stitches in the first place… I understand that it should create a lighter fabric, but I would have preferred a yarn that naturally knits up closer to the finished gauge, even if that meant casting on more stitches. As it is, I couldn’t stretch it out enough for a proper infinity scarf, but now it’s too big for a good cowl! I’ll consider re-blocking it smaller or washing in hot water, we’ll see, or perhaps using it more as a half-length shawl (though that may be my fantasy self, the sophisticated woman who wears shawls around the house). That being said, it was really easy to knit, because once you’ve memorized the pattern, it’s a bit mindless. This makes it a good pattern if you knit during your morning commute, for example.


I had started a sweater for myself as well, but had to set it aside for unforeseen reasons – more about that eventually.

I also knit a sweater for the Fox. Unfortunately, I can’t find the pattern online – I think it’s by Phildar, it’s called “Le Pull” and was the 10th pattern in that catalog and was on page 31. But all I have is a photocopy, no catalog reference, sorry. In any event, I really like making this sweater, and I have to say that it is more convenient to knit a colorblock pattern than stripes (no balls of yarn getting tangled). Then again, there was a lot of sewing involved, but I decided to pick up stitches for the collar instead of knitting it separately and sewing it on. I also knit some ribbing at the edges to prevent them from rolling in, and I omitted the slits at the bottom. I used yarn that was given to me by my first cousin once-removed: two skeins each of Phildar Intemporel in Raisin, Émail, and Mercure as well as Phildar Cabotine in Outremer. The sweater is still a bit big for the Fox, so hopefully he’ll wear it next winter.


Since I had leftover yarn, I made what I hope can be a gender-neutral cardigan for the baby (due any day now) of the Actor and his Leading Lady; the pattern was the Little Coffee Bean Cardigan and the buttons were from my stash. I can’t express how much I like knitting top-down sweaters with set-in sleeves!


That being said, it didn’t turn out quite as cute as I would have liked, so then I knit up the newborn size of the Tristan cardigan (that pattern is free, and for a fee it comes in sizes up to 12 months here). I used Sublime Baby Cashmere Merino Silk DK in Vanilla, but almost picked Little Linen (I was genuinely paralyzed in front of my screen, trying to pick between white and off-white, and the Engineer picked for me). The buttons are from my stash as well.


While I was at it, I sewed up another bunny because I had just enough fabric left in my stash to make one, and because the Actor loves rabbits. Clutter-busting for me, soft plushie for them – win-win!


For Christmas, I made the Langston Shrug for my niece, using Rowan Wool Cotton 4-Ply, Rich colorway. The pattern comes in sizes 3 months to 10 years! While I love this shrug, I think that it would have been better without cotton in the yarn – the wool-silk blend that is recommended would, in fact, be better to show off the cables. I used a button from my stash and paired it with a purple dress from Tea Collection, because purple is my niece’s favorite color.


I had a skein of that yarn left, and found out that some friends were expecting a little girl in a few months, so I made the Demne cardigan by Knitsofacto – it’s a free pattern in newborn size, and it calls for only 100 grams of yarn, so this was perfect! It’s knit vertically, starting with the left sleeve, but the cuff is knit last because of a special bind-off. The pattern is a bit hard to follow, mostly because it takes a while before you see the shape of a cardigan emerge so you really have to trust the instructions. (To speed things along, I did some of the seams along the way instead of at the very end, because it was getting to be a tangle of scrap yarn and stich holders.) My beef with this is that both side seams are worked in the recommended three-needle bindoff, which actually adds a row, but that row was NOT accounted for in the pattern! So as you can see, the space between the vertical purl rows is wider at the seam than in other places. It’s something that I notice, as a knitter, but I’m not sure to what extent anyone else would notice. That being said, I’d work one row less next time before binding off. The buttons are from my mother’s stash.

Thursday, May 17, 2018

Three sewing projects for girls

I made two tops and one nightgown for my niece recently. (Well, one of the tops and the nightgown were made before Christmas, and I made the second top last month – I have so many more things I’d love to make, but sadly no time to execute anything!).

I started with this flannel nightgown. The pattern was very easy, but had one MAJOR drawback: the neckline is MUCH too small! I realized this only after I had cut my pieces, so I asked my sister for measurements, then altered the pattern as you can see on the photo below to make the neckline bigger. After that it looked decent, though I feel like the bias tape edging is a bit wider than what I would have liked… I used Michael Miller’s Flannel in Robin in the Hood Coral and coordinating bright pink double fold bias tape.


The second top I made was this Ice Cream Dress, though I made the blouse version because I didn’t have enough fabric for the dress. My niece’s favorite color is purple, so I used the rectangular tunic I had once made from a bedsheet, since I wasn’t wearing it anymore, and coordinating scrap fabric from a pair of pajama pants in my discard pile for the pocket and button loop.


Finally, I made a Lucy Tunic. The pattern was easy to follow and made an adorable tunic! I was originally looking for something in dark green with a more whimsical coordinating fabric, but could not find anything that worked. So I ended up using the reverse strategy when I found this whimsical hedgehog print and, at the suggestion of the shop owner, went with a lime green coordinating cotton. I modified the pattern a bit by throwing in an adorable circular pocket on the front using this tutorial – and I wish I could get away with wearing one of those too! Come to think of it, the Lucy Tunic does come in women’s sizes… Anyway, if you make it non-reversible, do take out the side-seam pockets from the lining, though – I didn’t, and I feel like it’s a bit too heavy. Also, something interesting happened: my sewing machine is a modern one now, with a computer for a brain, and it comes with a button presser foot that basically makes button holes all by itself. I thought this was fantastic, right up until I tried setting it up for a pair of buttons I had in mind for this tunic (the same ones as for her blue Petite Facile sweater). And lo and behold, they were too big for the button presser foot! I felt like the other stitches on the machine didn’t allow me to make solid buttonholes manually, so I ended up using smaller buttons from my stash. But yeah, score one for the old machines, I guess. It turned out nicely nonetheless – now I just hope she likes hedgehogs!

Sunday, March 05, 2017

Sewing for kids

It occurs to me that I mentioned upcycling clothing to make children’s garments, but I never posted any patterns or finished pieces, so let me address this!

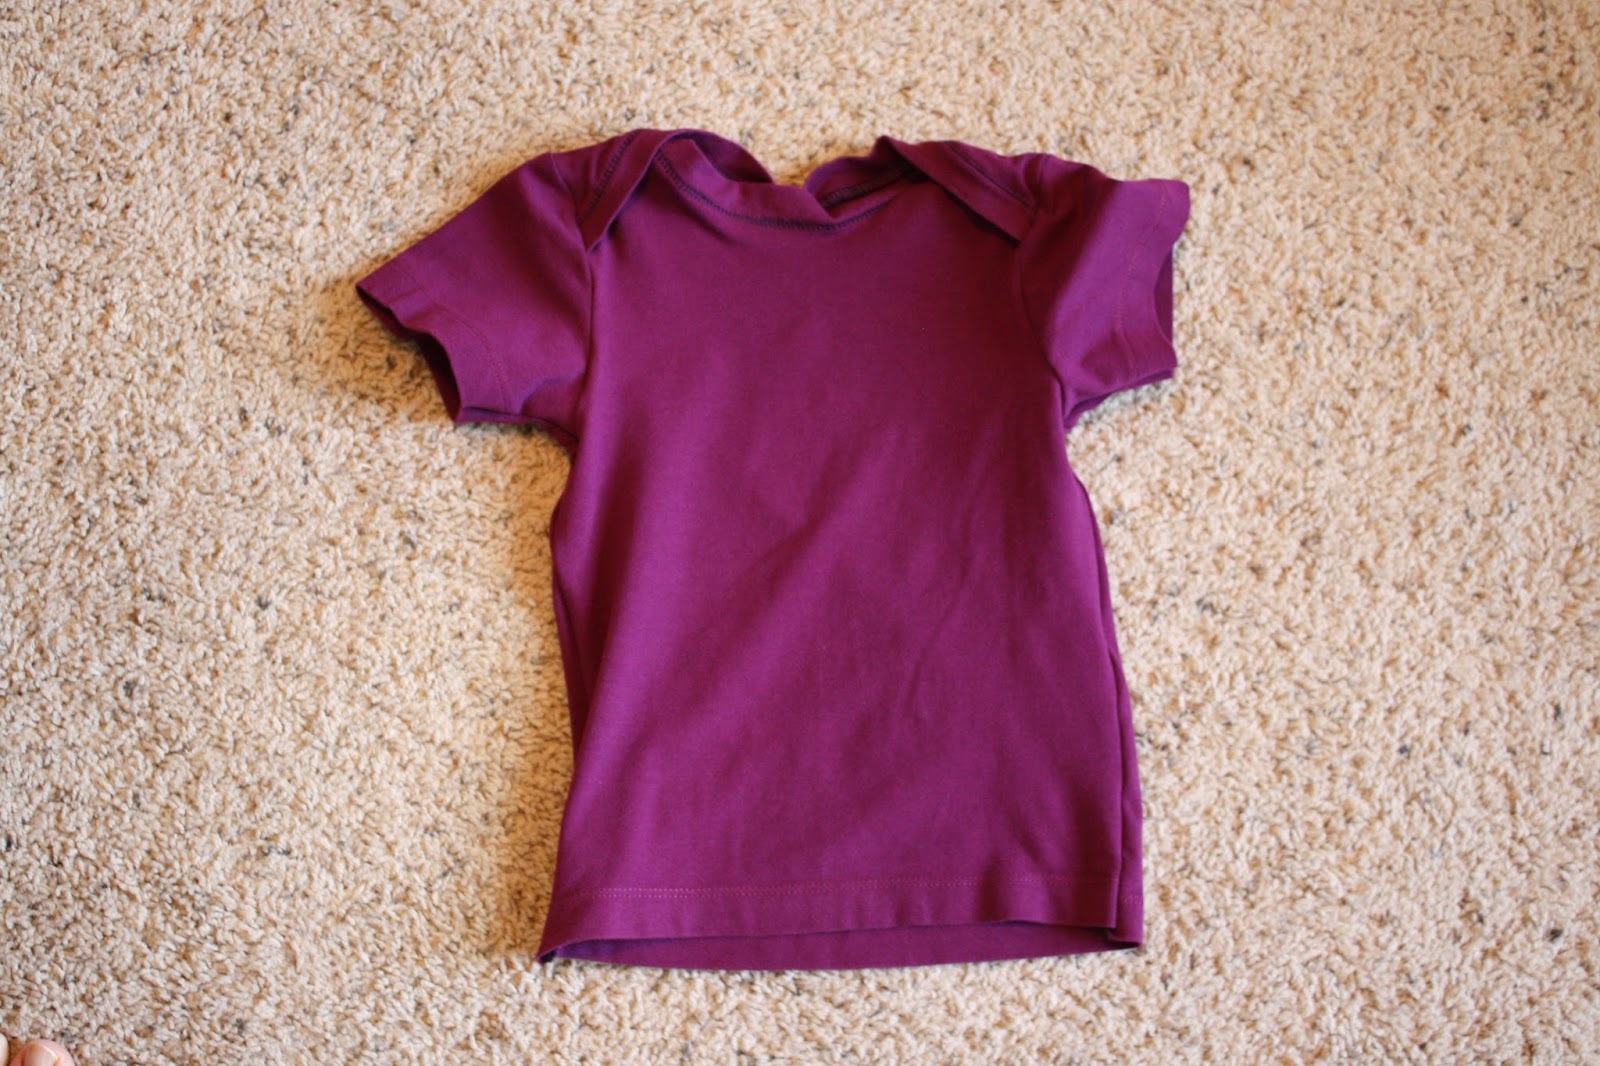
A few years ago, I think shortly after the Little Prince turned one, I made him some tops with envelope necklines by using the excellent 90-minute shirt tutorial, along with this pattern. I needed an actual pattern to make a nice t-shirt, because tutorials alone have never worked out to my liking! This is a relatively easy shirt to make, and it allowed me to upcycle some t-shirts that I and the Engineer were discarding. Attaching the binding for the neck also gave me the chance to flatlock with my serger – I tried with the ladder side of the stitch both on the outside and on the inside, and I think I prefer the former. (In case anyone is interested: here is an Amy Alan video demonstrating four types of stitches with a serger, as well as a quick guide to sergers on Make It Handmade, a tutorial for flatlock stitching, and another one if you want to understand which thread goes where).


I also made a pair of shorts from the sleeves of a man’s t-shirt (tutorial here). I had to do some adjusting for the size, but I’m not crazy about how they came out (so no pictures). I do plan on making more, though, and use them as pajama bottoms for Baby 2.

More recently (last spring, actually), I made some crew-neck t-shirts for the Little Prince, and I am really pleased with how they turned out! I used this tutorial and pattern because I find the author reliable. This time, I used the regular serger stitch on the neck ribbing, not flatlock. I started by using two of my old t-shirts, and I liked the result so much that I bought two more at the Salvation Army for the purpose of converting them (and at $3 and $4 respectively, plus thread, they were still cheaper than brand-new t-shirts). With a serger, these are surprisingly fast to make, especially since you can use existing hems. Note that these shirts fit my son very well at 3 years old, so I’ve adjusted the pattern by printing it at 115% to make a few more now that he’s grown a bit, and I made a pattern piece for a long sleeve to make a few more in a different style.


Another piece I’m really proud of is a cardigan I made from a beloved old sweater of mine (which I couldn’t wear because of bleach stains on the front). I was inspired by this and used the pattern for the Darling Cardigan on Etsy, and in addition to said sweater, threw in some scrap jersey knit from another t-shirt, along with thread and buttons. I just love how it turned out!


I also made a few pieces for my goddaughter. First, a few years ago, I used McCall’s M7007 pattern to make a tunic from a shirt I no longer wore. I threw in a pair of legwarmers made from an old pair of socks that I had really liked (and the colors complemented each other so well!).


For Christmas, I made her this comfy knit dress (with pockets!). I used scraps from the pink shirt above along with some grey jersey knit from another garment.


And just last month, I used an old garment I had made and only worn a few times (and would no longer wear because it really didn’t suit me that well) to sew a Polly Peasant dress for next summer. I added a small ribbon loop to mark the back neckline. Then I decided to add a ribbon at the waist and use one of the fancy stitch settings on my machine, which I never get to do otherwise – I love the result!


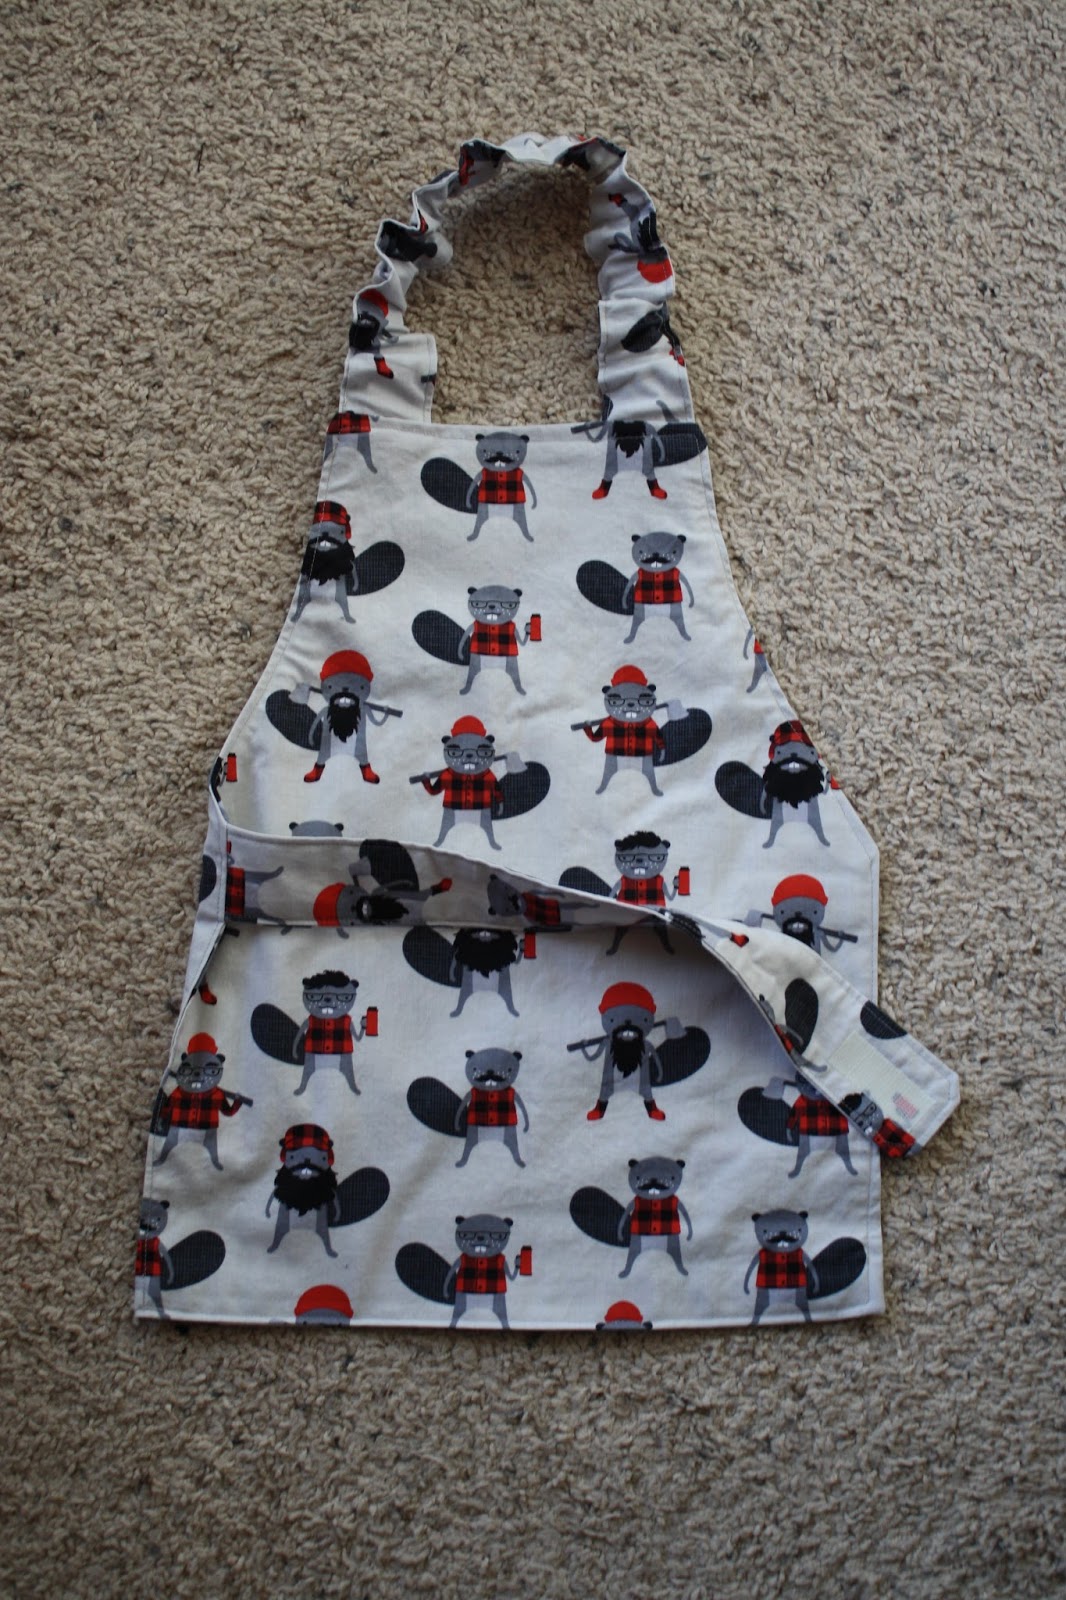
My most recent projects included a child’s apron and Oxford shirts. The apron was a Christmas gift for the Little Prince; I came across the pattern on Jejune.net, and following the link for where she found the Darling Fox print fabric led me to this awesome, Canadian-looking Burly Beaver print. This apron was very fast to make (seriously, you can do it during your toddler’s afternoon nap). The only thing I would change is that I would make the neckband longer, since my son has a big head and this is borderline comfortable to put on or off. About that, since the neckband is elastic and the strap ties on with Velcro, your toddler can in theory put it on and remove it by himself, which is a definite plus! The Little Prince enjoys wearing it when he’s standing in his learning tower watching us cook.


Then I made a classic button-down Oxford shirt. This pattern comes in sizes from 3 months to 12 years, so it’s very versatile! I started by using yellow scrap fabric from another project (which never came out to my liking and which I was never going to wear) along with the cool variegated thread I had bought for it, plus buttons from a shirt discarded by the Engineer, so even though I had to pay for the materials at some point, I feel like by now it was free and just helping me make some space in my stash. I made size 4T, but it turned out to just barely fit the Little Prince now (he’s 3 ½), so the next ones I made were size 6T. I ran into a problem with the collar, which the pattern seems to size too large for the shirt, so I had to do some fudging with the pattern to get it to come out right. Then I made three more using old shirts of the Engineer’s, so the upcycling is keeping me happy AND it’s faster than making a shirt from scratch entirely. (The sleeve plackets can be reused easily, as can the bottom hems, but I recommend making a collar from scratch.)


Finally, I made two sweaters using this pattern and two sweaters I had in my discard pile (one was mine, one was the Engineer’s).


As for toys, I made two ragdolls (one for my son and one for my niece, on their first birthdays) using the tutorial and pattern found here. I used this fabric for the body, and fabric scraps to make clothes, along with embroidery floss for the facial features and yarn for the hair. For the boy doll, I sewed the hair in several strips from right to left (I’d use fewer strips next time, as he has a bit too much hair!), and from front to back for the girl (see tutorial here). Honestly, front to back would work for the boy doll too, but when I tried it, I wasn’t sure, and ended up preferring the other way – you can compare the first picture with the ones where he is dressed. And for the girl, I used a few yards of scrap yarn to knit her some undies and a scarf, since I was sending her to Canada in the winter and felt like the summer dress wasn’t enough (and I said I wasn’t into animism – lies!).