Sunday, March 29, 2015

Blood Orange and Almond Scones


I’m calling these scones because that’s what they’re called on Tutti Dolci, but they are scones only in the loosest, North American sense of the term. The crumb is light and fluffy, not dense like I’d expect a good scone to be, and these are sweet even before the addition of the (naturally!) pink glaze. That being said, the dough was very easy to work with, probably because I didn’t have to handle it much at all, and the resulting pastries were absolutely delicious. I actually cheated and used the food processor for the entire recipe, instead of simulating a pastry cutter with two knives (which would have taken much, much longer). I used butter in the scones (since there wasn’t much of it, the lactose didn’t bother me), but I swapped coconut oil for the glaze, and it turned out really well.

For the scones
1/3 cup sugar
1 Tbsp. blood orange zest
2 oz. (57 g) almond paste, cubed
1 ¾ cups all-purpose (white) flour
¾ tsp. baking soda
¼ tsp. salt
¼ cup chilled unsalted butter (if this is too much for you, try frozen margarine)
½ cup cold low-fat buttermilk substitute (i.e. lactose-free milk with a splash of lemon juice)
1 large egg

For the glaze
1 cup powdered sugar, sifted
1 pinch of salt
2 ½ Tbsp. blood orange juice
1 ½ tsp. coconut oil, melted
1/8 tsp. pure almond extract

Preheat oven to 400 °F and line a baking sheet with a silicone mat or parchment paper.

Combine sugar, blood orange zest, and almond paste in a food processor and pulse for 1 minute. Place mixture in a large bowl and whisk in flour, baking soda, and salt (I did this all in the food processor, by the way, and it was way easier). Dice butter into ½-inch pieces; sprinkle over flour mixture and use a pastry cutter to cut in evenly until mixture resembles coarse meal (again, the food processor is your friend here, just don’t over-process).

Whisk together buttermilk and egg in a small bowl; add to flour mixture and fold in just until incorporated. Use a floured bench scraper (or a large spoon, in my case) to scrape dough out onto prepared baking sheet; lightly dust dough with flour, flour hands, and pat dough into an 8-inch circle. (See? No despair as you’re kneading sticky dough and wondering whether it’ll submit.) Score into 8 wedges with floured bench scraper. Bake 15 to 16 minutes, until golden. Cool 2 minutes on baking sheet, then carefully transfer to wire rack to cool before slicing into wedges.

For the glaze, whisk together powdered sugar, salt, blood orange juice, coconut oil, and almond extract in a small bowl until smooth. Set rack with scones over a piece of wax paper and drizzle with glaze; let set before serving. These are best fresh - if not serving immediately, store unglazed in an airtight container and glaze just before serving. This kept well as room temperature for a few days in my case.

Friday, March 27, 2015

(Raw, Vegan) Chocolate Tarts


Ever since the Bavarian tart I’d made a few weeks prior, the Little Prince had been asking for pie or tart (“Ta’t! ta’t!”) several times a day. I finally took pity on him and made these chocolate tarts that happen to be raw, gluten-free and vegan. Really, I wanted something that he would recognize as tarts and that he would like, but without giving him something either too sugary or that would stain too easily (I’ll get around to blueberry pie eventually, but I’d love it if he were more dexterous first). I decided to double the recipe (which is what I wrote below) and had enough for 6 tartlets (my pans are slightly more than 4” at the bottom). The recipe came out great and we give it three thumbs up. The Engineer particularly likes the filling (which I must say came out way better than the last chocolate-cashew mousse I made). This is something I’ll be making again!

1 ½ cups rolled oats (GF if necessary)
1 ½ cups walnuts
½ tsp. sea salt, plus an extra pinch for the filling
6 Tbsp. + 2/3 cup cacao powder (or cocoa powder), divided
12 large, pitted medjool dates
2 Tbsp. + 2/3 cup maple syrup, divided
2 cups cashews, soaked overnight
2/3 cup coconut oil
2 tsp. vanilla
½ cup water
fresh raspberries or strawberries (optional)

To make the crust, grind oats in a food processor. Add walnuts and grind until they're quite crumbly. Add sea salt and 6 Tbsp. cacao and pulse to combine. Add the dates to the processor and process till mixture is sticking together. Add 2 Tbsp. maple syrup and continue to process till mixture is holding together really well. Press crust into your tartlet pans, making sure to keep the thickness even and get the sides nice and high. Refrigerate for one hour or more (up to a day or two).

In a high speed blender, blend the cashews, oil, 2/3 cup maple syrup, 2/3 cup cacao powder, vanilla, water, and a generous pinch of sea salt. Let it blend for as long as necessary to make it completely silky smooth.

Pour the filling into the tartlet shells. Refrigerate for several hours before serving, to let the ganache set. Top with fresh raspberries or strawberries if desired.

Thursday, March 26, 2015

Shepherd's Pie with Lentils, Mushrooms and Sweet Potato


I hesitated to blog about this recipe from The Kitchn, because I’m the only one who liked it. I knew the Little Prince doesn’t usually like lentils, but at least he ate the sweet potato topping (as long as there were no lentils clinging to it). The Engineer didn’t like it either, however, so I ate most of it myself over several days. It should be said that the fact that I managed that means I did think it was good! I thought the lentil and mushroom mixture had some great umami flavor going on and was well-seasoned, the oatmeal was a good binder, and I liked the topping, too. But I admit that as I was eating it, I thought that the potato-cheese topping from this recipe would have been better, and I might combine the two recipes eventually. Perhaps the name is disappointing, but even though I’m reluctant to use the term “shepherd’s pie” for something with sweet potato (and vegan to boot), I can’t really think of anything else.

My major discovery here, though, was bay leaves. I’ve always used them in whatever recipes called for them, perhaps more out of respect for the recipe than anything else, but I was wondering how much flavor they were really bringing. I know that spices can go stale quickly, but even when I opened a new jar or bag, their aroma was very faint and I just wasn’t convinced they were making much of a difference. This time, however, I got a brand new jar (from Morton & Bassett, for those who want to know), and the leaves were a bright, dark green in it – they looked fresher than I’ve ever seen them. As soon as I screw off the lid, I was hit with a powerful smell that reminded me of eucalyptus. And I think that’s when I got it: for my entire life up to that point, I had been cooking with subpar, stale bay leaves! The one leaf I used in this recipe really did make a difference. I’m going to seek out this brand now, and make sure the leaves look fresh when I buy them (now that I know what to look for). Also, I’m now storing them in the freezer.

5 medium sweet potatoes, scrubbed
1 cup brown or green lentils, washed and picked over
¾ cup uncooked steel cut oats (GF if necessary)
1 bay leaf (see note above)
1 tsp. salt
1 Tbsp. olive oil
1 lb. cremini mushrooms, divided
1 medium yellow onion, chopped
1 large carrot, chopped
1 celery stalk, chopped
1 garlic clove, minced
¾ cup low-sodium vegetable stock
¼ cup red wine
1 Tbsp. tomato paste
1 Tbsp. soy sauce or tamari (GF if necessary)
1 tsp. smoked paprika
¼ cup chopped fresh parsley

Preheat the oven to 400 °F. Prick each sweet potato several times with a fork and place on a baking sheet. Roast for 45 minutes to 1 hour, or until very soft to the touch. Set aside to cool.

In a medium pot, combine the lentils, oats, bay leaf, and salt with 5 cups of water. Bring to a boil and lower heat. Simmer uncovered for 15-20 minutes, or until lentils are soft but not mushy, stirring occasionally to keep the oats from sticking to the bottom of the pot. Discard bay leaf and drain mixture into a colander or sieve.

While the lentils and oats are cooking, finely chop half of the mushrooms and set aside. Cut the remaining mushrooms into quarters. Warm the olive oil in a large pot over medium-high heat. Add the quartered mushrooms and a pinch of salt and cook until browned and soft. Add the chopped mushrooms, onion, carrot, celery, and garlic and cook, stirring occasionally, until onions are soft and translucent. Lower heat to medium and add the lentil and oat mixture, followed by the vegetable stock, wine, tomato paste, soy sauce, paprika, parsley, and a few grinds of black pepper. Simmer mixture for 5 minutes. Taste, and add salt or correct the seasonings as needed.

Preheat oven to 350 °F. Peel sweet potatoes and place in a medium bowl. Mash them into a smooth paste and season to taste with salt and pepper.

Evenly spread the lentil mixture into a 9”x13” baking dish. Spoon the sweet potato mixture on top and smooth with a spatula. Bake for 30 minutes, or until the filling is bubbling at the edges.

Wednesday, March 25, 2015

Banana Zucchini Chocolate Chip Muffins

I tried a few “healthy” muffin recipes in the past month-and-a-half. There was one that billed itself as You-Won’t-Believe-They’re-Whole-Wheat Blueberry Muffins, but you know what? I could totally believe it. And I didn’t enjoy it. So I scrapped that one. I also tried chocolate quinoa muffins with beet, which happened to be gluten-free, but they were a disappointment. They tasted great, but they fell apart all the time (the Engineer said he didn’t mind, but I certainly did). Plus, the quinoa ended up being crisp and unpleasant to bite into, even though it was cooked. So I scrapped that one too.

But then there were these banana zucchini chocolate chip muffins from Averie Cooks, which reminded me of the ones I got from Garden Lites on occasion. It’s a bit of an odd recipe, in that it makes 11 muffins, and some of them aren’t pretty. I’m including a picture of the muffin tin so you can see what I mean – I think it would have been better if I had put a little less batter in each, and yet somehow I still wouldn’t have had enough for a 12th muffin… I mean, I was filling each tin the same way I do for any other recipe, and when I got to the 11th cup, I was like, “Well, what do you know, this actually does make 11 and not 12!” I reordered the steps below to make the recipe easier. These muffins were very good, and we give them three thumbs up. Next time I make them, I’ll use a little less sugar, because I found them a bit too sweet. The flavors were even better the second day, though.


1 ½ cups all-purpose flour
1 Tbsp. baking powder
1 pinch of salt
¾ cup granulated sugar
¼ cup light brown sugar, packed
1/3 cup coconut oil, melted
2 Tbsp. unsweetened vanilla almond milk (any lactose-free milk may be substituted)
2 tsp. vanilla extract
1 tsp. cinnamon
1 cup ripe mashed bananas (about 2 small/medium bananas)
1 ¼ cups shredded zucchini, measured loosely laid in cup (about 1 medium zucchini; I didn't peel it)
about 11 tsp. mini semi-sweet chocolate chips divided (regular-sized chips may be substituted)

Preheat oven to 400 °F. Spray a muffin pan with floured cooking spray or grease and flour the pan; set aside.

In a medium bowl, mix the flour, baking powder and salt. Set aside.

In a large bowl, whisk together the sugar, brown sugar, coconut oil, milk, vanilla and cinnamon. Add the bananas and whisk to combine.

Before adding the zucchini, put it in a paper towel and squeeze tightly for about 10 seconds to remove some moisture. After squeezing, you should have about ¾ cup of compacted shreds. Add zucchini to bowl and stir to incorporate.

Add the dry ingredients to the bowl and mix until just combined.

Using an ice cream scoop (my preferred method), turn batter out into prepared pan, noting that the recipe yields 11 muffins (trying to get 12 muffins out of this would result in muffins that are too small; each cavity should be filled about ¾ cup full).

Sprinkle the top of each muffin generously with mini chocolate chips, about 1 teaspoon each.

Bake for 10 minutes, reduce oven temp to 350 °F and bake for 8 minutes, or until muffins are set, domed, golden, and a toothpick comes out clean or with a few moist crumbs, but no batter. Allow muffins to cool in pan for about 10 to 15 minutes, or until they've firmed up and are cool enough to handle. (The top will flatten as they cool.)

Saturday, March 21, 2015

Baked Honey Garlic Chicken


This chicken dish, from Damn Delicious, was oh-so-good. It’s an easy recipe, mostly hands-off, because it’s baked instead of fried. What really makes it delicious, though, is the sauce! It’s thick with honey, but still has a depth of flavor thanks to the garlic and soy sauce. I’m definitely adding this to my rotation!

Note that I doubled the recipe below to get 6 generous servings, but the dish was better the first night. You could always top the chicken with the sauce before serving, as opposed to stirring everything together. I served it with coconut rice with ginger.

For the chicken
1 lb. boneless, skinless chicken breasts, cut into 1-inch chunks
kosher salt and freshly ground black pepper, to taste
2 large eggs, beaten
1 cup panko

For the honey garlic sauce
1/3 cup honey
4 cloves garlic, minced
2 Tbsp. soy sauce
1 Tbsp. sriracha (optional; I only used a few drops)
1 Tbsp. cornstarch
1/3 cup water

For garnish
2 green onions, thinly sliced
2 tsp. sesame seeds

Preheat oven to 400 °F. Lightly oil a 9”x13” baking dish or coat with nonstick spray (I lined it with tin foil for easier clean-up).

Season chicken with salt and pepper, to taste. Working in batches, dip chicken in the beaten eggs, then dredge in panko, pressing to coat.

Add chicken to prepared baking dish. Place in oven and bake until golden brown and crisp, about 15-20 minutes.

Meanwhile, in a medium saucepan over medium-high heat, combine honey, garlic, soy sauce and sriracha, if using. In a small bowl, combine cornstarch and water. Stir mixture into the saucepan until thickened, about 1-2 minutes.

Once chicken is cooked, coat with sauce and gently toss to combine.

Serve immediately, garnished with green onions and sesame seeds, if desired.

Friday, March 20, 2015

Batch of links - Gender roles

I’m still going through my backlogged links for these Friday posts and seeing how I can make a few thematic posts. This one is about the very broad topic of gender roles (which includes feminism and parenting here), though I’ll have to continue the conversation in a separate post – there are just too many links!

- Joseph Gordon-Levitt on why he’s exploring the word “feminism” and online misogyny for an episode of the second season of his TV show.

- And in case you missed it, here’s Emma Watson’s speech on feminism, delivered at the UN, where she introduced He For She.

- One of my favorite quotes by Joss Whedon was his answer to a reporter who had asked him why he creates strong female characters. He replied, “Because you’re still asking me that question.” Well, I found a video with a much more elaborate answer and the context to that quote, and it made me like Joss Whedon even more.

- Some might contend that any story with a prominent female character is automatically balanced, but I read a great essay saying that we are losing all our strong female characters to Trinity Syndrome.

- This article by Kameron Hurley is well worth the read: “We Have Always Fought”: Challenging the “Women, Cattle and Slaves” Narrative.

- A great article by actress Zosia Mamet on why she won’t lean in, thanks. Essentially, we need to embrace the idea that success can be defined by markers other than the traditional male ones (power and money). Related: Women shouldn’t have to lead like men to be successful.

- Of course, this type of sexism goes both ways. We also need to recognize that men are fully capable of taking care of things on the home front, including chores and parenting.

- While we’re on that topic, here’s why Ivanka Trump says work-life balance is impossible.

- Katharine Zaleski admits that she didn’t realize how horrible a manager she had been – until she had a child of her own. What’s awesome is that in addition to writing about it, she has also cofounded PowerToFly, an organization that matches women in technical positions to work they can do from home on a flexible schedule.

- Why don’t women advance at work? Ask a transgender person, who’s seen it from both perspectives first-hand.

- As a matter of fact, a Harvard Business Review study suggests that women are not the ones holding themselves back at work, contrary to popular belief. “The authors found no correlation at all between career success and decisions an individual makes to accommodate family, by limiting travel, choosing more flexible hours, or moving laterally within a company.”

- I’ve noticed the gender segregation in most toy stores in the past few years (it was happening before, but I’ve only really set foot in there since my pregnancy). Data actually suggests that toys are more gendered than ever (and another study shows that “even when gendered marketing was most pronounced in the 20th century, roughly half of toys were still being advertised in a gender-neutral manner,” but the gender-neutral category has now completely disappeared for some retailers). I love it when stores offer gender-neutral toys, like the ones I see at Ikea (though we don’t have one in San Antonio, sadly). I therefore liked this throwback to the iconic 1981 Lego ad that featured a girl playing with multi-colored Legos. Today’s “girl Legos” are often exclusively in shades of pink and purple, and it is implied that the multi-colored ones are for boys – ridiculous! This comic sums it up well.

- Moreover, forcing kids to stick to gender roles can be harmful to their health (and obviously, this is not the same as encouraging their interests even if they happen to intersect with gender roles).

- If you could rid the world of gender, would you? Sweden is conducting an interesting social experiment and moving in that direction. I see this as having many great advantages, but personally, I think that outright banning certain forms of (stereotypical) gender-normative play is taking it too far.

- I loved this Smithsonian article about when girls started wearing pink. This is something of which so few people are aware: it used to be that children wore gender-neutral clothing for the first several years of their life. In the mid-19th century, light pink and light blue and other pastels were introduced as colors for babies, and they became associated with gender around WWI, but it wasn’t the same as today: “For example, a June 1918 article from the trade publication Earnshaw's Infants' Department said, ‘The generally accepted rule is pink for the boys, and blue for the girls. The reason is that pink, being a more decided and stronger color, is more suitable for the boy, while blue, which is more delicate and dainty, is prettier for the girl.’” So this “tradition” we have today of pink for girls is a complete social construct and not self-evident at all, unlike what I’ve heard some people say to me!

- And here are 5 ways to avoid implicit sexism when parenting.

- There is now a line of clothing that makes twirly dresses with robots and dinosaurs on them; it’s called Princess Awesome and was funded on Kickstarter. My favorite is the pi dress!

- We’ve long been told that girls don’t do as well as boys in math and that we need to make sure girls see STEM fields as an option. While this is true, another problem that has gotten less attention in the past decades (but that seems to be getting more attention now) is that overall, girls do better in school than boys. There’s been some theories that this might be because the skills required for traditional schooling are instilled in girls more than in boys (the latter being seen as more hyperactive or mischievous). In any event, this seems more important to me now that I have a boy.

- Scientists are now redefining sex as a continuum. Yes, that’s sex, not gender!

- Here are 13 myths and misconceptions about trans women.

- Hopefully, after reading the previous link, you’re prepared to assess the stupidity of a (Republican, obviously) Florida lawmaker who decided that the use of single-sex facilities (such as public restrooms) would be restricted according to people’s biological sex at birth. Surprisingly, he doesn’t think this is discriminatory against transgender people because, get this: he says that using the bathroom is a choice! His policy is both ignorant and dangerous to the public. Meanwhile, Montreal’s Dawson College converted two of its men’s rooms into gender-neutral rooms that “may be used by any person regardless of gender identity or expression” – thank God some people are more rational than Florida lawmakers! There’s also a new app that lets trans gender people know which public bathrooms are safe to use.

Thursday, March 19, 2015

Chocolate Avocado Cake


You know by now I like trying vegan recipes with a twist, like those that put vegetables in dessert. To be fair here, avocados are fruit, not vegetables, but still, they’re not usually in sweet dishes! However, the chocolate avocado puddings I made recently were good enough to make me want to finally try this recipe, a chocolate avocado cake from Joy the Baker. I know some people, like Dear Brother-in-Law, would be completely turned off by this, but luckily, the Engineer was game. (As for the Little Prince, anything we call “cake” gets his attention!) And in this dessert, it’s not like you can hide the avocado and just not mention it. The frosting is bright green, people! (Come to think of it, this would be a good cake for Saint-Patrick’s Day!) The cake itself barely tastes like avocado, but with the frosting, you can’t deny the flavor. And yet, it totally works. Honestly, this was a great cake! I can’t go so far as to say that it was healthy, though, because even though the fats are healthy, it’s so full of sugar that it’s definitely an indulgence. I’d love to find a surefire way to reduce sugar in baked goods and still enjoy them!

As a side note, I had also bookmarked a gluten-free vegan chocolate avocado cake from One Green Planet, but I was afraid to try it because of the mint it calls for. You see, I abhor the combination of mint and chocolate (and I know someone else who feels the same way, so I’m not the only weirdo who gags when thinking of After Eights). However, I recently realized that perhaps what I can’t stand is really artificial mint flavor or concentrated mint extract, combined with chocolate (I also dislike candy canes, for example, but I really like fresh mint or wintergreen candy). So in the interest of science, I got a fresh mint leaf from the garden, chopped it very finely, and sprinkled it on a few bites of this cake. And you know what? It was actually pretty good. So if you want to add some finely chopped fresh mint to the icing, I won’t hold it against you, but I’d obviously warn you away from mint extract. I might even try a riff on this icing next, because it calls for agave as a sweetener instead of powdered sugar (in a 4:1 ratio of avocado to agave), and I’d love to see how that turns out!

For the chocolate avocado cake
3 cups all-purpose flour
6 Tbsp. unsweetened cocoa powder
2 tsp. baking powder
2 tsp. baking soda
½ tsp. salt
2 cups granulated sugar
¼ cup vegetable oil (I used safflower oil)
½ cup soft avocado, well mashed (about 1 medium avocado)
2 cups water
2 Tbsp. white vinegar
2 tsp. vanilla

Preheat oven to 350 °F. Grease and flour two 8- or 9-inch round cake pans.

In a medium bowl, sift together the flour, cocoa powder, baking powder, baking soda and salt. Set aside.

In a large bowl, mix together the sugar, vegetable oil, avocado, water, white vinegar and vanilla.

Add the dry ingredients to the wet ingredients and beat with a whisk until smooth.

Pour batter into a greased cake tins. Bake for 30 to 40 minutes, until a toothpick inserted comes out clean.

Let cakes cool in pan for 15 minutes, then turn out onto cooling racks to cool completely before frosting with avocado buttercream.

For the avocado buttercream frosting
8 oz. of avocado flesh (about 2 small- to medium-sized very ripe avocados)
2 tsp. lemon juice
1 lb. powdered sugar, sifted
½ tsp. vanilla

Peel and pit the avocados. (It’s important to use the ripest avocados you can get your hands on. If the avocados have brown spots in the flesh, avoid those spots when you scoop out the flesh.) Place the avocado flesh into the bowl of a stand mixer fit with the whisk attachment. Add lemon juice and whisk the avocado on medium speed until slightly lightened in color and smooth, about 2-3 minutes.

Add the powdered sugar a little at a time and beat. Add vanilla and beat until combined. If not using right away, store in the refrigerator. Surprisingly, the frosting will stay green for days – I’m assuming the sugar has something to do with this, because I can’t imagine there’s enough lemon juice to keep the whole thing green…

Wednesday, March 18, 2015

Baked Fried Chicken

I like fried chicken, but I never deep-fry anything at home. I’m much keener on baked versions of the dish for homemade dinners, to be honest, but some of them aren’t as good as others. The first time I made this recipe from Our Life Uncommon, I simply sprayed the baking sheet with oil instead of using the amount of butter recommended – it seemed like too much. But then the delicious coating stuck to the sheet instead of to the chicken, and I knew I should have listened. Even then, it was already good enough that I wanted another go at it. So I made it a second time a few weeks later, using margarine instead of butter so it would be lactose-free, and it was just perfect. This chicken is crisp and well-seasoned (I reduced the amount of paprika a bit, though), and everyone here loved it. It makes the kitchen smell fantastic! I don’t usually buy spice mixes, but this one was worth it just for this dish. The recipe below is my version, which has more precise quantities than the original, and the addition of lemon to the milk (since that’s closer to buttermilk, the classic to marinate fried chicken). The first time, I used the juice of my giant Meyer lemon, but a Eureka lemon will do, and you could even omit it.

The quantities below make 4-6 generous servings. The first time, I served it alongside roasted vegetables and a chickpea salad; the second time, I made a corn and tomato salad to accompany it.

2 lbs. chicken tenders
juice of half a lemon
about 1 cup of lactose-free milk
4 Tbsp. margarine (or butter), cut in pieces
1 cup all-purpose flour
½ tsp. salt
¾ tsp. pepper
1 Tbsp. Season-All
1 tsp. paprika

In a large bowl, mix the lemon juice and the milk. Put the chicken in the mixture and add milk to cover if needed. Let marinate in the fridge for at least 30 minutes.

Preheat oven to 400 °F. Line a 9”x13” baking pan with tin foil and place the margarine pieces in it. Melt the margarine in the preheated oven, then make sure it is spread evenly around the pan.

In a small bowl, mix the flour and spices. Shake excess milk off of chicken and completely coat each piece with the seasoning mix.

Place each piece of chicken in the pan. Cook for 20 min. Turn each piece of chicken and continue cooking for 15 more minutes, or until cooked through.

Tuesday, March 17, 2015

Date-Hazelnut Balls


I got this recipe from Gluten-Free Girl. I initially chose it because it helped me use up a lot of nuts in my pantry, though I admit I used pecans instead of walnuts. I also increased the amount of chocolate and coconut milk for the ganache (though I still kept the proportions the same), and used chocolate that was closer to 60% cocoa than 70%. The Engineer and I loved having these in the fridge for a quick treat at various times during the day! This recipe yielded 20 balls for me.

9 pitted Medjool dates
1 cup almond flour (I used almond meal)
½ cup raw hazelnuts
½ cup raw walnuts (I used pecans)
1 Tbsp. coconut oil
1 Tbsp. honey or agave nectar
1 pinch sea salt
4 oz. semi-sweet chocolate, chopped
½ cup coconut milk

Put the dates, almond flour, hazelnuts, walnuts, coconut oil, honey and salt in the bowl of a food processor. Process until everything is mixed into a fine crumble (but not so much as to make nut butter). The mixture should stick together between your fingers, but it should not gather into one ball. If the mixture feels too dry, add a teaspoon of water at a time.

Grab a tablespoon’s worth of the nut mixture and roll it into a ball. Put it on a parchment-lined baking sheet. Repeat until you have formed all the balls.

Freeze the balls until they are solid.

Put the chopped chocolate and coconut milk into the bowl of a double boiler and set over medium-high heat, stirring occasionally, until you have a smooth chocolate ganache.

Let the ganache cool enough to touch it. Twirl each date-hazelnut ball in the ganache (I like using two forks to do this), then put it on a cooling rack set over a parchment-lined baking sheet until the chocolate sets. (I put them right on the baking sheet because I didn’t mind having a flat bottom on the balls.)

Eat at room temperature for a soft ball that melts in the mouth. Refrigerate before eating for a more candy-like experience (this was our preference).

Flan aux poireaux et aux épinards

La recette suivante est adaptée du livre Qu’est-ce qu’on mange? Volume 3, publié par les Cercles des Fermières du Québec. Ma mère utilise de la farine de pois chiches au lieu de la farine de blé, ce qui en fait donc une recette sans gluten. Pour ma part, puisque je ne pouvais pas me procurer de crème sans lactose ici, et forte du succès de ma dernière tarte salée, j’ai utilisé du lait de noix de coco à la place. Nous avons tous aimé ce flan (qu’on pourrait comparer à une frittata ou à une quiche sans croûte), et c’est un bon moyen de faire manger des légumes au Petit Prince!

3 c. à soupe d’huile d’olive
3 gros poireaux, nettoyés et coupés en rondelles
sel et poivre du moulin
500 g (1 lb.) d’épinards, rincés et essorés
6 œufs
½ tasse de farine de pois chiches (ou de farine de blé)
1 tasse de lait sans lactose
1 tasse de lait de noix de coco (ou de crème sans lactose)
1 tasse de gruyère ou de cheddar extra-fort râpé
paprika, au goût

Préchauffer le four à 400 °F.

Faire chauffer l’huile dans un poêlon. Y faire revenir les poireaux 5 minutes, à feu moyen, en mélangeant souvent. Saler et poivrer. Réserver.

Dans une casserole contenant très peu d’eau, faire cuire les épinards 2 minutes, à feu vif. Les égoutter, puis les hacher grossièrement. Réserver.

Dans un bol, battre les œufs avec la farine de pois chiches, le lait et le lait de noix de coco, jusqu’à consistance homogène. Incorporer le fromage. Saler et poivrer. Réserver.

Tapisser de rondelles de poireaux un plat à quiche beurré. Couvrir uniformément d’épinards.

Verser la préparation aux œufs sur les légumes et saupoudrer de paprika, si désiré.

Cuire 15 minutes. Réduire la chaleur du four à 350 °F et poursuivre la cuisson de 20 à 25 minutes, jusqu’à ce que le flan soit doré.

Monday, March 16, 2015

Maple Cupcakes with Maple Cream Cheese Frosting


Now that I have found lactose-free cream cheese, I figured I could use it to make cream cheese frosting. I’m also looking for ways to eat less sugar, so cupcakes that are sweetened with maple syrup sounded great to me. (I know maple syrup is still a type of sugar, but at least from a nutrition standpoint, it’s better than cane sugar.) I ended up halving this maple cupcake recipe from The Kitchn, and they were delicious! The batter was very liquid, though, so I was afraid it would be a failure, but they turned out great. The crumb was slightly denser than that of regular cupcakes, but it was moist. And the frosting was perfect, even though I used vegan margarine instead of butter. It made me realize how much I’d missed cream cheese! The recipe below yields 12 cupcakes.

I had a little frosting left over, so I used some of it on beet cookies, since maple and beet go well together. They were really good, though I’d caution you to bake them less than recommended, especially if you’ve rolled them thinner!


For the maple cupcakes
1 ½ cups all-purpose flour
1 ½ tsp. baking powder
½ tsp. salt
¼ cup (½ stick) butter, slightly softened, cut into chunks (I used cold margarine)
1 Tbsp. vegetable shortening, at room temperature
1 cup pure maple syrup
1 egg yolk
1 large egg
¾ cup lactose-free whole milk

For the maple cream cheese frosting
6 Tbsp. unsalted butter, softened (I used vegan margarine)
6 oz. lactose-free cream cheese, softened
2 cups confectioners’ sugar, sifted
1 Tbsp. maple syrup

For the maple cupcakes
Preheat the oven to 325 °F. Line a 12-cup cupcake pans with paper liners.

In a medium bowl, sift together the flour, baking powder, and salt.

In the bowl of a stand mixer fitted with the paddle attachment, beat the butter and shortening until ribbon-like. Turn the mixer to low and stream in the maple syrup. Increase the speed to medium-high and beat until the mixture is nearly uniform in color, about 3 minutes.

Add the egg yolk and egg, one at a time, and beat until just incorporated. Scrape down the sides and bottom of the bowl. Add half of the flour mixture and mix on low speed until incorporated. Stream in the milk. Stop the mixer, add the rest of the flour, then turn the mixer on until just combined. Scrape down the sides and bottom of the bowl.

Fill the prepared cupcake pan about three-quarters full. Bake the cupcakes for 20 to 25 minutes, until a toothpick inserted in the center of a cupcake comes out clean. Note: These cupcakes take longer to bake than traditional cupcakes, due to the maple syrup.

Allow the cupcakes to cool for 15 minutes in the cupcake pan, then turn them out onto wire racks to cool completely.

For the maple cream cheese frosting
In the bowl of a stand mixer fitted with the paddle attachment, beat the softened butter until it is completely smooth. Add the cream cheese and beat until combined.

Add the sugar and the maple syrup and beat until smooth. Be careful not to overbeat the frosting or it will lose structure. (At this point, if you want to, you can tightly cover the frosting and refrigerate it for a day. Let it soften at room temperature before using.)

For assembling the cupcakes
Frost the cupcakes to your liking. Refrigerate any leftover cupcakes in an airtight container for up to 3 days. Bring cupcakes to room temperature before serving.

Saturday, March 14, 2015

Raspberry Mousse


This is a recipe from Whole Foods, but to be fair, I think it’s more like pudding than mousse. I changed the quantities slightly, using all juice instead of a mix of juice and water (my juice was from concentrate, though), which helped compensate for the extra tofu in my version (I didn’t want to leave just a few ounces in the package). I really liked this dessert, but the Little Prince was not convinced, and the Engineer doesn’t like raspberries to begin with. I garnished it with chocolate shavings and pomegranate arils that I had in the fridge, since I didn’t have fresh raspberries.

1 cup berry blend 100% juice
½ cup vegan cane sugar
¼ cup cornstarch
1/8 tsp. fine sea salt
2 cups (from two 6-oz. packages) fresh raspberries, divided (I used frozen raspberries that I thawed)
14 oz. silken tofu (refrigerated variety), drained (I used 16 oz.)
1 ½ oz. dark chocolate, shaved with a vegetable peeler

In a medium pot, whisk together juice, sugar, cornstarch and salt and bring to a simmer over medium heat, whisking often. Reduce heat to medium-low and cook 30 seconds more, whisking constantly; remove pot from heat. (Juice mixture will be very thick.)

In a food processor, purée 1 ½ cups raspberries and the tofu until creamy and smooth. Add juice mixture and process until well combined. Spoon mousse into small dishes or a serving bowl, cover and chill until very cold, 4 to 6 hours.

Garnish with chocolate shavings and remaining ½ cup raspberries. Serve immediately.

Gratin de macaronis aux trois fromages

Je sais, je parle souvent de macaronis au fromage. Je pense que c’est en partie parce que l’Ingénieur aime beaucoup ça et en partie parce que je cherche des recettes sans lactose qui me satisferont. Cette recette-ci, de Coup de Pouce, me satisfait! Elle est très bonne et remplacera d’ailleurs celle de Martha Stewart que j’ai faite il y a deux ans et qui laissait à désirer. La recette de Coup de Pouce est meilleure et plus simple. J’ai fait un peu plus de garniture (mes quantités sont ci-dessous), et la prochaine fois, j’ajouterais un peu plus de sel et je m’assurerais d’utiliser du cheddar extra-fort, pour que ça goûte un peu plus.

3 tasses de macaronis ou autres pâtes courtes
3 c. à soupe + 1 c. à soupe de beurre ou de margarine
½ c. à soupe de thym frais, haché (ou ½ c. à thé de thym séché)
1/3 tasse de farine
4 tasses de lait entier sans lactose
1 c. à soupe de moutarde de Dijon
¼ c. à thé de noix de muscade râpée
¼ c. à thé de sel (ou plus, au goût)
¼ c. à thé de poivre noir du moulin
1 pincée de piment de Cayenne
1 ¾ tasse de gruyère râpé
1 ¾ tasse de cheddar extra-fort râpé
¾ tasse de chapelure panko
½ tasse de parmesan râpé

Préchauffer le four à 400 °F. Beurrer légèrement un plat de 12 tasses (3 L; j’ai pris un plat de 9"x13").

Dans une grande casserole d'eau bouillante salée, cuire les pâtes pendant environ 8 minutes ou jusqu'à ce qu'elles soient al dente. Égoutter et réserver.

Entre-temps, dans un grand poêlon, faire fondre 3 c. à soupe du beurre à feu moyen. Ajouter le thym et cuire, en brassant de temps à autre, pendant 1 minute ou jusqu'à ce qu'il dégage son arôme. À l'aide d'un fouet, incorporer la farine, et cuire, en brassant, pendant 2 minutes. Verser le lait petit à petit en fouettant sans arrêt jusqu'à ce que la préparation soit lisse. Cuire, en fouettant souvent, pendant environ 7 minutes ou jusqu'à ce que la sauce ait épaissi. Incorporer la moutarde, la muscade, le sel, le poivre et le piment de Cayenne. Ajouter le gruyère et le cheddar et cuire, en brassant, jusqu'à ce que les fromages aient fondu.

Ajouter les macaronis réservés à la sauce et mélanger pour bien les enrober. Verser les macaronis dans le plat préparé.

Dans un petit bol, mélanger la chapelure et le parmesan. Couper le reste du beurre en dés et l'incorporer avec les doigts jusqu'à ce que la garniture ait une texture sablonneuse. Parsemer la garniture sur les macaronis.

Cuire au four pendant environ 25 minutes ou jusqu'à ce que la sauce soit bouillonnante, et la garniture, dorée. Laisser reposer pendant 10 minutes avant de servir.

Friday, March 13, 2015

Petits pots au chocolat et à l'avocat

J’ai essayé deux recettes de petits pots au chocolat récemment. Selon la définition que l’on veut bien utiliser, il s’agit de genre de poudings ou de mousses au chocolat végétaliennes. La première était à base de crème de noix de cajou. L’Ingénieur l’a trouvée délicieuse, et le Petit Prince a beaucoup apprécié lui aussi, mais moi, je la trouvais fade. Enfin, c’était bon, crémeux et tout, mais ça ne goûtait pas assez le chocolat à mon goût. Je me suis ensuite rabattue sur une recette de mousse au chocolat et à l’avocat, celle trouvée sur Christelle is Flabbergasting (pour les anglophones, il y en a une très semblable sur The Kitchn).

J’ai doublé la recette, histoire d’en avoir plus que deux portions (ça se garde très bien au frigo); la recette ci-dessous donne entre 4 et 6 portions dans de petits ramequins. C’est délicieux, c’est riche, c’est ultra-rapide, c’est même relativement santé. Je n’aurais pas pu deviner qu’il y avait de l’avocat, en plus; le chocolat a l’avantage de bien masquer le goût des autres ingrédients. Conclusion : j’adore ça. Je préfère utiliser seulement des arilles de grenade en garniture et laisser tomber les pistaches; ce serait aussi bon avec d’autres fruits, comme des framboises ou des bleuets. La prochaine fois, j’essaierais peut-être d’y ajouter un peu de beurre d’amandes, comme le suggère cette recette.

2 avocats bien mûrs
½ tasse de cacao (je recommande de le tamiser)
½ tasse de sirop d’érable (ou de sirop d’agave ou de miel)
1 c. à thé de pâte de vanille (ou d’extrait de vanille ou les graines d’une gousse de vanille)
1 bonne pincée de fleur de sel
Garniture : arilles de grenade ou autres fruits; pistaches ou autres noix concassées (facultatif)

Mélanger tous les ingrédients à l’aide d’un mixeur plongeant (ou au robot culinaire), jusqu’à obtenir une texture homogène.

Garnir des arilles de grenade et des pistaches, au goût.


Batch of links - Drugs... Uh, I mean, pharmaceuticals

- An interesting recap of the medical uses of marijuana. (And as a recreational drug, at least it’s probably the least deadly.)

- An article about women and alcoholism, in which we learn about why they drink, how their body reacts, and why traditional treatment methods like AA often don’t work for them.

- Did you know that the top-selling drug in America is Abilify? It’s an anti-psychotic most often used to treat depression, except… scientists aren’t sure how it works. It is also used to treat schizophrenia, FYI.

- I read that 1 in 4 women in America is on psychiatric medication, compared with 1 in 7 men. The psychiatrist who wrote the article says that “this is insane” and that women are probably being overmedicated because they show more emotion than men, who are considered the norm. “Obviously, there are situations where psychiatric medications are called for. The problem is too many genuinely ill people remain untreated, mostly because of socioeconomic factors. People who don’t really need these drugs are trying to medicate a normal reaction […]. This emotional blunting encourages women to take on behaviors that are typically approved by men.”

- I recently read the most interesting New Yorker article about psychedelics. It’s a very long read, but well worth your time. In a nutshell, the author, Michael Pollan, explains the current state of research into psychedelics, and it’s really fascinating. For example, LSD is being used to treat anxiety about death in some patients with terminal cancer, and a single dose had such a great impact that their lives were still positively affected 18 months later! There’s also an explanation on how psychedelics affect the brain and how they work exactly, and it really seems like if society can get over its hang-up with this drug, it could do wonders for patient care, under the supervision of trained professionals.

- Scientists have discovered that roughly 20% of the population has a genetic mutation that enables them to produce anandamide – a feel-good chemical akin to THC. This could help explain, in part, why some people are more anxious than others and feel a greater need for drugs such as marijuana: to alleviate anxiety that others (20%) simply don’t feel. According to the article, those who have the mutation usually don’t find marijuana pleasant. I wonder whether that also has something to do with why some people feel relaxed when using marijuana but others actually feel increased anxiety?

- I’ve also heard interesting things about addiction in general recently. We’ve always been told that using drugs even one time can alter the brain and make the user physically addicted to that drug for the rest of his/her life, and that the user wouldn’t have any control over it. I’ve internalized that addiction is a genetic disease. Some researchers are challenging that, however. For example, Carl Hart., Ph.D., says his research shows that drug addicts make rational choices. Let me quote from the article: “The image of a crack-starved addict who will do anything for another taste of his drug isn't backed up by the scientific evidence, according to a psychology professor at Columbia. In an interview with the New York Times […], Carl Hart said his research, as well as the work of others, shows drug addicts respond rationally and will regularly turn down crack or methamphetamine -- even if it's their drug of choice -- if presented with other options.”

- And then there’s Johann Hari, who says that everything we know about drug addiction is wrong. In a nutshell, we’ve all been told that using heroin is what makes you a heroin addict, that it just happens when you use it for a few weeks or so. It turns out that is demonstrably false. Addiction has more to do with one’s environment and psychology than anything in the drug itself. Portugal currently seems to have the best handle on the problem, with solutions that actually work in reducing rates of addiction by giving addicts a purpose in life.

- A recent article on IFLS corroborates this, saying that in short, for the majority of users, “what determines whether or not drug use escalates into addiction, and the prognosis once it has, is less to do with the power of the drug and more to do with the social, personal and economic circumstances of the user.”

- I’ve always said that I’m surprised that the 12-step program is still the most popular treatment in the early 21st century. Well, the UK is stepping up its game by covering pills that reduce alcohol dependency in patients (and I use the term “patients” loosely, because the target audience is likely middle-class drinkers who don’t think they have a problem, but who can’t reduce consumption on their own).

Friday, March 06, 2015

Batch of links

- Did you know that lung cancer is the number one cancer killer of women? It doesn’t only affect smokers, either.

- Here’s a great animated short of how Alzheimer’s disease affects the brain.

- I very much liked this plea to the media to quit using the word adoption, which you should follow up with a video appropriately titled If you wouldn’t say it about a boob job…

- This video on archery is the coolest. Makes me want to pick up a bow and arrow next time I need a hobby, really.

- A great guide to spend 24 hours in Montreal, by Ali Inay. This makes me realize I’ve been gone a while, since I’ve never heard of many of these places!

- It turns out it isn’t illegal to deface Canadian banknotes, just frowned upon (the Bank of Canada says it is “inappropriate”). On a related note, my friend the Actor says, “Of all the Prime Ministers we’ve encountered on our money, Spock was the most… scribbled.”

- Did you know that gamers are more likely to be social and educated than non-gamers?

- Oklahoma lawmakers are taking a stand – against history, because they don’t like what is being taught. I couldn’t make this up if I tried.

- The Internet in Real Time: watch how quickly data (and money) are generated!

- I wanted to share a link to Spent: Looking for Change, a 40-minute documentary about Americans who don’t have a bank account. (I found it via STFU, Parents.) I had no idea that it was so difficult for some people to open or maintain a bank account (even though they have a SSN and a job), and obviously, not having access to the financial services that come with a bank account makes life very hard. This was eye-opening!

- Former Governor Ted Strickland (D-Ohio) tried living on minimum wage for a week – he made it to Thursday.

- Oliver Sacks on learning he has terminal cancer. This was a good read.

- We’ve all noticed that Facebook restricts certain things in our newsfeed. For example, we don’t see all the posts from a page we’ve “liked” unless the creator of that page pays to have posts transmitted to more users – which is all the more unfair given that when we users “like” a page, we usually do so because we want to be kept in the loop! We also tend to see more of our friends’ content if we “like” it or comment on it, and the content with which we do not interact tends to disappear over time. This can lead to a situation where Facebook becomes a self-affirming bubble in which we only interact with things that don’t challenge our world views. This video explains it best by comparing the role of advertisers and monetization in Facebook and YouTube.

- I remember being at a bed-and-breakfast in France, maybe in 1999, when I met an interesting jazz aficionado. This man would go from Paris to London once a month to buy jazz records, and every once in a while, he would get together with his friends and they would pay for a private performance by their favorite artists, jazz or otherwise. He named some jazz greats (whose names I’ve since forgotten), but the one that stuck out to me was Jonny Lang. (This man liked talking about his love of music so much that, I kid you not, he travelled with a photo album of these performances. This was before smartphones, obviously.) Up until that point, it had never even occurred to me that “civilians” could pay for a private concert if they so pleased! Now, we tend to hear about it in the news when it’s someone uber-rich, like the Sultan of Brunei or something, but really, there are regular Joes out there who pay for this sort of thing! In any event, that’s why I was so interested when I found this price list for various artists. My favorite band’s in the $25-30k range; let me know if you want to chip in!

- How the music industry is literally brainwashing you into liking bad pop songs. It turns out that repeated exposure is a more effective way of getting you to like a song than actually writing one that suits your taste.

- On a similar note, I’ve said that country music often sounds the same to me. This six-song mashup proves my point better than I could express.

- Some people boycotted Amazon over its treatment of publisher Hachette, though with today’s retail landscape, this is becoming increasingly hard to do. Luckily, that dispute has been settled. There are other concerns, however, like the way Amazon treats its employees (or lets its subcontractors treat their employees), especially with the increased business around the holidays each year. I’m not sure that individuals boycotting such a big chain is useful or practical), but I think this is a case where being vocal about aspects we don’t like could create positive changes. (Just like Ringling Bros and Barnum & Bailey, who will be phasing elephants out of their performances by 2018, because customer expectations have changed. Hurray!)

- Finally, the USPS announced two weeks ago that it would issue a stamp honoring Maya Angelou, though at the time there was no release date and no artwork. Well, I’m pleased that for once, things are moving fast: the stamp will be released in a month, shortly after what would have been her 87th birthday. I’ve preordered mine!

Wednesday, March 04, 2015

Garlic Olive Oil Mashed Potatoes

I decided to make some mashed potatoes “like they do on American TV”, which is to say, using my stand mixer. I went with this recipe for garlic and olive oil mashed potatoes because it is dairy-free. I thought it was odd that the recipe called for red-skinned potatoes, because I’d heard those are usually too waxy to make good mashed potatoes, but I liked the result nonetheless. I ended up leaving the skins on (and perhaps that’s the draw of using red-skinned potatoes here?), because I know the Engineer loves it. In his family, mashed potatoes with the skin on was a treat, whereas I didn’t even know this was a thing until I met him. It turns out it’s really good! I served this with tourtière I had in the freezer, and on a side note, I’ve decided that from now on, I’m only freezing cooked tourtières. The potatoes were awesome, though, and I’d definitely make them again.

10-12 red potatoes (medium sized), cubed – skins left on or removed (I had 2 lbs. total)
¼ cup good quality olive oil
6 cloves of garlic, minced
6 Tbsp. of vegetable broth
1 tsp. of Himalayan sea salt or regular salt
1 bunch of chives, diced

Into a large Dutch oven, put the cubed potatoes and cover with cold water. Bring to a boil, then reduce heat to medium and boil until fork tender – about 18 minutes or so. Drain and add to your stand mixer (paddle attached) or pass your potatoes through a ricer or mash by hand with a hand masher. In a separate bowl, add the garlic, oil, broth and salt. Whisk that together and pour over the potatoes. Blend in the stand mixer until creamy. Add additional broth if you need to for extra creaminess. Then add the chopped chives, mixing well, and spoon into a serving dish. Serve immediately.

Tarte aux pommes à la bavaroise


Puisque j’ai maintenant du fromage à la crème sans lactose, j’avais décidé de fouiller dans mes vieilles recettes et d’en ressortir une que je faisais dans le temps où je digérais encore du lactose. Je suis tombée sur une tarte aux pommes à la bavaroise, dont j’ignore l’origine. J’aurais parié Kraft ou Philadelphia, et l’image (la même) sur leurs sites respectifs est très semblable (mais pas identique) à celle que j’ai découpée et collée dans mon cahier, mais la recette n’est pas la même. Il se peut que j’aie changé certaines quantités, mais toujours est-il que je ne peux pas retracer l’origine de ma version. Et puis bon, celle-ci, je l’ai faite avec une grosse poire plutôt que 2 pommes, vu ce que j’avais sous la main, et c’était vraiment délicieux. C’est le genre de recette qu’on pourrait faire avec du faux-mage à la crème, mais ça serait probablement trop fade. Je pense que du yogourt grec ne serais pas assez solide (malgré qu’il se solidifie en cuisant, alors ça vaudrait la peine d’essayer). Liberté fait par contre du fromage à la crème avec cultures actives qui a une teneur réduite en lactose – ça reste trop de lactose pour moi, mais certaines personnes qui tolèrent mieux le lactose pourraient y trouver leur bonheur.

Ça faisait plus de 10 ans que je n’avais pas fait cette recette, et elle n’était pas comme dans mes souvenirs! En mettant le mélange de pâte dans le moule, j’étais sûre que ça allait foirer, parce qu’il avait la consistance de sable et ne tenait pas ensemble. Et puis, le mélange de fromage était tellement liquide que je me suis dit que ça ne se pouvait pas. Et en fin de compte, tout a fonctionné, et le dessert était absolument génial! L’Ingénieur a même beaucoup aimé la pâte. J’ai fait ce dessert il y a un mois, et depuis ce temps, le Petit Prince me demande de la tarte. « Ta’te? Ta’te! » À n’importe quelle heure du jour. Il faut croire qu’il a vraiment aimé ça lui aussi!

½ tasse de beurre ou de margarine
1/3 tasse de sucre
1 pincée de sel
1 tasse de farine
1 œuf
1/3 tasse de sucre
1 paquet (8 oz. / 250 g.) de fromage à la crème sans lactose (voir plus haut)
2 pommes (ou 1 grosse poire) pelées et tranchées mince
sucre, cannelle, amandes effilées (facultatif, pour la garniture)

Préchauffer le four à 375 °F. Mélanger le beurre, la première quantité de sucre, le sel et la farine dans un bol (j’ai fait ça au robot). Presser la pâte dans le fond et sur 1 pouce des côtés d’un moule à charnière de 9 pouces ou d’un moule à tarte è fond amovible de 9 pouces.

Battre l’œuf et la deuxième quantité de sucre avec le fromage à la crème. Étendre uniformément dans le moule à tarte.

Disposer les pommes en forme de soleil sur la couche de fromage à la crème. Saupoudrer d’un peu de sucre et de cannelle, puis d’amandes effilées (j’ai sauté cette étape). Cuire au four pendant 45 minutes.

Laisser refroidir à la température de la pièce, puis réfrigérer (c’est bon tiède ou froid).

Tuesday, March 03, 2015

Za'atar Roast Chicken with Green Tahini Sauce

As I was catching up with my magazines early last fall, I came across this great article about Yotam Ottolenghi in Bon Appétit, and I promptly tore out the pages to make his za’atar roast chicken with green tahini sauce. And it was really fantastic. Although, note to self (and I know I’ve said this before, but this time I really mean it): for the love of God, stop serving chicken with the skin and bones! I wanted to give this recipe a chance as is, because it’s from Yotam Ottolenghi and all, but none of us here enjoy the skin or bones in a chicken, and especially here where the skin doesn’t crisp because of the marinade. So we remove the skin, but that takes away all the spices with it… I’m giving the recipe below as it was written, because I would have to adapt the cooking times to skinless, boneless chicken breasts and I haven’t had time to test it. Just know that the next time I’m making this, it’ll be with boneless, skinless chicken breasts. The Engineer and I both love it, though! I roasted some potatoes at the same time to complete the dish, since I wasn’t serving it with salads like in the article. Also, the original recipe had you toss the pine nuts in browned butter, but I’d skip that step entirely next time to keep the dish lactose-free, or omit the pine nuts entirely if I wanted a nut-free version.

For the green tahini sauce
2 cloves garlic, smashed
1 cup (lightly packed) flat-leaf parsley leaves with tender stems
½ cup tahini
¼ cup fresh lemon juice
kosher salt

For the chicken and assembly
1 3½–4-lb. chicken, cut into quarters, or 2 large skin-on, bone-in chicken breasts and 2 skin-on, bone-in chicken legs (see note above)
2 medium red onions, thinly sliced
2 cloves garlic smashed
1 lemon, thinly sliced, seeds removed
1 Tbsp. ground sumac
1½ tsp. ground allspice
1 tsp. ground cinnamon
1 cup low-sodium chicken broth or water
¼ cup olive oil, plus more for drizzling
kosher salt and freshly ground black pepper
2 Tbsp. za’atar
¼ cup pine nuts, toasted (optional, see note above)
6 pieces lavash or other flatbread

For the green tahini sauce
Pulse garlic, parsley, tahini, lemon juice, and ½ cup water in a food processor, adding more water if needed, until smooth (sauce should be the consistency of a thin mayonnaise); season with salt. If making ahead, cover and chill.

For the chicken and assembly
Toss chicken, onions, garlic, lemon, sumac, allspice, cinnamon, broth, and ¼ cup oil in a large resealable plastic bag; season with salt and pepper. Chill at least 2 hours.

Preheat oven to 400 °F. Place chicken, onions, garlic, and lemon on a rimmed baking sheet, spooning any remaining marinade over and around chicken. Sprinkle with za’atar and roast until chicken is browned and cooked through, 45–55 minutes.

Slice chicken breasts, if desired. Serve chicken with roasted onion and lemon, topped with pine nuts, with green tahini sauce and lavash.

Monday, March 02, 2015

Candlemas Crêpes - Juliette & Julia

If you’ve been following my blog for a while, or if you are familiar with francophone Christian culture, you’ll know that on February 2nd, we celebrate Candlemas with crêpes. And I’m told our neighbors to the south celebrate with tamales. (To be clear, I don’t believe I know anyone who still celebrates the religious aspects of the holiday, but the traditional culinary aspects, certainly. Those tend to be the best holiday traditions, in my opinion.) I made two kinds of crêpes this year, a new recipe and my old chocolate crêpes. I’ve now decided to renounce my old chocolate crêpes, because they’re really not that great, but I figured I’d share the new recipe. And then it occurred to me that I haven’t talked about last year’s crêpes either, as evidenced by the photo still on my hard drive! So I’m throwing that in. Note that both of these recipes are sweet, but many people will serve a main dish of savory buckwheat crêpes filled with a béchamel, ham and cheese, for example, before moving on to the sweet crêpes for dessert. Leftovers make for a great breakfast, too! And I’m going to mention this because just last summer, some friends of mine thought they were doing something wrong and they didn’t realize it’s par for the course: your first crêpe is usually going to be ruined. It’s really a tester for the heat of the pan and the amount of fat you’ve put in, and it almost seasons the pan for use. At our house, we call it the dog’s crêpe. I also recommend using 2 pans at the same time, to make faster work of the batch.

On a side note, ever since I saw Curtis Stone use a crêpe maker similar to this on Take Home Chef, I’ve been wondering whether that is what I need to make crêpes as thin as those I would like. My mother always made them in a pan, but somehow mine have always been thicker than hers. I always follow recipe instructions, I run the batter through a sieve and have even tried adding extra milk to make the batter thinner, but somehow my crêpes are never thin like hers! I do let the batter rest, and it’s not an issue of putting too much in the pan because even as I tilt the pan a bit to spread out the batter, it never reaches the edges before setting.

The first recipe is the one I made last year. It’s Julia Child’s recipe, which I got from this app (though a scaled down version also appears on Epicurious). I followed the written instructions, which call for a blender, but upon watching the included video, I realized that Julia Child mixes everything by hand. I personally liked using the blender, as it eliminated any lumps in the batter and made things easier – especially for pouring batter into the pan. These are fairly typical crêpes and I would recommend them to anyone who’s making them for the first time.

1 cup cold water
1 cup cold lactose-free milk
4 eggs
½ tsp. salt
1 ½ cups flour
4 Tbsp. melted butter or margarine

Put the liquids, eggs, and salt into the blender jar. Add the flour, then the butter. Cover and blend at top speed for 1 minute. If bits of flour adhere to sides of jar, dislodge with a rubber scraper and blend for 2 to 3 seconds more. Cover and refrigerate for at least 2 hours.

The batter should have the consistency of very light cream, just thick enough to coat a wooden spoon. If, after making your first crêpe, it seems too heavy, beat in a bit of water, a spoonful at a time.

Brush the skillet lightly with oil. Set over moderately high heat until the pan is just beginning to smoke. Immediately remove from heat and, holding handle of pan in your right hand, pour with your left hand a scant ¼ cup of batter in the middle of the pan. Quickly tilt the pan in all directions to run the batter all over the bottom of the pan into a thin film. (Pour any batter that does not adhere to the pan back into your bowl; judge the amount for your next crêpe accordingly.) Your cooked crêpe should be about 1/16 inch thick (see my note above). This whole operation takes but 2 to 3 seconds.

Return the pan to heat for 60 to 80 seconds, then jerk and toss pan sharply back and forth and up and down to loosen the crêpe. Lift its edges with a spatula and if the underside is a nice light brown, the crêpe is ready for turning.

Turn the crêpe by using two spatulas; or grasp the edges nearest you with your fingers and sweep it up toward you and over again into the pan in a reverse circle; or toss it over by a flip of the pan. (You can also flip it with a spatula like a pancake if you wish; don’t be intimidated by these techniques.)

Brown lightly for about 30 seconds on the other side. This second side is rarely more than a sporty brown, and is always kept as the underneath or nonpublic aspect of the crêpe (the first side is the ‘hero” side used by food stylists, FYI). As they are done, slide the crêpes onto a rack and let cool several minutes before stacking on a plate. Grease the skillet again, heat to just smoking, and proceed with the rest of the crêpes. Crêpes may be kept warm by covering them with a dish and setting them over simmering water or in a slow oven. Or they may be made several hours in advance and reheated when needed. (Crêpes freeze perfectly, according to this recipe, though I’ve never tried it. If it’s anything like pancakes, then that would be perfect!)

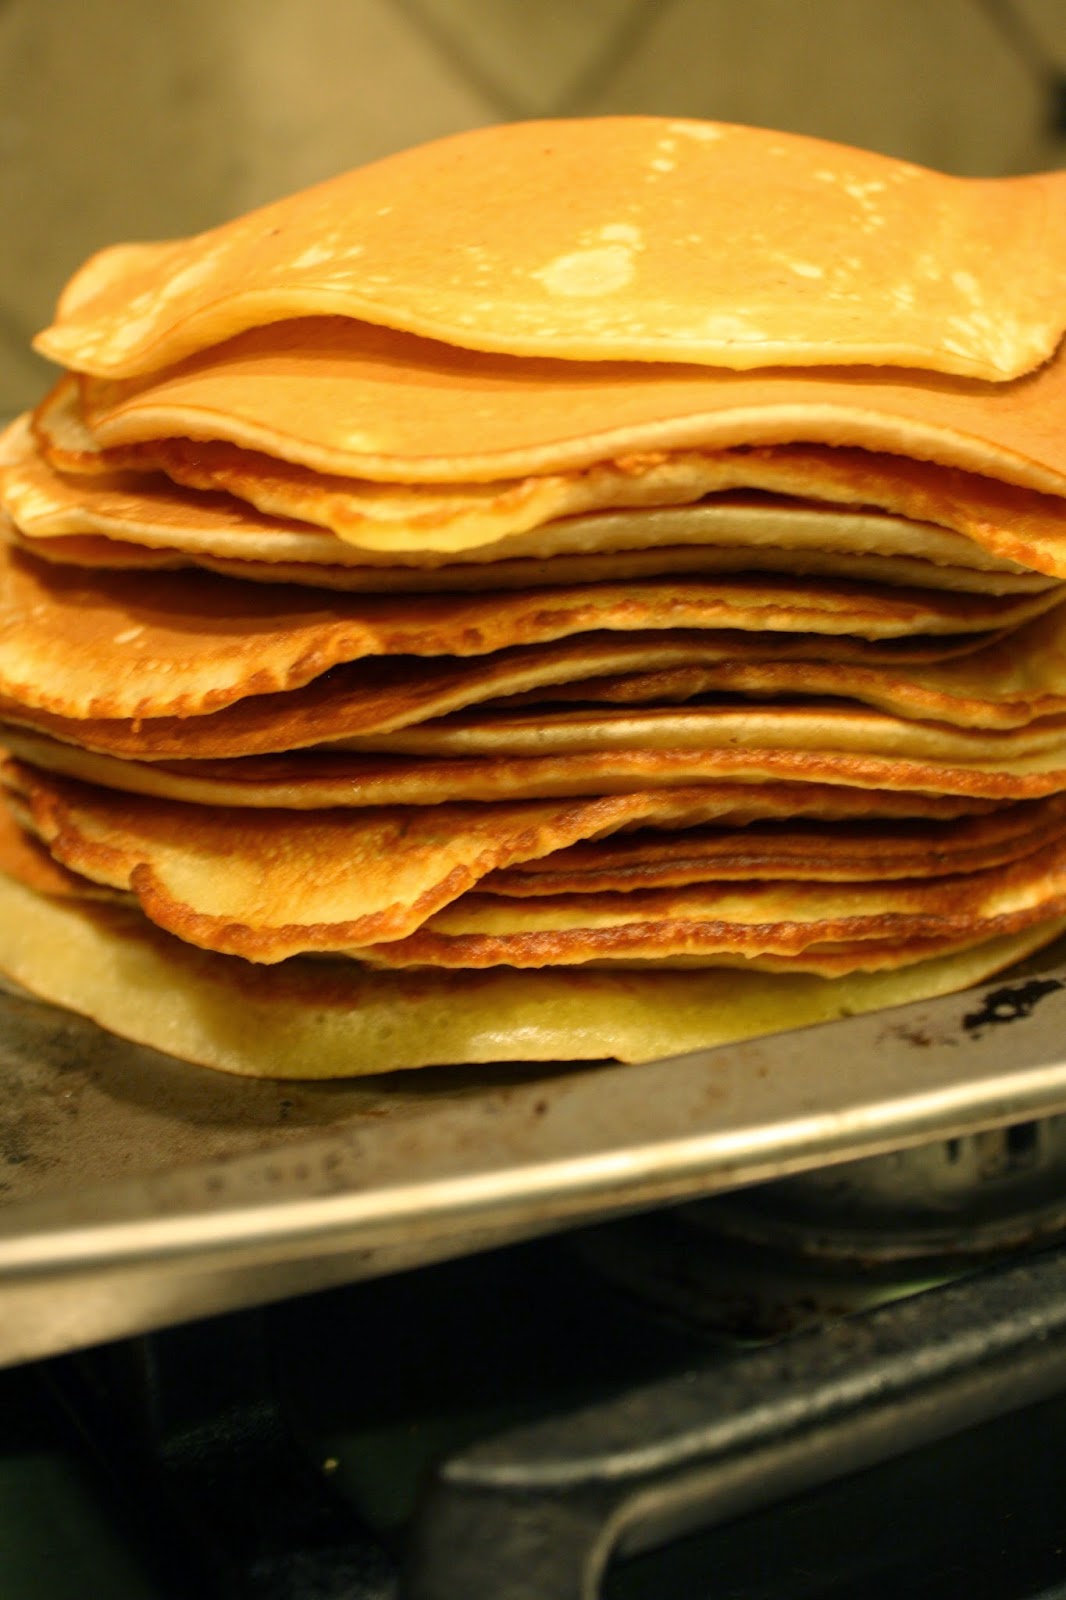
According to the recipe, this should make 25 to 30 crêpes, each 6 to 6½ inches in diameter, but as you can see, I got fewer – I think it was 11, though they may have been slightly larger than recommended. I like big crêpes and I cannot lie.


The second recipe, the one I tried this year, is Juliette Brun’s recipe; I went to school with her and she is now the famous and successful owner of Juliette & Chocolat in Montreal. This recipe is different from those I’ve seen before because it contains a lot (a lot!) of sugar. But obviously, it’s absolutely delicious, and it’s once a year, so to hell with nutrition. In her restaurant, these would probably be served with fresh fruit, chocolate syrup and whipped cream. Here at home, I went the more traditional way of lemon juice with sugar for some, and maple syrup for the rest. Warm Nutella also works really well. That being said, these are so sweet that they don’t need much accompaniment! You could halve the recipe if you’re not feeding an army. I keep the crêpes warm in the oven until I’m ready to serve them.

4 cups all-purpose white flour
2 cups sugar
1 pinch of salt
3 eggs
2 ½ cups lactose-free milk
1 ½ tsp. vanilla

Mix the flour, sugar and salt. Add the eggs, milk and vanilla and mix well. The ideal batter will have the consistency of 35% cream. Let the batter rest in the fridge overnight. (I made mine in the morning, ran it through a sieve before letting it rest, and took it back out again before dinner.)

Use a very hot nonstick pan or cast iron skillet – a drop of water in the pan should sizzle. (The recipe here doesn’t say anything, but I like using a tiny bit of oil in the skillet and replenishing it as needed; this would be less of an issue with a very well-seasoned cast iron pan, I suppose.) Cook the crêpes on medium heat (the technique is fairly standard, so just look at the recipe above for tips if need be).