Monday, October 10, 2022

Strawberry Chia Breakfast Pudding


I enjoyed this strawberry chia breakfast pudding, though next time, I would add some protein powder to keep me full longer. (Funnily enough, I thought the same thing about this overnight chocolate chia seed pudding, and now I just think that North American breakfasts in general seem to be high in carbs and low in proteins, which is why we get hungry mid-morning. Why are we doing this to ourselves?) 


½ cup chia seeds 
1 pinch kosher salt 
½ cup lactose-free plain whole-milk yogurt or unsweetened coconut yogurt 
1 tsp. pure vanilla extract 
2 cups lactose-free whole milk or coconut milk 
1 lb. fresh strawberries, hulled and thinly sliced (4 cups), plus more for serving 
3 Tbsp. granulated sugar (I omitted it) 
½ cup granola 

Combine chia seeds and salt in a medium bowl. Whisk in yogurt and vanilla. Slowly pour in milk, whisking constantly. Continue to whisk for 1 minute to break up any clumps. Cover and refrigerate for at least 4 hours and up to overnight. 

Gently toss strawberries with sugar in a bowl (I skipped this step). Cover and refrigerate for at least 1 hour and up to overnight. 

To serve, divide strawberry mixture between 4 glasses or bowls, using a slotted spoon. Top with chia pudding, 2 tablespoons granola each, and more sliced strawberries.

Batch of Bon Appétit links


Here’s Part 2 of the Bon Appétit links (Part 1 is here). 

- Why is Cream Soda Called “Cream” Anyway? This doesn’t give a definitive answer, but it’s informative! 


- Why I’ve Never Learned How to Cook, by Taffy Brodesser-Akner. Even though I clearly do cook, I enjoyed this article! 

- What You Need to Know About the Tipping Debate. Did you know that waiters in Texas make an abysmal $2.13 an hour before tips? 

- Here’s a day in the life of Nana Wilmot, a line cook at Le Coucou in NYC. (There’s also a video if you prefer, though it’s not as complete.) It raises the question of whether it’s possible for a woman to be a chef and have a family, or whether anyone can really afford to be a line cook in a big city. 

- Related: I Was Searching for a Cook Who Looked Like Me – Then I Found Edna Lewis, by Mashama Bailey, who opened The Grey in Savannah. 

- Buc-ee’s Is the Best Rest Stop in America. I’m biased because I live in Texas, and surprisingly enough there’s very rarely a Buc-ee’s on our road trips, but when we do stop there… it is pretty amazing! 

- An article about Frankie & Jo’s vegan ice creams. One of these days, I will plunk down the money and have a sample of everything shipped here. Unless I travel to Seattle first! 

- Speaking of which, Stop Telling Me to Travel Like a Local! I can’t get behind this article enough – really, I *want* to travel like a tourist! “That urgent tourist energy to see and do all sorts of things is far superior to the apathy of knowing something will always be there. Maybe it’s best not just to travel like a tourist, but to live like one too.” 

- What to Eat in Montreal in the Depths of Winter. Not sure if I’d be a local or a tourist, or something in between, but I’d be happy at all those places, that’s for sure!

Sunday, October 09, 2022

Gâteau au chocolat infaillible de Patrice Demers modifié par Amélie


Pour son anniversaire, l’Ingénieur m’a demandé un gâteau au chocolat. Je me suis rappelé que, lors de notre grand concours de gâteau au chocolat, son préféré à lui était le gâteau infaillible de Patrice Demers, publié dans nos livres de bébé La Bête). Malheureusement, je n’avais pas pris beaucoup de notes, mis à part le fait que je n’aimais pas la texture du chocolat haché dans le gâteau. Les instructions étaient peu précises, en plus, parce qu’une tasse de chocolat haché donne des quantités différentes selon la taille des morceaux… J’ai effectué une recherche Google et j’ai décidé que cela correspondait à 5 onces, alors je modifie les mesures ci-dessous en conséquence. J’ai aussi décidé de râper le chocolat dans le gâteau au lieu de le hacher, et grand bien m’en pris! C’était absolument délicieux, même si par moment j’avais plus l’impression de manger un brownie qu’un gâteau! 

La taille du moule n’était pas précisée dans la recette, alors en partant je ne trouve pas ça infaillible, vous voyez? Je recommanderais un moule à charnière de 9 pouces de diamètre. Les instructions disaient bien que ceci faisait un gâteau et que, pour faire un gâteau à deux étages, il suffisait de doubler la recette. Mais alors là, en doublant, j’en ai eu pour remplir trois moules de 8 pouces, dont un (à charnière) qui contenait un peu plus de pâte que les autres. On en a eu au moins 12 morceaux, c’était vraiment très riche, mais aussi très satisfaisant - et c’était jour de fête, alors je ne regrette rien! Les quantités ci-dessous sont pour le gâteau « simple », pas « double ». 

Pour le gâteau 
1 1/3 tasse de farine 
2/3 tasse de cacao 
1 c. à thé de poudre à pâte 
1 pincée de sel 
3 œufs 
1 ½ tasse de sucre 
2/3 tasse d’huile végétale 
½ tasse de crème sans lactose 
1 tasse de lait sans lactose 
3,5 (ou 4) oz. de chocolat râpé (j’avais du 60 %) 

Préchauffer le four à 350 °F. Recouvrir le fond d’un moule rond (voir ci-dessus) de papier sulfurisé et le graisser comme il faut. 

Dans un bol de taille moyenne, mélanger au fouet la farine, le cacao, la poudre à pâte et le sel. Réserver. 

Dans un grand bol, au malaxeur, fouetter les œufs et le sucre pendant 2 minutes. Ajouter graduellement l’huile en fouettant. 

Incorporer, en alternant, les ingrédients secs et les liquides. 

Terminer le mélange en incorporant délicatement le chocolat râpé. 

Mettre la pâte dans le moule et cuire au four 40 minutes, jusqu’à ce qu’un cure-dent inséré au milieu en ressorte propre. 


Pour le glaçage 
¾ tasse + 2 c. à soupe de crème sans lactose 
2 c. à soupe de sirop de maïs 
10 oz. de chocolat haché 
¼ tasse de beurre sans lactose, à la température de la pièce 

Amener la crème et le sirop de maïs à ébullition et verser sur le chocolat. 

Après une minute de repos, émulsionner au fouet 

Incorporer, toujours au fouet, le beurre. 

Recouvrir d’une pellicule plastique directement en contact avec la ganache et laisser figer quelques heures à la température de la pièce. La ganache sera crémeuse et facilement tartinable. On peut alors crémer le gâteau.


Deviled Eggs with Basil Aioli


For his birthday, the Engineer asked me to make deviled eggs. I wanted to try a new-to-me recipe, so I looked at this one on Orangette. I changed it a bit, using the basil aioli right into the yolk mixture instead of as a topping; I also now like to buy hard-boiled eggs and save myself that extra step, which makes the whole process infinitely more approachable. These were great! 

Shortcut basil aioli (yields a generous ½ cup) 
2 Tbsp. olive oil 
¼ cup packed basil leaves 
½ tsp. lemon juice 
1 medium garlic clove, pressed 
1 pinch of salt 
½ cup mayonnaise 

In the jar of a blender (or a small food processor or with a stick blender), combine the olive oil, basil, lemon juice, garlic, and salt. Process until the mixture is smooth, pausing every now and then to scrape down the side of the blender jar with a small spatula or spoon. 

Put the mayonnaise in a small bowl. Add the basil mixture and stir well to mix. 

Any basil aioli not used in this recipe can be served as a dip for raw vegetables, spread onto sandwiches, or folded into chicken salad. 

For the deviled eggs 
12 large eggs (see note above) 
1 Tbsp. olive oil 
2 Tbsp. jarred capers, drained, rinsed, and dried well 
6 Tbsp. basil aioli (see above) 
1 Tbsp. Dijon mustard 
½ tsp. lemon juice 
¼ tsp. salt, or more to taste 

Hard-boil the eggs. (As I noted above, I like to buy hard-boiled eggs, but here’s how Molly Wizenberg boils hers. Put them in a large pot, so that they can sit in a single layer. That’s important. Add cold water to cover by an inch or two, and place the pot over medium-high heat. Bring to a boil; then immediately cover the pot and remove it from the heat. Let sit exactly 12 minutes. Drain and rinse well with cold water.) 

Warm the oil in a small skillet over medium-high heat. When it’s hot and runs easily around the pan, add the capers; they should sizzle. Fry, shaking the skillet occasionally, until they split open and start to crisp, about 3 minutes (they should not brown). Fish them out of the skillet, leaving the oil behind, and drain them on a paper towel. 

When the eggs are fully cool, cut them in half (Molly Wizenberg likes to cut hers crosswise, but I cut mine lengthwise). Carefully remove the yolks and put them in a medium bowl. Trim a tiny sliver off the rounded end of the whites, so that they will sit upright when you serve them (I didn’t bother); then set them aside. Using a fork, mash the yolks. Add the aioli, mustard, lemon juice, and salt. Mash and mix until smooth. Taste, and adjust as necessary.

Just before serving, spoon the filling into a pastry bag, and pipe the filling into the egg white halves. If you don’t have a pastry bag, spoon the filling instead. Top the filled eggs with a few fried capers (I preferred the eggs without capers, but I’m in the minority group in my household).


Chicken Tacos with Pineapple Salsa

I had some canned pineapple to use up before the expiration date, so I ended up making two kinds of tacos with a pineapple salsa. Sadly, the honey ginger pork tacos with pineapple salsa were bland and disappointing, but the chicken tacos with pineapple salsa were well received by all! 


I’ll be the first to say that I would have preferred them with fresh pineapple, and that is how I would make them next time, but I was restricted by what I had to use up. I like to use carb-conscious tortillas now, and FYI, the corn tortillas often have more carbs than their wheat counterparts, so keep that in mind if you are watching your carb intake. 

For the pineapple salsa 
1 cup fresh pineapple, diced 
1 cup diced tomato, core and pulp removed before dicing 
1 cup orange bell pepper 
⅓ cup fresh cilantro, chopped 
¼ cup red onion, chopped 
1 jalapeño, diced (optional) 
3 Tbsp. fresh lime juice 
¼ tsp. kosher salt, plus more to taste 
¼ tsp. freshly ground black pepper 

For the chicken tacos 
½ cup lactose-free sour cream 
8 tortillas of your choice, warmed 
2 cups shredded red cabbage 
1 lb. (or thereabouts) of shredded rotisserie chicken 
2 avocados, peeled, pitted, halved, and sliced into ¼-inch thick half-moons 

In a medium bowl, combine the pineapple, tomatoes, bell pepper, cilantro, red onion, jalapeño (if using), lime juice, salt, and pepper. Drain the excess liquid from the salsa before using. Extra salsa will keep in an airtight container in the refrigerator for up to 3 days. 

Spread 1 tablespoon of sour cream evenly over a warm tortilla. Layer on ¼ cup red cabbage, 2 ounces chicken, sliced avocado, and top with 2 or 3 tablespoons pineapple salsa. Repeat to make the remaining tacos.


Saturday, October 08, 2022

Dark Chocolate and Roasted Beet Ice Cream


This is another recipe from Babka, Boulou & Blintzes – Jewish Chocolate Recipes from Around the World. It was intriguing to me, and somewhat up my alley, so I ended up trying it. 

The original recipe called for mint, but since I don’t like mixing that with chocolate, I omitted it. The original recipe also called for straining the beet purée so as to obtain a small amount of liquid, but I knew this would not make for a good ice cream consistency, so I just used the purée as is. 

In the end, this was a bit blander and had a harder consistency than I expected, and I’m not sure I’d make it again, but I’m glad I tried it. 

9 oz (250 g) whole raw beets, scrubbed (about 3 medium) 
½ cup + 2 Tbsp. lactose-free milk, divided 
½ cup lactose-free cream or substitute 
2 large egg yolks 
¼ cup granulated sugar 
2 oz (55 g) dark chocolate, chopped 

Preheat oven to 400 °F. Wrap the beets individually in foil and place them on a baking sheet. Roast for 40-60 minutes or until they are fork-tender. Let cool. 

When the beets are cool enough to handle, peel them, quarter them, and place them into a blender with 2 tablespoons of the milk; blend until smooth. Set aside. 

In a small saucepan, over low heat, combine the remaining milk and the cream. 

Meanwhile, in a small heatproof bowl, whisk together the egg yolks and sugar until light in color, then set aside. 

Slowly pour a few tablespoons of the hot milk mixture into the egg mixture, whisking continuously, then pour the egg mixture back into the pan of hot milk mixture, again whisking continuously. Increase the heat to medium-low and stir continuously until it thickens and turns a pale yellow, about 10 minutes (do not let the custard boil). Once it has thickened enough to coat the back of a spoon, remove from the heat and pour into a medium heatproof bowl to cool slightly. 
 
Meanwhile, melt the chocolate in a double-boiler. Let cool slightly, then stir into the custard. Then, stir in the beet purée. Chill, at least a few hours and up to overnight. 

Churn the ice cream base in your ice cream maker according to the manufacturer’s instructions. Store the finished ice cream in the freezer, but consider placing it in the refrigerator for 15-20 minutes before serving, to soften it a bit.

Friday, October 07, 2022

Mini Chocolate Cupcakes


This is also a recipe from the Weelicious Lunches cookbook. My kids really liked these in their lunchbox – I mean, what’s not to like? I called them cupcakes instead of the original name “doughnut muffins”, because they are sweeter than muffins yet are not rolled in sugar like typical doughnut muffins. Plus, “chocolate” is more descriptive! 

1 cup all-purpose flour (I used white whole wheat) 
¼ cup cocoa powder 
1 tsp. baking powder 
½ tsp. salt 
½ tsp. ground cinnamon (optional – my kids like it) 
2 Tbsp. lactose-free butter, softened 
½ cup sugar 
1 large egg 
½ cup lactose-free buttermilk substitute (½ Tbsp. vinegar or lemon juice, topped up with lactose-free milk) 
1 tsp. vanilla extract 

Preheat the oven to 350 °F and grease mini muffin cups (the recipe was supposed to make 24, but I got 20). 

In a medium bowl, whisk together the flour, cocoa powder, baking powder, salt, and cinnamon. Set aside. 

In the bowl of a stand mixer, cream together the butter and sugar until light and fluffy, about 3 minutes. 

Add the egg, buttermilk, and vanilla, and stir to combine. 

Add the dry ingredients to the wet ingredients and mix until just combined. 

Using a small ice cream scoop or a 1-tablespoon measure, scoop the batter into the prepared mini muffin cups. 

Bake for 10 minutes, or until the tops spring back when lightly pressed (this was more like 15-18 minutes in my case).


Pizza Cups


There was a recipe for pizza muffins in the Weelicious Lunches cookbook, which I still use a lot! The thing is that to me, this is what a pizza muffin looks like, so I had to find them a different name for these. They are made in a muffin pan, so the crust is concave, and therefore the word “cup” seems appropriate. They are very similar to this recipe below, from the Weelicious website. You can (and should!) customize the toppings to suit your kids’ taste. I used pepperoni and olives, but you could use bell peppers, mushrooms, onions, broccoli, ham, bacon, sausage crumbles… anything goes! The recipe below makes about 16 pizza cups, and they freeze well. Make sure not to overdo it on the pizza sauce, or else they will get messy when eaten – either way, make sure to put a napkin in that lunchbox. 

1 lb. pizza dough 
1 cup lactose-free mozzarella cheese, shredded 
½ cup pizza sauce 
olive oil 
toppings of choice (see above) 

Bring dough to room temperature and preheat oven to 450 °F. 

Roll out the dough to a thin 18” x 12” rectangle and cut into squares about 3” x 3” inches (I used a 4” cookie cutter). 

Grease muffin cups and place one square in each cup, making sure that the corners of the dough are sticking out and gently pressing them onto the pan. 

Brush edges of dough with olive oil. 

Par-bake dough for 8 minutes, or until the dough feels dry to the touch, and take tins out of oven. 

Pour 1-2 tsp of sauce in each cup and evenly distribute the cheese between the cups (you can add toppings now as well). 

Bake for an additional 5 minutes, or until the cheese is golden and bubbling. 

Cool and serve (or put it in the lunchbox, assuming your kids enjoy cold pizza – mine do).

Thursday, October 06, 2022

Instant Pot Peach Chicken with Basil


I was interested in a recipe for peach balsamic grilled chicken, but then I lost access to the site. Very shortly after, this recipe for instant pot chicken with the same flavors fell in my lap, and I decided it was providence. I served it as is the first night, but added leftover polenta and balsamic glaze the second night – I really recommend the balsamic glaze! I just need to remember to use it more often. 

1 Tbsp. olive oil 
1 tsp. kosher salt, divided 
1 large white or yellow onion, very thinly sliced 
4 peaches, no need to peel, sliced, divided 
¼ cup plus 1 Tbsp. balsamic vinegar, divided 
1 garlic clove, peeled 
¾ cup chicken stock 
2 lbs. boneless, skinless chicken breasts or thighs 
¼ cup tightly packed basil leaves, thinly sliced 
hot sauce to taste, optional 

Add the olive oil to an electric pressure cooker. Turn to sauté, add the onion and ¼ teaspoon salt and sauté for 7 minutes, stirring occasionally. 

Add 2 sliced peaches, ¼ cup balsamic vinegar, garlic, chicken stock, chicken, and remaining ¾ teaspoon salt to the pressure cooker. 

Secure the lid, select the manual setting, and set it to high pressure for 15 minutes. 

When the pressure cooker timer is done, quick-release the pressure. 

Remove the chicken, and shred or chop into bite sized pieces. Add back to the pressure cooker, along with the remaining 1 tablespoon balsamic, stirring to combine with the sauce. Taste and add additional salt if desired. 

Serve the chicken and sauce topped with 2 sliced peaches, a sprinkling of basil, and hot sauce to taste.


Muscovado Chocolate Chip Cookies


Here’s a recipe from Real Sweet by Shauna Sever. I was whittling down the contents of the pantry and decided that maybe I don’t need to keep muscovado sugar on hand, so I wanted to use it up. I’m never not in the mood for a chocolate chip cookie, so these were the obvious choice! I got a total of 17 cookies. 

1 2/3 cups (7 oz / 200 g) whole wheat pastry flour (I used white whole wheat flour) 
½ tsp. fine sea salt 
½ tsp. baking soda 
¼ tp. baking powder 
½ cup (1 stick) lactose-free butter, at room temperature 
2/3 cup (5.25 oz / 148 g) firmly packed dark muscovado sugar 
½ cup (3.5 oz / 100 g) turbinado sugar 
2 tsp. pure vanilla extract 
1 large egg, at room temperature 
1 generous cup (7 oz / 200 g) bittersweet chocolate chips 

In a medium bowl, whisk together flour, salt, baking soda, and baking powder. Set aside.

In the bowl of a stand mixer fitted with the paddle attachment, beat together the butter, sugars, and vanilla on medium-high speed for 5 full minutes, until lightened in texture and color. Add the egg and beat 1 minute more. Reduce the speed to low and stir in the dry ingredients. Stir in the chocolate chips. Cover the bowl and chill the dough in the refrigerator for at least 1 hour or up to overnight. 

Preheat the oven to 350 °F. Line a baking sheet with parchment paper. (You will be baking roughly 24 cookies – I had 17 – and I prefer baking one batch at a time; otherwise, prep 2 baking sheets, place the racks in the upper and lower third of the oven, and rotate halfway through the baking time.) 

Using a small ice cream scoop, shape the dough into balls of about 2 tablespoons each (I used my 3-oz scoop) and arrange on the prepared baking sheet. Bake until the cookies are set enough on their perimeters so that you can lift the very edges with a fingertip, but still soft in the centers, 12 to 14 minutes – do not overbake. Let the cookies cool completely on the baking sheets.


Monday, October 03, 2022

Batch of Bon Appétit links

 I’ve decided not to renew my subscription to Bon Appétit. I still enjoy reading it, but the price has gone up outrageously in recent years. It used to be $12 a year, then it went up to $15, which was still a great deal. But now it’s $50 a year, yet what I get from it hasn’t suddenly tripled in value, so I’m just going to drop it and maybe give money to someone’s substack or podcast instead. Anyway, this prompted me to look through my bookmarks to print out recipes to which I would lose access, as well as round up articles that had seemed interesting. I’m going to break this up into a few posts, but here are some links to Bon Appétit articles. 

- There’s this thing called ground vanilla that I really want to try. It is exactly what it sounds like – vanilla beans that are ground to a dry powder. Sort of like vanilla bean paste, but without the additives. The thing is that with my personality, I’m not likely to deviate from a recipe that calls for vanilla extract, even though it would be really simple, and presumably really delicious. I think I’ll wait until I come across a recipe that calls for it specifically before deciding that I can’t live without tasting it! 

- I talked about aquafaba before, but had not posted this link, which has tips such as using 1 tablespoon of aquafaba instead of 1 egg yolk, 2 tablespoons instead of 1 egg white, and 3 tablespoons instead of 1 egg. 


- Yes, I Bring My Children to Restaurants (this is possibly more aimed at non-parents than parents, though?). The Commandments of Going Out to Restaurants with Kids has tips for parents, though I feel like anyone who’s actually taken their kids to a restaurant would have figured these out already. 


- Why Restaurants Now Pay Attention to Kids’ Menus. Obviously this isn’t every restaurant, and I do feel like the vast majority oversimplify the kids’ menu, but I’m always pleasantly surprised when one treats them like little adults. 


- I can’t help but think that I’ve shared this already, but even so, it’s worth repeating: 50 Things Jenny Rosenstrach and Andy Ward have Learned About Feeding Kids

- Why Do Millennials Spend So Much Money on Food? There’s more to it than just inflation. 


Monday, September 26, 2022

Cauliflower Egg Cups


I made this recipe for lunch, and it was great. I like calling them egg cups rather than egg muffins, given that there’s no flour, but that’s just me. I liked the amount of cauliflower hidden in here! 

The recipe calls for ricing a head of cauliflower, but I used a bag of riced cauliflower straight from the freezer, without even thawing it and wringing out the water, and it turned out great, so I encourage the lazy approach. I got 14 muffins from this recipe and baked them in two batches, 25 minutes each time. I froze about half of them for later. 

This would be great served with a salad, like this kohlrabi and cabbage salad with maple lemon dressing, a rainbow carrot salad, or a simple green salad. 


1 large cauliflower (or about 3 cups riced cauliflower) 
6 oz. diced ham 
½ cup baby spinach 
½ cup finely chopped onion 
5 eggs, beaten 
½ tsp. garlic powder 
1 cup shredded lactose-free cheddar 
kosher salt 
1 pinch cayenne pepper 
freshly ground black pepper 

Preheat oven to 375 °F. Grease a silicone muffin pan and set it aside on a baking sheet. 

On a box grater or in a food processor, grate cauliflower and transfer to a large bowl. Place cauliflower in paper towels or cheesecloth and wring out any excess water. 

Add eggs, cheddar cheese, garlic powder and whisk until combined. Fold in cheddar cheese, ham, spinach and onion. Fill each cavity of the muffin pan about two-thirds full. Bake for about 20-25 minutes, or until lightly golden.


Thursday, September 22, 2022

Housekeeping, Part 2

Part 1 of the housekeeping was about our drive back to Texas, but I’m going to go against chronological order and use Part 2 to wrap up what happened while we were still in Quebec. 

I wrote about Evive smoothies, but I got to try a few more products as well, like ice cream sandwiches from the new line of Chapman’s lactose-free no sugar added products. These were really good! I would have been happy with just a lactose-free version, but given that I’m also trying to limit sugar these days, I really appreciated this extra step. 


The Engineer also found Philadelphia lactose-free cream cheese! I haven’t seen it in their line-up of American products, but it’s such a major brand that it seems logical they would roll it out in the U.S. at some point, right? 


I also got some of this dark chocolate and cranberry spread (it’s nut- and peanut-free, too!). I really enjoy it – it’s very chocolaty, yet the fruit is very present as well. I prefer the consistency at room temperature, though, so I take it out of the fridge the night before if I remember (but it’s not a big deal if I forget). 


I also bought a dark chocolate maple swirl bar from Chocolat Boréal, which I thoroughly enjoyed! I recommend their chocolate products and would love to try more. 


We also tried some of the latest Made Good offerings. I’m a big fan of the brand – allergen-free snacks that contain a serving of vegetables? Yes please! The pizza crackers were okay, but my kids (and I) are really crazy about the cookies! I’ve only bought the chocolate chip flavor so far, but I’ll branch out and try the rest. This is great in their lunchbox! 


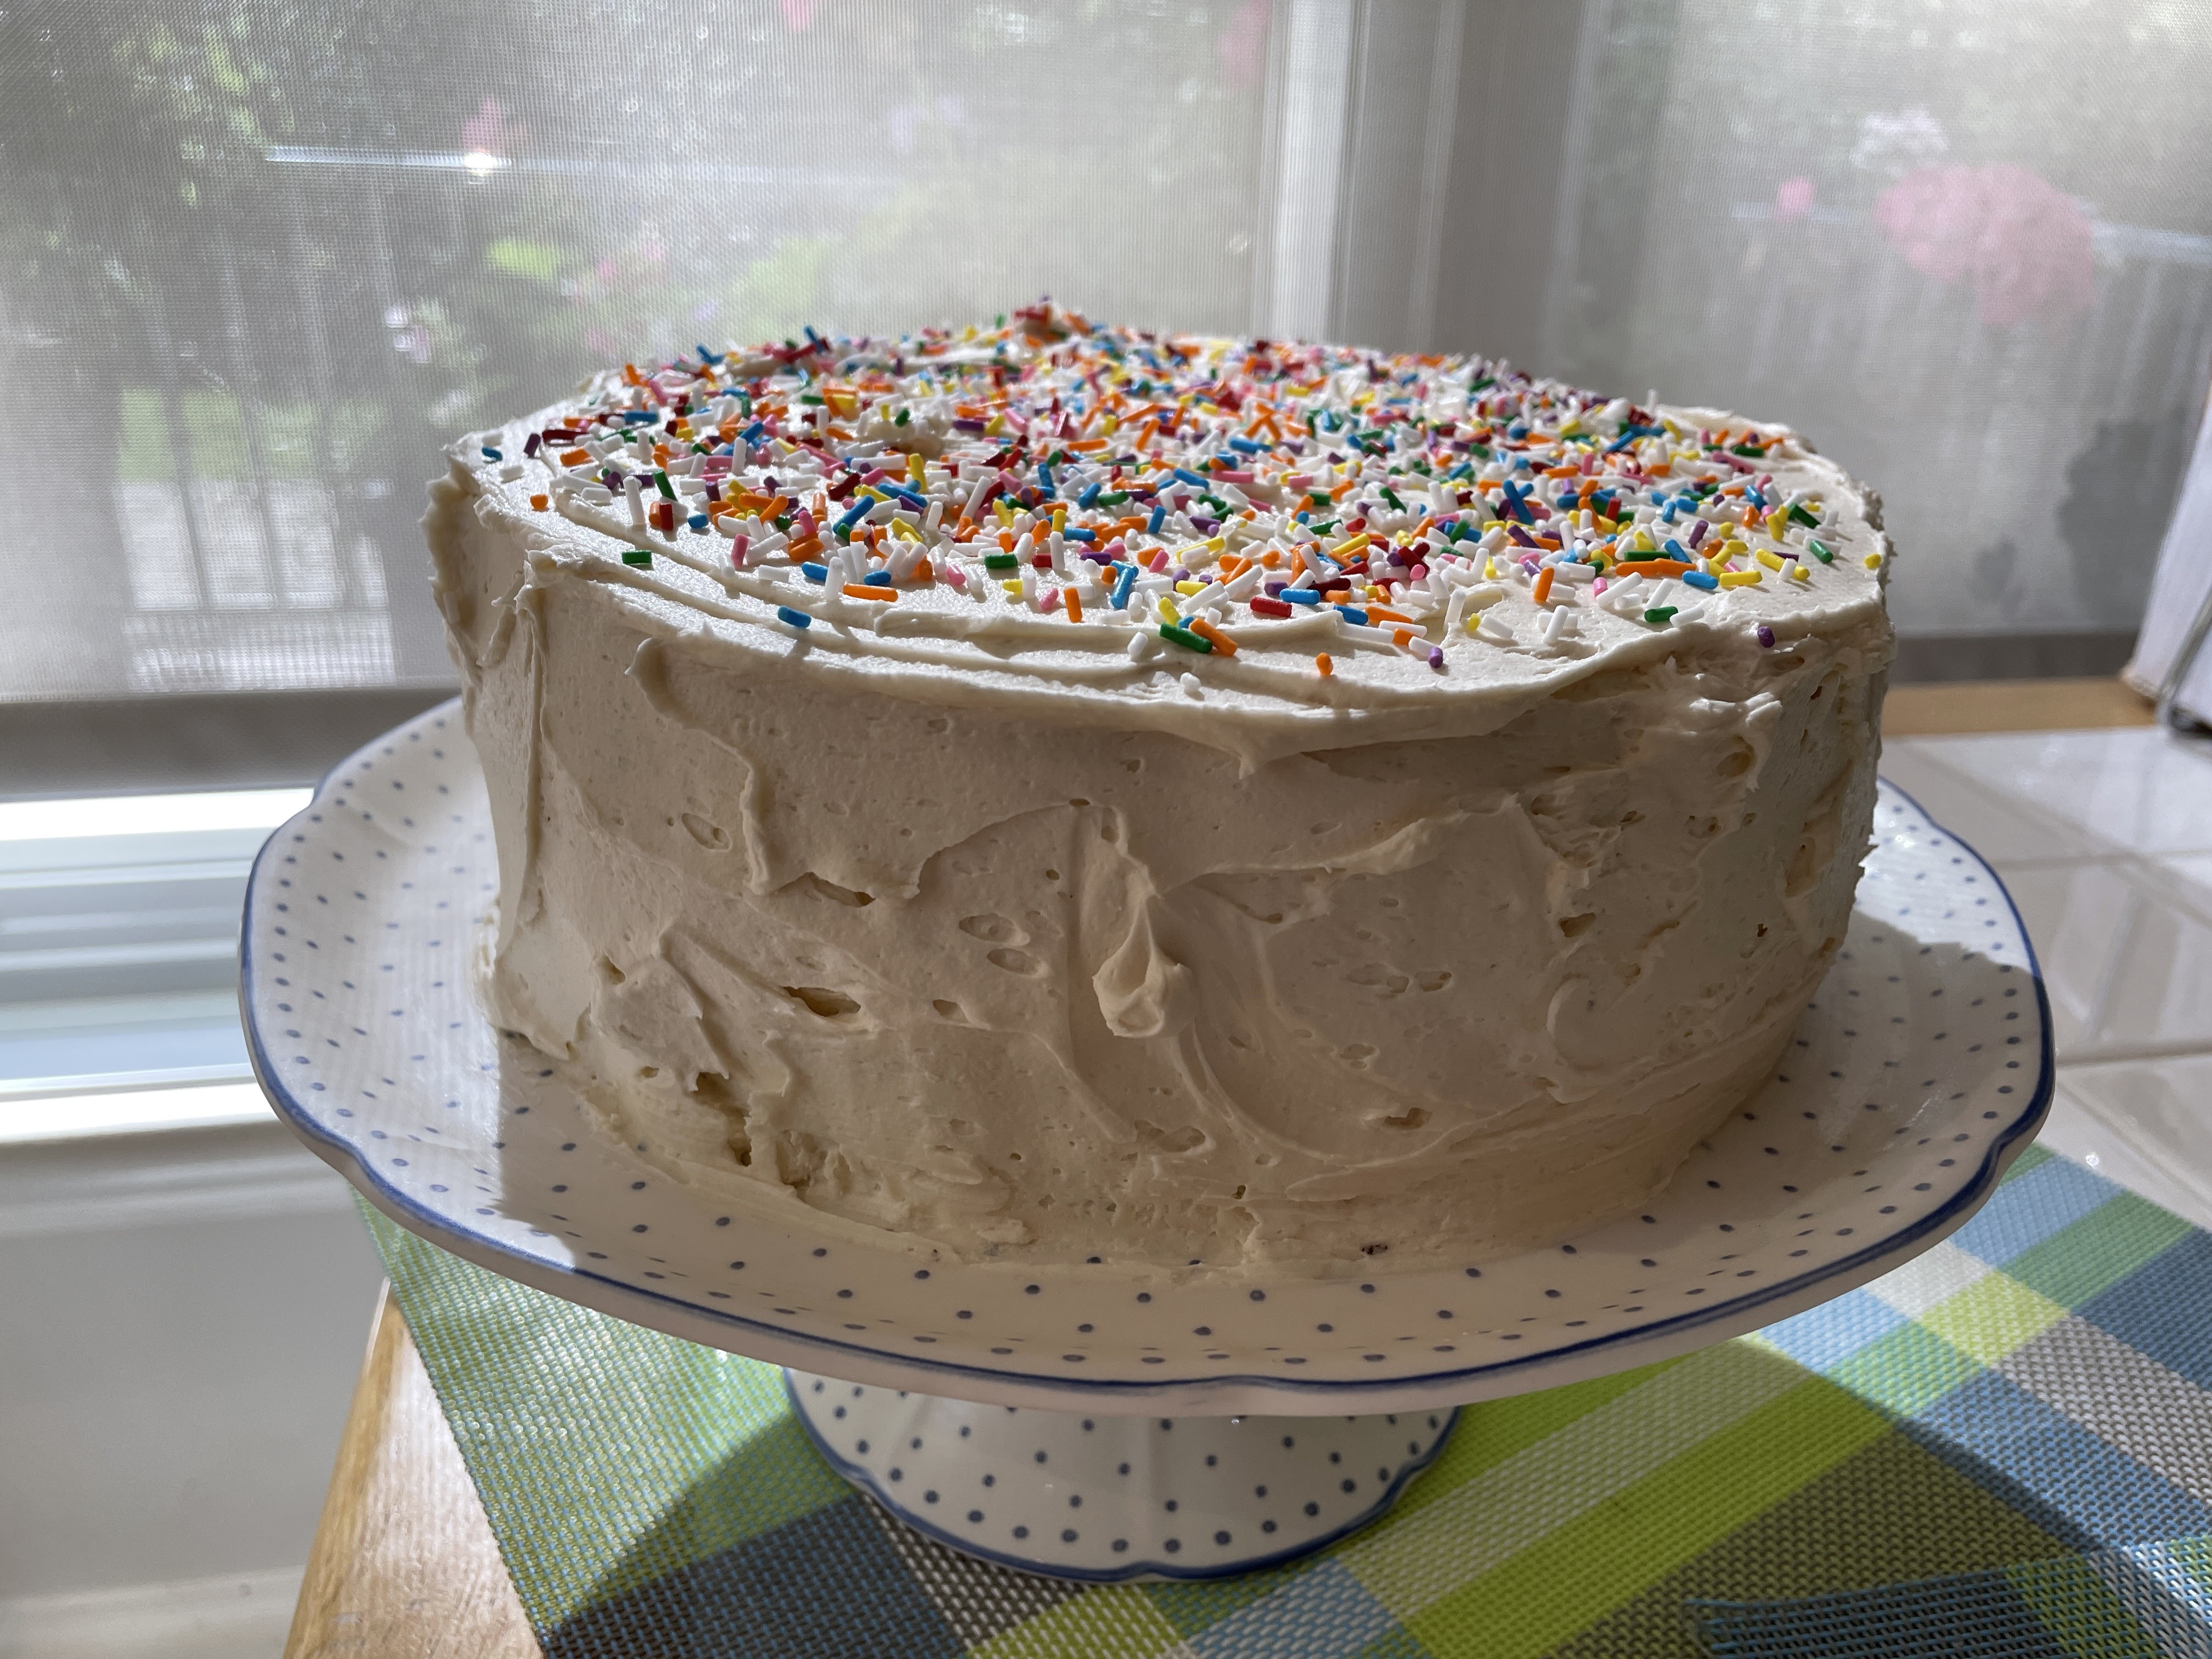
I made the Little Prince’s birthday cake as per his request, which he was kind enough to keep simple this year: chocolate cake, vanilla frosting, sprinkles. It was my usual chocolate cake, and I made this vanilla buttercream frosting with lactose-free butter. (If you want to make it a stark white, then use clear vanilla extract and, yes, white gel food coloring, because that’s a thing. I was happy with the result of these plain ingredients, though! 


And while I may not have been to nearly every restaurant on my list, I did get to go back to Leméac for our wedding anniversary, and it was lovely as ever. 

We also went to Les Couleurs de la Terre in Yamachiche – I wrote about it before, as it’s co-owned by my first cousin once removed. Those in Quebec may have heard about it in late June and early July, though, because it went viral on Tik-Tok for having the best poutine in the province. For the record, I can confirm that it is indeed the best! The downside was that they went from serving 200 people a day to 2,000 people a day overnight, so it was a bit overwhelming for everyone! 


And we also went to Gibeau Orange Julep and Swirl because how could we not? They were good as ever, and Swirl doubled the number of flavors they offer – I had the chocolate-mango swirl and bought some amazing strawberry sorbet to go.


Wednesday, September 21, 2022

Bol-repas couscous, patates douces et pois chiches


Voilà un bol-repas comme je les aime! Simple à préparer, végétalien, délicieux. Je recommande cette recette de Coup de Pouce

Pour la sauce dragon 
¼ tasse de levure alimentaire 
3 c. à table d’huile d’olive 
2 c. à table de sirop d’érable 
2 c. à table de sauce tamari ou de sauce soya 
2 c. à table d’eau 
1 gousse d’ail hachée 

Au mélangeur (ou avec un pied mélangeur), mélanger de la levure alimentaire, l’huile d’olive, le sirop d’érable, la sauce tamari, l’eau, et l’ail. (La sauce se conservera jusqu’à 5 jours au réfrigérateur.) 

Pour le bol-repas 
1 boîte de pois chiches, rincés et égouttés 
2 tasses de patate douce pelée et coupée en cubes de ½ po (1 cm) 
1 petit oignon rouge coupé en tranches de ½ po (1 cm) 
1 c. à table d’huile d’olive 
½ c. à thé de poudre d’ail 
½ c. à thé de cumin moulu 
½ c. è thé de paprika fumé 
1 ½ tasse de couscous de blé entier 
1 ½ tasse d’eau bouillante 
1 (ou 2) avocat, coupé en tranches 
4 tasses de roquette ou de jeunes épinards 
sel et poivre, au goût 

Préchauffer le four à 450 °F. 

Sur une plaque de cuisson, étendre côte à côte les pois chiches, la patate douce et l’oignon. Les arroser de l’huile, les saupoudrer des épices et mélanger en laissant les légumes séparés, si désiré. Saler et poivrer. Cuire au four pendant 15 minutes ou jusqu’à ce que la patate douce soit tendre et dorée (remuer à mi-cuisson). 

Entre-temps, dans un bol résistant à la chaleur, mettre le couscous et verser l’eau bouillante. Couvrir le bol et laisser reposer 5 minutes. À l’aide d’une fourchette, détacher les grains de couscous. Saler et poivrer. 

Au moment de servir, répartir le couscous dans quatre bols. Garnir des légumes rôtis, de l’avocat et de la roquette. Servir avec la sauce dragon.

Tuesday, September 20, 2022

Batch of links

- I read two articles recently about a new study showing that early Europeans had not yet developed lactase persistence when they started raising animals for their milk (or, at least, not in the overwhelming proportions that we know today). There’s an article in the New York Times titled Early Europeans Could Not Tolerate Milk But Drank It Anyway, and one published by McGill University called Putting Up With Farts: A Story of Our Ancestors and the Animal Milk They Loved in which the information is popularized quite well. Essentially, it now looks as though people without lactase persistence were quicker to die in times of famine, which is why lactase persistence is now so prevalent in populations with European ancestry. 

- My friend Jen shared this article titled Stop telling busy parents to meal plan, though interestingly the URL says “meal prep” instead of “plan.” The gist of it is that when you have kids, especially small kids, you can’t spend as much time cooking as before, and that’s absolutely true. However, I am someone who does a lot of meal planning and almost no meal prepping ahead of time. The planning part, even though it’s long and sucks, actually helps me manage anxiety and free up brain space for the rest of the week. This isn’t to say that I’ll plan anything elaborate, just that I know what I’ll be eating for the week and will have the ingredients on hand. It also minimizes waste because I’ll plan to use up leftover ingredients before they go bad. And I always plan around my schedule so that I stay realistic in what I can accomplish on any given night. So all this to say that while I agree with the uncomplicated cooking advocated in the article, to me that’s an entirely separate thing from meal planning. 

- There was this really cool article in Bon Appétit, written by a woman who goes hunting for the first time. I found it well written, nuanced, showing pros and cons and all sides of the issue, and going in depth with facts and statistics as well as feelings. It’s a good article and I do recommend it. However, as I was looking it up online to link to it (Bon Appétit doesn’t put everything up right away upon print publication), it turns out that the author, Rachel Levin, is a fixture of the niche social media subculture of female hunters. She wrote about going bow-hunting years earlier (with some of the same players as in her recent firearm hunt in Bon Appétit, who presumably at this point are not experts she meets for the first time but are in her circle of friends already), and she was interviewed in 2020 about how unusual it is for Jews to hunt, given that hunted meat is not kosher. So all this left a bad taste in my mouth because she’s not the inexperienced layperson she made herself out to be, even though I’m sure she was at one point. 

- Molly Wizenberg wrote about Mollie Katzen’s cookbook Still Life With Menu

- Here’s an interesting article about why Italians avoided eating tomatoes for centuries

- I learned that the color of a hen’s eggs is correlated with the color of her earlobes. Hens with white earlobes lay white eggs, hens with red or dark earlobes lay brown eggs, and hens with blue earlobes lay blue eggs. 

- If your chocolate cake is dry, it could be due to the type of cocoa powder you’re using (hint: you want at least 1 g of fat per 5 g of cocoa).

- A study found that there’s a type of starch that can reduce cancer risk by more than half. It’s present in underripe bananas as well as beans, pasta, and rice. 


- This article explains how the color of cheddar correlates with its taste, and there’s a really cool map showing regional preferences in the U.S.! 

- It’s PCOS Awareness Month! I enjoyed listening to these podcasts about the best diet for PCOS and snacking for PCOS (TL; DL: protein+produce or fiber+fat). 


- And I really liked this video explaining what it’s like to have face blindness.

Wednesday, September 14, 2022

Easy Chocolate Pie


Strictly speaking, does the world *need* another chocolate pie recipe? Probably not. But isn’t a chocolate pie always welcome? I mean, I don’t think I’m ever NOT in the mood for chocolate pie, you know? This pie is particularly nice for hot days or busy holidays, because you don’t need an oven to make it, assuming you’ve got a crust already. Plus, you can use any crust you want: pâte brisée, pâte sablée, graham cracker crust, oreo crust, gluten-free, vegan, homemade or storebought, it’s all good. 

We all really enjoyed this! Even the Fox decided to taste it, even though it wasn’t “solid chocolate” like a cake. 

One word of warning, though: do NOT use stale marshmallows for this! I learned the hard way that stale marshmallows will not melt. Make sure they are still squishably fresh. 

3 cups mini marshmallows (about 6 oz.) 
2 ½ cups cold lactose-free cream or substitute, divided 
¼ tsp. kosher salt 
1 (12-oz.) bag semi-sweet chocolate chips (about 2 cups) 
2 Tbsp. granulated sugar (I would omit this next time) 
1 (9-inch) fully baked pie crust of your choice 

Place 3 cups mini marshmallows, ½ cup of the cream, and kosher salt in a large microwave-safe bowl. Microwave on HIGH in 30-second bursts, stirring between each, until the marshmallows are fully melted, about 2 minutes total. (Alternatively, melt in a small saucepan over low heat.) 

Set aside about 2 tablespoons of semi-sweet chocolate chips from a 12-ounce bag for garnish. Immediately add the remaining chocolate to the warm marshmallow mixture. Stir until the chocolate is melted and the mixture is smooth. 

Set the chocolate-marshmallow mixture aside to cool until barely warm to the touch, about 30 minutes. 

Place the remaining 2 cups cold cream and 2 tablespoons granulated sugar in the bowl of a stand mixer fitted with the whisk attachment. (Alternatively, use an electric hand mixer or whisk and a large bowl.) Begin beating on low speed, gradually increase the speed to medium-high, and beat until stiff peaks form, 1 to 2 minutes. 

Reserve and refrigerate about 1 cup of the whipped cream for topping the pie. Fold the remaining whipped cream into the cooled chocolate mixture until no streaks of cream remain. 

Transfer the filling into the crust and smooth into an even layer. Refrigerate until the filling firms up, at least 1 hour and up to 3 hours. Top with the reserved whipped cream and chocolate chips and serve.


Monday, September 12, 2022

Mousse chocolat blanc et framboises


J’ai pu profiter de mon passage au Québec cet été pour faire des recettes avec de la crème, comme ces côtelettes de porc avec sauce à l’ail et aux herbes. Mais saviez-vous qu’il y a maintenant de la crème à fouetter végétalienne au Québec aussi? Ben oui, Becel en fait. Alors je n’ai pas pu résister à cette mousse chocolat blanc et framboises d’Émilie Murmure! Nous avons adoré. 

Pour le coulis de framboises 
2 tasses de framboises congelées 
2 c. à soupe de sucre 
1/3 de tasse d'eau 
1 c. à soupe de fécule de maïs diluée dans un peu d'eau 

Dans une casserole, mélanger les framboises, le sucre et l'eau. Laisser mijoter le temps que les framboises réduisent en purée. Ajouter la fécule diluée dans un peu d'eau et laisser épaissir une minute à feu doux. Réserver hors feu. 

Pour la mousse au chocolat blanc 
1 tasse de pépites de chocolat blanc 
1 ½ tasse + ½ tasse de crème à fouetter végétalienne Becel 
2 c. à soupe de sucre à glacer, tamisé 
1 c. à thé d'extrait de vanille 
quelques framboises fraiches, pour garnir 

Au micro-onde ou au bain-marie, faire fondre le chocolat blanc dans ½ tasse de crème. Laisser refroidir au réfrigérateur. 

Dans un cul de poule, mettre 1 ½ tasse de crème à fouetter, le sucre à glacer et la vanille. Battre la préparation au fouet électrique jusqu'à la formation de pics. 

Ajouter délicatement à la spatule la ganache au chocolat blanc. 

Couvrir et laisser refroidir au moins 2h ou toute la nuit. 

Alterner les couches de mousse, de coulis de framboises et de framboises fraiches dans de petits ramequins et servir sans attendre.


Wednesday, September 07, 2022

Evive

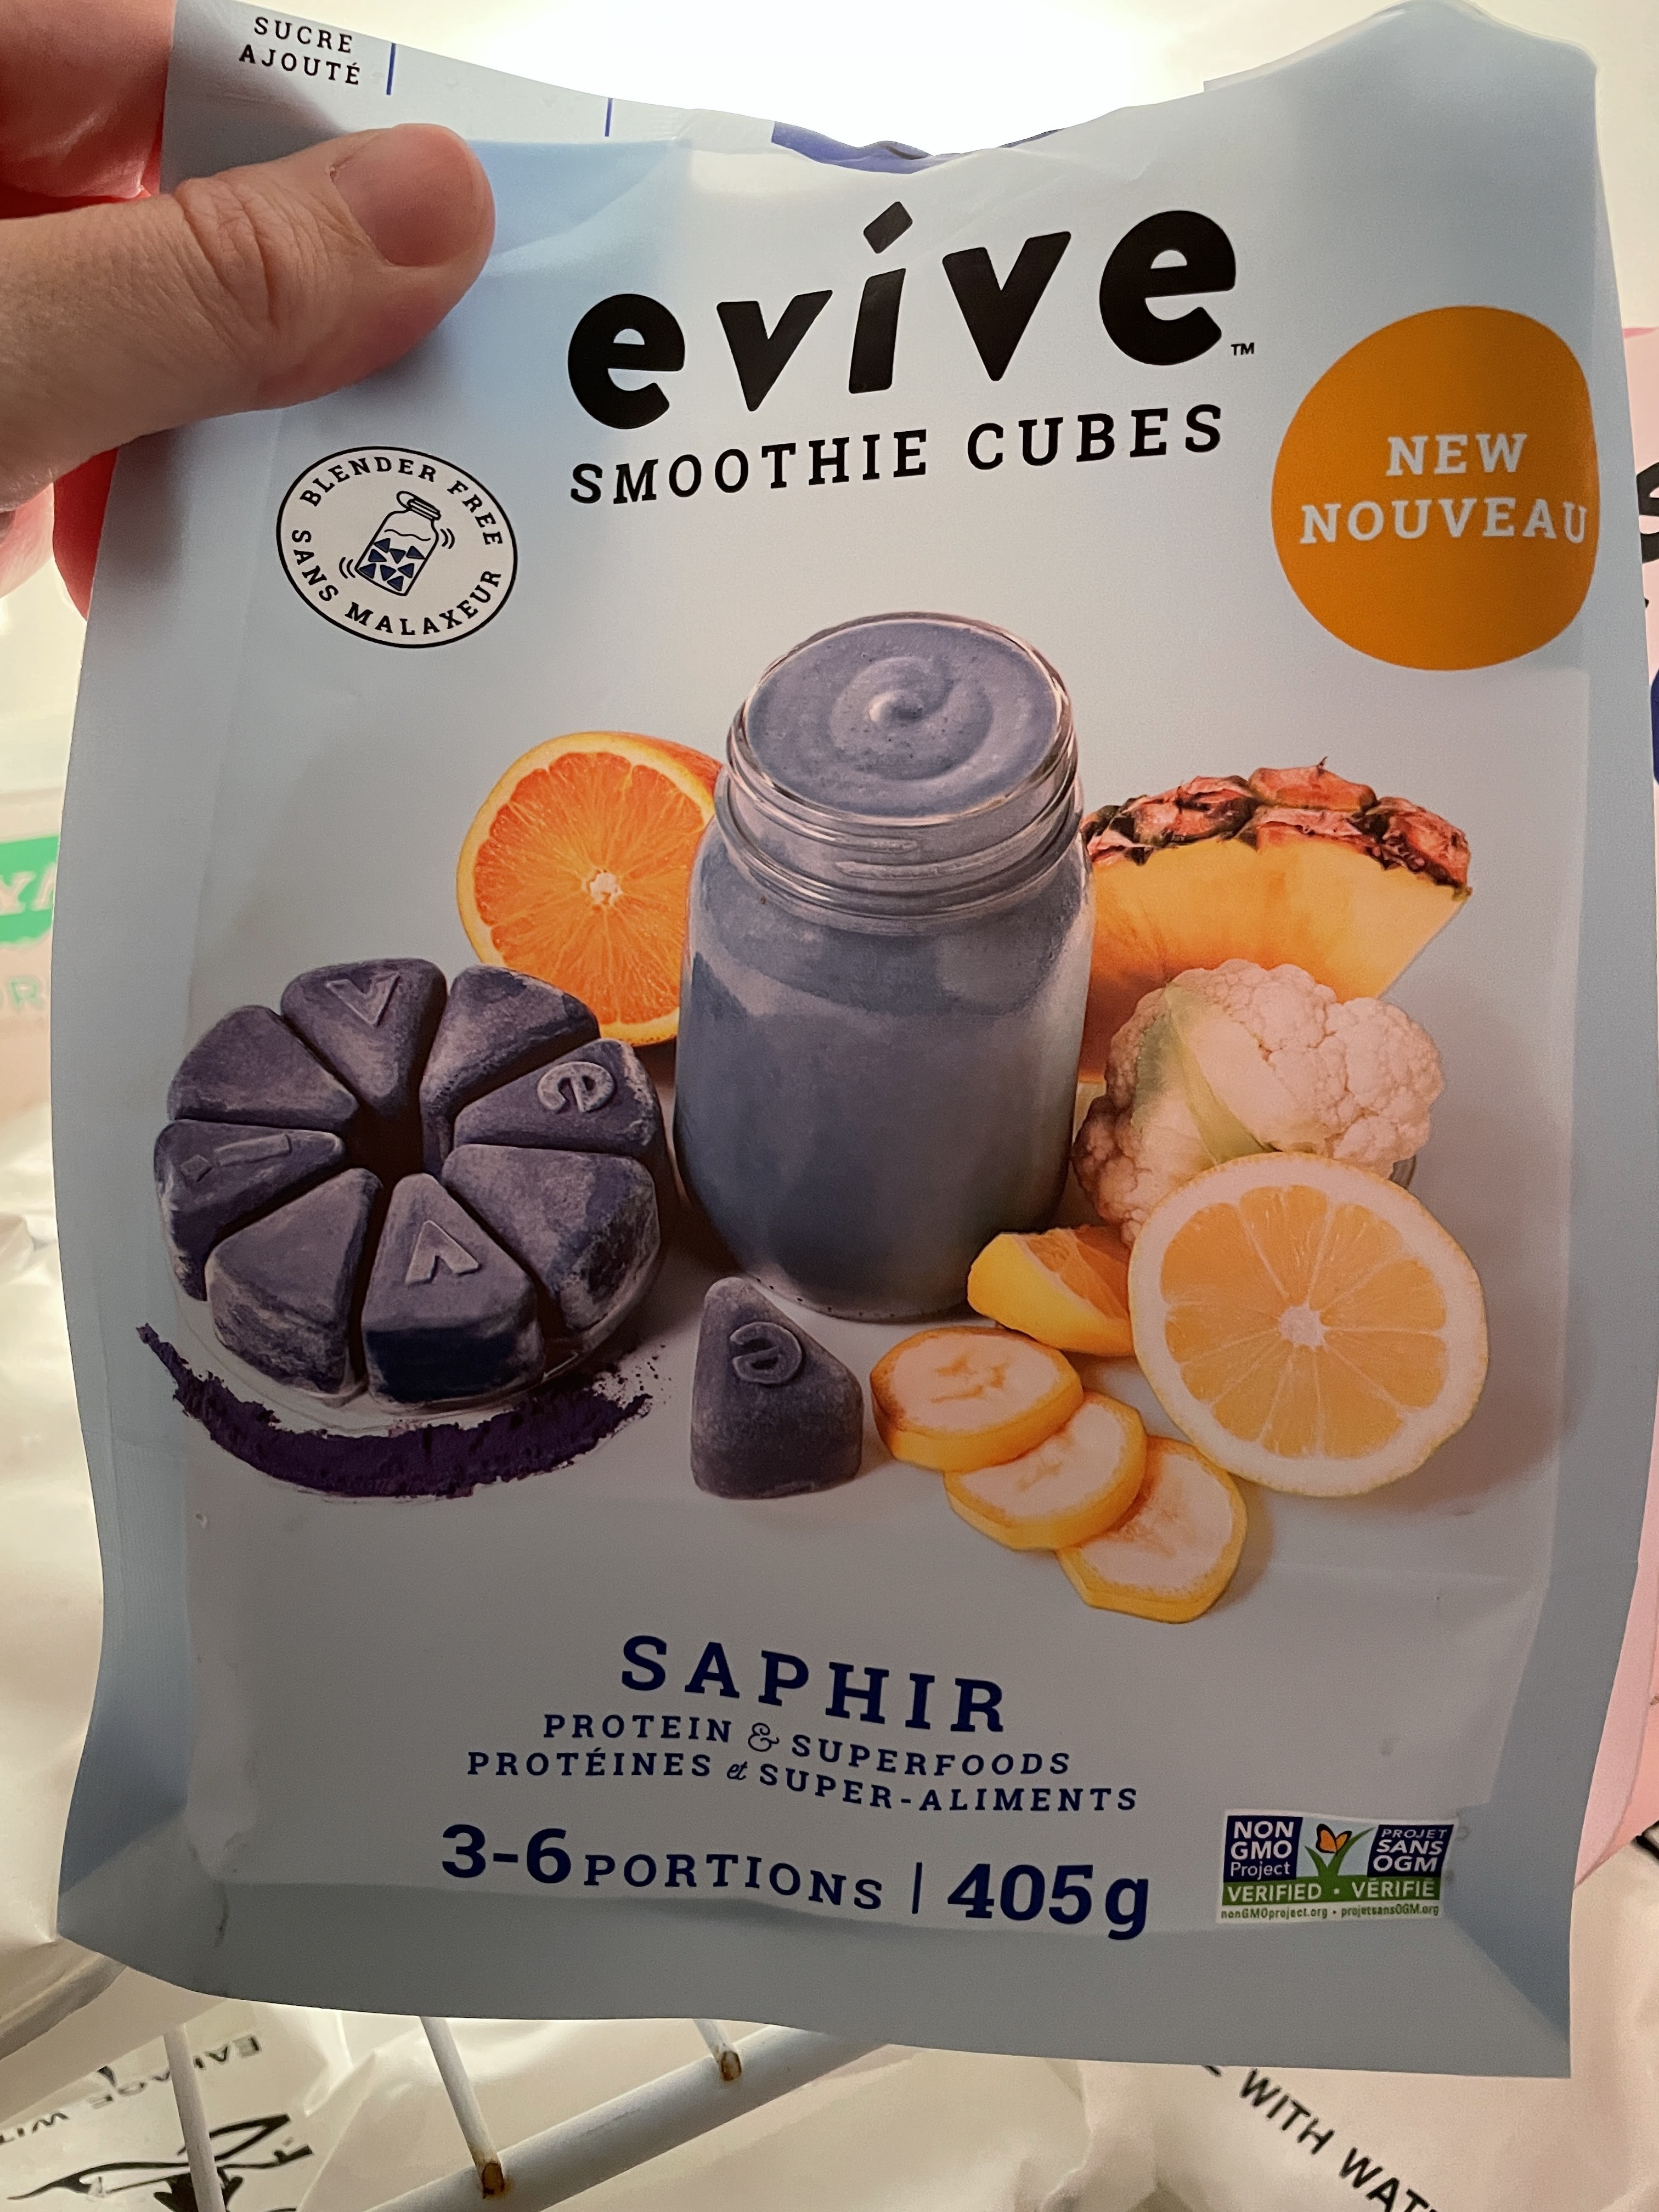
I’d heard about Evive Nutrition maybe a year ago and was bummed I couldn’t get their products. The company is based in Quebec and is quickly branching out to North America in general, but they do not yet deliver to my area and no local stores carry their products. They make vegan smoothie bases that are served frozen in cute little trays, and part of the draw is that you don’t need a blender to make them – just thaw a bit, add liquid, shake, and boom, you’ve got a smoothie! Another big selling point is that they use all-natural ingredients (say, spirulina instead of blue food coloring), contain no added sugars, and even hide vegetables in their smoothies. You should definitely take a look at their awesome selection! (All their products are gluten-free; see here for allergen information.) 

In addition to using these products to make smoothies, you can also blend them with a banana or other fruit to make a smoothie bowl, or chia seed to make chia pudding. Their website even has recipes to incorporate the smoothie bases into muffins and pancakes! They’ve also started making soups. 


In my opinion, the downside with ordering online is that you can’t do it piecemeal, it’s by subscription only, and I for one do no want to jump into a subscription with a product I haven’t tried yet! So in Quebec, I found a retailer that sold some Evive smoothies and tried two flavors: Saphir (banana, pineapple, and spirulina to make it blue) and Viva (strawberry, banana, and dragon fruit being the main flavors). They both contain extra protein (pea protein, chia protein, hemp seeds) along with cauliflower and vegetable powder. 


After some trial and error, I’d say that the best way to enjoy an Evive smoothie is to pop out the frozen cubes into a jar and leave it in the fridge overnight so that they are ready to mix for breakfast (otherwise, they just take too long to thaw properly). I mixed them with lactose-free milk, and I have to say that not only were they absolutely delicious, but they also kept me feeling satiated until lunch, which is no small feat! 

In conclusion, I really love these products and look forward to being able to buy them in San Antonio!

Tuesday, September 06, 2022

RED Chocolate


I was lucky enough to get some samples of new-to-me RED Chocolate recently. I believe the “RED” stands for “reduced” because it contains less fat and fewer calories than typical chocolate (though it is not necessarily a low-calorie food). The big draw for me was that it contains no added refined sugar (only “natural zero-calorie sweeteners”), thus making it lower in carbs and keto-friendly. All their flavors contain milk fat (which is not the same as lactose, of course) and are cross-contaminated with nuts, so keep that in mind if you have food restrictions. The bars I tried were gluten-free and kosher. 

I tried four flavors. First, the RED Delight dark chocolate tastes like it has some orange in it, but that’s not listed in the ingredients. There’s a slight cooling sensation, probably from the erythritol, yet it still has a slightly bitter aftertaste. It was okay, but not my favorite. 

The RED Delight extra dark chocolate feels richer, more chocolaty somehow. It had none of the “alternative sweetener” taste nor the orange aftertaste. I really like this one! 

Then I had the RED Delight orange and almond dark chocolate – this one tasted of orange, obviously, but I expected that, and it also had a cooling mouthfeel. I appreciate that the pieces of almond are very small so that they almost melt away with the chocolate. I think I detected one of those pieces in the regular dark chocolate, though, so I do wonder if there was shared equipment, and the regular dark chocolate just took on a lot more of the orange almond characteristics than it was supposed to! 

Finally, I tasted the RED Delight milk chocolate. It was good, but that one does have lactose, so I’ll use it as a treat in my kids’ lunchboxes. 

If you are interested in trying it for yourselves, you can use code LFGIRL10 to get 10% off your order! 

Update: Both kids *loved* the chocolate in their lunch! The Little Prince called it “diamond chocolate” because of the shape, and they want more.