- The always-delightful Natalie Portman visit the Bon Appétit test kitchen and makes a vegan carpaccio following only verbal instructions.
- PSA: Green Valley Organics changed its name to Green Valley Creamery. The bad news is that for the moment, they are no longer making lactose-free butter, as there is apparently a nation-wide shortage of organic cream.
- I heard about Sarah Harmeyer, who brought her community closer thanks to a large wooden table handmade by her father. Together, the two now run a company called Neighbor’s Table where you can order your own handmade table (continental U.S. only). If I had $1,700 to spare, I think I’d actually order one!
- A really interesting article titled Everything you know about obesity is wrong. There is so much information in there that it’s a wonder society (and doctors in particular) still treats obesity in ways that don’t work. Did you know that ALL diets fail? The chances of a woman classified as obese reaching a “normal” weight are 0.008%. Unfit skinny people are twice as likely to get diabetes as fit fat people. And only 4% of all agricultural subsidies go to fruits and vegetables. Anyway, it’s a long read, but well worth it.
- A British study found that men are embarrassed to order vegetarian food.
- Scary news: for some people, taking probiotics can actually harm gut bacteria.
- And, oh yeah: elimination diets can MAKE you allergic to a food you previously tolerated.
- Why deaf people sneeze silently.
- Why mistranslation matters.
- I just read a very interesting article in Real Simple titled (in the print edition) How to split the chores so everyone is happy. It contained interesting statistics, such as the fact that chore-related arguments are the third most cited reason for divorce (after infidelity and drifting apart). Also, adoptive parents are happier than other parents with the division of labor in their household. This could be due in part to the fact that couples who adopt have often survived difficult times (infertility, IVF, the adoption process itself) and have a strong partnership. But research suggest that this is also in part because given the absence of pregnancy and breastfeeding, both parents start out on a more even playing field. Finally, “same-sex couples are somewhat more likely than straight couples to feel their division of chores is fair” because “they’re less likely to fall back on traditional gender roles and make assumptions about who will do what” and more likely to assign tasks “based on preference, ability, and natural inclination.”
- The above article made me think of the always relevant comic, You should’ve asked.
- It also reminded me of an article I linked to previously, from The New York Times Magazine, which had found that a more equal marriage meant less sex. It turns out that their data was from the early 1990s (even though the study was published in 2013); a more recent study with data from 2006 found that this trend had reversed. (There’s an article about it in French here.) Interestingly, though, according this the more recent data, couples where men who did at least 2/3 of the household chores had less sex than either couples who split things 50/50 or couples where women did at least 2/3 of the chores (but couples with an even split of chores had the most sex). I’d love to see data from the past few years!
- In a recent issue of Parents magazine, I read an article titled Parenting with a Buzz. I found it interesting mostly for the statistics, because I don’t really drink myself and so had no idea what is considered “normal”, beyond the memes I see online and in stores. (I just never liked wine or beer and I never found pleasure in being drunk. My idea of daily self-care is a few squares of dark chocolate in the evening. And knitting.) So the fact that 47% of moms have been drunk or tipsy in front of their children was surprising to me. Also, 50% of women say they drink more than their mothers, but it’s hard to say to what extent generational differences mean something is wrong. And 77% of moms say that it doesn’t affect the way they parent (which means that, depending on how the question was phrased, perhaps over 1 in 4 moms thinks that alcohol DOES affect the way she parents, and then one might wonder whether she meant that she lays off until the kids go to bed or whether she is actively trying to be more chill). And nearly one in three Americans is an excessive drinker.
Saturday, September 29, 2018
Thursday, September 27, 2018
Carrés aux dattes

Voici une recette bien simple, qui est dans ma famille depuis avant ma naissance. C’est la recette de ma grand-mère, un peu adaptée au goût du jour. Le Petit Prince n’a pas vraiment aimé les dattes (!), mais le reste de la famille a adoré. Je vais devoir en faire plus souvent!
Pour la garniture aux dattes
½ lb. de dattes dénoyautées
1 c. à soupe de cassonade
½ tasse d’eau (ou plus, au besoin)
Pour la croûte
1 tasse de beurre sans lactose, à la température de la pièce
2 tasses de flocons d’avoine
1 tasse de farine
½ c. à thé de bicarbonate de soude
1 pincée de sel
1 tasse de cassonade
Pour la garniture aux dattes
Dans une petite casserole, mélanger les dattes, la cassonade et l’eau. Faire bouillir ensemble jusqu’à ce que les dattes d’écrasent facilement à la fourchette, en ajoutant de l’eau au besoin pour éviter que les dattes brûlent. (J’ai utilisé un total de ¾ tasse d’eau. Si vous avez mis un peu trop d’eau, il suffit de laisser chauffer le mélange plus longtemps pour que l’eau s’évapore.) Le mélange doit avoir la consistance d’une confiture épaisse. Laisser refroidir.
Pour la croûte
Pendant ce temps, préchauffer le four à 350 °F. Graisser un moule carré de 8 pouces.
Dans un grand bol, bien mélanger le beurre et l’avoine avec une cuillère de bois de façon à ce que tous les flocons d’avoine soient bien enrobés de beurre.
Dans un petit bol, bien mélanger la farine avec le bicarbonate de soude et le sel. Ajouter les ingrédients secs au mélange de beurre et d’avoine avec la cassonade; bien mélanger.
Mettre la moitié du mélange dans le moule et presser pour bien aplatir et former une croûte. Étendre uniformément la garniture aux dattes par-dessus, puis recouvrir du reste du mélange pour la croûte (je l’ai émietté entre mes doigts pour en avoir partout).
Mettre au four environ 30 minutes ou jusqu’à ce que le dessus prenne une belle couleur dorée. Laisser refroidir puis (ça ne surprendra personne) couper en carrés.

Friday, September 21, 2018
Cardamom Cake with Plum Jam and Coffee Buttercream
At the tail end of summer, I made a few recipes with stone fruit, which was just perfect here in Texas. The always-lovely almond torte with sugared apricots made an appearance, and I tried a cinnamon oatmeal peach crisp which, sadly, did not live up to my expectations. Then, when I saw red apricots, I couldn’t resist buying them and trying a vegan version of the ice cream I’ve been seeing everywhere that calls for whipped cream and sweetened condensed milk – sadly, I still need to work on it to get the consistency right, so no recipe just yet; but look how pretty!


I ended up also trying a recipe I bookmarked on Not Without Salt several years ago: cardamom cake with plum jam and coffee buttercream. It was delicious! I ended up overcooking the plums a bit, so to counterbalance the loose consistency of the plum jam, I added a cornstarch slurry. Honestly, it was hard to gage in the pan! Perhaps “jam” is the wrong word here, though; it should be more of a plum filling. Also note that while the cake was delicious as is, you could consider omitting the coffee from the buttercream, to end up with a plain vanilla Italian meringue buttercream. I did love the consistency of that frosting, though, even if it is more complicated than American buttercream!
It turns out that my cake layers were concave, which became very obvious once I had cut into the cake (it really didn’t show before I assembled it, I swear!). So I decided to bite the bullet and buy both baking strips and baking heating cores; I’ll let you know how that went next time.
For the cardamom cake
3 large eggs
2 egg yolks (reserve the whites for the buttercream)
1 Tbsp. vanilla
1 cup lactose-free sour cream
2 cups all-purpose flour
1 ½ cups sugar
¾ tsp. baking powder
¾ tsp. baking soda
1 tsp. kosher salt
2 tsp. ground cardamom
1 tsp. orange zest (optional; I didn’t use it)
½ lb. (2 sticks, 1 cup) lactose-free butter, at room temperature, cut into 1-inch pieces
For the plum jam
1 lb. fresh plums, pitted and halved (I quartered them)
¼ cup sugar
For the coffee buttercream
1 ¼ cups sugar
5 large egg whites
1 lb. (4 sticks, 2 cups) lactose-free butter, chilled
2 tsp. vanilla
¼ tsp. sea salt
¼ cup strong coffee or espresso
For the cake
Preheat the oven to 350 °F. Grease two 8”x2” round cake pans and line the bottoms with parchment paper; grease again.
Whisk together the eggs, egg yolks, vanilla, and sour cream in a medium bowl. Set aside.
In the bowl of a stand mixer fitted with the paddle attachment, mix the flour, sugar, baking powder, baking soda, salt, cardamom, and orange zest (if using). Turn the mixer on low and mix until everything is combined. Add the butter while the mixer is still running and continue to mix until the mixture resembles coarse sand. Slowly add half of the wet ingredients and beat until combined. Add the remainder of the wet ingredients, speed up the mixer to medium speed, then beat for 20 seconds. Scrape down the sides and bottom of the bowl with a spatula. Finish the batter by stirring with the spatula a few more times.
Divide the batter between the prepared pans and smooth the top. Bake for 17 to 22 minutes or until the cakes are golden brown and pulling away from the edges of the pan ever so slightly.
Transfer the pans to a wire rack and let cool for 30 minutes. Turn the cakes out onto the rack, remove the parchment, and let cool completely.
For the jam
Combine the plums and the sugar in a medium saucepan. Bring to a simmer and cook for about 15 minutes or until the plums start to break down and the juices look like warm honey. (This is where I had trouble and cooked the mixture too long; I used a cornstarch slurry to thicken it and only used about half of it on the cake.)
For the frosting
Combine the sugar and about ¼ cup water in a small saucepan.
Bring the sugar to a boil, then cook to 240 °F or soft ball stage. (Apparently, you can test this by blowing a sugar bubble through the tines of a fork, but I didn’t want to risk that!)
While the sugar cooks, whip the egg whites to soft peaks.
Carefully stream the sugar down the side of the bowl with the machine running on medium speed. Increase the speed and whip until the bowl is no longer hot.
Add the butter, 1 tablespoon at a time, and whip until smooth. IT may look like a mess, but keep whipping until it comes together.
Add the vanilla, coffee and salt.
Pipe a border around the edge of the first cake layer. Fill with the jam. Add the other cake on top, then cover the layers with frosting. (I put on a crumb coat and refrigerated for 20 minutes, then frosted as usual.)


I ended up also trying a recipe I bookmarked on Not Without Salt several years ago: cardamom cake with plum jam and coffee buttercream. It was delicious! I ended up overcooking the plums a bit, so to counterbalance the loose consistency of the plum jam, I added a cornstarch slurry. Honestly, it was hard to gage in the pan! Perhaps “jam” is the wrong word here, though; it should be more of a plum filling. Also note that while the cake was delicious as is, you could consider omitting the coffee from the buttercream, to end up with a plain vanilla Italian meringue buttercream. I did love the consistency of that frosting, though, even if it is more complicated than American buttercream!
It turns out that my cake layers were concave, which became very obvious once I had cut into the cake (it really didn’t show before I assembled it, I swear!). So I decided to bite the bullet and buy both baking strips and baking heating cores; I’ll let you know how that went next time.
For the cardamom cake
3 large eggs
2 egg yolks (reserve the whites for the buttercream)
1 Tbsp. vanilla
1 cup lactose-free sour cream
2 cups all-purpose flour
1 ½ cups sugar
¾ tsp. baking powder
¾ tsp. baking soda
1 tsp. kosher salt
2 tsp. ground cardamom
1 tsp. orange zest (optional; I didn’t use it)
½ lb. (2 sticks, 1 cup) lactose-free butter, at room temperature, cut into 1-inch pieces
For the plum jam
1 lb. fresh plums, pitted and halved (I quartered them)
¼ cup sugar
For the coffee buttercream
1 ¼ cups sugar
5 large egg whites
1 lb. (4 sticks, 2 cups) lactose-free butter, chilled
2 tsp. vanilla
¼ tsp. sea salt
¼ cup strong coffee or espresso
For the cake
Preheat the oven to 350 °F. Grease two 8”x2” round cake pans and line the bottoms with parchment paper; grease again.
Whisk together the eggs, egg yolks, vanilla, and sour cream in a medium bowl. Set aside.
In the bowl of a stand mixer fitted with the paddle attachment, mix the flour, sugar, baking powder, baking soda, salt, cardamom, and orange zest (if using). Turn the mixer on low and mix until everything is combined. Add the butter while the mixer is still running and continue to mix until the mixture resembles coarse sand. Slowly add half of the wet ingredients and beat until combined. Add the remainder of the wet ingredients, speed up the mixer to medium speed, then beat for 20 seconds. Scrape down the sides and bottom of the bowl with a spatula. Finish the batter by stirring with the spatula a few more times.
Divide the batter between the prepared pans and smooth the top. Bake for 17 to 22 minutes or until the cakes are golden brown and pulling away from the edges of the pan ever so slightly.
Transfer the pans to a wire rack and let cool for 30 minutes. Turn the cakes out onto the rack, remove the parchment, and let cool completely.
For the jam
Combine the plums and the sugar in a medium saucepan. Bring to a simmer and cook for about 15 minutes or until the plums start to break down and the juices look like warm honey. (This is where I had trouble and cooked the mixture too long; I used a cornstarch slurry to thicken it and only used about half of it on the cake.)
For the frosting
Combine the sugar and about ¼ cup water in a small saucepan.
Bring the sugar to a boil, then cook to 240 °F or soft ball stage. (Apparently, you can test this by blowing a sugar bubble through the tines of a fork, but I didn’t want to risk that!)
While the sugar cooks, whip the egg whites to soft peaks.
Carefully stream the sugar down the side of the bowl with the machine running on medium speed. Increase the speed and whip until the bowl is no longer hot.
Add the butter, 1 tablespoon at a time, and whip until smooth. IT may look like a mess, but keep whipping until it comes together.
Add the vanilla, coffee and salt.
Pipe a border around the edge of the first cake layer. Fill with the jam. Add the other cake on top, then cover the layers with frosting. (I put on a crumb coat and refrigerated for 20 minutes, then frosted as usual.)

Wednesday, September 19, 2018
Muffins au maïs et aux framboises
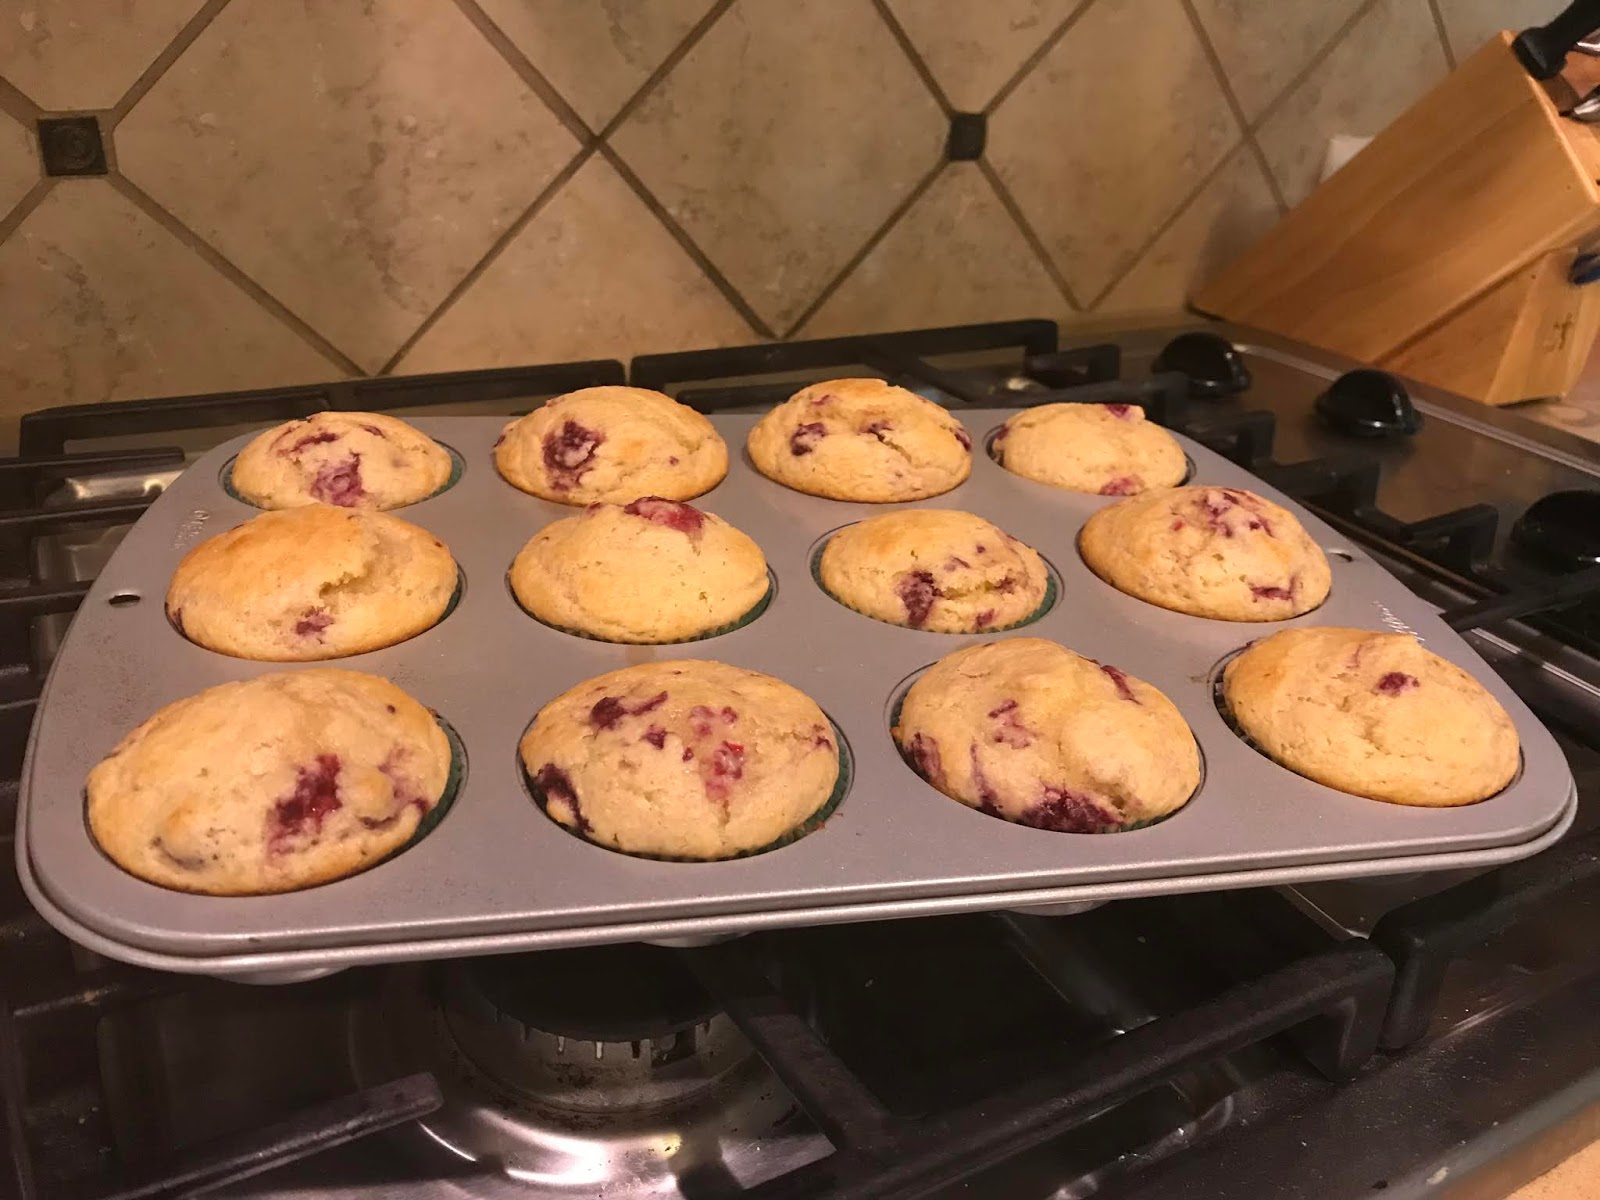
J’ai pu feuilleter plusieurs numéros du magazine Ricardo cet été (ma mère a un abonnement, et il y en avait toute une pile au chalet). J’ai essayé certaines recettes qui sont tombées à plat (jus de melon d’eau puis sorbet express au melon d’eau, tiens), mais d’autres étaient vraiment réussies. C’est le cas de ces muffins au maïs et aux framboises, que j’ai faits sans les canneberges séchées de la recette d’origine. Bon, je suis la seule à les manger, parce que l’Ingénieur et le Renard détestent les framboises et que le Petit Prince a déclaré ne vouloir manger les muffins que s’ils contiennent du chocolat, apparemment. Mais moi, j’adore! La farine de maïs leur donne un goût délicieux, et le yogourt les garde moelleux. Ils se congèlent bien, en plus!
À noter que pour la farine, j’ai pris de la farine de blé blond, comme d’habitude, et j’en ai utilisé 150 grammes, même si cela correspond plus à 1 ¼ tasse qu’à la simple tasse demandée. J’ai aussi ajouté une pincée de sel, quand même!
1 tasse (150 g.) de farine tout usage non blanchie (voir note plus haut)
½ tasse (60 g.) de semoule de maïs fine
2 c. à thé de poudre à pâte
1 pincée de sel cachère
2 œufs
½ tasse (100 g.) de sucre
½ tasse d’huile végétale
1 tasse de yogourt grec nature
1 ½ tasse de framboises surgelées
Placer la grille au centre du four. Préchauffer le four à 375 °F. Chemiser 12 moules à muffins de caissettes de papier ou de silicone.
Dans un bol, mélanger la farine, la semoule de maïs et la poudre à pâte. Réserver.
Dans un autre bol, mélanger au fouet les œufs, le sucre et l’huile. Incorporer le mélange de farine. Ajouter le yogourt et mélanger jusqu’à ce que la pâte soit homogène. À la cuillère de bois, ajouter les framboises. Répartir la pâte dans les moules.
Cuire au four 20 minutes ou jusqu’à ce qu’un cure-dents inséré au centre d’un muffin en ressorte propre. Laisser refroidir. Servir avec du yogourt nature, si désiré.


À noter que pour la farine, j’ai pris de la farine de blé blond, comme d’habitude, et j’en ai utilisé 150 grammes, même si cela correspond plus à 1 ¼ tasse qu’à la simple tasse demandée. J’ai aussi ajouté une pincée de sel, quand même!
1 tasse (150 g.) de farine tout usage non blanchie (voir note plus haut)
½ tasse (60 g.) de semoule de maïs fine
2 c. à thé de poudre à pâte
1 pincée de sel cachère
2 œufs
½ tasse (100 g.) de sucre
½ tasse d’huile végétale
1 tasse de yogourt grec nature
1 ½ tasse de framboises surgelées
Placer la grille au centre du four. Préchauffer le four à 375 °F. Chemiser 12 moules à muffins de caissettes de papier ou de silicone.
Dans un bol, mélanger la farine, la semoule de maïs et la poudre à pâte. Réserver.
Dans un autre bol, mélanger au fouet les œufs, le sucre et l’huile. Incorporer le mélange de farine. Ajouter le yogourt et mélanger jusqu’à ce que la pâte soit homogène. À la cuillère de bois, ajouter les framboises. Répartir la pâte dans les moules.
Cuire au four 20 minutes ou jusqu’à ce qu’un cure-dents inséré au centre d’un muffin en ressorte propre. Laisser refroidir. Servir avec du yogourt nature, si désiré.


Tuesday, September 18, 2018
Summer 2018
I haven’t gotten around to recapping the summer, even though school started a few weeks ago already. In my defense, summer doesn’t actually end until September 21st, right?
So over the summer, while in Montreal, I got to try Natrel’s lactose-free ice cream. The vanilla flavor was very good, but my favorite was the saly caramel! There are five flavors in all, but I’m not sure they’re all available in Quebec – British Columbia seems to be their testing ground. This ice cream comes in small packages, like Häagen Daz or Ben & Jerry’s, but without being as fancy or as wild with the flavors. Still, I’ve always preferred that format over large tubs that get frosted over by the time you finish them. I look forward to eating more!

I tried assortments of chocolates from two places for the first time. There was a box of 10 jewels by Christophe Morel – presentation was beautiful, but there was no insulating packaging for shipping, so a few of the chocolate were stuck to the box; I suppose I’m lucky they hadn’t melted further! They were good, but many of them had caramel or nuts, which aren’t really my thing in chocolate.

Then I bought a selection of nine at Chocolats Privilège (this is the place at Jean-Talon Market where I have bought cocoa nibs previously). These were more to my liking, because they were more melt-in-your-mouth while still having original flavors (though, to be fair, I didn’t have them shipped and don’t know how they would have compared to the other ones in that aspect). The box also comes with instructions for the best range of temperatures in which to store the chocolates as well as a “best before” date a month down the road; both these factors make me feel like the chocolate makers are more professional, though obviously that’s just an impression. These chocolates were also a bit less expensive, so all in all, that’s what I’d lean toward next time.

I took the opportunity to make a chocolate peanut butter icebox cake again, to much acclaim. (And this time, the Engineer had been warned not to snack on the chocolate wafers, so I had enough to decorate the top of the cake properly!)

I also made a cake for the Little Prince’s birthday, following his precise instructions regarding contents (chocolate cake, chocolate frosting, chocolate chips, M&Ms, and sprinkles) and their placement (the chocolate chips are in between the two cake layers, which is why you can’t see them here).

As for restaurants, the Engineer and I celebrated out tenth (!) wedding anniversary at Maison Boulud, which is in the Ritz-Carlton in downtown Montreal. I started with the acorn-fed senorio iberico ham, followed it up with the egg yolk ravioli with sheep milk ricotta and spinach coulis, and for dessert, the chocolate coolant with fleur de sel liquid caramel and caramelized milk (and obviously I had some LactoJoy to go with this meal!).
Since my parents are such great babysitters, we went on another date in a nice restaurant: Chez l’Épicier, in the Old Port, which I’d been meaning to try out for a while. I started with the sourdough bread, wild honey and brown butter appetizer, then had the filet mignon with onions and potatoes, and finally the white chocolate aero, rose milk and pink peppercorns for dessert (more LactoJoy, naturally). Presentation was superb, and as much as I loved the food, I think I was even more enamored with the ceramic dishware. I’d have bought a few pieces on the spot!
Also, my mother took me to lunch at Europea, where Jérôme Ferrer is the executive chef; the restaurant is a member of Relais & Châteaux. We had the four-course discovery menu: lobster cappuccino with truffle purée; smoked duck ham and beef tartare, fresh mustard leaves, wild souffléed rice and taro chips, heart of frisée salad; roasted Cornish hen, smoked mashed potatoes, asparagus and root vegetables, bold meat juice reduction; strawberry trifle, candies and sweets (which included tiny lemon madeleines, meringues and cotton candy). This was one of the best meals I’ve had, ever! The lunch menu also offers excellent value. This is one place where I really hope to go again!
Finally, I surprised myself and bought… Crocs. See, I always thought of Crocs as unsightly clogs with holes, which only children and people with no self-respect wore. But I was wrong! I saw some shoes on which Drew Barrymore collaborated and realized I should go take a closer look in a brick-and-mortar store. To be clear, it’s not because they were designed by a celebrity, but it made me realize how stylish some Crocs are! So I went and tried on a few pairs (not hers, in the end), before settling on Swiftwater sandals in turquoise, which replaced my beat-up Land’s End sandals. They haven’t even come close to giving me blisters, which is incredibly surprising for me! Granted, I haven’t worn them for long walks in the Texas heat, but we’ll see how they fare. I’ve also acquired a pair of Kadee flats in black and have loved them so far. Plus, these shoes are really not expensive! I’m including two pictures with the old pair I’m getting rid of on the left, and the new Crocs on the right for comparison. It may be rubber, but it’s a step up, at least for casual occasions.

So over the summer, while in Montreal, I got to try Natrel’s lactose-free ice cream. The vanilla flavor was very good, but my favorite was the saly caramel! There are five flavors in all, but I’m not sure they’re all available in Quebec – British Columbia seems to be their testing ground. This ice cream comes in small packages, like Häagen Daz or Ben & Jerry’s, but without being as fancy or as wild with the flavors. Still, I’ve always preferred that format over large tubs that get frosted over by the time you finish them. I look forward to eating more!

I tried assortments of chocolates from two places for the first time. There was a box of 10 jewels by Christophe Morel – presentation was beautiful, but there was no insulating packaging for shipping, so a few of the chocolate were stuck to the box; I suppose I’m lucky they hadn’t melted further! They were good, but many of them had caramel or nuts, which aren’t really my thing in chocolate.

Then I bought a selection of nine at Chocolats Privilège (this is the place at Jean-Talon Market where I have bought cocoa nibs previously). These were more to my liking, because they were more melt-in-your-mouth while still having original flavors (though, to be fair, I didn’t have them shipped and don’t know how they would have compared to the other ones in that aspect). The box also comes with instructions for the best range of temperatures in which to store the chocolates as well as a “best before” date a month down the road; both these factors make me feel like the chocolate makers are more professional, though obviously that’s just an impression. These chocolates were also a bit less expensive, so all in all, that’s what I’d lean toward next time.

I took the opportunity to make a chocolate peanut butter icebox cake again, to much acclaim. (And this time, the Engineer had been warned not to snack on the chocolate wafers, so I had enough to decorate the top of the cake properly!)

I also made a cake for the Little Prince’s birthday, following his precise instructions regarding contents (chocolate cake, chocolate frosting, chocolate chips, M&Ms, and sprinkles) and their placement (the chocolate chips are in between the two cake layers, which is why you can’t see them here).

As for restaurants, the Engineer and I celebrated out tenth (!) wedding anniversary at Maison Boulud, which is in the Ritz-Carlton in downtown Montreal. I started with the acorn-fed senorio iberico ham, followed it up with the egg yolk ravioli with sheep milk ricotta and spinach coulis, and for dessert, the chocolate coolant with fleur de sel liquid caramel and caramelized milk (and obviously I had some LactoJoy to go with this meal!).
Since my parents are such great babysitters, we went on another date in a nice restaurant: Chez l’Épicier, in the Old Port, which I’d been meaning to try out for a while. I started with the sourdough bread, wild honey and brown butter appetizer, then had the filet mignon with onions and potatoes, and finally the white chocolate aero, rose milk and pink peppercorns for dessert (more LactoJoy, naturally). Presentation was superb, and as much as I loved the food, I think I was even more enamored with the ceramic dishware. I’d have bought a few pieces on the spot!
Also, my mother took me to lunch at Europea, where Jérôme Ferrer is the executive chef; the restaurant is a member of Relais & Châteaux. We had the four-course discovery menu: lobster cappuccino with truffle purée; smoked duck ham and beef tartare, fresh mustard leaves, wild souffléed rice and taro chips, heart of frisée salad; roasted Cornish hen, smoked mashed potatoes, asparagus and root vegetables, bold meat juice reduction; strawberry trifle, candies and sweets (which included tiny lemon madeleines, meringues and cotton candy). This was one of the best meals I’ve had, ever! The lunch menu also offers excellent value. This is one place where I really hope to go again!
Finally, I surprised myself and bought… Crocs. See, I always thought of Crocs as unsightly clogs with holes, which only children and people with no self-respect wore. But I was wrong! I saw some shoes on which Drew Barrymore collaborated and realized I should go take a closer look in a brick-and-mortar store. To be clear, it’s not because they were designed by a celebrity, but it made me realize how stylish some Crocs are! So I went and tried on a few pairs (not hers, in the end), before settling on Swiftwater sandals in turquoise, which replaced my beat-up Land’s End sandals. They haven’t even come close to giving me blisters, which is incredibly surprising for me! Granted, I haven’t worn them for long walks in the Texas heat, but we’ll see how they fare. I’ve also acquired a pair of Kadee flats in black and have loved them so far. Plus, these shoes are really not expensive! I’m including two pictures with the old pair I’m getting rid of on the left, and the new Crocs on the right for comparison. It may be rubber, but it’s a step up, at least for casual occasions.

Friday, September 14, 2018
Salade de patates douces façon tex-mex
J’ai essayé une recette estivale de tomates grillées à l’ail, mais nous l’avons tous trouvée moyenne. (J’ai réduit les restes en purée et je les ai mis au congélateur, en espérant les passer dans une sauce tomate.) J’ai aussi fait un souper en me basant sur une recette du magazine Ricardo (pas en ligne) pour des tacos au bœuf et aux patates douces, avec des avocats et des oignons, qui étaient tout simplement délicieux!


Pour faire le pont avec ces goûts tex-mex et les tomates d’été, j’ai ensuite fait une salade de patates douces tirée du magazine Tellement bon! avec une belle tomate de variété ancienne. Malheureusement, le magazine n’est plus publié, alors la recette ne se trouve pas en ligne non plus, mais je trouvais ça tellement dommage de ne pas vous en faire profiter que je l’ai recopiée ci-dessous en l’adaptant un peu. C’est exactement le genre de chose que j’aime manger le midi, et il y avait assez de variété pour plaire au Renard. Bon appétit!
3 patates douces, pelées et coupées en cubes d’environ 1 ½ po.
2 c. à soupe d’huile d’olive
1 pincée de piment fort (ou de piment coréen, ou rien du tout)
sel et poivre, au goût
1 boîte (15 oz ou 19 oz, selon le pays) de haricots noirs, rincés et égouttés
1 boîte de maïs en grains, égoutté
2 avocats, en dés
8 oz. de tomates, en gros cubes
1 petit oignon rouge, en lamelles
1 petite botte de coriandre, grossièrement hachée
le jus de 1 lime
Préchauffer le four à 400 °F. Sur une plaque à cuisson, mettre les cubes de patate douce, puis les enrober de 1 c. à soupe d’huile, de flocons de piment fort, de sel et de poivre. Les faire rôtir 30 minutes ou jusqu’à ce qu’ils soient tendres.
Dans un grand bol, mélanger les haricots, le maïs, les avocats, les tomates, l’oignon, la coriandre, le jus de lime et 1 c. à soupe d’huile d’olive, en remuant délicatement pour éviter d’écraser les avocats. (Moi, je mets les avocats seulement avant de servir, ce qui permet de garder les restes beaux plus longtemps.)
Répartir la salade dans 4 assiettes, garnir des patates douces rôties et servir.


Pour faire le pont avec ces goûts tex-mex et les tomates d’été, j’ai ensuite fait une salade de patates douces tirée du magazine Tellement bon! avec une belle tomate de variété ancienne. Malheureusement, le magazine n’est plus publié, alors la recette ne se trouve pas en ligne non plus, mais je trouvais ça tellement dommage de ne pas vous en faire profiter que je l’ai recopiée ci-dessous en l’adaptant un peu. C’est exactement le genre de chose que j’aime manger le midi, et il y avait assez de variété pour plaire au Renard. Bon appétit!
3 patates douces, pelées et coupées en cubes d’environ 1 ½ po.
2 c. à soupe d’huile d’olive
1 pincée de piment fort (ou de piment coréen, ou rien du tout)
sel et poivre, au goût
1 boîte (15 oz ou 19 oz, selon le pays) de haricots noirs, rincés et égouttés
1 boîte de maïs en grains, égoutté
2 avocats, en dés
8 oz. de tomates, en gros cubes
1 petit oignon rouge, en lamelles
1 petite botte de coriandre, grossièrement hachée
le jus de 1 lime
Préchauffer le four à 400 °F. Sur une plaque à cuisson, mettre les cubes de patate douce, puis les enrober de 1 c. à soupe d’huile, de flocons de piment fort, de sel et de poivre. Les faire rôtir 30 minutes ou jusqu’à ce qu’ils soient tendres.
Dans un grand bol, mélanger les haricots, le maïs, les avocats, les tomates, l’oignon, la coriandre, le jus de lime et 1 c. à soupe d’huile d’olive, en remuant délicatement pour éviter d’écraser les avocats. (Moi, je mets les avocats seulement avant de servir, ce qui permet de garder les restes beaux plus longtemps.)
Répartir la salade dans 4 assiettes, garnir des patates douces rôties et servir.
Thursday, September 13, 2018
Chocolate Chips Scones

I was surprised to find that I don’t have a recipe for chocolate chip scones on here yet. I mean, I made pear and chocolate chip scones and then ginger and chocolate chunk scones, but not plain chocolate chip. So of course I had to remedy that with this recipe! We all loved it, but then again, chocolate chips for breakfast are an easy sell.
2 cups (250 g.) all-purpose flour
2 ½ tsp. baking powder
1 tsp. cinnamon
½ tsp. salt
½ cup (1 stick; 115 g.) lactose-free butter, frozen (or very cold)
½ cup lactose-free cream, plus an extra 2 Tbsp. for brushing
½ cup (100 g.) packed light or dark brown sugar
1 large egg
1 tsp. vanilla extract
1 heaping cup (180 g.) mini semi-sweet chocolate chips
coarse sugar for sprinkling on top before baking (optional)
confectioners' sugar for topping after baking (optional)
Preheat oven to 400 °F. Adjust baking rack to the middle-low position. Line a large baking sheet with parchment paper or a silicone baking mat. Set aside.
In a large bowl, whisk the flour, baking powder, cinnamon, and salt together. Grate the frozen butter. (You can do this by hand or with a food processor, but as I like using the food processor instead of a bowl and a fork or pastry cutter to mix scone dough, I cut corners and cut the butter into little cubes instead.) Toss the grated butter into the flour mixture and combine it with a pastry cutter, a fork, or your fingers until the mixture resembles coarse meal. Set aside.
In a small bowl, whisk ½ cup lactose-free cream, the brown sugar, egg, and vanilla extract together. Drizzle it over the flour mixture and then toss the mixture together with a rubber spatula until everything appears moistened. Mix in the chocolate chips. With floured hands, work the dough into a ball as best you can and transfer to a floured surface. Press into a neat 8″ disc and cut into 8 equal wedges with a very sharp knife. Place scones at least 2 inches apart on the prepared baking sheet. Brush scones with remaining cream, then sprinkle with coarse sugar, if desired (it adds some nice crunch!).
Bake for 20-25 minutes or until lightly golden and cooked through. Remove from the oven and allow to cool. Sprinkle lightly with confectioners' sugar, if desired.

Tuesday, September 11, 2018
Double Chocolate Tart with Black Pepper Ice Cream and Candied Nuts
I got this recipe from Bon Appétit years ago (the online edition says it was published in 2011, which somehow is even more years ago than I thought). It calls for cream, so I waited until I was in Canada to get lactose-free cream; that being said, coconut milk would be a reasonable substitute here. I used semi-sweet chocolate instead of milk chocolate and loved it, so that’s what I’m writing below. Since I couldn’t find skinned hazelnuts and really didn’t want to bother skinning them myself, I used macadamia nuts instead. OH, wow, was this ever wonderful! Everyone loved it. And FYI, leftover ice cream is delicious with warm chocolate syrup!
For the ice cream
2 cups lactose-free cream
2 cups lactose-free whole milk
1 cup sugar, divided
1 tsp. kosher salt
9 large egg yolks
1 Tbsp. freshly ground black pepper
For the candied nuts
¼ cup sugar
1 large egg white
¼ tsp. kosher salt
¾ cup skinned hazelnuts (see note above)
For the tart
6 ½ oz. chocolate wafer cookies (such as Nabisco Famous Chocolate Wafers, about 28 cookies), coarsely broken
5 Tbsp. lactose-free butter, melted
15 oz. high-quality semi-sweet chocolate (such as Valrhona, Scharffen Berger, or Lindt), chopped
1 ¼ cups lactose-free cream
For the ice cream
Bring cream, milk, ½ cup sugar, and salt to a boil in a large heavy saucepan over medium heat, stirring to dissolve sugar; remove from heat.
Whisk egg yolks and remaining ½ cup sugar in a large bowl to blend; gradually whisk in hot milk mixture and return to saucepan. Stir over low heat until custard thickens and your finger leaves a path on the back of a spoon when drawn across, about 6 minutes. Pour through a fine-mesh strainer into a medium bowl. Stir in pepper. Set bowl over a large bowl of ice water; stir until cold.
Process custard in an ice cream maker according to manufacturer's instructions. Transfer to a container, cover, and freeze. (The ice cream can be made up to 3 days ahead.)
For the candied nuts
Preheat oven to 250 °F. Line a baking sheet with parchment paper.
Whisk sugar, egg white, and salt in a medium bowl just until bubbles form. Stir in hazelnuts. Spread out on prepared sheet. Bake, stirring every 10 minutes, until nuts are golden brown and caramelized, about 50 minutes. (The nuts can be made a day ahead. Store airtight at room temperature.)
For the tart
Preheat oven to 325 °F. Coat tart pan with nonstick spray (I used a tart pan with a removable bottom).
Finely grind cookies in a food processor. Drizzle butter over; pulse until blended. Press evenly onto bottom and up sides of pan. Bake until firm, about 15 minutes. Let cool completely.
Place chocolate in a medium bowl. Bring cream to a boil in a small saucepan. Pour over chocolate; stir until melted. Pour filling over cooled crust. Freeze until firm, at least 2 hours and up to 2 days (mine lasted a bit longer and suffered no ill effects).
Remove the tart pan side. Cut tart into wedges, working quickly as tart will become gooey as it sits (this was not actually a big issue for me); place 1 piece on each plate. Serve with a scoop of black pepper ice cream and garnish with candied hazelnuts.

For the ice cream
2 cups lactose-free cream
2 cups lactose-free whole milk
1 cup sugar, divided
1 tsp. kosher salt
9 large egg yolks
1 Tbsp. freshly ground black pepper
For the candied nuts
¼ cup sugar
1 large egg white
¼ tsp. kosher salt
¾ cup skinned hazelnuts (see note above)
For the tart
6 ½ oz. chocolate wafer cookies (such as Nabisco Famous Chocolate Wafers, about 28 cookies), coarsely broken
5 Tbsp. lactose-free butter, melted
15 oz. high-quality semi-sweet chocolate (such as Valrhona, Scharffen Berger, or Lindt), chopped
1 ¼ cups lactose-free cream
For the ice cream
Bring cream, milk, ½ cup sugar, and salt to a boil in a large heavy saucepan over medium heat, stirring to dissolve sugar; remove from heat.
Whisk egg yolks and remaining ½ cup sugar in a large bowl to blend; gradually whisk in hot milk mixture and return to saucepan. Stir over low heat until custard thickens and your finger leaves a path on the back of a spoon when drawn across, about 6 minutes. Pour through a fine-mesh strainer into a medium bowl. Stir in pepper. Set bowl over a large bowl of ice water; stir until cold.
Process custard in an ice cream maker according to manufacturer's instructions. Transfer to a container, cover, and freeze. (The ice cream can be made up to 3 days ahead.)
For the candied nuts
Preheat oven to 250 °F. Line a baking sheet with parchment paper.
Whisk sugar, egg white, and salt in a medium bowl just until bubbles form. Stir in hazelnuts. Spread out on prepared sheet. Bake, stirring every 10 minutes, until nuts are golden brown and caramelized, about 50 minutes. (The nuts can be made a day ahead. Store airtight at room temperature.)
For the tart
Preheat oven to 325 °F. Coat tart pan with nonstick spray (I used a tart pan with a removable bottom).
Finely grind cookies in a food processor. Drizzle butter over; pulse until blended. Press evenly onto bottom and up sides of pan. Bake until firm, about 15 minutes. Let cool completely.
Place chocolate in a medium bowl. Bring cream to a boil in a small saucepan. Pour over chocolate; stir until melted. Pour filling over cooled crust. Freeze until firm, at least 2 hours and up to 2 days (mine lasted a bit longer and suffered no ill effects).
Remove the tart pan side. Cut tart into wedges, working quickly as tart will become gooey as it sits (this was not actually a big issue for me); place 1 piece on each plate. Serve with a scoop of black pepper ice cream and garnish with candied hazelnuts.

Thursday, September 06, 2018
Cornets au fromage ricotta et aux pépites de chocolat
Quand j’étais au Québec cet été, j’ai lu un numéro du magazine 3 fois par jour où il y avait toute une section sur le fromage ricotta, avec une recette de fromage ricotta maison et plein d’autres recettes pour l’utiliser. L’une d’entre elles s’intitulait « Cornets à la crème de ricotta aux pépites de chocolat » et elle m’a fait penser à des cannolis. Et vu que j’aimais tellement les cannolis quand j’étais petite (et que je ne peux plus en manger depuis que je suis intolérante au lactose), j’ai fait des cannolis. Mais en fait, je n’ai pas suivi la recette, je m’en suis plutôt inspirée! J’ai aimé l’idée d’utiliser des cornets au lieu des coquilles de cannolis, qui peuvent être difficiles à trouver, mais j’ai fait ma recette de ricotta et je n’ai pas fait congeler la garniture. (Si vous êtes vraiment, mais vraiment, motivés, vous pouvez même faire les coquilles vous-mêmes avec cette recette-ci.) J’ai aussi utilisé des pépites de chocolat miniatures, que je trouve plus appropriée dans ce cas-ci. Ci-dessous, ma recette de ricotta, puis la garniture inspirée de 3 fois par jour. Nous avons vraiment adoré! Ça me rappelait vraiment les cannolis de mon enfance, en légèrement moins sucré (j’ajoute donc une indication ci-dessous). Le Petit Prince a tellement aimé ça qu’il les a préférés à de la vraie crème glacée! Vraiment, c’est à refaire. Buon appetito!
Pour le fromage ricotta
3 tasses de lait entier sans lactose
1 tasse de crème sans lactose (ou alors 1 autre tasse de lait entier sans lactose)
½ c. à thé de gros sel de mer
3 c. à soupe de jus de citron fraîchement pressé
Verser le lait, la crème et le sel dans une grande casserole et y fixer un thermomètre à bonbons. Faire chauffer le lait jusqu’à 190 °F en le mélangeant de temps à autre pour l’empêcher de brûler au fond de la casserole. Retirer du feu et ajouter le jus de citron, en mélangeant doucement d’un geste ou deux. Laisser reposer le tout pendant 5 minutes.
Tapisser une passoire de quelques épaisseurs d’étamine et la placer au-dessus d’un grand bol (pour recueillir le petit-lait). Verser le contenu de la casserole dans la passoire et laisser le caillé reposer pendant au moins 1 heure; le fromage ricotta sera alors mou et facile à étendre. Après 2 heures, il sera un peu plus ferme, un peu comme du fromage à la crème. Jeter le petit-lait (ou le garder pour cuisiner autre chose, si le cœur vous en dit). Utiliser le fromage ricotta tout de suite ou le transférer dans un contenant hermétique et le réfrigérer jusqu’à une semaine.
Pour les cornets
1 ½ tasse de ricotta sans lactose (voir plus haut)
3 (ou 4) c. à soupe de sucre en poudre
1 c. à thé de vanille
¼ c. à thé de cannelle (facultatif)
½ tasse de pépites de chocolat miniatures
6 cornets gaufrés ou sucrés
Mélanger au robot le fromage ricotta, le sucre en poudre, la vanille et la cannelle jusqu’à homogénéité. Puis, avec une cuillère de bois ou une spatule, incorporer les pépites de chocolat au mélange. En garnir les cornets.
Pour le fromage ricotta
3 tasses de lait entier sans lactose
1 tasse de crème sans lactose (ou alors 1 autre tasse de lait entier sans lactose)
½ c. à thé de gros sel de mer
3 c. à soupe de jus de citron fraîchement pressé
Verser le lait, la crème et le sel dans une grande casserole et y fixer un thermomètre à bonbons. Faire chauffer le lait jusqu’à 190 °F en le mélangeant de temps à autre pour l’empêcher de brûler au fond de la casserole. Retirer du feu et ajouter le jus de citron, en mélangeant doucement d’un geste ou deux. Laisser reposer le tout pendant 5 minutes.
Tapisser une passoire de quelques épaisseurs d’étamine et la placer au-dessus d’un grand bol (pour recueillir le petit-lait). Verser le contenu de la casserole dans la passoire et laisser le caillé reposer pendant au moins 1 heure; le fromage ricotta sera alors mou et facile à étendre. Après 2 heures, il sera un peu plus ferme, un peu comme du fromage à la crème. Jeter le petit-lait (ou le garder pour cuisiner autre chose, si le cœur vous en dit). Utiliser le fromage ricotta tout de suite ou le transférer dans un contenant hermétique et le réfrigérer jusqu’à une semaine.
Pour les cornets
1 ½ tasse de ricotta sans lactose (voir plus haut)
3 (ou 4) c. à soupe de sucre en poudre
1 c. à thé de vanille
¼ c. à thé de cannelle (facultatif)
½ tasse de pépites de chocolat miniatures
6 cornets gaufrés ou sucrés
Mélanger au robot le fromage ricotta, le sucre en poudre, la vanille et la cannelle jusqu’à homogénéité. Puis, avec une cuillère de bois ou une spatule, incorporer les pépites de chocolat au mélange. En garnir les cornets.
Wednesday, August 29, 2018
Creamy Balsamic Mushroom Bacon Chicken
Contrary to what it may seem, given my last two posts, I do not spend my whole summer eating caramel. I make the occasional savory dish, too! Like this creamy balsamic mushroom bacon chicken. Okay, yes, it still calls for cream, but I never have it the rest of the year, so it balances out. This was delicious, by the way!
With 4 chicken breasts, it would seem that the yield should be 4 servings, but we had much more than that! I ended up freezing the leftovers. This is good served with potatoes and a green salad, for example.
1 Tbsp. olive oil
4 chicken breasts, thinly sliced
5 slices of bacon, chopped
4 oz. mushrooms, sliced
½ cup chicken broth
1 cup lactose-free cream
3 Tbsp. balsamic vinegar
½ cup grated parmesan cheese
salt and pepper
chopped parsley, to garnish
In a large skillet, pour 1 tablespoon olive oil and cook the chicken on medium high heat for 3-5 minutes on each side or until golden-brown and cooked through. Remove chicken and set aside on a plate.
Add the bacon to the skillet and cook until crisp. Remove bacon and set aside on plate. Add the mushrooms to the skillet and cook until tender. Remove and set aside on a plate.
Add the chicken broth, cream, balsamic vinegar, parmesan cheese, and salt and pepper to the skillet. Whisk over medium high heat until it starts to thicken 3-5 minutes. Add the mushrooms to the sauce.
Add chicken to the skillet and let simmer for 1-2 minutes. Top with crispy bacon and chopped parsley.
With 4 chicken breasts, it would seem that the yield should be 4 servings, but we had much more than that! I ended up freezing the leftovers. This is good served with potatoes and a green salad, for example.
1 Tbsp. olive oil
4 chicken breasts, thinly sliced
5 slices of bacon, chopped
4 oz. mushrooms, sliced
½ cup chicken broth
1 cup lactose-free cream
3 Tbsp. balsamic vinegar
½ cup grated parmesan cheese
salt and pepper
chopped parsley, to garnish
In a large skillet, pour 1 tablespoon olive oil and cook the chicken on medium high heat for 3-5 minutes on each side or until golden-brown and cooked through. Remove chicken and set aside on a plate.
Add the bacon to the skillet and cook until crisp. Remove bacon and set aside on plate. Add the mushrooms to the skillet and cook until tender. Remove and set aside on a plate.
Add the chicken broth, cream, balsamic vinegar, parmesan cheese, and salt and pepper to the skillet. Whisk over medium high heat until it starts to thicken 3-5 minutes. Add the mushrooms to the sauce.
Add chicken to the skillet and let simmer for 1-2 minutes. Top with crispy bacon and chopped parsley.
Sunday, August 26, 2018
Salted Caramel Chocolate Mousse

I couldn’t resist trying this salted butter caramel chocolate mousse recipe when I was in Canada. I think I first saw it on the White on Rice Couple’s blog, though it appears to have disappeared from the site now. A Google search turned it up again on Epicurious, and it turns out that the recipe is originally by David Lebovitz, from his book My Paris Kitchen. I didn’t bother using “butter” in the title because I didn’t really see the difference between good caramel that is salted and contains butter versus salted butter caramel, at least as far as taste goes. Besides, the lactose-free butter on the market is salted anyway, so there you go. This mousse was absolutely delicious; my mother found is very sweet, but I thought it was more rich than sweet. The kids loved it, obviously. I’ll have to make this one again!
½ cup granulated sugar
3 Tbsp. lactose-free butter, cut into cubes
¾ cup lactose-free cream (coconut milk will do here)
6 oz. (170 g.) bittersweet or semisweet chocolate, chopped
4 large eggs, separated
a rounded ¼ tsp. flaky sea salt, preferably fleur de sel
Spread the sugar evenly over the bottom of a wide saucepan (ideally not a dark one, as you’ll need to see the color of the caramel). Heat the sugar over medium heat. As it begins to liquefy at the edges, use a heatproof spatula to very gently drag the liquefied sugar toward the center. Watch carefully, as once the edges start to darken, the sugar is in danger of burning. Continue to cook, stirring very gently, until all the sugar is melted and begins to caramelize. (The original recipe suggest taking it to the edge of burnt, and even letting it burn just a bit, but that usually tastes too bitter to me, so I stopped when the whole thing was a light amber color.)
Remove the caramel from the heat and quickly whisk in the butter, stirring until melted. Gradually whisk in the cream and stir until the little bits of caramel are completely melted. (This can take a while; if all else fails, the mixture can be strained.)
When the caramel is smooth, add the chocolate, stirring gently until it’s melted and smooth. Scrape the mixture into a large bowl and let it cool to room temperature. Once it’s no longer warm, whisk in the egg yolks.
In a separate bowl, whip the egg whites until stiff. Fold one-third of the whipped whites into the chocolate mixture, sprinkling in the flaky salt. Fold in the remaining beaten egg whites just until no streaks of white remain. Divide the mousse into serving glasses (I made 6 servings), or transfer it to a decorative serving bowl, and chill for at least 8 hours.

Sunday, August 19, 2018
Salted Caramel Pound Cake

I came across this recipe over the summer and made it the very next week, which is incredibly fast in my world. But hey, it calls for whipped cream, and only Canada has lactose-free cream for the moment, so it was then or never. And wow, was it good! Great is more like it, really; we all loved it. The Little Prince even said it was the best cake I had ever made and even chose it over a Drumstick (which had become his favorite dessert ever the previous week). I’ll have to remember to make it every once in a while when we’re up there!
For the cake
12 Tbsp. lactose-free butter, softened
1 cup all-purpose flour, plus more for pan
¾ cup cake flour
½ tsp. baking powder
½ tsp. kosher salt
1 ¼ cups granulated sugar
2 tsp. vanilla extract
2 large eggs, room temperature
2 large egg yolks, room temperature
¾ cup lactose-free cream
For the salted caramel glaze
½ cup packed dark-brown sugar
½ cup lactose-free cream
5 Tbsp. lactose-free butter
1 ¾ tsp. fleur de sel, divided (I used a total of 1 ¼ tsp.)
¼ to ½ cup confectioners’ sugar, sifted
For the cake
Preheat the oven to 350 °F and position a rack in the center of the oven. Butter the bottom and sides of a 9-by-5-inch loaf pan. Place a long piece of parchment paper in the bottom of the pan, letting the parchment extend up the two long sides of the pan and overhang slightly. (This will make it easy to remove the pound cake from the pan after it is baked.) Butter the parchment paper and dust with flour; remove any excess flour.
Whisk together the flours, baking powder, and salt in a medium bowl.
Beat the butter and granulated sugar on high speed until fluffy, 4 to 5 minutes, in the bowl of a stand mixer fitted with the paddle attachment. (I did this with a handheld electric mixer.) Add the vanilla and beat until incorporated, about 15 seconds. Scrape down the sides and bottom of the bowl.
With the mixer on medium-low speed, add the eggs and the egg yolks, one at a time, beating for about 1 minute after each addition. Scrape down the sides and bottom of the bowl again and beat for 10 seconds. Turn the mixer to low speed and add the flour mixture in three parts, alternating with the cream, beginning and ending with the flour mixture.
Transfer batter to prepared pan, smooth top with an offset spatula, and bake until a skewer inserted into the center comes out with a few moist crumbs, 55 to 65 minutes. (If top of cake begins to darken too much before it is done in the middle, tent pan with aluminum foil and continue baking.) Place pan on a cooling rack for 15 minutes. Using a small knife or offset spatula, gently loosen cake from sides of the pan, pull up on parchment paper to lift cake out of pan, and place it directly on cooling rack.
For the salted caramel glaze
Stir together the brown sugar, cream, and butter in a medium saucepan over low heat. When butter is half melted, increase heat to medium-high and bring mixture to a boil. Whisking constantly, boil mixture for 1 ½ minutes. Remove from heat, whisk vigorously for 1 minute to release excess heat, and add ¾ teaspoon fleur de sel. Let cool 5 minutes.
Sift in ¼ cup confectioners’ sugar and whisk until combined. Continue adding confectioners’ sugar, a tablespoon at a time, until the mixture is pourable and slightly thick (it will thicken more as it cools); you may not use all of the confectioners’ sugar.
Place cake on wire rack set over rimmed baking sheet covered in parchment (to catch the excess caramel). Use a bamboo skewer to poke holes in cake. Pour warm caramel glaze over cake to cover. Sprinkle evenly with remaining 1 teaspoon fleur de sel (I only used ½ teaspoon). Let cool 15 to 20 minutes before serving.


Rhubarb and Strawberry Ripple Frozen Yogurt
Here’s a recipe that would be best in early summer. Granted, we still have rhubarb in San Antonio, but the strawberries are not in season. I made this rhubarb and strawberry ripple frozen yogurt twice already, tweaking it a bit each time, and would have one more thing to add below.
The first time I made this, I hadn’t been able to find a lactose-free whole milk Greek yogurt at the store, so I added 4 tablespoons of maple syrup to the yogurt. This helped a bit with the taste, as it wouldn’t have been sweet enough for me otherwise, but it also helped make the frozen yogurt softer once it was frozen (both fat and sugar will do that, especially liquid sweeteners as opposed to granulated sugar). However, the frozen yogurt was still too hard for my taste.
Fast-forward a few years and I made the recipe again and increased the amount of sweetener a bit more. This time, I did have lactose-free whole-milk Greek yogurt, so I thought I’d be good, but it turns out it was still too hard for my taste – though the amount of sweetener was spot-on with seasonal Quebec strawberries. So in a last-ditch effort, do yourself a favor and add 2 tablespoons of vodka to this recipe, to make sure the yogurt isn’t rock-hard in the freezer.
½ lb. (225 g.) rhubarb, sliced
1 lb. (500 g.) strawberries, coarsely chopped
1 vanilla pod, seeds scraped (I used 1 tsp. vanilla bean paste)
¼ cup (4 Tbsp.) + ½ cup (8 Tbsp.) honey
2 cups lactose-free full-fat plain yogurt (Greek or Turkish style)
2 Tbsp. vodka
Place rhubarb, strawberries, vanilla pod and seeds, and 4 Tbsp. honey in a medium size saucepan. Cover and bring to a boil; lower the heat and simmer for 10 minutes. Remove the pod and use a fork or a stick blender to mash up the fruit. Refrigerate for 1 hour or until completely cool.
Combine yogurt, vodka, the rest of the honey and ¾ of the fruit compote. Pour the mixture into an ice cream machine and follow the manufacturer’s instructions. When done, remove the ice cream paddle. Stir in the rest of the fruit compote carefully so you get a ripple effect. Pour the mixture into a freeze proof container. Leave in the freezer until firm, or as long as you like.
Monday, July 30, 2018
Raspberry Ricotta Cake

I had seen this recipe in a few places – I think it’s originally from Bon Appétit, but I made Molly Wizenberg’s version. This cake was absolutely delicious! The ricotta was a great addition, and summer berries are always great. I’m thinking the Engineer would have enjoyed this more with blueberries, but the rest of us loved it as is!
I’m posting my recipe for ricotta again below, because I realize it’s annoying to have to click away and then flip back and forth between two tabs. This time, I made it with lactose-free cream (I highly recommend this if you have the cream, as the resulting ricotta is so much richer and – obviously – creamier) and I doubled the recipe, to make sure I had enough, because when I use only milk I get about 1 generous cup of ricotta. It turns out that the yield is greater when using cream as compared to only milk, possibly because you have more solids to start with (maybe someone who is well-versed in cheese-making could chime in). Anyway, since the strawberries were in season, I used leftover ricotta to make this strawberry raspberry arugula salad with ricotta topping, which I also highly recommend.

For the ricotta
3 cups lactose-free whole milk
1 cup lactose-free cream (if unavailable, use 1 more cup lactose-free whole milk and see note above)
½ tsp coarse sea salt
3 Tbsp. freshly squeezed lemon juice
Pour the milk, cream and salt into a 3-quart nonreactive saucepan. Attach a candy or deep-fry thermometer. Heat the milk to 190 °F, stirring it occasionally to keep it from scorching on the bottom. Remove from heat and add the lemon juice, then stir it once or twice, gently and slowly. Let the pot sit undisturbed for 5 minutes.
Line a colander with a few layers of cheesecloth and place it over a large bowl (to catch the whey). Pour the curds and whey into the colander and let the curds strain for at least an hour. At an hour, you’ll have a tender, spreadable ricotta. At two hours, it will be spreadable but a bit firmer, almost like cream cheese. (It will firm as it cools, so do not judge its final texture by what you have in your cheesecloth.) Discard the whey, or, if you’re one of those crafty people who use it for other things, of course, save it. Use the ricotta right away or transfer it to an airtight container and refrigerate until ready to use.
For the raspberry ricotta cake
1 ½ cups (210 g.) all-purpose flour
1 cup (200 g.) sugar
2 tsp. baking powder
¾ tsp. kosher salt
3 large eggs
1 ½ cups (325 g.) whole-milk ricotta (see above for lactose-free version)
½ tsp. vanilla extract
1 stick lactose-free butter, melted
1 cup (100 g.) frozen raspberries, divided (I used fresh raspberries)
Preheat the oven to 350 °F. Lightly grease a 9-inch round cake pan (I used a springform pan), and press a round of parchment paper into the bottom; grease it again.
In a large bowl, whisk the flour, sugar, baking powder, and kosher salt.
In a medium bowl, whisk the eggs, ricotta, and vanilla until smooth. Gently stir ricotta mixture into the dry ingredients until just blended. Then fold in the butter, followed by ¾ cup of the raspberries, taking care not to crush them. Scrape the batter into the prepared pan, smoothing it evenly, and scatter the remaining raspberries on top.
Bake the cake until it is golden brown and a toothpick inserted into the center comes out clean, 50 to 60 minutes. Let cool at least 20 minutes before unmolding. Cool completely before serving.

Thursday, July 26, 2018
Double Chocolate Banana Bread
So, it turns out there are banana breads I hadn’t made yet – one of them being this double chocolate banana bread from Smitten Kitchen. As is the case with all banana breads, it is easy to make and incredibly satisfying first thing in the morning. And with all the chocolate, it’s obviously an easy sell with the kids. Give it a try!
1 cup (125 g.) all-purpose flour (or white whole wheat would work too)
½ cup Dutch-process cocoa powder
1 tsp. baking soda
¼ tsp. table salt
3 medium-to-large very ripe bananas
½ cup lactose-free butter, melted
¾ cup (145 g.) brown sugar
1 large egg
1 tsp. pure vanilla extract
1 cup (about 6 oz. or 170 g.) semisweet or bittersweet chocolate chunks or chips
Preheat the oven to 350 °F. Butter a 9×5-inch loaf pan, or spray it with a nonstick baking spray.
In a medium bowl, sift together the flour, cocoa, baking soda, and salt. (My cocoa is always lumpy, so I think sifting it is essential.) Whisk together and set aside.
Mash bananas in the bottom of a large bowl. (You’ll have a little over 1 cup mashed banana total.) Whisk in melted butter, then brown sugar, egg, and vanilla. Stir dry ingredients into wet ingredients with a wooden spoon until just combined. Stir in chocolate chunks or chips.
Pour into prepared pan and bake 55 to 65 minutes, until a tester or toothpick inserted into the center of the cake comes out batter-free, though a smear of melted chocolate is normal. Cool in pan for 10 to 15 minutes, then run a knife around the edge and invert it out onto a cooling rack. Serve warm or at room temperature.

1 cup (125 g.) all-purpose flour (or white whole wheat would work too)
½ cup Dutch-process cocoa powder
1 tsp. baking soda
¼ tsp. table salt
3 medium-to-large very ripe bananas
½ cup lactose-free butter, melted
¾ cup (145 g.) brown sugar
1 large egg
1 tsp. pure vanilla extract
1 cup (about 6 oz. or 170 g.) semisweet or bittersweet chocolate chunks or chips
Preheat the oven to 350 °F. Butter a 9×5-inch loaf pan, or spray it with a nonstick baking spray.
In a medium bowl, sift together the flour, cocoa, baking soda, and salt. (My cocoa is always lumpy, so I think sifting it is essential.) Whisk together and set aside.
Mash bananas in the bottom of a large bowl. (You’ll have a little over 1 cup mashed banana total.) Whisk in melted butter, then brown sugar, egg, and vanilla. Stir dry ingredients into wet ingredients with a wooden spoon until just combined. Stir in chocolate chunks or chips.
Pour into prepared pan and bake 55 to 65 minutes, until a tester or toothpick inserted into the center of the cake comes out batter-free, though a smear of melted chocolate is normal. Cool in pan for 10 to 15 minutes, then run a knife around the edge and invert it out onto a cooling rack. Serve warm or at room temperature.

Wednesday, July 25, 2018
Almost-Ketogenic Vanilla Cupcakes
A few months ago, I tried another vegan cupcake recipe, this one with a maple buttercream that called for coconut oil and non-dairy milk powder. The frosting was way too liquid; I added a tablespoon of ground chia seeds and let it set up in the fridge, but it was still a disaster. I don’t know if it was just too hot for the coconut oil, but I have to admit I’m not too keen on recipes that only work if the weather is just right (I’m looking at you, meringues). The cupcakes themselves were only okay.
Once I was in Canada, though, I decided to try a vanilla cupcake recipe by Ketogenic Girl (full disclosure: I knew her briefly when we were teenagers living abroad). I’m not actually considering a ketogenic diet, because it is way too restrictive for me (not to mention the anecdotal negative side effects), BUT I was curious about ketogenic baked goods. That being said, I used regular sugar because I didn’t have stevia and I don’t like the taste of it anyway. I don’t know how erythritol compares, but I didn’t feel like tracking it down… So these are almost-ketogenic, but that was good enough for me. Also, since these are gluten-free, I’m not convinced that baking powder is necessary, but I didn’t want to change the recipe too much in one go – I already ran out of almond flour and had to top it up with hazelnut flour as it was! I really liked the cupcakes themselves, but for the frosting, I recommend either increasing the amount of sugar or omitting the frosting altogether. Everyone here liked these, though the Fox was the most vocal about it!
For the cupcakes
1 cup (4 oz./115 g.) almond flour (I used 2.8 oz. almond flour and 1.2 oz. hazelnut flour)
2 Tbsp. coconut flour
1 tsp. baking powder
½ tsp. fine sea salt
1 cup lactose-free cream
2 whole eggs
4 egg yolks
¼ cup (1¼ oz./36 g.) erythritol or granulated/powdered stevia (I used granulated sugar)
½ tsp. liquid stevia (I omitted this)
½ tsp. vanilla bean paste (or 1 tsp. vanilla extract)
For the frosting (see note above)
½ cup (4 oz./115 g.) lactose-free butter, softened
2 Tbsp. coconut oil, softened
2 Tbsp. granulated stevia or erythritol, ground until powdery (I used powdered sugar)
Preheat the oven to 350 °F. Line 11 wells of a standard-size 12-well muffin pan with paper liners. (The original recipe said 10, but I got 11 cupcakes from this – too bad it’s not an even 12!)
In a medium bowl, whisk together the almond flour, coconut flour, baking powder, and salt until well blended. Set aside.
Using a stand mixer or handheld mixer, whip the cream until stiff peaks form. Add the whole eggs and egg yolks, one at a time, beating after each addition. Add the powdered sweetener, liquid stevia, and vanilla and mix to combine.
Fold the flour mixture into the cream mixture and combine well.
Fill each cupcake liner about three-quarters full with the batter. Bake for 20 minutes, until a toothpick inserted in the center of a cupcake comes out clean. Let cool in the pan for 20 minutes before frosting.
While the cupcakes are cooling, make the frosting. Using a stand mixer or handheld mixer, whip together all the frosting ingredients until creamy and fluffy.
When the cupcakes are cool, scoop the frosting into a piping bag and pipe the frosting evenly onto the cupcakes. Alternatively, use a knife to spread frosting on each cupcake.


Once I was in Canada, though, I decided to try a vanilla cupcake recipe by Ketogenic Girl (full disclosure: I knew her briefly when we were teenagers living abroad). I’m not actually considering a ketogenic diet, because it is way too restrictive for me (not to mention the anecdotal negative side effects), BUT I was curious about ketogenic baked goods. That being said, I used regular sugar because I didn’t have stevia and I don’t like the taste of it anyway. I don’t know how erythritol compares, but I didn’t feel like tracking it down… So these are almost-ketogenic, but that was good enough for me. Also, since these are gluten-free, I’m not convinced that baking powder is necessary, but I didn’t want to change the recipe too much in one go – I already ran out of almond flour and had to top it up with hazelnut flour as it was! I really liked the cupcakes themselves, but for the frosting, I recommend either increasing the amount of sugar or omitting the frosting altogether. Everyone here liked these, though the Fox was the most vocal about it!
For the cupcakes
1 cup (4 oz./115 g.) almond flour (I used 2.8 oz. almond flour and 1.2 oz. hazelnut flour)
2 Tbsp. coconut flour
1 tsp. baking powder
½ tsp. fine sea salt
1 cup lactose-free cream
2 whole eggs
4 egg yolks
¼ cup (1¼ oz./36 g.) erythritol or granulated/powdered stevia (I used granulated sugar)
½ tsp. liquid stevia (I omitted this)
½ tsp. vanilla bean paste (or 1 tsp. vanilla extract)
For the frosting (see note above)
½ cup (4 oz./115 g.) lactose-free butter, softened
2 Tbsp. coconut oil, softened
2 Tbsp. granulated stevia or erythritol, ground until powdery (I used powdered sugar)
Preheat the oven to 350 °F. Line 11 wells of a standard-size 12-well muffin pan with paper liners. (The original recipe said 10, but I got 11 cupcakes from this – too bad it’s not an even 12!)
In a medium bowl, whisk together the almond flour, coconut flour, baking powder, and salt until well blended. Set aside.
Using a stand mixer or handheld mixer, whip the cream until stiff peaks form. Add the whole eggs and egg yolks, one at a time, beating after each addition. Add the powdered sweetener, liquid stevia, and vanilla and mix to combine.
Fold the flour mixture into the cream mixture and combine well.
Fill each cupcake liner about three-quarters full with the batter. Bake for 20 minutes, until a toothpick inserted in the center of a cupcake comes out clean. Let cool in the pan for 20 minutes before frosting.
While the cupcakes are cooling, make the frosting. Using a stand mixer or handheld mixer, whip together all the frosting ingredients until creamy and fluffy.
When the cupcakes are cool, scoop the frosting into a piping bag and pipe the frosting evenly onto the cupcakes. Alternatively, use a knife to spread frosting on each cupcake.


Saturday, July 21, 2018
Crème étagée au citron
J’ai reçu un livre de cuisine Famille futée en cadeau récemment; je l’ai feuilleté en mettant des signets autocollants sur les pages qui m’intéressaient, et j’ai pu essayer la crème étagée au citron. Le fond de la verrine est de la chapelure de biscuits graham; personnellement, je trouve que ce serait un peu meilleur avec de l’huile de coco, pour que ça se tienne ensemble davantage, mais c’était bon comme ça aussi. La simili-crème au citron (« curd ») elle-même est végétalienne et peu sucrée, mais très savoureuse grâce au jus d’orange – elle garde tout de même une jolie couleur jaune. Le Petit Prince n’a pas aimé le dessert, mais le reste de la famille l’approuve!
2 citrons
½ tasse de sucre
¼ tasse de fécule de maïs
½ tasse d’eau
1 tasse de jus d’orange
½ tasse de chapelure graham
½ tasse de yogourt grec sans lactose à la vanille
Presser le jus des citrons dans une tasse de 1 litre (4 tasses) allant au four à micro-ondes. (J’ai pressé le jus dans un bol allant au micro-ondes; j’en ai obtenu environ ½ tasse.)
Ajouter le sucre, la fécule de maïs, l’eau et le jus d’orange. Fouetter pour bien délayer la fécule. Chauffer au four à micro-ondes à puissance maximale pendant 2 minutes. Fouetter vigoureusement pour obtenir une texture parfaitement lisse. Chauffer de nouveau à puissance maximale de 1 à 2 minutes, ou jusqu’à épaississement. Fouetter de nouveau.
Répartir la chapelure dans 4 petits verres ou verrines. Verser la crème au citron et laisser refroidir environ 20 minutes au frigo. Au moment de servir, garnir chaque portion de yogourt grec à la vanille.
2 citrons
½ tasse de sucre
¼ tasse de fécule de maïs
½ tasse d’eau
1 tasse de jus d’orange
½ tasse de chapelure graham
½ tasse de yogourt grec sans lactose à la vanille
Presser le jus des citrons dans une tasse de 1 litre (4 tasses) allant au four à micro-ondes. (J’ai pressé le jus dans un bol allant au micro-ondes; j’en ai obtenu environ ½ tasse.)
Ajouter le sucre, la fécule de maïs, l’eau et le jus d’orange. Fouetter pour bien délayer la fécule. Chauffer au four à micro-ondes à puissance maximale pendant 2 minutes. Fouetter vigoureusement pour obtenir une texture parfaitement lisse. Chauffer de nouveau à puissance maximale de 1 à 2 minutes, ou jusqu’à épaississement. Fouetter de nouveau.
Répartir la chapelure dans 4 petits verres ou verrines. Verser la crème au citron et laisser refroidir environ 20 minutes au frigo. Au moment de servir, garnir chaque portion de yogourt grec à la vanille.
Wednesday, July 18, 2018
Black and White Cranberry Cherry Vegan Cheesecake
Somehow I’m now busier in the summer than during the rest of the year. Probably because the Little Prince doesn’t have daycare three days a week anymore… Plus, admittedly, I don’t have a comfortable desk in the summer, so I’m less prone to sitting down at the computer. I did want to post this recipe, though – it came in very handy when I was trying to unload some frozen cherries and cranberries. It would be a good dessert for the holidays, too! I changed a few things to make prep easier. I also noticed that it took all afternoon for the chocolate layer to harden, so I recommend making this cake the day before; to make it easier to slice, move it from the freezer to the fridge a few hours before serving it (but don’t store it there, or the chocolate layer might melt too much).
For the coconut milk in the chocolate layer in the cheesecake, it gets a bit tricky: there’s a product called So Delicious Culinary Coconut Milk (which I’m not linking to because it was actually so hard to find that I had to get it online and I’m wondering if it might be discontinued). It’s sold in carton packaging (as opposed to a metal can) and is actually thicker than canned coconut milk. If you fond some, you can use it directly at room temperature for this recipe and I find that easier; otherwise, you have to refrigerate cans of coconut milk overnight and skim the creamy layer at the top (use the coconut water for smoothies or something).
For the crust
1 ¾ cup raw cashews and/or almonds
1/3 cup cacao powder
1 cup Medjool dates, pitted and soaked if dry
1 Tbsp. coconut oil, melted (I used 4 Tbsp.)
For the chocolate layer of the cheesecake
2 cups of the thick cream part at the top of refrigerated canned coconut milk (see note above)
½ cup pure maple syrup or agave nectar
½ cup cacao powder
¼ cup chocolate chips, melted
For the cashew layer of the cheesecake
2 cups raw cashews (soaked overnight; rinsed and drained)
½ cup pure maple syrup or agave nectar
½ cup canned coconut milk (or more So Delicious Original Culinary Coconut Milk; see note above)
2 Tbsp. fresh lemon juice
1 vanilla bean, seeded, or 1 tsp. vanilla bean paste or 1 Tbsp. vanilla extract
For the cranberry cherry topping (you could consider halving this)
½ cup sugar
2 Tbsp. cornstarch
¼ tsp. salt
2 cups pitted frozen cherries
2 cups fresh whole cranberries
1 cup water
2 Tbsp. lemon juice
For the crust
Place the nuts into a food processor and pulse until ground. Add dates, cacao powder, and coconut oil to the food processor and pulse until combined. Press mixture into the bottom of an 8” springform pan. Place the pan in the freezer while you make the filling.
For the chocolate layer of the cheesecake
In a high-powered blender like a Vitamix, blend coconut milk (2 cups of the thick cream part from chilled canned coconut milk if not using the So Delicious Culinary Coconut Milk), maple syrup, and cacao powder until smooth. Add melted chocolate chips and blend until chocolate is incorporated and smooth. Pour on top of the prepared crust. Tap the pan a couple of times gently to remove any bubbles. Place in the freezer on a level surface. (Since this will need some time to chill before you can make the cashew layer, you can either stop here for now or go ahead and make the cranberry cherry topping.) Rinse the blender thoroughly but don’t bother washing it just yet.
For the cashew layer of the cheesecake
Place cashews with the maple syrup and lemon juice into your Vitamix and blend until it starts to get creamy. Add in coconut milk and vanilla blend until smooth and creamy, scraping the sides as needed. Remove pan from the freezer, making sure the top of the chocolate layer is set, and pour/spread your filling into the pan on top of the chocolate layer. Gently shake the pan side to side to even out and carefully tap the pan on the counter to get out any possible air bubbles. Place in the freezer on a flat level surface.
For the cranberry cherry topping
Combine the sugar, cornstarch, and salt in a large sauce pan. Whisk in water and lemon juice. Add cherries and cranberries. Cover and bring to a boil, stirring frequently. Once the mixture comes to a boil, continue cooking for 2 minutes while stirring constantly to prevent burning. (If all of your cranberries start popping, reduce the heat.) Remove from heat and let cool. Place mixture in a jar in the fridge to cool completely and until ready to serve. You can make the topping up to 2 days ahead of time.
Freeze for 2 hours or until ready to enjoy. If storing in the freezer longer, remove 35-45 minutes before serving, or an hour or two ahead if you want to put it in the fridge. Cut cake and serve with cranberry cherry topping. Enjoy!


For the coconut milk in the chocolate layer in the cheesecake, it gets a bit tricky: there’s a product called So Delicious Culinary Coconut Milk (which I’m not linking to because it was actually so hard to find that I had to get it online and I’m wondering if it might be discontinued). It’s sold in carton packaging (as opposed to a metal can) and is actually thicker than canned coconut milk. If you fond some, you can use it directly at room temperature for this recipe and I find that easier; otherwise, you have to refrigerate cans of coconut milk overnight and skim the creamy layer at the top (use the coconut water for smoothies or something).
For the crust
1 ¾ cup raw cashews and/or almonds
1/3 cup cacao powder
1 cup Medjool dates, pitted and soaked if dry
1 Tbsp. coconut oil, melted (I used 4 Tbsp.)
For the chocolate layer of the cheesecake
2 cups of the thick cream part at the top of refrigerated canned coconut milk (see note above)
½ cup pure maple syrup or agave nectar
½ cup cacao powder
¼ cup chocolate chips, melted
For the cashew layer of the cheesecake
2 cups raw cashews (soaked overnight; rinsed and drained)
½ cup pure maple syrup or agave nectar
½ cup canned coconut milk (or more So Delicious Original Culinary Coconut Milk; see note above)
2 Tbsp. fresh lemon juice
1 vanilla bean, seeded, or 1 tsp. vanilla bean paste or 1 Tbsp. vanilla extract
For the cranberry cherry topping (you could consider halving this)
½ cup sugar
2 Tbsp. cornstarch
¼ tsp. salt
2 cups pitted frozen cherries
2 cups fresh whole cranberries
1 cup water
2 Tbsp. lemon juice
For the crust
Place the nuts into a food processor and pulse until ground. Add dates, cacao powder, and coconut oil to the food processor and pulse until combined. Press mixture into the bottom of an 8” springform pan. Place the pan in the freezer while you make the filling.
For the chocolate layer of the cheesecake
In a high-powered blender like a Vitamix, blend coconut milk (2 cups of the thick cream part from chilled canned coconut milk if not using the So Delicious Culinary Coconut Milk), maple syrup, and cacao powder until smooth. Add melted chocolate chips and blend until chocolate is incorporated and smooth. Pour on top of the prepared crust. Tap the pan a couple of times gently to remove any bubbles. Place in the freezer on a level surface. (Since this will need some time to chill before you can make the cashew layer, you can either stop here for now or go ahead and make the cranberry cherry topping.) Rinse the blender thoroughly but don’t bother washing it just yet.
For the cashew layer of the cheesecake
Place cashews with the maple syrup and lemon juice into your Vitamix and blend until it starts to get creamy. Add in coconut milk and vanilla blend until smooth and creamy, scraping the sides as needed. Remove pan from the freezer, making sure the top of the chocolate layer is set, and pour/spread your filling into the pan on top of the chocolate layer. Gently shake the pan side to side to even out and carefully tap the pan on the counter to get out any possible air bubbles. Place in the freezer on a flat level surface.
For the cranberry cherry topping
Combine the sugar, cornstarch, and salt in a large sauce pan. Whisk in water and lemon juice. Add cherries and cranberries. Cover and bring to a boil, stirring frequently. Once the mixture comes to a boil, continue cooking for 2 minutes while stirring constantly to prevent burning. (If all of your cranberries start popping, reduce the heat.) Remove from heat and let cool. Place mixture in a jar in the fridge to cool completely and until ready to serve. You can make the topping up to 2 days ahead of time.
Freeze for 2 hours or until ready to enjoy. If storing in the freezer longer, remove 35-45 minutes before serving, or an hour or two ahead if you want to put it in the fridge. Cut cake and serve with cranberry cherry topping. Enjoy!


Subscribe to:
Posts (Atom)