Thursday, February 18, 2016

Whole Wheat Date Scones


I love a good scone, and since I had dates in the pantry, these seemed like a no-brainer. I found the recipe on Orangette, and the only change I made was to use vegan margarine instead of butter. Note that I have Morton brand kosher salt, so I only put in ¼ teaspoon (if you use Diamond Crystal brand, those salt crystals are bigger than the Morton ones, so you should use ½ teaspoon in that case). We really enjoyed eating those scones – they are best warm, but they keep very well for a few days in an airtight container.

125 g. (¾ cup plus 2 Tbsp.) all-purpose flour
125 g. (1 cup) whole wheat flour
2 tsp. baking powder
¼ tsp. kosher salt (see note above)
¼ tsp. freshly grated nutmeg
2 heaping Tbsp. brown sugar
5 Tbsp. cold unsalted margarine, diced
90 to 100 g. (½ cup) pitted, chopped dates
2/3 cup lactose-free whole milk
1 egg, beaten well

Set a rack in the middle of the oven, and preheat to 400 °F. Line a baking sheet with parchment paper or a silpat.

In a large bowl, combine the flours, baking powder, salt, and nutmeg. Whisk to blend well. Add the brown sugar, whisking again, and then add the margarine. Using your fingers, work the margarine into the flour mixture, rubbing and pinching it until there are no lumps of margarine bigger than a pea. Stir in the dates. Add about three-quarters of the milk and, using a fork, stir it into the dry ingredients. If it seems too dry and crumbly, add more milk as needed, but start sparingly, so that the dough doesn’t wind up sticky.

Once the dough is coming together, put down the fork and finish bringing it together with your hand, pressing it and turning it to incorporate all the flour. Turn the dough out onto a lightly floured work surface, and massage it into a disk roughly 1 inch tall. Cut the dough into 10 even wedges (or squares, or you can use a cutter to make circles), and arrange them on the baking sheet. Brush lightly with egg.

Bake for about 15 minutes, or until the tops are lightly golden. Serve warm, ideally, but room temperature is fine too.

The only spiced nut recipe you'll ever need

I had bookmarked a recipe for maple roasted almonds, but when I decided to make it, I realized that the link is no longer active. I found others online by Googling, but somehow, they didn’t look as good to me as the one I had wanted to make. Luckily, I remembered that I had also bookmarked a recipe for spiced mixed nuts on Orangette, so I decided to try that instead. (It’s originally from Gramercy Tavern, though I’ve never been there.) It was hands down the best mixed nuts I’ve ever eaten, and I won’t be needing those maple roasted almonds in the future. I actually wasn’t sure I’d post this recipe, which is why I didn’t bother taking better pictures, but I’ve decided that it would be a shame not to share it – it’s just so good! The recipe yields about 4 cups, and the nuts should keep about 2 weeks in an airtight container (if you haven’t eaten them all by then). We were grabbing handfuls as we went. These nuts are crunchy, sweet, salty, and full of flavor.


Note that I don’t like spicy/hot foods, so I used a generous pinch of Korean pepper instead of the cayenne pepper. Also, I use Morton brand kosher salt, so the amount I wrote below corresponds to that brand. If you are using a brand with bigger salt crystals (like Diamond Crystal), increase the amount by up to half. To make simple syrup, I combined ¼ cup sugar and ¼ cup water in a small pan and brought it to a boil, stirring, until the sugar dissolved, then I let it cool. I had a bit more than I needed for the recipe – you can always make single servings of lemonade from the leftovers, if you have no other use for it.

1 cup raw almonds
3 Tbsp. turbinado sugar
1 ½ tsp. kosher salt (see note above)
1 ¼ tsp. fine sea salt
2 ¼ tsp. ground cumin
1 tsp. ground cinnamon
1 tsp. cayenne pepper (see note above)
¾ tsp. ground ginger
½ tsp. freshly ground black pepper
¼ tsp. freshly grated nutmeg
2 cups pecan halves
1 ¼ cup cashews
¼ cup (2 fl. oz.) simple syrup (see note above)
1 ½ tsp. light corn syrup
1 Tbsp. grapeseed oil, or another oil with a similarly high smoke point

Preheat the oven to 300 ˚F.

Spread the almonds on a rimmed baking sheet, and bake until lightly toasted and fragrant, about 10 minutes. Immediately transfer to a plate, and set aside to cool.

While the almonds toast, make the spice mix. Combine the sugar, salts, cumin, cinnamon, cayenne, ginger, black pepper, and nutmeg in a small bowl. Stir to mix.

Reduce the oven temperature to 275 ˚F. Line a rimmed baking sheet with parchment paper or a silpat (I recommend the latter, since there is melted sugar involved here).

In a large bowl, combine the almonds, pecans, and cashews. Toss to mix. Add the simple syrup, corn syrup, and grapeseed oil, and stir to coat the nuts. Add the spice mix, and toss gently until the nuts are evenly coated. Spread on the prepared baking sheet. Bake until the spice mixture is caramelized and the nuts are toasted, about 25-40 minutes. (To check for doneness, take a few nuts out of the oven and let cool for a few minutes; if done, they should be dry to the touch.)

Cool completely, then store in an airtight container.

Wednesday, February 17, 2016

Vegan Meyer Lemon Bars


My lemon tree suffered greatly over the summer (our drip irrigation wasn’t working properly), so I had no home-grown Meyer lemons this year. The good news is that the tree roots were healthy and seem to be growing a new plant, so I might have Meyer lemons again in the future, maybe even next season (though I won’t push it). I didn’t want to miss out on citrus season, though, so the Engineer bought a package of Meyer lemons at the grocery store (there were something like 8 in a clamshell box). I started by making Meyer lemon and Italian meringue verrines, but that was a fail. The yield was ridiculously small, the meringue never whipped up properly, and it was no more than alright (though the Little Prince flat out refused to eat it). Then I made buttermilk vanilla cupcakes with Meyer lemon glaze, but the cupcake recipe didn’t work (there were craters in the cakes, not domes) and the glaze was only, for lack of a better word, adequate. Neither recipe is one I’d make again.

Luckily, I still had some lemons after that, so I tried these vegan Meyer lemon bars from Sift and Whisk. I was a bit nervous, because I don’t think I’d ever made vegan lemon bars before (unless you count this tart that the Engineer didn’t like), but the recipe totally worked! It was a hit for everyone in our household. The eggs are replaced with tofu in this recipe, and turmeric is added to get that bright yellow color (I actually added a bit too much, but it came out fine). The result was delicious!

For the crust
½ cup (110 g.) vegan butter, at room temperature (I use Earth Balance sticks)
¼ cup (30 g.) confectioners' sugar
1 cup (120 g.) all-purpose flour

For the filling
1 cup (200 g.) granulated sugar
4 Tbsp. lemon zest, from about 4 Meyer lemons
1 cup (240 g.) firm silken tofu
½ cup fresh lemon juice, from about 4 Meyer lemons
2 Tbsp. (15 g.) all-purpose flour
2 Tbsp. (15 g.) tapioca starch
⅛ tsp. turmeric, for color
confectioners' sugar, sifted (optional, for serving)

For the crust
Preheat oven to 350 °F. Grease and flour an 8-inch square baking pan. Set aside.

Cream together vegan butter and confectioners' sugar in the bowl of a stand mixer until light and fluffy. Add the flour, and beat until the dough begins to clump together.

Turn out the dough into your greased baking pan and press evenly into the bottom. Poke a few holes in the top of the dough with a fork, then bake for about 20 minutes, or until the crust is light brown in color. Move to a wire rack and allow to cool while you make the filling.

For the filling
In a food processor, combine sugar and lemon zest and process until the sugar is yellow and fragrant. (This releases the oils from the lemon zest and will make the final lemon bars more flavorful, so don’t skip this step!) Add the tofu and process until smooth. Add lemon juice, flour, tapioca starch, and turmeric and process to combine.

Pour the filling over the crust and bake for 30-40 minutes, until the filling is mostly set (it may still be a little wiggly in the center). Cool completely on a wire rack, then transfer to the refrigerator and chill for at least 1 hour.

Slice the bars into even portions (the original recipe said 8 or 16 servings, but in my house, an 8-inch square pans turns out 9 servings, period). Right before serving, dust the tops of the lemon bars with confectioners' sugar, if desired.


Green Bean Casserole


I realized that I don’t have a good recipe for green bean casserole, so when I saw one on Minimalist Baker, I took note. It was a hit for the adults here; the Engineer approves of these green beans, and there’s enough creamy sauce and crisp fried onions to make things interesting for me. The Little Prince wasn’t crazy about it, but he did have a few bites, so that’s a start. I’d make this again! I served it here with meat pie.

1 lb. green beans, rinsed, trimmed and cut in half
sea salt and black pepper
2 Tbsp. vegan butter or olive oil
1 shallot, minced
2 cloves garlic, minced
1 cup finely chopped mushrooms (button, baby bella or cremini)
2 Tbsp. all-purpose flour
¾ cup vegetable broth
1 cup unsweetened plain almond milk
1 ½ cups crispy fried onions, divided

Preheat oven to 400 °F.

Bring a large pot of water to a boil and salt well - it will help season the green beans. Add green beans and cook for 5 minutes, then drain and place in an ice water bath to stop cooking. Drain and set aside.

In the meantime, start preparing sauce. In a large oven-safe skillet over medium heat, add vegan butter or olive oil and shallots and garlic. Season with salt and pepper and stir. Cook for 2-3 minutes, then add mushrooms and season with a bit more salt and pepper. Cook for 3-4 minutes more or until lightly browned.

Sprinkle in flour and whisk to stir and coat the veggies. Cook for 1 minute, then slowly add in veggie stock, whisking to incorporate.

Add almond milk next and whisk to stir again. Season with a touch more salt and pepper bring to a simmer, then reduce heat to low to thicken. Cook for 5-7 minutes more, or until thick and bubbly. Taste and adjust seasonings as needed.

Remove from heat and add ½ cup of the fried onions and all of the cooked green beans. Toss to coat well, (transfer the mixture to an 8”-square dish if you want, and) top with remaining fried onions.

Bake for 15 minutes, or until warmed through and bubbly and slightly browned on top. Serve immediately.

Monday, February 15, 2016

Banana Carrot Muffins

These banana carrot muffins are vegan and healthful to boot. They were good, albeit maybe a little spongy, but they stayed moist for a few days at room temperature. If you happen to have some lactose-free cream cheese to schmear on them, you’re in for an extra treat! This recipe makes a dozen muffins.

2 cups white whole wheat flour
1 ½ tsp. baking powder
½ tsp. baking soda
½ tsp. sea salt
1½ tsp. cinnamon
2 flax eggs (2 Tbsp. ground flaxseed] + 6 Tbsp. water)
½ heaping cup mashed banana (1 big or 2 small)
1 ½ tsp. vanilla extract
¼ cup coconut sugar
1 Tbsp. unsulfured molasses
½ cup maple syrup
1 ½ cups finely grated carrots

Pre-heat oven to 390 °F. Grease a muffin pan with coconut oil or non-stick cooking spray.

Add ground flax seed and water to a large size bowl, whisk together and leave to thicken up while preparing the dry ingredients.

In a medium sized bowl, add and mix dry ingredients (flour to cinnamon) together until evenly dispersed.

When the flax has reached an egg-like consistency, add the rest of the wet ingredients (mashed banana to finely grated carrots). Whisk together until well combined. Fold the dry ingredients into the wet ingredients until just combined, making sure not to overmix.

Scoop the batter into the muffin pan using an ice cream scoop or a ¼ cup measuring cup. Bake for 4 minutes and then turn the oven down to 350°F. Bake until an inserted toothpick comes out clear. The amount of time the muffins take to bake will depend on your oven - mine took 15 minutes at 350 °F (plus the initial 4 minutes at 390°F).

Remove the muffins from the oven and leave to cool in the pan for 5 minutes. Remove from the muffin pan and leave the muffins to cool on a cooling rack.

Tacos à l'effiloché végétalien

J’avais entendu parler, il n’y a pas si longtemps, d’une recette pour faire de l’effiloché végétalien sans avoir recours à des produits comme le seitan ou le tempeh. Il en existe plusieurs versions, mais j’ai choisi celle de Vert et Fruité. Il suffit d’utiliser des conserves de fruit du jacquier, qui s’effiloche quand on le fait cuire. Le résultat est à s’y méprendre : on jurerait que c’est de la viande! La texture et l’apparence y sont, et le mélange d’épices convient parfaitement aux tacos, le fruit lui-même étant assez fade. La préparation est assez simple, et on peut servir avec nos accompagnements préférés : j’ai choisi un mélange d’avocats, de tomates, de coriandre et de jus de lime, mais on pourrait y aller aussi avec de la salsa, du fromage, des haricots, de la laitue, des poivrons, du riz, etc. Attention cependant : il faut des conserves de fruit du jacquier dans l’eau ou dans la saumure, PAS dans le sirop!

2 boîtes de conserve de fruit du jacquier dans l’eau ou la saumure (environ 20 oz. chacune)
2 c. à thé de cumin
2 c. à thé de poudre de chili (j’ai mis une pincée de piment coréen)
1 c. à thé de paprika
1 pincée de cannelle
¼ c. à thé de poudre d’ail
¼ c. à thé de poudre d’oignon
1 c. à soupe de jus de lime ou de citron
1 c. à soupe de sauce soya sans gluten ou de tamari
1 c. à soupe d’huile d’olive
1 petit oignon, haché finement
2 gousses d’ail, hachées finement
1 ou 2 c. à soupe de sirop d’érable (au goût)
tortillas (farine de blé ou farine de maïs sans gluten)
garnitures, au choix (voir suggestions plus haut)

Égoutter les fruits du jacquier. Vous pouvez les utiliser tels quels, mais je recommande de couper le bout triangulaire (ils s’effilocheront mieux) et de retirer les graines. Réserver.

Mélanger les ingrédients de la pâte d’épices, du cumin jusqu’à l’huile d’olive.

Dans une grande poêle, faire suer l’oignon et l’ail dans la pâte d’épices.

Ajouter les fruits du jacquier et le sirop d’érable, et laisser cuire à feu moyen-doux en retournant les morceaux à l’occasion, jusqu’à ce que les morceaux se défassent facilement, soit environ 30 minutes. (Ajouter un petit peu d’eau si le mélange semble trop sec.) Au fur et à mesure que les morceaux sont cuits, défaire à la spatule ou à la fourchette (j’ai utilisé ma cuillère en bois).

Servir avec les tortillas et les accompagnements choisis.

Saturday, February 13, 2016

Pumpkin Cinnamon Rolls

Last fall, I realized that I had not one, not two, but three recipes for pumpkin cinnamon rolls that I wanted to try. I didn’t want to keep three recipes, though, so I decided to make each one and compare them, hoping a winner would emerge. (I did this over the course of a few months, taking notes and freezing samples for future reference.) Luckily for me, there is a clear winner, so that’s the recipe I’m sharing below!

The first recipe I tried was from Smitten Kitchen. The only change I made was to halve the amount of sugar in the frosting. The recipe made two pans of rolls, so I froze half. I thought they were really good and definitely a contender, despite the fact that they didn’t look as photogenic as I would have hoped…


The last recipe I tried happened to be gluten-free (and vegan), and let me tell you, that dough was an effing nightmare to work with. I ended up with what I called buns rather than rolls, because it was just pieces of dough scraped off the counter, shoved in a pan, baked, and schmeared in icing. Basically, I have too much self-respect to ever attempt that one again.


It was the second recipe that turned out to be the winner, producing rolls that are both delicious and aesthetically pleasing. They are actually pumpkin maple rolls from The Nonpareil Baker. They could easily be veganized if you wanted. I would perhaps use less sugar in the filling next time, because this had a few unpleasantly sticky/hard clusters. I also halved the amount of frosting while changing the amounts of extracts, but I think I should have used a bit more than 3 ½ Tbsp. of liquid to get more of a glaze consistency – that’s easy enough to fix. My quantities are below. That being said, a lactose-free cream cheese frosting would be nice, too; you can refer to the Smitten Kitchen link above. The recipe makes 16 rolls.


For the dough
2 ¼ tsp. active dry yeast
¼ tsp. + 2/3 cup granulated sugar, divided
½ cup warm water
½ cup warm lactose-free milk
¼ cup butter or margarine, melted
1 tsp. salt
2/3 cup pumpkin purée
6 cups all-purpose flour (I only used 3 cups, see note below)

For the filling
2 Tbsp. butter or margarine, melted
¼ cup maple syrup
¾ cup brown sugar, packed (I’d use less next time)
2 Tbsp. cinnamon
½ tsp. nutmeg

For the glaze
2 cups powdered sugar, sifted
1 tsp. vanilla
1 tsp. maple extract
3 ½ Tbsp. lactose-free milk (or more, see note above)

In a large bowl, stir together the yeast, ¼ tsp. granulated sugar, and warm water. Allow to proof for 5-10 minutes, or until the yeast becomes foamy. If the yeast does not foam, discard and start over with new yeast.

To the same bowl, add the warm milk, butter, sugar, salt, and pumpkin purée and stir well. Add the flour ½ cup at a time, until you can no longer stir the dough. Transfer the dough to a lightly floured surface and knead in the remaining flour until the dough is sticky, but does not stick to your hands. I used the dough hook in my stand mixer for this and added flour until I got the right consistency. I somehow only needed 3 cups of flour, which seemed like a ridiculously low amount, but it worked!

Transfer the dough to a lightly greased bowl and cover with plastic wrap. Allow the dough to rise in a warm, draft-free area for about two hours, or until doubled in volume.

While the dough is rising, combine the melted butter and maple syrup in a small bowl.

In a separate bowl, combine the brown sugar, cinnamon and nutmeg.

Grease a 9”x13” pan and an 8” square dish.

Punch down the dough and transfer it to a lightly greased surface. Roll the dough out into a rectangle approximately 12 inches by 24 inches. Using a pastry brush or small spatula, spread the butter and syrup mixture evenly over the surface of the dough. Sprinkle the brown sugar and spice mixture evenly over the moistened surface, and gently press it into the dough.

Roll the dough up as tightly as possible into a log. With a sharp knife, trim about one inch off each end of the log and discard. Cut the log into 16 equal pieces. The easiest way to do this is to cut the log in half, then cut the halves in half, and so on. You can do this with unflavored dental floss, tying it around the log and tightening the knot to cut off pieces with clean edges. Carefully transfer the slices to the prepared pans (12 in the large pan, 4 in the small pan) and reshape if necessary. Cover the pans with plastic wrap.


Place a baking dish filled with about 1" of boiling water on the bottom rack of a cold oven. Place the covered pans on the top rack of the oven and allow to rise for about one hour, or until almost doubled in size. (I didn’t bother with the warm water. I recommend putting the rolls in the microwave oven with the door ajar or in another warm place. Note also that you can refrigerate the rolls overnight at this point, which is what I do to have them for breakfast without waking up at 4 in the morning.)

Remove the pan of boiling water and the risen rolls from the oven and preheat to 350 °F. Once the oven is heated, remove the plastic wrap from the pans and bake for 20-25 minutes, or until the rolls are golden brown. (I took my risen rolls out of the fridge while the oven was preheating and I baked them for 25 minutes.)

While the rolls are baking, prepare the glaze. Combine the powdered sugar, vanilla, maple extract, and milk in a medium bowl. Whisk until the ingredients come together to form a thick glaze. Drizzle the glaze over the hot rolls. Serve warm.

Wednesday, February 10, 2016

The most recent outings

I’m writing another one of those housekeeping posts that turn out to be behemoths, so I’m breaking it down and talking about my most recent monthly outings here. (For previous outings, see here.)

My September outing (which I attended by myself) was a talk by Jane Goodall, a living legend in my eyes. It was wonderful to hear her speak in person, and if you have an hour or so to spare, you can watch her talk below.


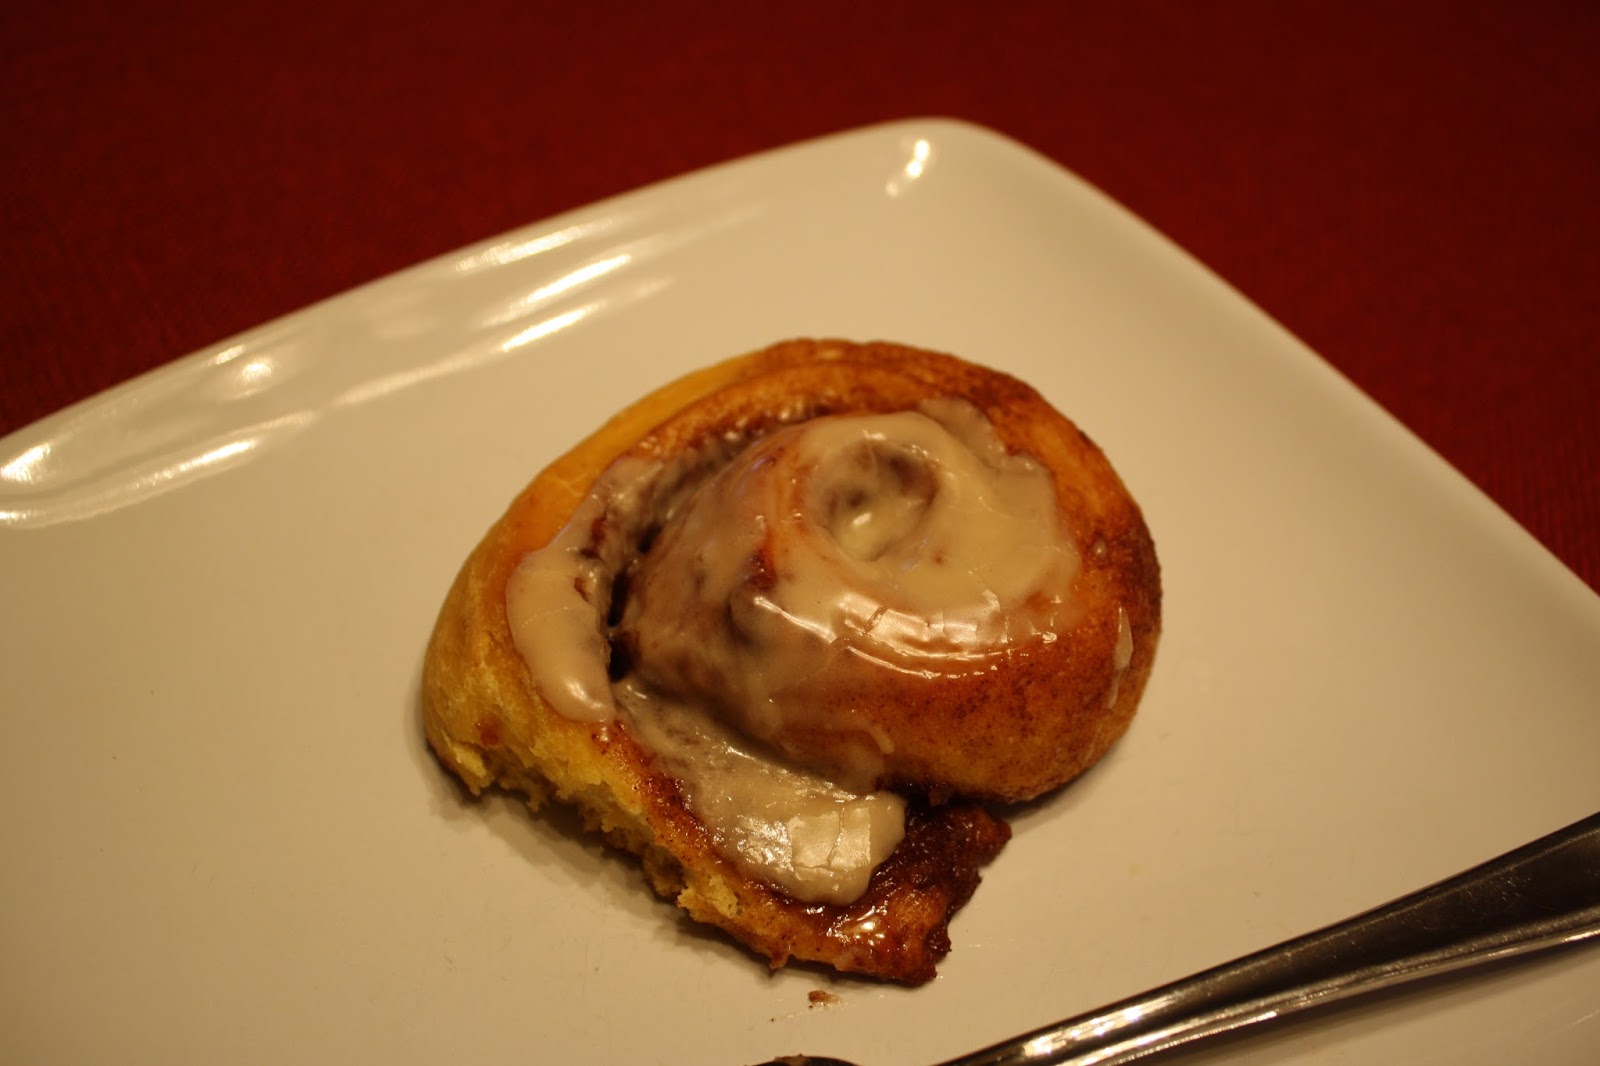
For our October outing, we went to see the walking path beneath Oakwell Drive, because of this San Antonio Magazine article. As far as I can tell, it’s technically in Tobin Park, though we couldn’t find the exact spot in the picture. What we found was definitely less pleasant, mostly because it seemed abandoned (in a creepy way, not an idyllic one). We also made it a point to try the famous 3-pound cinnamon roll at Lulu’s Bakery and Cafe. Yes, it is as ginormous as it sounds! We took the leftovers home and it took us an extra three days to finish it. Plus, we took a look at the Japanese Tea Gardens, which I can confirm look better in October than in February, though they didn’t seem at their peak then either.


In November and December, we had a single outing to Panther Springs Park, which has a beautiful new 2.5-mile asphalt trail. It’s stroller- and bike-friendly and very pleasant to walk on! We plan on going back when the weather is warmer, perhaps for a picnic.


I’m including this here as an outing, even though it was more than that: in January, we took a trip to Cancún. We hadn’t had a “real” vacation in a while, so this was fantastic! It was also our first time booking accommodations and tours with a toddler in mind, and I think we did pretty well. We stayed at a resort on the beach most of the time, so we got some relaxation in (I read Cheryl Strayed’s Tiny Beautiful Things and played Monument Valley, both of which I highly recommend, and I got a wonderful massage at the hotel spa). We also booked a tour to visit Chichén Itzá. At that point, our main concern was that we wanted the Little Prince to travel safely, but most tour companies operate buses without car seats and some won’t even guarantee a place for a toddler! We ended up booking a tour with a well-rated, small company that we ended up loving: Flavio Tours. They provided a seat that we managed to secure with the lap belt, plus we really liked the individualized attention that we got with this small tour. We started off by swimming in Cenote Ik Kil, an unexpected highlight of the trip; plus, Flavio took us there first thing in the morning, and we left as the first tour bus crowds got there – I’m so glad we had the place practically to ourselves! We loved seeing Chichén Itzá, and we also made a short stop in Valladolid on the way back. Overall, this was great value for the money, and we’d readily do business with them again! Maybe when the Little Prince is older, we can go back and visit Sian Ka’an or Tulum…

Potato, Spinach and Chive Frittata

I’m in the process of doing some decluttering, and I came across a stash of old issues of the LCBO’s Food & Drink magazine. I tore out a few recipes before dumping the magazines in the recycling bin, and one of those recipes was this frittata. It was first published in 1993, but this was a reprint from a more recent year (2003, I believe). I made it for dinner, modifying it to be lactose-free and increasing the cheese, and I really liked it. In fact, both the Engineer and I gave it two thumbs up. (Also, the Engineer declared that he loves gruyère, which could explain why he likes some of my quiches and not others – it depends on whether or not I use gruyère.) Sadly, the Little Prince literally gave it a thumbs down, complete with tears, and said “I don’t like it!”, possibly because there’s too much green in it. It’s hidden well enough for my taste, but there’s no fooling him!

1 Tbsp. vegetable oil
2 Tbsp. butter or margarine, divided
2 potatoes, peeled and cubed (my cubes were about ½ inch)
1 Tbsp. chopped fresh rosemary (or 1 tsp. dried rosemary)
1 bunch spinach
10 eggs
1 dash lactose-free milk (or up to ¼ cup lactose-free cream if you have it)
½ cup to 1 cup grated gruyère cheese
½ cup chopped chives
salt and freshly ground pepper, to taste

In a 10-inch (25-cm) skillet on medium-high heat, heat oil and 1 Tbsp. butter. Add potatoes and sauté until brown and tender, about 8-10 minutes (this took longer for me). Sprinkle with rosemary, season with salt and pepper and reserve. Wipe out skillet.

Meanwhile, wash and stem spinach. Place in a saucepan on medium-high heat. Cover and steam until spinach is tender, about 2 minutes. Place spinach in colander, cool slightly then squeeze out all excess water. Chop. (If your spinach was frozen, then just thaw it and squeeze out excess water.)

In a large bowl, stir together eggs, milk, cheese, chives, salt and pepper. Add potatoes and spinach.

Place skillet on medium-low heat and add remaining butter. When melted, add egg mixture. Cook slowly until bottom is set, stirring occasionally, about 10 minutes. The top will be slightly liquid.

Place skillet under preheated broiler and broil until top is just set. Turn out onto serving platter (naturally, there was a slight unmolding accident in my kitchen) and cut in wedges. Garnish with chive flowers, if available. (I wish!)

Tuesday, February 09, 2016

Cherry Muffins with Walnut, Sesame Seed, and Cardamom Streusel


After making white chocolate-cherry-almond cookies, I had finished the package of dried cherries I wanted to use for these muffins from Not Without Salt. But I still had walnuts and sesame seeds to use up, so I decided to use dried cranberries instead of the cherries (I know it’s not the same, but I think this type of muffin can work with various fruits and would be nice with dried apricots, too). I had trouble with the streusel topping, because I think there was too much (vegan) butter in it; at least one other commenter on the original post reports the same problem. I think that’s also what made the bottom of the liners *very* oily, despite the muffins having a dry crumb. I halved the amount in the version below based on other streusel recipes, but I haven’t actually tested it that way. That being said, the muffins were good enough that I’d make them again, with the adjustments below.

For the streusel
¾ cup all-purpose flour
½ cup walnuts, chopped
½ stick (4 Tbsp.) butter or margarine, melted
1 generous pinch cardamom (or the seeds from 4 pods, ground)
¼ tsp. kosher salt
¼ cup turbinado sugar (you may substitute brown sugar)
1 Tbsp. sesame seeds

For the muffins
¾ cup dried cherries
¼ cup water
½ vanilla bean or 1 tsp. vanilla extract
½ tsp. lemon zest
¼ tsp. cinnamon
1 pinch nutmeg
1 ½ cups (6 ¾ oz.) all-purpose flour
1 ½ tsp. baking powder
¼ tsp. baking soda
½ tsp. kosher salt
5 Tbsp. butter or margarine, softened
½ cup dark brown sugar
1 large egg
¾ cup lactose-free whole milk yogurt

Pre-heat oven to 350 °F. Line a muffin tin with 12 muffin papers.

To prepare the streusel, mix all the ingredients until combined and break into small and medium clumps. Set aside.

In a small saucepan, combine the dried cherries, water, lemon zest, cinnamon, and nutmeg. Over low heat, bring to a gentle simmer, then remove from the stove and let stand while you prepare the muffin batter. (Alternatively, you can place this all in a small bowl, cover with plastic wrap and microwave for one minute and then let stand.) The cherries will soak up the liquid until very little remains.

Combine the flour, baking powder, baking soda, and salt in a bowl and use a whisk to combine.

In a medium bowl, or in the bowl of a stand mixer fitted with a paddle attachment, cream the butter and sugar until light, about three minutes on medium speed. Scrape down the side of the bowl, then with the machine running on medium low, add the egg. Stop the machine and scrape down the side of the bowl again. Once the egg is combined, add a third of the flour mixture on low speed. With flour streaks still present, add half of the yogurt then repeat until all the flour and yogurt has been added. Stop the machine and stir in the cherry mixture using a rubber spatula, taking care not to over mix.

Using a large spoon, fill the muffin tin with batter ¾ of the way. Scatter the streusel evenly over each muffin. Bake in the middle rack for about 20-25 minutes or until a toothpick inserted comes out with a few crumbs. (The original recipe said 25 minutes, but my muffins were dry, so I’d check earlier next time.) Let cool in the pan for about 5 minutes before transferring to a wire rack to cool until warm enough to bite into.

Monday, February 08, 2016

Sandwiches

I’ve made some sandwiches I never told you about, but I liked them enough that I need to rectify that. First, there was a modern BLT with white bean-wasabi hummus, which I made for lunch. At the time, the Little Prince was perfectly happy with eating the components of a sandwich, which made this a great choice. Now, though, he wants to eat a sandwich like everybody else, which makes the handling a bit more complicated. In this case, I could have chopped the bacon in small pieces, and the hummus probably would have helped to hold everything in place, so this would still be a good choice. I reduced the amount of wasabi in the hummus, since I don’t like it spicy to begin with, and I’d consider omitting it entirely in the next iteration (though you could replace it with whatever pepper flakes strike your fancy).

a 540-mL (19 oz.) can of navy beans, rinsed and drained (I used a 15-oz. can of cannellini beans)
1 garlic clove, minced or grated
2 Tbsp. extra-virgin olive oil
2 Tbsp. lemon juice
2 tsp. wasabi paste (I only used a dash of wasabi powder)
¼ tsp. salt
8 slices bacon
½ cup shelled edamame, cooked
½ English cucumber, thinly sliced
2 tomatoes, thinly sliced
8 slices light rye bread

Whirl beans with garlic, oil, lemon juice, wasabi and salt in a food processor until smooth. Set aside.

Heat a large non-stick frying pan over medium-high. Cook bacon until crispy, about 3 min per side.
Spread a layer of hummus on 4 slices of bread. Top each with edamame, cucumber, bacon and tomato, and sandwich with remaining bread.


This was followed by two types of chicken sandwiches that I made for dinner. The first was Margaux curried chicken sandwich, which was once Oprah’s favorite sandwich in America. I followed the recipe initially, but I have come to the conclusion that the chicken must be chopped in order for this to be pleasant to eat. It tasted wonderful, though, so I’d make it again. Note that the chicken filling will give you lots of leftovers and makes for a great curried chicken salad (otherwise, reduce the quantities by about half).

20 whole black peppercorns
2 bay leaves
2 whole cloves
½ lemon
3 lbs. medium chicken tenders
½ cup plus 2 Tbsp. spicy brown mustard
½ cup honey
1 ¼ tsp. curry powder
¾ tsp. pepper
1/8 tsp. salt
butter or margarine, for spreading
1 loaf challah or other rich egg bread, cut into 12 thick slices
½ cup shredded carrots
½ cup slivered almonds
2 medium tomatoes, chopped
1 bag (about 5 oz.) mesclun salad greens
red grapes and assorted berries, for garnish

In a large saucepan over high heat, add peppercorns, bay leaves, cloves, lemon and 14 cups water; cover and bring to a boil. Add chicken and cook, uncovered and stirring occasionally, 7 to 10 minutes, or until cooked through; drain. Once cool, chop the chicken into smaller-than-bitesize pieces.

In a large bowl, combine mustard, honey, curry powder, pepper and salt; stir in chicken. Cover and refrigerate at least 30 minutes, or up to 1 day.

Butter both sides of bread slices. In a heated nonstick skillet over medium-high flame, cook bread in batches 3 to 5 minutes or until browned, turning once.

Combine carrots and almonds with chicken mixture. Divide chicken curry among 6 bread slices. Top with tomatoes, mesclun and remaining bread slices. Serve with fruit.


Finally, the second chicken sandwich I made was a chicken BLT from Coup de Pouce, in which the bacon was chopped and stirred into the mayonnaise – delicious! I doubled the amount of chicken but left all other ingredients the same.

4 Tbsp. extra-virgin olive oil, divided
2 Tbsp. lemon juice
1 Tbsp. Dijon mustard
2 tsp. chopped fresh thyme
4 chicken scallops, about 1 lb. total (this is the amount that I increased)
½ cup mayonnaise
1 garlic clove, finely chopped or grated
4 slices of bacon, cooked, finely chopped
8 slices of bread
2 medium tomatoes, sliced
1 cup small arugula leaves
salt and pepper, to taste

In a large bowl, whisk together 3 Tbsp. olive oil with the lemon juice, mustard and thyme. Add salt and pepper to taste. Add the chicken and turn it over so that it is well coated in marinade. Let marinate for 10 minutes.

Meanwhile, in a small bowl, mix the mayonnaise, garlic and bacon. Add a dash of pepper and set aside.

Preheat the grill to medium. Remove the chicken from the marinade and set it on the oiled grill; close the lid. Cook 10 minutes or until the chicken is cooked all the way through, flipping over at the halfway point. (I cooked my chicken in a pan on the stovetop.)

Brush remaining olive oil on the slices of bread and put them on the grill. Cook 2 minutes or until they are golden and lightly crispy, flipping them over at the halfway point.

Spread some mayonnaise on the slices of bread. Garnish half with chicken, tomatoes and arugula. Cover with the other slices and serve.