Monday, February 08, 2016

White Chocolate-Cherry-Almond Cookies


I was trying to empty my pantry of nuts and dried cherries (without making granola, for once), so I made these cookies from Baking with Less Sugar. The almond and cherry flavors go very well together, of course, but both are already sweet. Throw in some white chocolate and vanilla, and all you need for these is a total of 6 Tbsp. of granulated sugar, which is really not a lot! We all loved these cookies. They were great, very flavorful and almondy and definitely sweet enough.

Note that the original recipe calls for making cookies by portioning the dough into the size of ping-pong balls, which was supposed to make 16 to 20 cookies. I made my cookies a bit bigger (roughly the same size I normally make chocolate chip cookies), and I had closer to 40 cookies in all; I baked a dozen at a time.

1 cup (120 g.) slivered almonds
1 cup unsalted butter or vegan butter, at room temperature
6 Tbsp. sugar
2 large eggs
3 egg yolks
2 Tbsp. vanilla extract
2 tsp. almond extract
1 2/3 cups (230 g.) all-purpose flour
2/3 cup (70 g.) almond flour
1 tsp. baking soda
1 tsp. kosher salt
12 oz. (335 g.) white chocolate, chopped into small chunks
1 ¼ cups (200 g.) dried cherries, about half of them coarsely chopped

Put the almonds on a baking sheet and toast for 8 to 10 minutes, or until lightly toasted. Set aside to cool. (Since I was emptying my pantry, I used sliced almonds, so I lightly pan-roasted them instead.)

Using a stand mixer fitted with the paddle attachment, beat the butter and sugar on medium speed for 5 minutes, or until the mixture is well combined, light, and fluffy. (I always beat it for less time that called for, but I think that vegan butter reacts differently, so you don’t want to overdo it.)

Beat in the eggs, egg yolks, vanilla, and almond extract on medium speed for 2 or 3 minutes, or until thoroughly combined.

In a separate bowl, mix together the flour, almond flour, baking soda, and salt. Add the almonds, white chocolate, and dried cherries to the flour mixture and toss to combine. Turn the mixer on low speed and slowly blend the flour mixture into the butter mixture. Mix until the flour is completely incorporated.

For best results, scrape the dough into an airtight container and let it rest in the refrigerator overnight before baking. The next day (or when ready to bake), place a rack in the center of the oven and preheat to 350 °F. Line a baking sheet with parchment paper or a silpat.

Using a small ice cream scoop or rounded spoon, drop the dough in balls the size of a ping-pong ball onto the prepared baking sheet, about 2 inches apart. Press the dough balls flat with the palm of your hand. Bake for 14-18 minutes, or until the cookies are golden brown on the edges and slightly soft in the center (be careful not to overbake; for me, 10 minutes seemed to do the trick). Remove the cookies from the oven and let cool on the sheet for 5 to 10 minutes, then transfer the cookies to a wire rack to cool completely.

The cookies can be stored in an airtight container at room temperature for up to 2 days. The unbaked dough can be stored in an airtight container in the refrigerator for up to 1 week.

Sunday, February 07, 2016

Vegan Shepherd's Pie

I know I’ve made a vegan shepherd’s pie with lentils before, but this one was better received! The recipe is from Minimalist Baker; it’s got a mashed potato topping (instead of the sweet potato topping in my previous recipe), as well as a vegetable medley straight from the freezer bag, which definitely cuts down on prep work. I added milk to the mashed potatoes (and to the recipe below), because they were too stiff for my liking, and I had to use a bit more cornstarch than the recommended 2 Tbsp. to thicken the filling. This is a really great winter dish, savory and filling!

For the filling
1 medium onion, diced
2 cloves garlic, minced
1 ½ cups uncooked brown or green lentils, rinsed and drained
4 cups vegetable stock
2 tsp. fresh thyme (or 1 tsp. dried thyme)
1 10-oz. bag frozen mixed veggies: peas, carrots, green beans and corn

For the mashed potatoes
3 lbs. Yukon gold potatoes, thoroughly washed (or peeled)
2-4 Tbsp. vegan butter
lactose-free milk (dairy or vegan), to taste
salt and pepper, to taste

Slice any large potatoes in half, place in a large pot and fill with water until they’re just covered. Bring to a low boil on medium high heat, then generously salt, cover and cook for 20-30 minutes or until they slide off a knife very easily.

Once cooked, drain, add back to the pot to evaporate any remaining water, then transfer to a mixing bowl. Use a masher, pastry cutter or large fork to mash until smooth. Add desired amount of vegan butter and lactose-free milk and season with salt and pepper to taste. Loosely cover and set aside.

While potatoes are cooking, in a large saucepan over medium heat, sauté onions and garlic in 1 Tbsp. olive oil until lightly browned and caramelized - about 5 minutes. Add a pinch each salt and pepper. Then add lentils, stock, thyme and stir. Bring to a low boil, then reduce heat to simmer. Continue cooking until lentils are tender (35-40 minutes).

In the last 10 minutes of cooking, add the frozen veggies, stir, and cover to meld the flavors together. Also, preheat oven to 425 °F and lightly grease a 2-quart baking dish (I used an 8”x11” pan; an 8”x8” won’t fit it all, but a 9”x13” will work too).

At this point, you will probably need to thicken the mixture. I used a cornstarch slurry (about 3 Tbsp. cornstarch mixed into the same amount of water) that I whisked into the lentil mixture. Alternatively, you could stir in a few tablespoons of mashed potatoes.
Taste and adjust seasonings as needed. Then transfer to your prepared oven-safe baking dish and carefully top with mashed potatoes. Smooth down with a spoon or fork and season with another crack of pepper and a little sea salt.

Place on a baking sheet to catch overflow and bake for 10-15 minutes, or until the potatoes are lightly browned on top. Let cool briefly before serving. The longer it sits, the more it will thicken. Let cool completely before covering, and then store in the fridge for up to a few days. Reheats well in the microwave or the oven.

White Chocolate and Tonka Bean Molten Cakes


That’s right, another molten cake recipe! This one is original, though, and uses tonka beans, with which I’ve fallen in love. I hope you’ll allow me a side note about tonka beans, even though it’s repetitive for those of you who have read my explanation in French in the post to which I just linked: tonka beans contain coumarin, which can be poisonous in high doses (according to Wikipedia, that would be about 275 mg/kg). So the FDA has banned merchants from selling it for use in edible goods, despite the fact that cassia also contains coumarin – and Lord knows Americans love their cassia! In any event, I bought mine online from what turned out to be a Wiccan supply store (had I been in Montréal, I would have bought them at Épices de Cru). I slightly reduced the amount in the recipe as well, just because I want to make my tonka beans last longer in my pantry! I’d say they have more of a scent than a taste, and they are somewhat reminiscent of vanilla and nutmeg, but different at the same time. I really love using them!

This recipe from Dessert First originally called for raspberry liqueur, but I know the Engineer doesn’t like raspberries, so I omitted it. What I really liked, besides the tonka beans, was the molten dark chocolate center in the middle of what is essentially a white chocolate soufflé. (Some molten cakes are wet in the center because they are under-baked, and some have ganache in the center, as is the case here. Some chefs will fight to the death over which is the proper way to make molten cakes, but I’m not going there.) That being said, I ended up not really liking the taste of the dark ganache here (it wasn’t bad, it just wasn’t exciting at all and was a bit too hard to work with properly), so I’m substituting the scaled-down recipe from the truffles I recently made below. These soufflé cakes were fantastic! We absolutely loved them. I preferred eating them warm (instead of hot or cold). If, like the Engineer, you insist on eating them cold (or making them in advance), then please unmold them while they are still warm and store them in the refrigerator after they’ve cooled a bit. You can give them a dusting of powdered sugar if you wish.

For the chocolate ganache
4 oz. bittersweet chocolate, finely chopped
3 Tbsp. coconut milk
1 dash vanilla (optional)

For the vanilla tonka bean cake
8 oz. white chocolate, finely chopped
7 Tbsp. unsalted butter or margarine, cut into pieces
5 large eggs, separated, at room temperature
½ tsp. vanilla extract
2 tonka beans (I only used one)
1/3 cup (40 g.) all-purpose flour
1/8 tsp. cream of tartar
1/3 cup (76 g.) sugar

For the ganache
Melt chocolate with coconut milk in a small metal bowl set over a pot of simmering water, stirring occasionally. Remove from heat. Stir in vanilla, if using. Let come to room temperature, then refrigerate until firm.

For the vanilla tonka bean cake
Meanwhile, combine white chocolate and butter in a large bowl and set over a pot of simmering water. Heat, stirring occasionally, until melted and combined.

Remove from heat and whisk in egg yolks, one at a time. The mixture might separate slightly because of all the fat in the white chocolate, but keep whisking and it should come back together. Add in the vanilla extract and whisk to combine. Grate the tonka beans over the batter and whisk to combine. Add flour and whisk to combine.

Place egg whites and cream of tartar in bowl of a stand mixer. Whisk on medium speed until whites are very foamy. Add sugar and whisk on high until glossy soft peaks form.

Spoon about a third of the meringue into the batter and fold in to lighten. Add the rest of the meringue and fold in carefully to combine. Cover batter bowl with plastic wrap and refrigerate for at least three hours or overnight.

When you are ready to make the cakes, preheat the oven to 375 °F. Prepare individual ramekins by buttering and sugaring the insides. (This recipe makes about ten 4-oz ramekins. I made them in two batches, a day apart.)

Fill the ramekins about 90% full. Do not fill all the way to the top as the batter will puff up and may overflow. Place about a truffle-sized scoop of ganache into the center of each ramekin and press in slightly just so it's covered by the batter.

Bake for about 17-18 minutes (bake one first as tester to see what the consistency is after 17 minutes - you don't want to overcook these cakes). The tops should be just springy when you pull them out.
Run an offset spatula or knife around the sides to loosen the cake. Place a plate over the top of the ramekin and invert cake onto plate. Serve immediately. (I let them deflate a bit before inverting and serving them.)

Wednesday, February 03, 2016

Twice-Baked Potato Pie

This potato pie is from Gluten-Free Girl. We thought it was delicious, and it’s a really wonderful, warming winter dish (I know that Punxsutawney Phil didn’t see his shadow yesterday, but winter ain’t over just yet). It’s easy to make, albeit somewhat long. The problem I ran into making this recipe was that there was no weight specified for the potatoes, simply “6 large russet potatoes”. So I ended up with “Texas-sized taters” (I’m not even kidding, it said so right on the package), but they weighed about 1 lb. each and that was way, way too much! They weren’t even cooked all the way through after 90 minutes in the oven… I used about half for the pie (and the rest became a side dish for the remainder of the week), so I’m going to write 3 lbs. potatoes total below. Even then, the pie was very good, so with the right amount of potatoes (and concentrated flavor), it would have been really great!

For the potato crust and mashed potatoes
3 lbs. russet potatoes (see note above), divided
1 large egg, beaten
kosher salt and cracked black pepper
1 cup lactose-free whole milk
2 Tbsp. butter or margarine
4 oz. lactose-free cream cheese
2 Tbsp. extra-virgin olive oil

Preheat oven to 400 °F. Pierce the potatoes with a fork and wrap them in foil. Bake until they are soft to the touch, about 60 minutes (for an average-sized potato).

When the potatoes are done, unwrap the foil and run about 1 lb. of the potatoes through a ricer. (This really does give the best texture, although you could mash them if you don’t have a ricer. I ended up getting one because I saw too many recipes like this and I haven’t regretted my investment.) Mix the riced potatoes with the egg; season to taste. Press the mixture into a greased pie plate, making a crust. Bake in the oven until the crust begins to harden and slightly brown, about 20 minutes.

Rice the remaining potatoes and put them in a large bowl. Set a large saucepan over medium heat. Heat the milk and butter until the butter has melted and the milk is simmering. Fold the milk and butter into the potatoes until the potatoes are creamy and the milk is fully incorporated. Season with salt and pepper. Add the cream cheese and olive oil; mix until all is combined. Set a kitchen towel over the bowl and put it in a warm place (for me, that was my microwave with the door ajar).

For the rest of the filling
2 Tbsp. extra-virgin olive oil
5 slices bacon
1 medium onion, peeled and diced
2 cloves garlic, peeled and sliced
1 Tbsp. chopped fresh thyme (I had about half as much)
1 bunch kale, stemmed and roughly chopped
1 cup shredded extra-sharp cheddar
1 cup grated parmesan
½ bunch green onions, sliced

Set a medium-sized skillet on medium heat. Add the oil and bacon. Render the bacon until the bacon is crispy and the fat is glistening.

Once the bacon is cooked, remove from the pan with a slotted spoon and set aside. Add the onion and garlic into the pan and place it back onto the heat. Cook, stirring frequently, until the onion and garlic are softened, about 5 minutes. Add the thyme. Once you smell the thyme, add the kale and stir it around the pan. When the kale is wilted, and the bacon back in, then fold this mixture into the mashed potatoes along with half of the cheddar and parmesan (save the rest of the cheese for topping).

To assemble the pie, put the mashed potato mixture into the shell gently, without destroying the shell. Top with the remaining cheeses and bake until it has a lovely golden brown color on top, about 10-15 minutes.

Top with green onions and serve. (This can be made a day ahead. To reheat, simple cover with foil and bake at 400 °F for about 20 minutes. I’m throwing in a picture of a slice on its side so you can see how flaky the crust came out – it really works.)

Friday, January 29, 2016

Deep-Dark-Chocolate Pudding Cake

This is the second recipe I try from Joanne Chang’s Baking with Less Sugar (the first one was vanilla honey rice pudding). I’m a sucker for molten chocolate anything, so her low-sugar version intrigued me. The very first dessert of the sort that I made was Nigella Lawson’s Choco-Hoto-Pots, but in my recollection, those are very sweet, so I was looking to update the recipe a bit. Joanne Chang’s chocolate pudding cakes only contain the sugar already in the chocolate, and they are gluten-free to boot; I only adapted them to be lactose-free. We really liked these! I didn’t miss the sugar at all.

10 oz. (280 g.) bittersweet chocolate, finely chopped
½ cup vegan margarine
2 large eggs
2 egg yolks
½ cup coconut milk
2 tsp. vanilla extract

Place a rack in the center of the oven and preheat to 350 °F. Butter six 4-oz ramekins.

Bring a saucepan filled partway with water to a very gentle simmer over medium-high heat. Place the chocolate and margarine in a medium metal or glass bowl. Place the bowl over (not touching) the barely simmering water in the saucepan and heat, stirring occasionally, until the chocolate and margarine are completely melted and smooth.

In a large bowl, by hand with a whisk, whip the eggs and egg yolks. Whip in the coconut milk, salt and vanilla. Whisk in the chocolate mixture until thoroughly combined.

Divide batter evenly among the prepared ramekins and place on a baking sheet. Bake for 16 to 20 minutes, or until the outsides of the cakes start to set and feel firm to the touch and the insides are still wiggly and soft when you poke them in the center. (You can bake the cakes further, but if the center is no longer runny, they aren’t really pudding cakes.) Remove the cakes from the oven and let them sit for a few minutes to firm up.

Run a knife around the cakes and carefully invert onto serving plates. Serve immediately. (In my case, I took these pictures immediately, but since the Little Prince can’t eat anything too hot and since the Engineer likes his pudding cakes cold, I held off on serving them. Once these cakes are refrigerated, they become very dense because of all the chocolate they contain.)

Thursday, January 28, 2016

Vegan Truffles

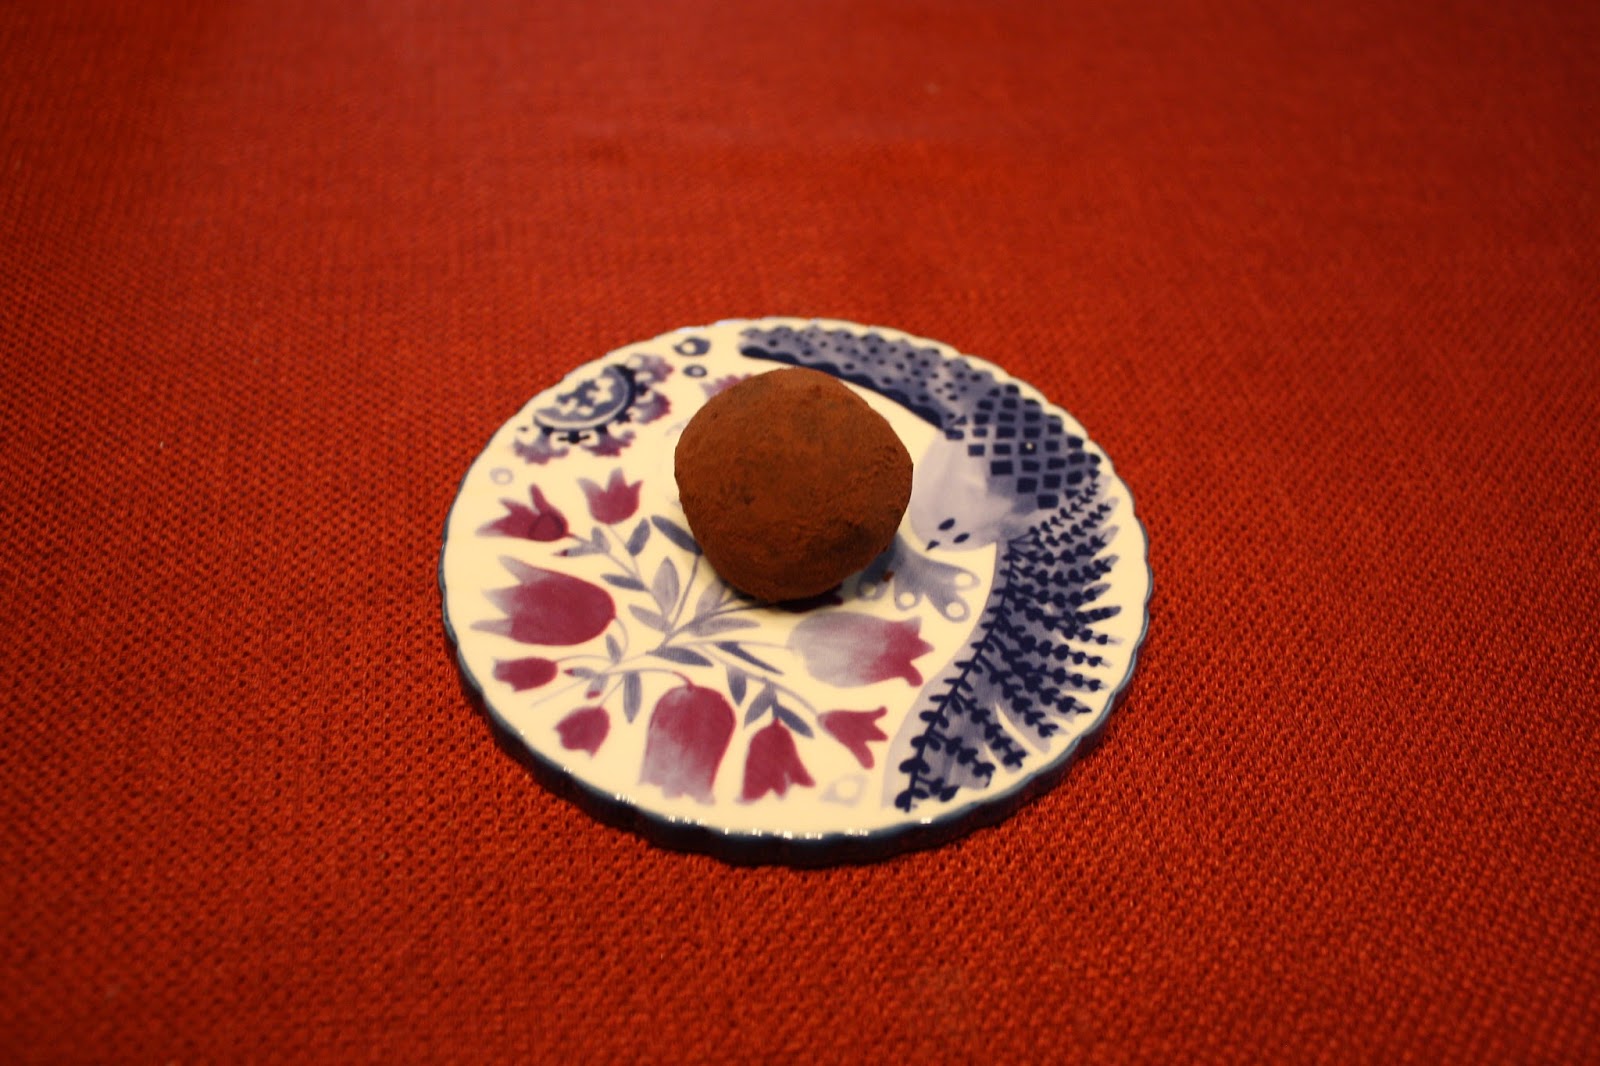
I love truffles. It’s like dark chocolate, taken to the next level. But I hadn’t gotten around to making my own, even though I’m stockpiling recipes. Not only do I need my truffles to be lactose-free, but I also really don’t feel like tempering chocolate… Enter Minimalist Baker’s truffles, which basically only call for two ingredients and, as it turns out, are stupid-easy to make. This is a great recipe for beginners! We loved them over the holidays; I’m probably only going to make them if we have guests, and my waistline will thank me.

Of course, you can use this recipe as a jumping-off point: replace the vanilla with finely chopped orange zest, add a tablespoon of nut butter or a shot of espresso, roll them in hemp seeds or coconut flakes or cookie crumbs, sprinkle on some vanilla fleur de sel… Personally, I like my truffles to melt in the mouth, so rolling them in cocoa was the way to go for me. For the chocolate, use something that you like eating on its own (I used Ghiradelli, though I can’t remember if it was semi-sweet or bittersweet – it isn’t vegan, but I can digest it just fine).


9 oz. (255 g. / 1 ¼ cup) dark chocolate, very finely chopped
7 Tbsp. coconut milk, well shaken
½ tsp. vanilla extract (optional, but recommended)
¼ cup (24 g.) unsweetened cocoa or cacao powder, for coating (optional, but recommended)

Place finely chopped chocolate in a medium-sized mixing bowl. Finely chopped chocolate will melt more easily and facilitate the process.

In a separate small mixing bowl, add coconut milk and microwave until very warm but not boiling, about 25 seconds (alternatively, heat in a small saucepan over medium heat until just starting to simmer).

Immediately add coconut milk to chocolate and loosely cover with a cooking lid or towel to trap the heat in. Do not touch for 5 minutes, then lift cover and use a mixing spoon to gently stir, trying not to incorporate air. Continue stirring until completely melted, creamy and smooth. (If, for some reason, you have unmelted pieces left, you can microwave the mixture in 10-second increments until completely smooth – just be careful not to overcook or it can affect the integrity of the chocolate).

Add vanilla at this time and stir (optional).

Set the mixture in the refrigerator to chill uncovered for 2-3 hours, or until almost completely solid. A good test is dipping a knife into the middle of the bowl to see if any chocolate sticks. If it comes out mostly clean, it’s ready to scoop. If there’s still wet chocolate in the center, continue refrigerating.

Once the mixture is chilled and firm, prepare a small dish of cocoa powder for rolling (optional).

Use a tablespoon-sized scoop (I used my cookie scoop) or a tablespoon to scoop out small balls, then use your hands to gently but quickly roll/form the chocolate into balls. Toss in cocoa powder to coat and shake off excess (or leave bare), then set on a parchment-lined serving dish. Continue until all chocolate is scooped. There should be about 16 truffles, depending on the size of your scoop. (If any of the chocolate near the center of the bowl was too soft to form, refrigerate that portion for a bit longer before proceeding.)

Enjoy truffles immediately, or refrigerate for 1-2 hours or overnight. This allows them to set and firm up. Store truffles covered in the refrigerator for best freshness. To serve, let come to room temperature for 10-15 minutes for optimum creaminess.


On a side note, I decided to transfer my dark chocolate almond butter cups to a bite-sized format by using silicone candy molds. This was my first attempt and I ended up making the filling a bit too big (it was almost the diameter of the molds, but in hindsight, it should have been even smaller). As a result, the chocolate didn’t always settle all the way around each candy properly – I’ll know better next time.

Wednesday, January 27, 2016

Duck Fat Cookies


I finally, finally got around to making David Lebovitz’s duck fat cookies for Christmas. They’re the kind of cookies where you roll the dough into cylinders, then chill it before slicing it into discs for baking. I sliced the first cylinder into 15 cookies, but unfortunately, they spread enormously on the baking sheet and looked like the sad ghosts of cookies-that-might-have-been. I was expecting *some* spread, especially since I had used margarine instead of butter, but not to the point that the cookies would be flat and burnt and very unappetizing (even though the thicker ones were really very good). So for the second batch, I let the dough come to room temperature and mixed it with additional flour and baking soda (the proportions being based on one of my mother’s recipes), then shaped it and chilled it again before slicing it. Now *those* cookies were fantastic, so that’s the version I’m giving you below. The yield should be around 3 dozen cookies, depending on how thinly you slice them – mine tend to be on the thicker side.

¼ cup (30 g.) dried currants or chopped dried cherries (I used the latter)
1 Tbsp. Armagnac, Cognac, or brandy (I used apple juice)
6 Tbsp. (85 g.) chilled duck fat
4 Tbsp. (2 oz./55 g.) unsalted butter, at room temperature (I used vegan margarine)
¾ cup (150 g.) granulated sugar
½ tsp. vanilla extract
1 ¾ cups (175 g.) all-purpose flour
¾ tsp. sea salt or kosher salt
½ tsp. baking soda

In a small saucepan, heat the currants over low heat with the liquor until the liquid is completely absorbed. Remove from the heat and set aside to cool to room temperature.

In the bowl of a stand mixer fitted with the paddle attachment, or by hand in a bowl, cream the duck fat, butter, and sugar on low speed just until well combined. Mix in the vanilla.

In a small bowl, whisk together the flour, salt and baking soda. Add it to the fat-butter-sugar mixture, stirring until the dough comes together. Then mix in the dried fruit pieces.

On a lightly floured countertop, knead the dough briefly until smooth. Shape it into a rectangle, and cut the dough in half lengthwise. Roll each piece of dough into a log 6 inches (15cm) long. (I did this differently because I started by separating the dough into two, then rolled each log until the diameter pleased me. My logs were roughly twice as long, so I’m assuming the diameter of my cookies was smaller.) If the dried fruit makes the dough crumble a bit, press the dough back together and continue to roll it into cylinders. Wrap each log in plastic and refrigerate until firm, at least 30 minutes. (The dough can be made up to 3 days in advance and refrigerated, or frozen for up to 2 months.)

To bake the cookies, preheat the oven to 350 °F and line two baking sheets with parchment paper or silicone baking mats. Slice the dough into ¼-inch (0.75 cm) rounds and set them on the baking sheets, evenly spaced. Bake the cookies, rotating the baking sheets midway through, for 12 minutes, until golden brown across the top. Remove the cookies from the oven and cool on the baking sheets until crisp. The cookies can be stored in an airtight container at room temperature for up to 3 days.

Tuesday, January 26, 2016

Winter Salad with Kale and Pomegranate


For a few Christmases in a row, my sister has made this kale and pomegranate salad that we really like, so I made it this year when my parents spent Christmas Eve with us in Texas. Maybe subconsciously, it was a way to have my sister at the table with us. It’s also a great salad for Christmas, because not only is it red and green, but it has a great mix of acidic and sweet that can help offset some of the richer dishes of the holiday. I only prepare the apple right before serving; the salad keeps well in the fridge, dressing separately, and the almonds should be kept in an airtight container at room temperature. I served it with meat pie and butternut squash sweet potato casserole.

For the salad
¾ cup almonds (100 g.)
2 Tbsp. red wine balsamic vinegar
1 Tbsp. honey
10-12 big leaves of kale (250-300 g.)
1 pomegranate
2 apples (I used Envy apples)

For the dressing
3 Tbsp. red wine balsamic vinegar
3 Tbsp. olive oil
1 tsp. honey
1 tsp. Dijon mustard
salt and pepper

Heat a pan and dry roast the almonds for 1-2 minutes. Add the balsamic and as soon as it is gone add the honey and stir for 1 minute. Transfer almonds to a baking shed lined with a silicone mat and let them cool until they are dry. Afterwards, chop them coarsely.

Wash and dry the kale. Remove the stems and use a food processor or mini chopper to chop the kale into a very fine texture. (You can use a sharp knife, but it takes longer.)

Prepare the pomegranate and cut the apple into thin boats and mix all of it with the kale. (I chopped the apples into bite-size pieces, which are less photogenic but more convenient to eat.)

Make the dressing by stirring everything thoroughly together (I like doing this in a small jar that I shake) and season to taste.

Stir everything together and serve.

Monday, January 25, 2016

The Chocolatiest Cookies with Fleur de Sel


I got this recipe from Happy Belly, but it was adapted from a recipe on Chocolate and Zucchini. The main differences are that the former used a mix of white and whole wheat flour instead of the all-purpose white flour called for in the latter, and it also used fleur de sel on top of the cookies instead of in the batter. In my version, I used white whole wheat flour and kept the fleur de sel in the batter while also sprinkling some on top. For the sugar, you can use either granulated sugar or brown sugar, or a mix of the two. Brown sugar tends to play well with chocolate, and it makes for cakier cookies, so that’s what I recommend (either just brown sugar or a mix of brown and granulated sugars). These small cookies are dense and intensely chocolaty, just the way they should be!

This recipe yielded 33 cookies for me; I baked half of the batch right away and kept the rest in the fridge.

1 cup (120 g.) all-purpose flour (see above)
¾ cup (90 g.) cocoa powder
1 ½ tsp. baking powder
4 oz. (120 g.) quality bittersweet chocolate, divided
½ cup (1 stick) vegan margarine
½ cup (100 g.) brown sugar (see above)
3 eggs, lightly beaten
1 tsp. vanilla extract
4 Tbsp. cocoa nibs
½ tsp. fleur de sel, plus more for garnish

In a large bowl, sift and mix together the flour, cocoa powder and baking powder.

Roughly chop 3 oz. (90 g.) of the chocolate and place in a heat-proof bowl with the margarine. Put the bowl over a pan of simmering water, without letting the water touch the base of the pot, and leave it to melt. Mix together and leave to cool at room temperature.

Finely chop the reserved chocolate and set aside.

In another bowl, whisk the sugar together with the eggs until well combined. Fold in the melted chocolate mixture and vanilla extract. Then fold in the flour mixture until well-combined. Lastly, fold in the reserved chopped chocolate and cocoa nibs, and ½ tsp. of the fleur de sel. The batter will be thick.

Preheat oven to 350 °F. Line a baking tray with a silicone mat or parchment paper.

Scoop tablespoons out the dough (I used my smallest ice cream scoop) and roll them into small bite-sized balls. It will get messy. And line them up, spaced 1 inch apart, on the cookie tray. Press down gently and sprinkle on fleur de sel. Put the cookie sheet in the freezer for 5 minutes or in the fridge for 10 minutes, so that the cookies don't spread as much when they bake. Then put in the oven to bake for about 10 minutes (do not overbake). The cookies should feel a bit soft as you pull them out of the oven so that they're nice and moist on the inside once they have cooled.

Saturday, January 23, 2016

Sweet Potato Chickpea Buddha Bowl


I love Buddha bowls, but for some reason I never got into the habit of making them. The Protein Salad I always order at Green is basically a Buddha bowl, after all, and it’s my favorite dish from that place. This Buddha bowl from Minimalist Baker really hit the spot for lunch: the kale and broccolini made me feel virtuous, while the sweet potato and chickpeas were comforting. The best thing was the tahini dressing, though, which both the Little Prince and I loved. I’ll have to keep that recipe handy to use with other similar dishes! I did change the recipe a bit by cutting the sweet potatoes into quarters so they’d cook more thoroughly; I peeled them once they were cooked; and I didn’t roast the chickpeas all the way because I prefer them chewy to crunchy. My onion was also a little less cooked than I would have liked, because I forgot to put it on the pan with the sweet potato. Next time, I’d consider doubling the sauce! Actually, I’ll probably use that sauce anytime I make a similar dish without a fixed recipe.

For the vegetables
2 Tbsp. olive, melted coconut, or grape seed oil
½ red onion, sliced in wedges
2 large sweet potatoes, halved
1 bundle (227 g.) broccolini, large stems removed, chopped
2 big handfuls kale, larger stems removed
¼ tsp. each salt and pepper

For the chickpeas
1 15-oz. can chickpeas, drained, rinsed and patted dry
1 tsp. cumin
¾ tsp. chili powder (I used a pinch of Korean pepper)
¾ tsp. garlic powder
¼ tsp. each salt and pepper
½ tsp. oregano (optional)
¼ tsp. turmeric (optional)

For the tahini sauce
¼ cup (56 g.) tahini
1 Tbsp. maple syrup
½ lemon, juiced
2-4 Tbsp. hot water, to thin

Preheat oven to 400 °F and arrange sweet potatoes and onions on a bare baking sheet. Drizzle both with a bit of oil, making sure the flesh of the sweet potatoes is well coated, and place skin side down on the sheet.

Bake for 10 minutes, then remove from oven, flip sweet potatoes and add broccolini. Drizzle broccolini with a bit of oil and season with a pinch each salt and pepper.

Bake for another 8-10 minutes, then remove from oven and add kale. Drizzle kale with a touch more oil and season with a pinch each salt and pepper. Bake for another 4-5 minutes then set aside.

While vegetables are roasting, heat a large skillet over medium heat and add chickpeas to a mixing bowl and toss with seasonings.

Once the skillet is hot, add 1 tablespoon oil and chickpeas and sauté, stirring frequently. If they’re browning too quickly, turn down heat. If there isn’t much browning going on, increase heat. How long you roast them is somewhat subjective – the original recipe said that 10 minutes on medium heat should do it, but I wanted to make sure they weren’t crisp, so I took them off the heat after roughly 5 minutes. Once the chickpeas are browned and fragrant, remove from heat and set aside.

Prepare sauce by adding tahini, maple syrup and lemon juice to a mixing bowl and whisking to combine. Add hot water until a pourable sauce is formed. Set aside.

To serve: Slice sweet potatoes into bite size pieces (and peel them if you wish). Divide vegetables between serving bowls and top with chickpeas and tahini sauce. This dish is best when fresh, although leftovers will keep for a few days in the fridge.

Friday, January 22, 2016

Pumpkin Cupcakes with Madagascar Vanilla Frosting


I’m not sure how seasonal pumpkin is for me at this point. Sure, nothing says “fall” like the return of pumpkin-everything on store shelves, but I always buy canned pumpkin purée, and that’s available year-round… I’ll concede that it usually feels warm (either the pumpkin itself or the spices associated with it), so I’d prefer it in the winter than in the summer. Do I say that every time I post pumpkin recipes now? Should I assume all my readers have heard me say that? In any event, I tried a recipe from Petit Lapin, chocolate and pumpkin pots de crème, but none of us were crazy about it (we much preferred the chocolate and sweet potato purée I had made once, and that’s the same general idea).

These pumpkin cupcakes, though, were a nice experiment. They were definitely not sweet, as they are only sweetened with coconut sugar. That being said, I had reduced the amount of vanilla bean paste to 1 teaspoon, because 1 tablespoon seemed like an obscene amount; in hindsight, the cupcakes would have been more flavorful (and would have given the illusion of being sweeter) had I used the full amount. The crumb was moist in a very pleasant way, though. I also tried Dollop frosting, which is vegan and soy-free and also barely sweet. It’s made with sustainably-sourced palm shortening, and the fat was more noticeable than the sugar. It was too stiff right out of the packaging, so I took it for a spin in my stand mixer and that helped the consistency as well as the mouthfeel. Even though it really wasn’t as sweet as most frosting I’m used to, it was somewhat addictive.


The original recipe called for Bob’s Redmill’s all-purpose gluten-free flour, but I used white whole wheat flour, since wheat isn’t an issue for me and I didn’t have all-purpose gluten-free flour on hand. The yield was supposed to be 10 muffins, and that’s indeed what I got. I’m a little annoyed that it’s not an even dozen, but there you go. That means you can have a few spoonfuls of frosting straight out o the package and still have enough to frost all the cupcakes – silver lining!

1 cup all-purpose flour (see note above)
½ cup of coconut palm sugar (or brown sugar if you want it sweeter)
½ tsp. salt
½ tsp. baking powder
½ tsp. baking soda
½ tsp. of ground nutmeg
½ cup unsweetened almond milk
½ cup canned pumpkin purée
1 Tbsp. vanilla bean paste (or 2 tsp. of vanilla extract)
4 Tbsp. vegan margarine, melted
1 Tbsp. apple cider vinegar
1 container of Dollop Madagascar vanilla frosting (or equivalent)

Preheat your oven to 350 °F. Line or spray your muffin pan and set aside (this recipe yields 10 cupcakes).

In a medium bowl, whisk the dry ingredients (from flour to nutmeg). Set aside.

Into a stand mixer with paddle attached (or in a bowl with a whisk, really, since there’s nothing to cream), beat the almond milk, pumpkin, vanilla, melted margarine and cider vinegar until combined.

Add the dry ingredients into the wet mixture and beat blend until combined. Scrape the sides down and blend one more time. (I did all this by hand with a wooden spoon.)

Fill each muffin cup about 60% full (I like doing this with an ice cream scoop). Bake for 20-24 minutes or until a toothpick inserted in the center comes out clean.

Once cooled, frost as you wish.

Thursday, January 21, 2016

Latkes with starch, from scratch


As always, I have a lot of posts to catch up on. I meant to post an article from The Atlantic last month all about how un-traditional potato latkes actually are. It turns out that, hundreds of years ago, latkes were made with cheese, then with grains. People used schmaltz before they used oil, and latkes weren’t associated with Hanukkah until more. It’s a very interesting article, if you have time for it.

So this year, I tried a new latke recipe for Hanukkah. Not the squash latke recipe I posted about during Hanukkah, but a potato recipe I made during that time and never got around to posting. Look at this as a very early post for the next Hanukkah, alright? The basic principle is outlined in this article on The Kitchn, but the recipe below is from Cook’s Illustrated. Basically, when you squeeze the water out of the grated potatoes, you let the water rest so that the starch collects at the bottom. The water is then carefully poured off, while the starch is added back into the potato mixture, making for crispier latkes. The starch acts as a binder, and this recipe doesn’t even contain flour, so it’s gluten-free (yet I didn’t have any trouble with latkes falling apart).

Both sources I linked to above recommend hand-grating the potatoes (because the food processor tends to make longer strands, which interfere with the proper latke consistency), but I really didn’t feel like it. I parent a toddler, I deserve to use my food processor here, and so do you. Instead, I cut the potatoes in 2-inch chunks to make sure the shreds wouldn’t be too long. Also, I forgot the parsley. The latkes were delicious nonetheless!

2 lbs. russet potatoes, unpeeled, scrubbed, and shredded
½ cup grated onion
salt and pepper
2 large eggs, lightly beaten
2 tsp. minced fresh parsley
vegetable oil (I used safflower oil)
apple sauce and lactose-free sour cream, to serve

Adjust oven rack to middle position, place rimmed baking sheet on rack, and heat oven to 200 °F.

Toss potatoes, onion, and 1 teaspoon salt in bowl. Place half of potato mixture in center of dish towel. Gather ends together and twist tightly to drain as much liquid as possible, reserving liquid in liquid measuring cup. Transfer drained potato mixture to second bowl and repeat process with remaining potato mixture. Set potato liquid aside and let stand so starch settles to bottom, at least 5 minutes. (I had about 1 cup of liquid, which yielded roughly 1/8 cup of starch in the end.)

Cover potato mixture and microwave until just warmed through but not hot, 1 to 2 minutes, stirring mixture with fork every 30 seconds. Spread potato mixture evenly over second rimmed baking sheet and let cool for 10 minutes. Don’t wash out bowl.

Carefully pour off water from reserved potato liquid, leaving potato starch in measuring cup. Add eggs and stir until smooth. Return cooled potato mixture to bowl. Add parsley, ¼ teaspoon pepper, and potato starch mixture and toss until evenly combined.

Set wire rack in clean rimmed baking sheet and line with triple layer of paper towels. Heat ¼-inch depth of oil in 12-inch skillet over medium-high heat until shimmering but not smoking (350 °F, if you want to bother measuring it). Place ¼-cup mound of potato mixture in oil and press with nonstick spatula into 1/3-inch-thick disk. Repeat until 5 latkes are in pan. Cook, adjusting heat so fat bubbles around latke edges, until golden brown on bottom, about 3 minutes. Turn and continue cooking until golden brown on second side, about 3 minutes longer. Drain on paper towels and transfer to baking sheet in oven. Repeat with remaining potato mixture, adding oil to maintain ¼-inch depth and returning oil to 350 °F between batches. Season with salt and pepper to taste, and serve immediately.

(Cooled latkes can be covered loosely with plastic wrap and held at room temperature for up to 4 hours. Alternatively, they can be frozen on baking sheet until firm, transferred to zipper-lock bag, and frozen for up to 1 month. Reheat latkes in 375 °F oven until crisp and hot, 3 minutes per side for room-temperature latkes and 6 minutes per side for frozen latkes.)


If you want a seasonal dessert, consider apple latkes with caramel sauce and lactose-free sour cream!

Filet de porc au cinq-épices


Voici une recette que j’ai trouvée sur le site d’Épices de cru. Il s’agit d’une recette rapide et délicieuse, que nous avons tous beaucoup aimée. J’ai doublé les quantités ci-dessous pour avoir des restes et j’ai servi le tout avec du riz.

Pour la marinade
2 c. à soupe de sauce hoisin
1 c. à soupe de vin de riz chinois ou de gin
2 c. à thé de vinaigre de riz
1 ½ c. à thé de sauce soya
1 c. à thé de sucre
1 c. à thé de gingembre râpé
2 gousses d’ail, hachées finement
½ c. à thé de cinq-épices chinois moulu (j’avoue que j’en mettrais moins la prochaine fois)
quelques gouttes d’huile de sésame grillé
1 pincée de sel

Pour le porc
½ lb. (250 g.) de filet de porc
3 oignons verts
2 c. à soupe d’huile végétale
2 c. à thé de sauce soya

Mélanger les ingrédients de la marinade et réserver.

Couper le filet de porc en tranches de ¼ po. (5 mm). J’ai aussi coupé mes tranches sur l’autre sens de façon à avoir de plus petits morceaux, plus faciles à manger pour les jeunes enfants et les grands adultes qui ne se servent pas de couteau. Des morceaux de taille uniforme permettent d’obtenir une cuisson réussie. Mélanger le porc dans la marinade et laisser reposer 15 minutes.

Entre-temps, séparer les parties blanches et vertes des oignons verts. Couper le blanc en sections de 1 po. (2,5 mm) de long; ciseler le vert.

Chauffer un wok à feu vif. Y verser l’huile et ajouter le blanc des oignons verts. Faire sauter 15 secondes. Ajouter la viande et remuer jusqu’à ce qu’elle soit cuite et encore juteuse (environ 2 minutes). Verser la sauce soya. Bien mélanger et verser dans un plat de service.

Servir avec du riz et garnir des oignons verts ciselés.

Tuesday, January 19, 2016

Pancakes à la courge musquée et à la fève de tonka

Je viens de découvrir la fève de tonka. Ou plutôt, je viens d’en découvrir le goût, parce que j’en avais entendu parler depuis plusieurs années quand même. J’en cherchais de temps à autre dans le rayon des épices, sans succès. Non seulement c’est assez rare, mais en plus, il se trouve que la FDA en interdit la vente en tant qu’épice aux États-Unis! En effet, elle contient de la coumarine, qui peut être toxique pour l’humain (selon Wikipedia, il en faudrait environ 275 mg/kg). Bon, soit, mais la casse contient également de la coumarine, et Dieu sait que les Américains raffolent de la casse! Toujours est-il que c’est parfaitement sécuritaire en petites doses. J’en ai commandé en ligne, d’une entreprise qui s’est trouvée être un magasin de fournitures wiccanes… Avoir été à Montréal, j’en aurais commandé chez Épices de cru!

Alors, donc, j’ai commencé par faire une recette de Catherine Draws : des pancakes à la courge musquée et à la fève tonka. Et je suis tombée sous le charme de la fève de tonka… C’est le noyau d’un fruit et on l’utilise comme la muscade, en la râpant. Elle a plus un parfum qu’un goût; ça rappelle un peu la vanille, mais plus délicat, plus foral. C’est vraiment délicieux! Si vous l’utilisez dans un plat sans en avertir les convives, il y a de bonnes chances qu’ils lui trouvent un goût de je-ne-sais-quoi, à la fois familier et indéfinissable. J’ai bien hâte de refaire cette recette! (À noter que j’utilise le terme « pancake » pour différencier des crêpes minces européennes, puisqu’ici il s’agit bien de crêpes à l’américaine.)

1 tasse de farine tout-usage
2 c. à thé de poudre à pâte
1 ½ c. à soupe de cassonade
½ c. à thé de sel
2 pincées de fève de tonka râpée finement
1 œuf
2/3 de tasse de babeurre (du lait sans lactose avec un peu de jus de citron)
1/3 tasse + 2 c. à soupe de chair cuite de courge musquée, en purée
1 noisette de beurre ou de margarine (ou de l’huile végétale)
yogourt nature sucré, miel, sirop d’érable (au goût, pour servir)

Dans un grand bol, mélangez la farine avec la poudre à pâte, la cassonade, le sel et la fève tonka.

Cassez l’œuf sur les ingrédients secs, versez le babeurre par-dessus, puis battez le tout vigoureusement à l’aide d’un fouet.

Quand le mélange est homogène, incorporez la chair de courge musquée.

Laissez reposer le mélange au réfrigérateur pendant 30 minutes.

Préchauffez le four à 212 °F.

Dans une poêle antiadhésive, faites fondre une très petite quantité de beurre à feu moyen-doux. Essuyez l’excédent avec un papier absorbant. (Trop de beurre mènerait à de moins jolies pancakes).

À l’aide d’une louche, versez une petite quantité de mélange dans la poêle. N’étendez pas. Faites cuire à feu doux jusqu’à ce que de petites bulles s’ouvrent dans la pâte. Retournez alors la pancake, et faites-la cuire encore 30 secondes. Transférez-la ensuite dans l’assiette se trouvant au four, puis recommencez jusqu’à épuisement du mélange.

Quand toutes les pancakes sont cuites, servez-les garnies de yogourt nature sucré, d’un filet de miel ou de sirop d’érable.

Skillet Baked Ziti


I’m back, after a little post-holiday hiatus. This time, I’d like to share an easy recipe from Serious Eats, which my friend Jen shared. The pasta is cooked by adsorption using chicken broth, though you could use vegetable broth instead. The yield is smaller than the recipes I normally post: you’ll probably get only 4 small servings out of this. That being said, it was really good, so I wouldn’t hesitate to make it again.

1 Tbsp. olive oil
3 medium cloves garlic, minced or grated with a microplane (about 1 Tbsp.)
1 tsp. dried red chili flakes (or to taste)
a 28-oz.can whole peeled tomatoes
kosher salt and freshly ground black pepper
1 ½ cup homemade or store-bought low sodium chicken broth
3 cups uncooked penne or ziti
½ cup grated parmesan cheese
1 cup shredded mozzarella (I used Daiya’s vegan substitute to avoid lactose)
½ cup picked fresh basil leaves, cut into strips

Adjust oven rack to center position and preheat the oven to 400 °F.

Heat the oil in an oven-safe 12-inch skillet over medium-high heat until shimmering. Add the garlic and chili flakes and cook, stirring constantly, until fragrant but not browned, about 30 seconds. Add the tomatoes and a pinch salt and reduce the heat to maintain a gentle simmer, breaking up the tomatoes with a potato masher as they soften until the sauce has thickened, about 10 minutes. Add broth and bring to a gentle simmer.

Add the pasta and cover. Raise the heat to medium, making sure there are active and vigorous bubbles. Cook, stirring occasionally to make sure the pasta isn’t sticking, until the pasta is just firm, following package directions for timing (12 to 15 minutes).

Remove lid, season to taste with salt and pepper, stir in the parmesan, and spread the mozzarella on top (a few stray chunks of mozzarella never hurt). Transfer to oven and bake until cheese has melted and is starting to brown, 8 to 10 minutes. Top with basil and serve.

Sunday, January 03, 2016

Batch of links

- I realized that I haven’t yet talked about Quiet: The Power of Introverts in a World That Can’t Stop Talking, by Susan Cain (affiliate link), and I must remedy that! I read this book last spring and absolutely loved it. It discusses the extrovert ideal (including the charismatic leadership and groupthink that are so prevalent these days), the biological and cultural predispositions to introversion, and how to function as an introvert (how to talk to extroverts, when to act more like them, etc.). It also dispels some myths, for example explaining the difference between someone who is an introvert and someone who is asocial. Every page I read made me nod my head, “Yes. Yes, that’s me!” I highly recommend it if you are an introvert or if you are trying to understand introverts. You can see the author’s TED Talk here (I had linked to the French version a few years ago). Bonus: a Buzzfeed list of 17 graphs that are way too real for introverts.

- A neat animated video on blame, and one on the difference between empathy and sympathy, both narrated by Brené Brown.

- A couple moving to New York wasn’t sure which neighborhood would be best for them, so they had the brilliant idea of renting a dozen Airbnb apartments for a month each before deciding where to settle down.

- A really great, really moving article about death, written by a father of two after his wife passed away from cancer and their best friend came to help. An excerpt: “I was in shock and stayed there a long time. We don't tell each other the truth about dying, as a people. Not real dying. Real dying, regular and mundane dying, is so hard and so ugly that it becomes the worst thing of all: It's grotesque. It's undignified. No one ever told me the truth about it, not once. When it happened to my beloved, I lost my footing in more than one way. “

- And an essay titled One Bouquet of Fleeting Beauty, Please, about the impermanence of life as seen by an assistant florist. (This hits home to me mostly because I used to be an assistant florist too.)

- Apparently, having a doppelgänger is not that unusual – each of us might have a half-dozen or so around the world.

- Did you know there’s a new way to learn written Chinese? It looks very promising, too.

- I’ve been reading a lot of articles about the “death” of handwriting. Not just the loss of handwriting to keyboards, but the loss of cursive to script.

Forty-five (!) US states have dropped teaching cursive in favor of using keyboards, even though studies show that kids who learn cursive script exclusively in their early education have a leg up on others as far as quality of writing goes. Specifically, learning cursive over script (the two types of handwriting) allows kids to have better grammar and spelling, as well as to write more quickly and more legibly. Notably, there are no more problems with mirror letters and spacing, and kids understand words and sentence structure more easily. Keyboards should only be introduced once some form of handwriting has been mastered. (All this info is from an article published by the Université de Montréal.)

Actually, a very interesting article in The Atlantic explains how the ballpoint pen killed cursive. You see, cursive was natural when everyone used fountain pens, but a ballpoint pen actually makes it harder to write in cursive, making script a more natural approach. I learned cursive with a fountain pen (though I have since switched to a cursive-script hybrid using ballpoints), and it didn’t even occur to me that some people don’t know how to use a fountain pen until I met the Engineer – he has no problem with a ballpoint, though, but looking at him with a fountain pen, you would think the pen had a mind of its own and was intent on defeating his attempts at writing! We were obviously in different school districts, though this make me wonder what schools still use fountain pens these days.

A Time article titled The paperless classroom is coming showed both sides of the analog vs. digital debate: teachers say they observe a 20% improvement in the quality of student writing when using digital word processing (as opposed to longhand), and schoolboards do everything they can to bring technology to classrooms. But parents worry that their children won’t know how to write by hand properly and they are left out of the loop when there is no paper trail; plus, doctors warn of physical ailments tied to looking at blue light from a screen too long or sitting at a desk made for pen and paper while using a computer. Obviously, one can have a much more interactive classroom with computers or tablets, as well as teaching methods that are more tailored to each child, but I worry that something important is lost as well when computers are introduced too early in development.