Monday, February 28, 2022

Poitrines de poulet bruschetta

J’avais deux recettes qui se ressemblaient: une de Delish et l’autre de Coup de Pouce. Je les ai donc mélangées un peu pour obtenir la recette ci-dessous. Et c’était vraiment délicieux! 

Pour l’orzo, j’ai utilisé un produit de marque Banza vendu comme un remplacement de riz (mais c’est clairement une pâte). Et pour les poitrines de poulet, ces temps-ci, je prends toujours celles qui sont sans la peau, sans les os et coupées en deux sur le sens de la longueur. 

Pour les poitrines de poulet bruschetta 
3 tomates, coupées en morceaux (ou 1 ½ tasse de tomates cerises multicolores coupées en 2) 
1 gousse d’ail, hachée finement 
2 c. à thé de vinaigre balsamique 
3 c. à thé d’huile d’olive extra-vierge 
5 ou 6 poitrines de poulet 
6 tranches de fromage mozzarella frais sans lactose 
¼ tasse de basilic frais haché 
sel et poivre, au goût 

Préchauffer le four à 350 °F. 

Dans un bol, mélanger les tomates, l’ail, le vinaigre et 1 cuillère à thé de l’huile. Saler et poivrer, puis réserver. 

Saler et poivrer les poitrines de poulet. Dans un grand poêlon, chauffer le reste de l’huile à feu moyen-vif. Ajouter le poulet et cuire 4 minutes ou jusqu’à ce qu’il soit doré (le retourner à mi-cuisson). Retirer le poêlon du feu et déposer le poulet sur une plaque de cuisson munie de rebords, huilée. 

Garnir les poitrines de poulet du fromage mozzarella et de la moitié bruschetta de tomates réservée. Cuire au four pendant 10 minutes ou jusqu’à ce que le poulet ait perdu sa teinte rosée à l’intérieur. Pendant ce temps, mélanger le basilic à la bruschetta restante. 

Au moment de servir, parsemer le poulet de la bruschetta crue et servir avec de l’orzo au citron. 


Pour l’orzo au citron 
8 oz. d’orzo (voir note plus haut) 
1 c. à thé de beurre sans lactose 
2 c. à thé de zeste de citron râpé 
2 c. à soupe de jus de citron 
3 c. à soupe de persil italien frais, haché 
sel et poivre 

Dans une grande casserole d’eau bouillante salée, cuire l’orzo de 6 à 8 minutes ou jusqu’à ce qu’il soit al dente. Égoutter les pâtes, en réservant ½ tasse de l’eau de cuisson, et les mettre dans un bol. Ajouter le beurre, le zeste et le jus de citron, le persil et l’eau de cuisson réservée. Mélanger pour bien enrober les pâtes. Saler et poivrer.


Thursday, February 24, 2022

Biscuits au chocolat et au gingembre


On est grands fans de desserts au chocolat chez nous! Bon, malheureusement, les bouchées de brownies d’Erin McKenna n’étaient pas fameuses, mais on s’est rattrapé avec les biscuits au chocolat et au gingembre de Coup de Pouce. C’est une recette en plusieurs étapes : il faut d’abord faire du gingembre confit, puis faire les biscuits, et enfin les tremper dans le chocolat pour les décorer. 

Alors, la recette avait quelques défauts. D’abord, j’ai fait une demi-recette de gingembre confit (ce que j’écris ci-dessous), et j’en avais quand même beaucoup, beaucoup trop! Ensuite, une fois la pâte à biscuits étalée et les biscuits formés à l’emporte-pièce, il était absolument impossible de les décoller du papier ciré! J’ai fini par prendre environ 2 cuillères à soupe de pâte à la fois pour les façonner en biscuits avec mes mains– j’ai obtenu un total de 18 biscuits. 

Quand même, une fois ces épreuves surmontées, c’était vraiment délicieux! Les biscuits ne sont pas trop sucrés, et le goût de gingembre reste assez subtil (sauf quand on croque le gingembre confit, évidement). Et ils sont jolis comme tout! 

Pour le gingembre confit (il y en aura plus qu’il faut pour les biscuits) 
½ tasse + 2 c. à soupe de sucre 
½ tasse d’eau 
¼ tasse de gingembre frais, pelé et coupé en julienne 

Dans une petite casserole, mélanger ½ tasse de sucre et l’eau. Porter à ébullition. Réduire le feu à doux et ajouter le gingembre. Cuire, en brassant de temps à autre, 20 minutes ou jusqu’à ce que le gingembre soit tendre. Égoutter le gingembre, l’étendre sur une grille placée sur une plaque de cuisson, puis laisser refroidir (conserver le sirop de gingembre pour un autre usage). 

Dans un petit bol, avec les doigts, mélanger le gingembre confit avec 2 cuillères à soupe de sucre pour bien l’enrober. (Le gingembre confit se conservera jusqu’à 3 mois dans un contenant hermétique, à la température ambiante.) 


Pour les biscuits 
1 ¼ tasse de farine 
1/3 tasse de poudre de cacao tamisée 
¼ c. à thé de bicarbonate de soude 
1 pincée de sel 
½ tasse de beurre sans lactose, à la température de la pièce et coupé en cubes 
1/3 tasse de sucre 
1 œuf 
1 ½ c. à thé de gingembre frais râpé 
1 tasse de brisures de chocolat mi-sucré 

Préchauffer le four à 350 °F. Tapisser deux plaques à biscuits de papier parchemin ou d’un silpat. 

Dans un bol, mélanger la farine, le cacao, le bicarbonate et le sel. Réserver. 

Dans un grand bol, à l’aide d’un batteur électrique, battre le beurre et le sucre jusqu’à ce que le mélange soit léger et gonflé. Incorporer l’œuf et le gingembre frais, en battant. En battant à faible vitesse, incorporer les ingrédients secs réservés en 2 fois jusqu’à ce que la préparation soit homogène. 

Façonner les biscuits en prenant des portions d’environ 2 cuillères à soupe de pâte. En les façonnant en boule et en les aplatissant légèrement. (J’ai obtenu 18 biscuits en tout.) Placer les biscuits sur les plaques préparées en les espaçant de 1 po (2,5 cm). 

Cuire, une plaque à la fois, de 10 à 12 minutes ou jusqu’à ce que les biscuits aient perdu leur brillance. Déposer les plaques sur une grille et laisser refroidir 10 minutes. Déposer les biscuits sur la grille et laisser refroidir complètement. 

Dans un bol en métal placé sur une casserole d’eau chaude, mais non bouillante, faire fondre le chocolat en remuant souvent. Retirer le bol de la casserole. Tremper un biscuit à moitié dans le chocolat fondu et laisser couler l’excédent. Déposer le biscuit sur une plaque de cuisson tapissée de papier parchemin et parsemer de gingembre confit. Répéter l’opération avec le reste des biscuits. Réfrigérer 15 minutes ou jusqu’à ce que le chocolat ait durci.


Super Spinach Crêpes

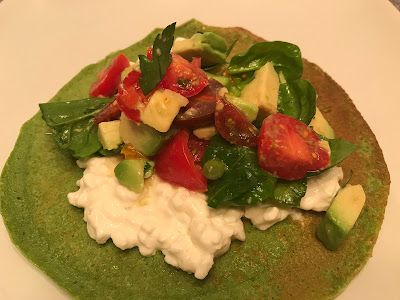
I tried making a vegan bulgogi and, while the seasoning was good, I ended up with some sort of aversion to the fake ground meat and couldn’t bring myself to eat the leftovers. I was at a loss to find a vegetarian meal that everyone would like, but then I saw this Jamie Oliver recipe that was just what I was looking for! I adapted it slightly to what I had on hand and how I wanted to eat things (say, avocado cut right before serving instead of macerating in a salad overnight), and that’s perhaps one of the reasons this recipe works so well. Plus, everyone can choose which topping they do or do not want, so in that regard, the meal was well received. Everyone *loved* the crêpes, and if anything, I’ll double the recipe next time! The amounts below yield 8 small crêpes. 

Jamie Oliver does say that you could use another leafy green instead of the spinach, such as swiss chard or kale, or you could even use herbs. Adapt the cheese to your liking, of course! I think I might even serve these instead of tortillas next time I make tacos. 
 
1 ripe avocado 
350 g mixed-color cherry tomatoes 
100 g baby spinach, divided 
3 green onions 
½ a bunch of fresh cilantro (15 g) 
1 lime 
extra virgin olive oil 
1 large egg
1 cup all-purpose flour 
1 cup lactose-free milk 
300 g lactose-free cottage cheese 
hot chili sauce (I omitted that) 

Halve, destone, peel and finely slice the avocado and quarter the tomatoes, then place in a salad bowl with a quarter of the spinach. 

Trim, finely slice and add the spring onions and pick in the coriander leaves, then squeeze over the lime juice. Drizzle with 1 tablespoon of extra virgin olive oil, season to perfection with sea salt and black pepper, toss to coat and put aside. 

Crack the egg into a blender, add the flour, milk, remaining spinach and a pinch of salt and pepper, then blitz until smooth. 

Place a large nonstick frying pan on a medium heat, rub the pan with a little olive oil, then pour in a thin layer of batter, swirling it up and around the edges. Cook on one side only for 2 minutes, or until lightly golden, then stack up on a serving plate and repeat. 

Top each crêpe with dollops of cottage cheese, the avocado salad, and a few good shakes of chili sauce. Really nice served with extra lime wedges for squeezing over, and a fried egg on top, if you fancy.


Saturday, February 19, 2022

Homemade Chocolate


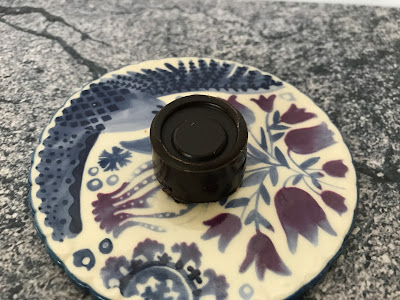
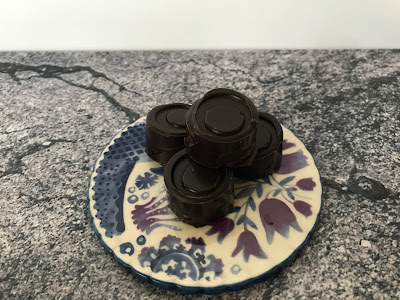
It’s a wonder that this didn’t happen sooner in my kitchen, given how much I love chocolate, but I only recently got around to making my own. And it was FANTASTIC! I used this Minimalist Baker recipe, omitted the almonds, and used candy molds instead of a baking sheet (for bonbon-type confections rather than bars). 

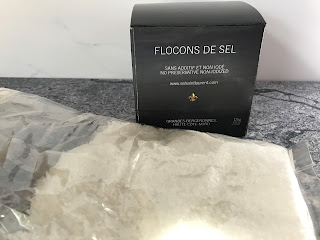
The cocoa powder I used was Callebaut (I highly recommend it); the cocoa butter was Navitas Organics (I like it, but it’s the only one I’ve ever had and don’t have a point of comparison). As for the salt, I decided to finally try sea salt from Quebec’s St. Lawrence River, and this was a perfect application for it! It has smallish flakes, closer to Murray River salt than Maldon salt flakes. I’d consider vanilla bean paste instead of the vanilla extract next time, and obviously this is something you could flavor as you wish, perhaps with orange zest or cinnamon and chili. 


I got 30 chocolates and still had some melted chocolate left over. We give this 4 enthusiastic thumbs up!

1 cup cacao butter 
½ cup maple syrup (you could use a bit less if you prefer) 
1 cup cacao powder or unsweetened cocoa powder 
1 tsp. vanilla extract 
1/8 tsp. sea salt (see note above) 

Melt cacao butter in a double boiler or in a glass mixing bowl set over a small saucepan with 1 inch of water over medium heat. Alternatively, melt in the microwave in a mixing bowl until completely liquid. 

Once melted, remove from heat and add maple syrup and whisk to combine. When the mixture is completely fluid with no separation, add cacao or cocoa powder, vanilla extract, and salt. Whisk to thoroughly combine. 

Taste and adjust sweetness if needed (the original recipe writer prefers 1/3 cup, but I typically like things a tad sweeter than she does, and ½ cup was perfect for me). 

Pour the chocolate into candy molds (if you have them), mini paper cupcake liners, or simply line a baking sheet with parchment paper and pour the chocolate on top. Top with a sprinkle of salt, if desired. 

Set in the refrigerator or freezer to harden for 30 minutes to 1 hour. Once hard, the chocolate can be kept at room temperature in an airtight container, or you can refrigerate it or freeze it for long-term storage.


Monday, February 14, 2022

Feuilletés à la crème d'amandes


J’ai fait des brioches roulées aux framboises et au citron de Coup de Pouce pour le déjeuner ce matin. Je trouvais ça parfait pour la Saint-Valentin! Et étonnement, j’ai été la seule à en manger (l’ingénieur n’aime pas les framboises, je le savais, mais le Renard a refusé d’y goûter, et le Petit Prince a déclaré après une seule bouchée, sans glaçage, qu’il n’aimait pas ça); puisque je dois limiter les glucides, je vais probablement devoir jeter une bonne partie de ces brioches. Elles sont pourtant si jolies! 


La recette qui est à l’endos de la même page du magazine, par contre, elle vaut la peine d’être partagée! Il s’agit de ces feuilletés à la crème d’amandes. Je fais une modification à la manière dont la recette est rédigée, parce que quand je les ai faites, j’ai mis les deux œufs dans la garniture, alors qu’il fallait en garder un pour la dorure, et ce n’était pas clair du tout. Alors voilà, je clarifie – et je recommande. (Avec la garniture rendue trop liquide par l’œuf supplémentaire, j’ai fait de petites tartelettes qui ont été bien reçues également.) 

Il y a une variante que je n’ai pas essayée: il suffit de rajouter 1/3 tasse de brisures de chocolat sur la garniture avant de sceller les feuilletés. Ça a l’air bon! 

½ tasse d’amandes moulues 
½ tasse de sucre granulé 
¼ c. à thé de sel 
¼ tasse de beurre sans lactose, à la température de la pièce, coupé en dés 
1 œuf, à la température ambiante 
½ c. à thé d’extrait d’amande 
2 feuilles (450 g) de pâte feuilletée surgelée, décongelée 
1 autre œuf 
¼ tasse d’amandes en tranches 
1 c. à soupe de sucre en poudre (facultatif) 

Dans un bol, à l’aide d’un batteur électrique, mélanger les amandes moulues, le sucre granulé, le sel, le beurre, 1 œuf et l’extrait d’amande, en battant jusqu’à ce que la garniture soit crémeuse. Réfrigérer la crème d’amandes de 30 à 60 minutes ou jusqu’à ce qu’elle soit suffisamment ferme pour tenir en petits monticules. 

Préchauffer le four à 400 °F. 

Sur une surface de travail, abaisser une feuille de pâte feuilletée en un carré de 12 po (30 cm) de côté, puis la couper en 9 carrés de 4 po (10 cm). Procéder de la même manière avec l’autre feuille de pâte. À l’aide d’une cuillère, déposer un monticule de crème d’amandes au centre de la moitié des carrés, environ 2 c. à soupe (30 ml) à la fois (ne pas l’étendre). Dans un petit bol, battre le dernier œuf. À l’aide d’un pinceau, badigeonner les bordures des carrés garnis de l’œuf battu. Déposer un carré de pâte restant par-dessus chaque carré garni, en prenant soin de bien presser les bords avec les doigts pour les sceller. 

Déposer les carrés sur une plaque de cuisson tapissée de papier parchemin, en les espaçant. À l’aide d’une fourchette, presser les bordures des carrés. Badigeonner le dessus des feuilletés d’œuf battu et parsemer des amandes en tranches. 

Cuire au four de 20 à 25 minutes ou jusqu’à ce que les feuilletés soient dorés et gonflés. Mettre la plaque sur une grille et parsemer du sucre glace, si désiré (je ne l’ai pas fait). Laisser refroidir 5 minutes. (Les feuilletés se conserveront jusqu’à 5 jours à la température ambiante dans un contenant hermétique; on peut également les faire congeler.)


Friday, February 11, 2022

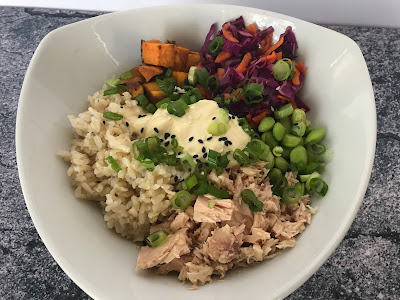
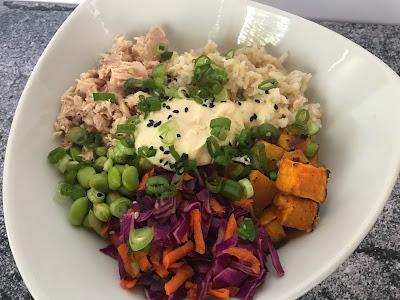
Tuna Grain Bowl


This recipe is from Food Network, where it was originally called a healthy tuna grain bowl with turmeric sweet potatoes and spicy yogurt dressing. I didn’t make my dressing spicy; I meant to use a rice substitute, but forgot to buy it at the store, so regular brown rice it was. This dish was delicious, but most of all, it was super satisfying as a lunch and kept me full until dinner – not a negligible thing! The amounts below make 4 generous servings – I recommend storing the leftovers separately in the fridge and assembling the salad as you’re ready to eat, warming up components as needed. 

2 medium sweet potatoes, peeled and diced into 1” pieces (mine were smaller)
2 Tbsp. toasted sesame oil, divided 
¾ tsp. ground ginger, divided 
¾ tsp. ground turmeric, divided
kosher salt and freshly ground black pepper, to taste 
3 cups cooked brown rice 
¼ head red cabbage, thinly sliced (about 2 cups) (I chopped it further) 
2 small carrots, trimmed and peeled into paper-thin ribbons (I grated them) 
2 large limes, halved (1 half cut into wedges for serving) 
¾ cup lactose-free Greek yogurt 
1 Tbsp. fish sauce (I used ½ Tbsp.) 
1 pinch Korean pepper (or chili paste, and increase to taste) 
1 ½ tsp. honey 
2 5-oz. cans of albacore tuna packed in water, drained 
1 cup frozen shelled edamame, thawed 
2 scallions, thinly sliced 
toasted sesame seeds, for serving 

Preheat the oven to 450 °F. Line a rimmed baking sheet with aluminum foil. 

Toss the sweet potatoes, 1 Tbsp. of the sesame oil, ½ tsp. of the ginger, ½ tsp. of the turmeric, ¼ tsp. salt, and several grinds of pepper on the prepared baking sheet until evenly coated (I like to do this in a bowl and then spread it out onto the baking sheet). Roast until tender and lightly browned, tossing halfway through, about 30 minutes. 

Meanwhile, let the rice cool if you’ve just prepared it, or warm it up if you are using leftover rice. 

Toss the sliced cabbage, carrot ribbons, the juice from ½ a lime, 1 pinch of salt, and a couple grinds od black pepper in a medium bowl until well dressed and combined. 

Squeeze the juice from the remaining 2 lime halves into a small bowl. Stir in the yogurt, fish sauce, Korean pepper, honey, as well as the remaining 1 Tbsp. sesame oil, ¼ tsp. ginger and ¼ tsp. turmeric, 1 pinch of salt, and several grinds of black pepper until smooth. Taste and adjust the seasoning as needed. 

Divide the warm rice among 4 shallow bowls (about ¾ cup per bowl). Top with the roasted sweet potatoes, cabbage-carrot slaw, tuna (about ¼ cup per bowl), edamame, and sliced scallions. Drizzle with the yogurt dressing, sprinkle with toasted sesame seeds, and serve with the reserved lime wedges for squeezing.


Another batch of links

- OK, despite the topic of my past batch of links, I’m not all about weight, health, and diets! Here’s something fun: look at this great cake-decorating technique

- Did you know they make biodegradable straws out of pasta? They’re gluten-free, too! 

- There’s a book called Fictitious Dishes, where the author created and photographed meals from famous passages in literature. 

- A bride spent 9 months knitting her own wedding dress (and hand-beading her stockings), and it looks beautiful! 

- Alright, so I finally caught up with the rest of America and listened to Serial, Season One, in which we learn all about how Adnan Syed was convicted for the murder of Hae Min Lee in 1999. I came away from that podcast feeling that the poor man never got a fair trial. Then, at Dear Sister’s recommendation, I listened to Undisclosed, Season One, which did a much more thorough job of getting to the bottom of things. It’s hosted by lawyers, whereas Serial was hosted by a reporter. It’s now clear to me that Adnan Syed is an innocent man and that Hae Min Lee’s killer is still out there, mostly because the Baltimore Police Department was more concerned with officially closing a case than with actually solving it. (I think that if the police had done their job properly, for example by actually testing the DNA found at the crime scene, the fact that Mr. Syed got ineffective assistance from his lawyer would be irrelevant.) I’m not going to go on about this, because I would just write pages and pages and get really upset, but I really hope that some higher court will set things right. I mean, as right as they can be, considering that he’s been in prison for over 20 years already for a crime he did not commit. And obviously, there’s no way he's the only person who got thrown under the bus by the justice system like this. Anyway, if you have like 60 hours or so (!), these are your new podcasts.

Tuesday, February 08, 2022

Batch of links

- I really enjoyed this article by Alex Beggs in Bon Appétit about diet foods (and fads) in America. “Americans continue to expect that food will make us healthier, more virtuous, and thinner.” But it hasn’t worked out that way, and as a matter of fact, obesity has risen since the popularization of diets. 

- I enjoy Virginia Sole-Smith’s articles on our relationship with food, and I particularly liked this one titled The Fallacy of Eating the Way Your Great-Grandmother Ate. Let’s just say that when Michael Pollan popularized this concept, he didn’t say anything about privilege or the unpaid labor of women. 

- While we’re at it, I also *loved* her article about Noom, which is pretty much what I experienced when I tried it for several months. 

- I try to keep my PCOS in mind when I eat, and I liked this recent podcast episode of Hormonally Yours with the Hormone Dietician, about nutrition and PCOS. I especially like how this dietician uses DATA instead of hearsay, so I trust her more than many others out there. In my experience, eating the right foods for PCOS has allowed me to lose weight without being hungry, a first for me, though it’s still a work in progress. 

- I was fascinated by this article by Gary Taubes about obesity science. You see, the central premise of modern obesity science is that obesity is a matter of energy imbalance (i.e., more calories are consumed than are expended). But there’s not-so-new evidence that follows a different model, based on carbohydrates and insulin. Back in 1930, scientists were on to this. “The medical profession in general believes that there are two kinds of obese persons [:] those who have become fat because they over-eat or under-exercise; and those composing a second group whose adiposity is not closely related to diet, but is caused by an endocrine or constitutional disorder.” In essence, some people become overweight not because of how much they eat, and in fact can become overweight even if they under-eat. “To attribute obesity to ‘overeating’ is as meaningful as to account for alcoholism by ascribing it to ‘overdrinking’.” It’s easy to see how, if the central premise of research is flawed, many explanations for and mechanisms of fat metabolism will be completely overlooked!

- I’ve been paying more attention to my health lately, and I’m aware that a lack of sleep affects me negatively in many ways. As tempting as it is, I avoid revenge bedtime procrastination, because it leaves me too tired the next morning. It turns out, though, that the answer isn’t just going to bed early – bedtimes that are either too early or too late have negative effects. For heart health specifically, it looks like the sweet spot is between 10 and 11 pm, so I’m doing fine in that regard!

Le meilleur gravy

Bon, je n’ai peut-être pas de belle photo, mais j’ai une bonne recette! J’avais fait une salade au steak fajita (correcte, sans plus), et il me restait du steak, que j’avais mis à congeler. J’ai décidé de le resservir avec une sauce brune de type gravy, sans trop d’attentes, et j’ai trouvé que cette sauce était vraiment, mais vraiment délicieuse. En plus, elle est végétalienne, alors on peut la faire d’avance, et même pas besoin de servir de viande! Il fallait de l’assaisonnement pour volaille, que je n’ai pas, alors j’ai remplacé ci-dessous avec les épices que j’ai utilisées. Vraiment, c’était le gravy parfait! 

Comme accompagnement, je recommande ces carottes glacées au gingembre et aux herbes et une salade avec vinaigrette au parmesan (dont j’ai réduit l’huile de moitié). 

¼ tasse d’huile d’olive 
¼ tasse de farine tout-usage 
2 c. à soupe de sauce soya 
2 c. à soupe de levure alimentaire 
2 tasses de bouillon de légumes 
¼ c. à thé de thym séché 
¼ c. à thé de sauge séchée 
1/8 de c. à thé de muscade 
1/8 c. à thé de poivre noir 
½ c. à thé de moutarde de Dijon 

Dans une casserole de taille moyenne, faire chauffer l’huile d’olive à feu moyen. Saupoudrer la farine dessus et faire cuire en fouettant constamment, jusqu’à ce que le mélange sente la farine grillée, 2 ou 3 minutes. Ajouter la sauce soya et la levure alimentaire, en fouettant pour mélanger. La sauce va faire des motons, comme on dit en bon québécois, et c’est normal. 

Ajouter lentement le bouillon de légumes à la casserole, en fouettant constamment, jusqu’à ce que le bouillon soit incorporé au mélange de farine et que le tout soit lisse. Augmenter le feu à moyen-élevé et faire cuire, en fouettant souvent, jusqu’à ce que le mélange épaississe et puisse enrober le dos d’une cuillère, de 8 à 10 minutes. Ajouter les épices et la moutarde et fouetter une dernière fois. Servir chaud ou tiède. 

(Pour le faire réchauffer, on peut ajouter un peu de bouillon de légumes au besoin.)

Sunday, February 06, 2022

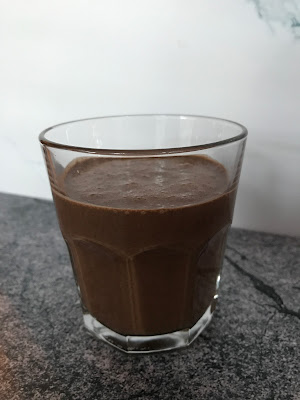
Keto Chocolate Protein Shake


I don’t share drink recipes often, but this one is worth it. It’s a keto chocolate protein shake that made for a good breakfast! I didn’t use the ice (and removed it from the ingredients below) and added a scoop of collagen peptides. It’s probably not going to keep you full until lunch, but it’s a good smoothie. 

¾ cup almond milk 
2 Tbsp. almond butter 
2 Tbsp. unsweetened cocoa powder 
2 Tbsp. keto-friendly sugar substitute 
1 Tbsp. chia seeds 
2 Tbsp. hemp seeds 
1 scoop collagen peptides (optional; omit for vegan version) 
½ Tbsp. vanilla 
1 pinch kosher salt 

Combine all ingredients in a blender and blend until smooth. Pour into a glass and garnish with more chia and hemp seeds if desired.

Tuesday, February 01, 2022

Schnee Shawl

Back when I posted about the Inspira cowl, my mother was very enthusiastic about how much she liked it. So much so, that I decided to knit her one for Christmas. Since I had plenty of the bright colors left over and not quite enough gray, I bought some tiny unicorn tails in Snap so that I wouldn’t have too much left over and I got to knitting. I was plenty early and was probably done within a few weeks. 


Then, in very late November, Dear Sister said that her home office (where she will be working for the foreseeable future) was very cold and that she would love a shawl to keep her warm. I looked at patterns that I could make with, say, worsted weight yarn, so that it would knit up quickly, but nothing I found was good enough. The only shawl that I actually wanted to make was Melanie Berg’s Schnee Shawl, conveniently sold in a kit with Shibui Knits yarn: two skeins of Lunar (a mix of merino and silk) and four skeins of Silk Cloud (mohair and silk). They are both lace weight, though, so I was going to have to knit up a storm to be done in time! I figured her birthday in early January was a more likely ETA than Christmas, and I was right. I chose the Bone colorway because it reminded me of her cat’s belly hair, and since mohair does have a tendency to shed, this was as good a color as any. 


“Schnee” means snow in German, and the pattern is meant to evoke “hushed drifts of fresh snow” with “fabric that’s as light and fluffy as a snowflake.” The shawl is knit in two halves, each with a different pattern, that you then join in the middle with a three-needle bind-off. However, as many knitters have pointed put before (say, here), there isn’t enough Silk Cloud yarn in the kit to complete the pattern as written! You are therefore better off starting with sections 3 and 4, which *must* be completed as written, and then knitting sections 1 and 2 as far as you can go, since in theory section 2 can be as short or long as you want. 


I admit that I sped through knitting a sample for gauge, because mohair is incredibly hard to frog and I didn’t want to waste any of it. Besides, this is a shawl, so knitting to gauge isn’t crucial. I used 4mm needles, since using the recommended size made fabric that was too tight for my liking. There are some places where I made a mistake or two and opted to leave it in place, because there was just so little time to knit this shawl!

Once you learn the pattern in each section, the knitting itself is pretty easy. This was a pleasant project, despite the pressure I felt to complete it on time. I ended up finishing it just before Dear Sister’s birthday, but by then I was back in San Antonio, so I showed it to her on FaceTime and then mailed it off later that week. Hopefully she likes it in person! Meanwhile, I’ll go back to the smaller projects I had set aside in December.


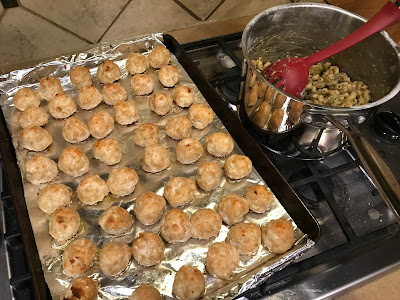
Baked Chicken Meatballs with Broccoli Pesto Pasta

I had tried a Greek-inspired menu of meatballs with mint and lentil purée with cilantro, thinking it would distract the kids from the side of raw vegetable salad, but I think no one liked them much. I then decided to try a leaner meatball, namely these baked chicken meatballs served with roasted broccoli pesto pasta. These were *great*! The Engineer had seconds, and surprisingly, the Little Prince liked the pasta the best. (It was dark by the time we had dinner, obviously, so you’ll have to make do with this photo.) 

For the roasted broccoli pesto 
4 cloves garlic 
1 large head broccoli, roughly chopped 
½ cup fresh basil 
½ cup grated lactose-free parmesan cheese 
¼ cup extra-virgin olive oil 
½ tsp. salt 

Preheat the oven to 400 °F. 

Cut and wash the broccoli into small florets and toss with salt and olive oil. 

Roast on a sheet pan until the edges begin to crisp and the inside of the broccoli is tender, about 30 minutes. 

In a food processor blend together broccoli along with remaining ingredients until blended well. If a thinner consistency is desired add more olive oil, one tablespoon at a time while blending. 


For the chicken meatballs 
2 lbs. ground chicken 
1 cup breadcrumbs 
2 large eggs, beaten 
1 Tbsp. dried fennel seed (I used less) 
1 cup finely grated lactose-free parmesan cheese 
4 cloves garlic, minced 
2 tsp. salt (I would use just 1 tsp. next time) 
1 lb. bucatini (or your pasta of choice, including low-carb) 

Preheat oven to 450 °F. 

Use your hands to combine the ground chicken, salt, eggs, fennel, grated parmesan cheese, garlic and breadcrumbs (do not overmix or the meatballs might get tough). Form uniform meatballs about 2 Tbsp. each and arrange on a baking sheet. 

Roast meatballs for 15 min on center rack. Turn heat up to 500 °F and brush meatballs with olive oil. Cook for another 5 minutes. 

Meanwhile, cook pasta according to package directions. Save some of the cooking water to help mix the pesto if you want. 

Toss pasta with broccoli pesto along with some olive oil or pasta water and top with chicken meatballs. Serve with freshly shaved parmesan. Enjoy!


Sunday, January 30, 2022

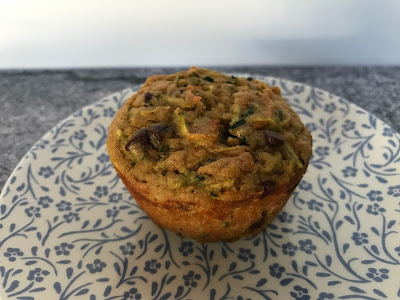
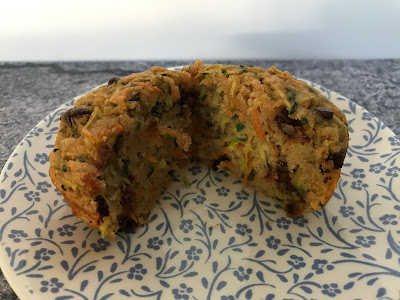
Vegetable Protein Muffins


It feels like I’m always trying to find interesting new muffin flavors. Apple cranberry muffins were fine but unimpressive, as were protein avocado chocolate chip muffins. I then decided to make protein vegetable muffins, adding in some miniature chocolate chips. Those were great! 

I still haven’t found a good protein powder, so I’m currently using collagen peptides. It’s not vegetarian, and even though it’s a powder, it’s not the same consistency as protein powder, which made for a wetter muffin batter than intended. (I just baked them a little longer and it was no big deal.) We all loved these muffins! 

¼ cup lactose-free plain Greek yogurt 
¾ cup unsweetened applesauce 
½ cup brown sugar 
1 egg 
½ tsp. vanilla extract 
1 cup grated carrot (I used 1 carrot) 
1 cup grated zucchini (I used 1 large zucchini) 
¾ cup whole wheat flour 
¾ cup all-purpose flour 
¼ cup protein powder (or flour; see note above) 
2 tsp. baking powder 
1 tsp. cinnamon 
½ tsp. nutmeg 
½ tsp. salt 
1/3 cup miniature chocolate chips 

Preheat oven to 400 °F. 

In a large bowl, whisk together yogurt, applesauce, brown sugar, egg and vanilla. Add in grated carrot and zucchini and set aside. 

In a separate bowl, whisk together flour, protein powder, baking powder, cinnamon, nutmeg, salt, and chocolate chips. Fold dry ingredients in with the wet and mix until just combined. 

Spoon mixture into greased muffin cups, filling to the top, and bake for 18 minutes to 20 minutes (a tad more if you had a lot of vegetables or if you had collagen peptides instead of protein powder). Enjoy!


Saturday, January 29, 2022

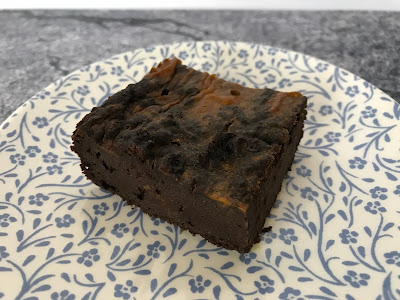
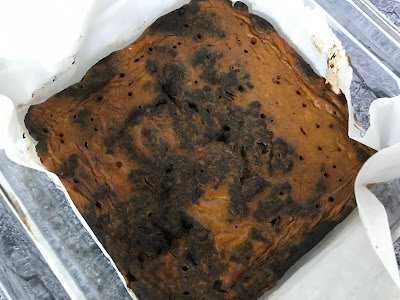
Protein Pumpkin Brownies


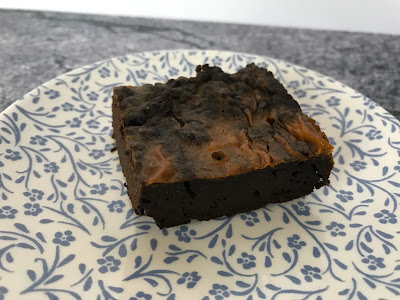
I’ve been following an Instagram account called Petite Pancakery, which specializes in low-calorie high-protein treats. I made these fudgy pumpkin brownies in October and ended up not talking about them, through no fault of their own. 

The protein powder I had at the time was Vega Protein and Greens Vanilla protein powder. I tried it in several applications, both smoothies and baked treats, and I’ve had to admit that I just don’t like it. It has an after-taste that reminds me of artificial sweeteners and I don’t enjoy that at all. All this to say that were it not for the taste of this specific protein powder, these brownies would have been really good – YMMV. Let me know if you have a good lactose-free protein powder to recommend! 

Note that I did not have applesauce that day, so I used a total of 280 grams of pumpkin purée. And I did not weigh my egg. 

For the brownies 
60 g all-purpose flour 
20 g protein powder of your choice 
30 g monkfruit sweetener (I used Lakanto) 
60 g unsweetened cocoa powder 
½ tsp. baking powder 
½ tsp. salt 
220 g pumpkin purée 
60 g unsweetened applesauce 
20 g pancake syrup (pick a brand with 0 net carbs) 
1 raw egg white (~35 g; save the yolk for the second part) 
2 Tbsp. coconut oil 
2 Tbsp. almond milk 

For the cheesecake swirl 
75 g pumpkin purée 
30 g (1 oz.) lactose-free cream cheese 
10 g monkfruit sweetener (I used Lakanto) 
1 egg yolk (~17 g) reserved from egg white above 
½ tsp cinnamon 

Preheat oven at 350 °F. Line and grease an 8”x8” tray and set aside. 

In a small bowl, combine the flour, protein powder, monkfruit, cocoa, baking powder, and salt. Set aside. 

In a larger bowl, combine the pumpkin purée, applesauce, pancake syrup, egg white, coconut oil, and almond milk. Add dry ingredients and combine until a thick batter forms. Spread batter evenly in prepared tray. 

Mix cheesecake swirl ingredients together and drop spoonfuls on top of brownie batter. Swirl around with a toothpick. 

Bake for about 50 mins. A toothpick test should come out fairly clean, or with a bit of moist crumbs if you prefer it extra fudgy. Let cool in baking tray so it sets further before transferring to a cooling rack. Slice and enjoy!


Friday, January 28, 2022

Beignes au cidre de pomme


Une recette de beignes, ça vous dit? J’en avais promis aux enfants (qui sont toujours partant pour des beignes, soit dit en passant), alors j’ai essayé beignes au cidre de pomme. Ils les ont beaucoup aimés! Les bonbons décoratifs sont entièrement facultatifs, mais encore une fois, c’est toujours vendeur avec mes enfants. 

J’ai eu cette discussion avec l’Ingénieur et je pense que ça peut être utile à d’autres, alors voici: le cidre de pomme, c’est en fait du jus pressé et non filtré, donc bien plus opaque que le jus de pomme habituel. C’est souvent, mais pas tout le temps, vendu réfrigéré. 

Pour les beignes 
2 tasses de farine tout-usage (j’ai pris de la farine de blé blond) 
¾ tasse de cassonade 
1 c. à thé de bicarbonate de soude 
1 c. à thé de cannelle moulue 
¼ c. à thé de muscade 
¼ c. à thé de sel 
2 œufs 
¾ tasse de cidre de pomme 
2 c. à soupe d’huile végétale 
½ c. à thé d’essence de vanille 

Pour le glaçage 
2 tasses de sucre à glacer, tamisé 
3 c. à soupe de cidre de pomme 
½ c. à thé de sirop de maïs blanc 
1 pincée de cannelle ou de cardamome moulue 

Préchauffer le four à 325 °F et vaporiser deux moules à beignes (12 beignes en tout) d’enduit à cuisson. Réserver. 

Dans un grand bol, mélanger la farine, la cassonade, le bicarbonate de soude, la cannelle, la muscade et le sel. Réserver. 

Dans un bol moyen, fouetter les œufs, le cidre de pomme, l’huile végétale et la vanille. Verser les ingrédients humides sur les ingrédients secs et bien mélanger. 

Remplir une poche à pâtisserie avec la pâte. Remplir les cavités du moulue préparé en formant des cercles de pâte. 

Enfourner de 10 à 12 minutes ou jusqu’à ce qu’un cure-dents inséré dans un beigne en ressorte propre. Laisser refroidir complètement sur une grille avant de glacer. Dans un bol, fouetter tous les ingrédients pour le glaçage. 

Tremper chaque beigne dans le glaçage et les déposer sur une grille. Saupoudrer les beignes de cannelle ou de cardamome si désiré, puis laisser le glaçage figer avant de déguster.


Friday, January 21, 2022

Everyday Lentil Soup

 Last fall, I made a few soups that were unremarkable. There was a carrot, apple, and curry soup topped with extra-sharp cheddar that, while good, was nothing to write home about. I also tried a soup with TVP, cabbage, sweet potato and tomatoes – I thought it was fine, but the kids refused to touch it, and the Engineer was flat-out repulsed by it, although he couldn’t figure out which ingredient it was (he said it tasted bitter to him, so maybe the cabbage?). Anyway, obviously not making that again. 

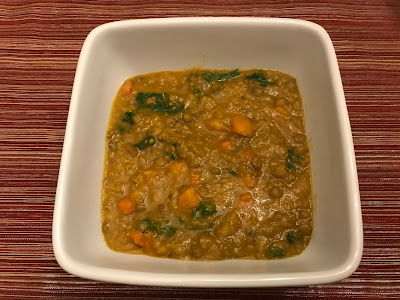
This everyday lentil soup, however, was just what I was looking for! It’s also perfect for the cold weather we’re having right now. It was savory and hearty and just hit all the right notes for me. 

There are two types of lentils in here, because the red lentils will dissolve and thicken the broth while the green lentils will hold their shape. The original recipe made 4 servings, but I wanted more, so I changed the proportions a bit – the amounts below are mine. Keep in mind that you can always add more broth to taste, but this was the right consistency for me. 

Suggested toppings are parsley and parmesan, but I imagine that this would also be great with feta, or roasted nuts and seeds. You could also serve the soup with crusty bread. 

2 Tbsp. extra-virgin olive oil 
1 yellow onion 
2 large carrots 
1 medium sweet potato 
2 stalks of celery 
3 garlic cloves, minced 
½ tsp. sea salt, plus more to taste 
½ tsp. lemon pepper (I used black pepper and a splash of lemon juice) 
1 tsp. dried Italian herbs 
¼ tsp., red pepper flakes, or to taste 
¾ cup green or du Puy lentils 
¾ cup red lentils 
6 cups vegetable or chicken broth 
½ tsp. turmeric or coriander 
2 Tbsp. lactose-free butter or olive oil (I omitted it) 
3 cups roughly chopped kale garnish of choice (see note above), optional 

In a large Dutch oven, over medium heat, warm the olive oil. Chop the onion, carrots, sweet potato, and celery into roughly ¼” pieces. Put all the vegetables, including garlic, into the warm pot with the sea salt and sauté until just softened, about 5-6 minutes. 

Stir in the lemon pepper, Italian herbs, red pepper, green lentils, and red lentils. Add the broth and stir. Turn the heat to low and cover. Cook for 30 to 40 minutes until everything is tender but not mushy. 

Using an immersion blender (or a regular blender), blend up about half of the soup just so it gets thicker (but nowhere close to purées – you still want the texture of the vegetables to come through). Turn off the heat. Stir in the turmeric, butter/oil and kale and stir for the greens to just soften and marry into the soup. Taste for seasoning. 

Serve each bowl with a squeeze of lemon and a generous sprinkle of parsley and parmesan.


Thursday, January 20, 2022

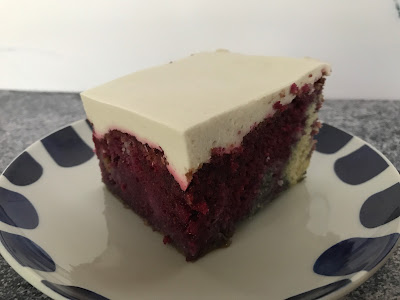
Raspberry-Hibiscus Poke Cake


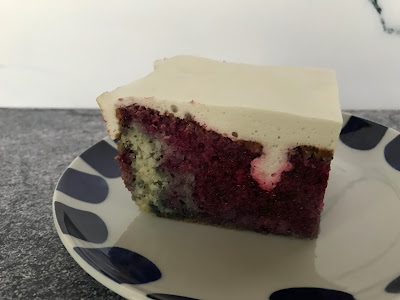
I decided to make this raspberry-hibiscus poke cake from Bon Appétit because we had a lot of hibiscus tea left over from one of the Engineer’s recipes, plus egg whites in the freezer. We really liked this cake! To be fair, the Fox didn’t eat it much, but the Little Prince said it was one of his favorite cakes ever. 

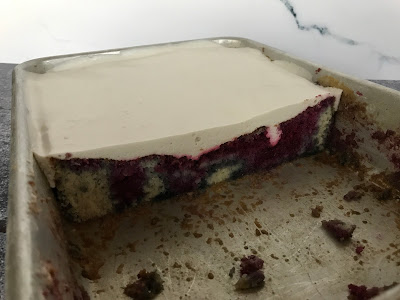
I have to say that this cake definitely wasn’t going to come out of the pan in one piece, so I left it in the pan. Individual pieces could be removed without too much trouble, so it worked out fine, but if unmolding it is important to you, line the pan with parchment paper first. Also, the topping never whipped up to stiff peaks like it was supposed to, but that could be my fault because I used a vegan substitute for the whipping cream and it may not have reacted properly to the recipe. That’s on me. However, since my cake was still in the pan, the frosting just levelled itself evenly over the surface and, once refrigerated, gelled with a nice smooth top. Perhaps this would not have happened had my cake not still been in the pan, so I guess two wrongs make a right? 


For the cake 
1 cup (2 sticks) lactose-free butter, at room temperature, cut into pieces 
3 cups (345 g) cake flour 
1 ½ tsp. baking powder 
1 tsp. baking soda 
½ tsp. Diamond Crystal or ¼ tsp. Morton kosher salt 
2 cups (400 g) sugar
6 large egg whites 
2 tsp. finely grated lemon zest 
1 tsp. vanilla extract 
½ tsp. almond extract 
1 ½ cups buttermilk substitute (1 ½ Tbsp. lemon juice + top up with lactose-free milk) 

For the filling
2 12-oz. bags of frozen raspberries, thawed 
1 Tbsp. unflavored powdered gelatin 
½ cup (100 g) sugar 
¼ cup dried hibiscus flowers 

For the topping 
1 10-oz. bag of mini marshmallows 
1 tsp. vanilla extract 
1 ½ cups lactose-free whipping cream or substitute (see note above), divided 


For the cake 
Place a rack in middle of oven; preheat to 325 °F. Grease a 13”x9" baking dish (as per my note above, I would also line it with parchment paper and leave some overhang on the long sides of the pan). 

Whisk flour, baking powder, baking soda, and salt in a medium bowl to combine. 

Using an electric mixer on medium-high speed, beat butter and sugar in a large bowl until light and fluffy, about 4 minutes. Add egg whites, one at a time, beating to blend after each addition and scraping down sides and bottom of bowl occasionally, until very light and airy, about 3 minutes. Beat in lemon zest, vanilla extract, and almond extract. 

Reduce mixer speed to low, add dry ingredients in 3 additions, alternating with buttermilk in 2 additions, starting and ending with dry ingredients. Increase speed to medium-high; beat 2 minutes. Scrape batter into prepared pan and smooth out evenly to edges. 

Bake cake until golden brown and a tester inserted into center comes out clean, 45–55 minutes. Transfer pan to a wire rack and let cake cool in pan 15 minutes. 

For the filling 
While the cake is cooling, place raspberries in a fine-mesh sieve set over a medium bowl. Using a wooden spoon, press down on raspberries until you have 1 cup juice; discard solids (or save for another use). Sprinkle gelatin over; let sit 10 minutes. 

Meanwhile, stir sugar, hibiscus flowers, and 1½ cups boiling water in a small bowl to combine and let sit 10 minutes. Strain through a fine-mesh sieve into bowl with raspberry mixture; discard solids. Whisk until filling is smooth. 

Using a chopstick, poke holes down into the cake at 1" intervals. Slowly pour filling over cake, letting it seep into holes. Chill cake while you make the topping to let the filling set up a bit. 

For the topping 
Heat marshmallows, vanilla extract, and ½ cup cream in a medium saucepan over medium, stirring constantly, until marshmallows are melted, about 3 minutes; chill remaining 1 cup cream until ready to use. Let marshmallow cream cool, about 30 minutes. 

Using an electric mixer on medium-high speed, beat chilled 1 cup cream in a large bowl until soft peaks form. Scrape in marshmallow cream and beat until almost stiff (see note above). 

Turn cake out onto a platter. Turn right side up and spoon marshmallow whipped cream on top. Spread to edges, making dips and swirls. 

Note that I froze several individual pieces, and they were great when thawed!


Tuesday, January 18, 2022

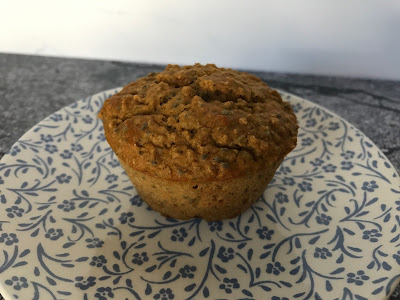
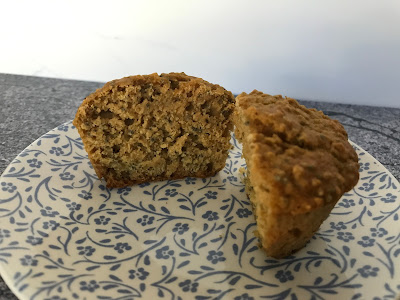
Chia Quinoa Muffins


The Fox often needs to have options for breakfast, otherwise he is likely to have a meltdown (assuming he didn’t get enough sleep and doesn’t have something delicious offered to him). He tends to like muffins if they are “dry” (as opposed to, say, these moist chocolate protein muffins), so I decided to try these chia quinoa muffins

I used 2 cups of white whole wheat flour instead of a mixture of white and whole wheat. I liked these muffins, but must admit that they were a bit bland – they were best spread with butter or jam. They placated the Fox, though, so that’s a win! 

2 cups cooked quinoa
1 cup whole wheat flour 
1 cup all-purpose flour 
1 ½ tsp. baking powder 
1 tsp. salt (I would use ½ tsp. next time) 
2 Tbsp. chia seeds 
¾ cup unsweetened almond milk 
1 egg 
¼ cup lactose-free plain Greek yogurt 
1/3 cup honey 
1 tsp. vanilla extract 

Preheat oven to 350 °F. Grease a muffin tin and set aside. 

If you haven’t done so already, cook quinoa according to package directions and let cool for at least 5 minutes. 

In medium bowl, combine quinoa, flours, baking powder, salt and chia seeds. 

In a smaller bowl, whisk together milk, egg, yogurt, honey and vanilla extract. Slowly add to quinoa mixture and stir until just combined. 

Divide mixture evenly among muffin cups and bake for about 25 to 30 minutes, until a toothpick inserted in the center comes out clean. Let cool until warm or at room temperature.


Wednesday, December 15, 2021

More Sheet Pan Gnocchi

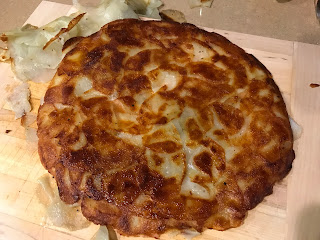
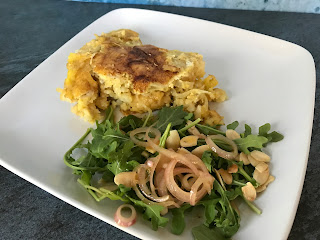
 Last winter, I tried a few potato dishes that looked very impressive (and, in one case, both labor-intensive and time-consuming), but they were a big let-down. There was this potato galette, for which I actually got the golden crust I was looking for, but the galette came apart in the middle upon unmolding just the same. 


I also made this tater tot egg bake, which also just fell apart. I should have been more aggressive using a spatula to loosen it before flipping it, and it seems like the whole thing would have been better made in the oven anyway! 


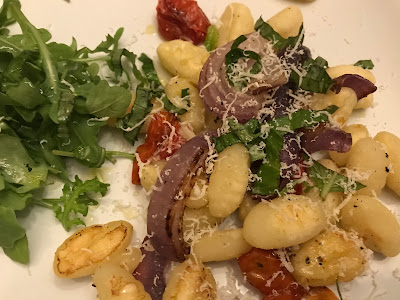
Then I found out I needed fewer carbs, so I haven’t eaten as many potatoes, but recently I’ve been steering back toward a flexitarian diet and was at a loss for a vegetarian main, so I made sheet-pan gnocchi. Lots of carbs, but really good and so easy! The quantities below yield 4 servings. 

½ large red onion, cut into ½"-thick wedges 
2 large garlic cloves, unpeeled 
2 pints cherry tomatoes 
a 17.6-oz. package shelf-stable or refrigerated potato gnocchi 
4 Tbsp. extra-virgin olive oil, divided, plus more for drizzling 
1 ½ tsp. Diamond Crystal or 1 tsp. Morton kosher salt, divided, plus more to taste 
freshly ground black pepper, to taste 
1 Tbsp. fresh lemon juice 
2 cups baby arugula 
1 cup basil leaves, large leaves torn 
2 oz. parmesan, shaved 

Place a rack in middle of oven; preheat to 425 °F. Toss onion, garlic, tomatoes, gnocchi, 3 Tbsp. oil, and 1¼ tsp. Diamond Crystal or ¾ tsp. Morton kosher salt on a rimmed baking sheet to coat; season generously with pepper and toss again to combine. 

Roast, stirring once or twice, until gnocchi are golden and starting to crisp, most of the tomatoes have burst, and onion is golden, 25–30 minutes. 

Remove garlic from baking sheet, peel, and place in a small bowl. Mash with ¼ tsp. salt (garlic should be quite soft). Whisk in lemon juice and remaining 1 Tbsp. oil; season dressing with pepper and more salt if needed. 

Add arugula, basil, and Parmesan to baking sheet and drizzle dressing over; toss to combine. Divide among plates and drizzle with a little more oil.


Tourtière de ville


Une recette de tourtière avant les Fêtes, ça vous dit? C’est une recette que j’avais faite l’année dernière et dont j’ai oublié de vous parler en délai raisonnable, alors j’ai attendu cette année (donc je ne suis pas en retard, mais en avance). Il s’agit d’une recette de 3 fois par jour. C’est une tourtière de ville parce qu’en ville, on n’a pas de gibier, alors on prend du porc, j’imagine! Nous avions beaucoup aimé. Comme accompagnement, j’avais une salade de brocoli une fois, puis des patates douces rôties à l’érable (délicieuses, mais il faudrait les couper en cubes bien plus petits que sur la photo). 

4 abaisses de pâte brisée (maison ou du commerce) 
1 c. à soupe d’huile végétale 
1 tasse d’oignons hachés 
1 gousse d’ail hachée 
2 lb. de porc haché 
1 ½ tasse d’eau froide 
1 pomme, pelée et râpée (½ tasse) 
1 pomme de terre, pelée et râpée (½ tasse) 
1 c. à thé de sirop d’érable 
½ tasse de flocons d’avoine instantanée 
1 c. à thé de sarriette 
1 c. à thé (moins, pour moi) de quatre-épices (ou cannelle, clou de girofle, muscade) 
2 feuilles de laurier 
2 c. à thé de sel 
1 œuf battu (pour badigeonner la pâte) 

Dans une casserole, à feu moyen, faire chauffer l’huile végétale, puis faire revenir l’oignon et l’ail pendant 5 minutes. Ajouter le porc haché et l’eau froide, puis porter à ébullition. 

Ajouter le reste des ingrédients, à l’exception de l’œuf. Couvrir et cuire à feu moyen pendant 45 minutes en remuant régulièrement. (J’ai ensuite fait cuire un peu plus longtemps à découvert, pour que l’eau s’évapore.) 

Enlever les feuilles de laurier, rectifier l’assaisonnement au besoin et laisser refroidir complètement au réfrigérateur. 

Foncer 2 moules à tarte avec 2 abaisses de pâte brisée. Garnir du mélange de tourtière froid (environ 2 tasses par tourtière). 

Badigeonner le rebord extérieur de la pâte avec l’œuf battu. Placer une 2e abaisse sur chaque tourtière et refermer les bords. Réfrigérer pendant 30 minutes, puis badigeonner le dessus de chaque tourtière avec l’œuf battu. 

Cuire au four à 425 °F pendant 15 minutes. Réduire la température à 400 °F et cuire pendant 30 minutes supplémentaires, ou jusqu’à ce que la croûte soit dorée.