- A European vegan supermarket chain will open in the US next year, in Portland, Oregon. Because of course.
- Two more links on the topic of food waste. In Southern California, there’s an organization called Copia that matches people/restaurants that have excess food with those who are lacking. So far, over 830,000 pounds of food have been saved from the landfill and been put to good use feeding people in need. There’s also a service called CropMobster: using the app, farmers with unsold crops can connect with families who can’t afford to pay full price for them. Win-win!
- On a somewhat related note, there’s a petition asking the USDA to let people use their food stamps to buy food online, thereby granting everyone access to healthy food regardless of where they live (food desert or not). I like the principle of it, obviously, but I worry that healthy food like produce, without being subsidized, is still too expensive to be bought with food stamps. I also think that the number of places accepting food stamps should be expanded, including to farmers’ markets.
- According to the latest census, Americans now spend more money eating out than doing groceries. And yet food blogs and cooking shows are more popular than ever! I can’t help but wonder whether they are a hit only with a subset of the population, or whether people like reading about cooking but with no intention of actually doing any of it…
- Jungle Jim’s and the Art of the Tourist-Attraction Grocery Store, or what I must visit if I’m ever in Cincinnati.
- A great (English-language) article about Juliette Brun, she of Juliette & Chocolat (and my former middle-school classmate).
- Cool map that shows the living wage in every US state. Follow that with a video about global economic equality.
- And finally, I’ve said before that I pitied Lucky, the elephant at the San Antonio Zoo, because I felt she was anything but lucky. She’s alone in her pen (even though elephants are highly social animals), and the pen itself is small and devoid of stimulation. I was gung-ho about sharing this petition I came across a few days ago, demanding that Lucky be relocated to a sanctuary. So imagine my surprise when, just this morning, the Engineer sent me this article announcing that the zoo has taken in a second elephant, Nicole, rescued from the circus. I’m still hoping that the pen in which the elephants are kept will be improved, but the two seem to be getting along, and I’m so happy that Lucky has some company now!
[Update: I was just reading the August 2016 edition of San Antonio Magazine, and it says that the elephants do in fact have a new habitat! It includes a pool and a dozen new trees, along with other features. Looking forward to seeing it!]

Tuesday, June 28, 2016


Monday, June 27, 2016
Tahini cookies, two more ways
In an effort to polish off my jar of tahini before I left San Antonio, I ended up making two recipes for tahini cookies. I know I’ve published similar recipes before, including some great ones in 2010, but my most recent forays had left me dissatisfied. These two recipes were a bit different in that one called for dates, while the other called for almonds, and yet they were still very similar.
The first recipe, from Christelle is Flabbergasting, is vegan but can easily be made non-vegan if that’s more convenient for you. I found that it’s important to purée the dates well, so I’d recommend soaking them in warm water first, then finely chopping them before puréeing them. If you can buy premade date purée, go with that! Also, note that I used white whole wheat flour instead of all-purpose and whole wheat. The cookies were very good, and surprisingly filling. Keep them in an airtight container at room temperature. I got 21 cookies from this recipe.
¾ cup (100 g.) whole wheat flour
1 ¼ cup (150 g.) all-purpose flour
1 pinch fleur de sel
2/3 cup (100 g.) cane sugar
1/3 cup canola or safflower oil (or ½ cup softened margarine or butter), plus more for brushing
½ cup (125 g.) tahini
2 Tbsp. ground flax seeds soaked in 6 Tbsp. warm water for a few minutes (or 2 large eggs)
1 tsp. vanilla
8 large, soft Medjool dates, puréed
white and/or black sesame seeds, to decorate
Preheat the oven to 350 °F. Line a baking sheet with a silpat or parchment paper.
In a medium bowl, whisk together the flours and fleur de sel. Set aside.
In a large bowl, beat the sugar, oil, and tahini until well mixed. Add the flax seeds and water along with the vanilla and beat again.
Add the flours and fleur de sel and beat until well incorporated. The dough must be somewhat crumbly but still hold together.
Add the date purée and mix well.
Roll the dough into balls roughly the size of a walnut, flatten them slightly and place them on the prepared baking sheet. Brush the tops with oil and sprinkle with sesame seeds.
Bake for 15 minutes or until the cookies are very lightly golden (they should still be a bit soft when you pull them out of the oven, since they’ll harden as they cool).


The second recipe is from David Lebovitz’s blog, and he got it in Israel. They would be a great basic cookie with which to tinker, by adding cinnamon or ground cardamom, for instance. I got a total of about 30 cookies, and they keep really well.
1 cup (140 g.) all-purpose flour
1 cup plus 2 Tbsp. (140 g.) whole wheat flour
2 ½ oz. (70 g) ground almonds
5 ½ oz. (150 g.) cold unsalted butter or margarine, cut into cubes
¾ cup (150 g.) sugar
1 tsp. vanilla extract
1 pinch of salt
2 Tbsp. water
¾ cup plus 2 Tbsp. (200 g.) raw tahini paste
Preheat oven to 350 °F. Line two baking sheets with parchment paper.
In a food processor, blend the all-purpose flour, whole wheat flour, ground almonds, butter, sugar, vanilla and salt, and process until the mixture looks crumbly.
Add water and tahini and process until a smooth dough begins to form. Remove the dough from the food processor bowl and knead it a few times on the counter until smooth. (If the dough feels very dry, dampen your hands and knead the dough slightly.)
Create small balls of the dough, place them on the baking sheet, then flatten each one slightly with your fingers.
Bake for about 12-14 minutes, or until golden brown. Cool completely and serve.


The first recipe, from Christelle is Flabbergasting, is vegan but can easily be made non-vegan if that’s more convenient for you. I found that it’s important to purée the dates well, so I’d recommend soaking them in warm water first, then finely chopping them before puréeing them. If you can buy premade date purée, go with that! Also, note that I used white whole wheat flour instead of all-purpose and whole wheat. The cookies were very good, and surprisingly filling. Keep them in an airtight container at room temperature. I got 21 cookies from this recipe.
¾ cup (100 g.) whole wheat flour
1 ¼ cup (150 g.) all-purpose flour
1 pinch fleur de sel
2/3 cup (100 g.) cane sugar
1/3 cup canola or safflower oil (or ½ cup softened margarine or butter), plus more for brushing
½ cup (125 g.) tahini
2 Tbsp. ground flax seeds soaked in 6 Tbsp. warm water for a few minutes (or 2 large eggs)
1 tsp. vanilla
8 large, soft Medjool dates, puréed
white and/or black sesame seeds, to decorate
Preheat the oven to 350 °F. Line a baking sheet with a silpat or parchment paper.
In a medium bowl, whisk together the flours and fleur de sel. Set aside.
In a large bowl, beat the sugar, oil, and tahini until well mixed. Add the flax seeds and water along with the vanilla and beat again.
Add the flours and fleur de sel and beat until well incorporated. The dough must be somewhat crumbly but still hold together.
Add the date purée and mix well.
Roll the dough into balls roughly the size of a walnut, flatten them slightly and place them on the prepared baking sheet. Brush the tops with oil and sprinkle with sesame seeds.
Bake for 15 minutes or until the cookies are very lightly golden (they should still be a bit soft when you pull them out of the oven, since they’ll harden as they cool).


The second recipe is from David Lebovitz’s blog, and he got it in Israel. They would be a great basic cookie with which to tinker, by adding cinnamon or ground cardamom, for instance. I got a total of about 30 cookies, and they keep really well.
1 cup (140 g.) all-purpose flour
1 cup plus 2 Tbsp. (140 g.) whole wheat flour
2 ½ oz. (70 g) ground almonds
5 ½ oz. (150 g.) cold unsalted butter or margarine, cut into cubes
¾ cup (150 g.) sugar
1 tsp. vanilla extract
1 pinch of salt
2 Tbsp. water
¾ cup plus 2 Tbsp. (200 g.) raw tahini paste
Preheat oven to 350 °F. Line two baking sheets with parchment paper.
In a food processor, blend the all-purpose flour, whole wheat flour, ground almonds, butter, sugar, vanilla and salt, and process until the mixture looks crumbly.
Add water and tahini and process until a smooth dough begins to form. Remove the dough from the food processor bowl and knead it a few times on the counter until smooth. (If the dough feels very dry, dampen your hands and knead the dough slightly.)
Create small balls of the dough, place them on the baking sheet, then flatten each one slightly with your fingers.
Bake for about 12-14 minutes, or until golden brown. Cool completely and serve.


Wednesday, June 22, 2016
Blueberry Clafoutis
Before leaving San Antonio, I tried two new clafoutis recipes. Both were originally gluten-free, but I didn’t have an all-purpose gluten-free flour mix handy so, since I was in fact trying to empty the pantry, I used an equal amount of all-purpose wheat flour.
One was dairy-free and called for ground almonds as well as silken tofu, which I was curious about, but I’ve decided that I didn’t like it nearly as much as regular versions, so I won’t be making it again.

The other was Gluten-Free Girl’s Blueberry Clafoutis, which is adapted from Julia Child’s recipe. I liked this one, and since I didn’t have a gluten-free recipe yet, I’ll be keeping the recipe!
2 cups blueberries (fresh or frozen)
½ tsp. cinnamon
2 Tbsp. honey
1 ¼ cup soy milk (almond milk or lactose-free dairy milk would work, too)
2/3 cup sugar, divided
3 eggs
1 tsp. vanilla extract
½ tsp. almond extract
1/8 tsp. kosher salt
70 g. (1/2 cup) all-purpose flour (gluten-free if necessary)
Preheat the oven to 350 °F. Grease a deep-dish pie plate.
Toss the blueberries with the cinnamon and honey and let them marinate for a bit. Set aside.
Thrown the soy milk, 1/3 cup sugar, eggs, vanilla, almond extract, salt, and flour into a blender and purée until the batter resembles a somewhat thick pancake batter.
Pour a thin layer of batter onto the bottom of the prepared pie plate. Put it in the oven and let it bake until the layer no longer jiggles when you shake the pan, about 5 minutes. (This will prevent the blueberries from being on the very bottom of the clafoutis.)
Spoon the honeyed blueberries evenly over the bottom layer. Sprinkle on the remaining sugar. Pour in the remaining batter.
Bake until top is golden brown and batter is set, about 45 minutes to 1 hour. The clafoutis will be puffed up when you pull it from the oven and will deflate as it cools.
Serve warm or at room temperature, or even cold.


One was dairy-free and called for ground almonds as well as silken tofu, which I was curious about, but I’ve decided that I didn’t like it nearly as much as regular versions, so I won’t be making it again.

The other was Gluten-Free Girl’s Blueberry Clafoutis, which is adapted from Julia Child’s recipe. I liked this one, and since I didn’t have a gluten-free recipe yet, I’ll be keeping the recipe!
2 cups blueberries (fresh or frozen)
½ tsp. cinnamon
2 Tbsp. honey
1 ¼ cup soy milk (almond milk or lactose-free dairy milk would work, too)
2/3 cup sugar, divided
3 eggs
1 tsp. vanilla extract
½ tsp. almond extract
1/8 tsp. kosher salt
70 g. (1/2 cup) all-purpose flour (gluten-free if necessary)
Preheat the oven to 350 °F. Grease a deep-dish pie plate.
Toss the blueberries with the cinnamon and honey and let them marinate for a bit. Set aside.
Thrown the soy milk, 1/3 cup sugar, eggs, vanilla, almond extract, salt, and flour into a blender and purée until the batter resembles a somewhat thick pancake batter.
Pour a thin layer of batter onto the bottom of the prepared pie plate. Put it in the oven and let it bake until the layer no longer jiggles when you shake the pan, about 5 minutes. (This will prevent the blueberries from being on the very bottom of the clafoutis.)
Spoon the honeyed blueberries evenly over the bottom layer. Sprinkle on the remaining sugar. Pour in the remaining batter.
Bake until top is golden brown and batter is set, about 45 minutes to 1 hour. The clafoutis will be puffed up when you pull it from the oven and will deflate as it cools.
Serve warm or at room temperature, or even cold.


Monday, June 20, 2016
Strawberry-Rhubarb Salad with Mint
I’ve been absent from this space for a few weeks while we drove up to Canada and settled in, and got used to doing groceries in Quebec once again. Lactose-free goat cheese proved harder to find than last summer, but it still exists – I bought four packages yesterday. And President’s Choice makes lactose-free sour cream now, so really, the only thing the US has that Canada doesn’t is lactose-free cream cheese. But Canada has lactose-free cream, so that more than compensates. (Also, we got quite a shock purchasing Earth Balance margarine in sticks, which not only are hard to find here, but are a whopping $8.49 per package! We pay about $4.00 in the States, and even factoring in the exchange rate, that seems outrageous.) Plus, I’m once again surprised at how hard it is to find decent everyday ingredients like vanilla, baking chocolate or cocoa. Sure, there is natural vanilla, but it comes literally last on the ingredient list, after water and alcohol and even sugar. As for the rest, it seems like there’s only Baker’s and Fry’s, respectively, which reminds me why I liked Aubut so much. (Both those brands are perfectly acceptable in most cases, but when you’ve tasted better, it’s hard to be limited to something so bland!)
Another thing Quebec does have is the best strawberries in the world, and they’re in season right now, so we’re enjoying them – the Little Prince seems especially fond of them. There’s a recipe that I made early last summer and somehow I never got around to posting about it, but it was really good. If you have access to great strawberries, now the perfect time for this fresh salad! It can be a light dessert, though I think it would be perfect for brunch.
2 rhubarb stalks, thinly sliced on the diagonal
2 Tbsp. sugar
1 Tbsp. Cointreau or fresh orange juice
1 Tbsp. fresh lemon juice
2 lbs. strawberries, hulled, quartered
¼ cup torn fresh mint leaves
Toss rhubarb, sugar, Cointreau, and lemon juice in a medium bowl. Let sit until rhubarb is slightly softened and releases its juices, about 30 minutes. Toss with strawberries and mint. (The salad is best eaten right away, but will keep for a day or two in the fridge.)

Another thing Quebec does have is the best strawberries in the world, and they’re in season right now, so we’re enjoying them – the Little Prince seems especially fond of them. There’s a recipe that I made early last summer and somehow I never got around to posting about it, but it was really good. If you have access to great strawberries, now the perfect time for this fresh salad! It can be a light dessert, though I think it would be perfect for brunch.
2 rhubarb stalks, thinly sliced on the diagonal
2 Tbsp. sugar
1 Tbsp. Cointreau or fresh orange juice
1 Tbsp. fresh lemon juice
2 lbs. strawberries, hulled, quartered
¼ cup torn fresh mint leaves
Toss rhubarb, sugar, Cointreau, and lemon juice in a medium bowl. Let sit until rhubarb is slightly softened and releases its juices, about 30 minutes. Toss with strawberries and mint. (The salad is best eaten right away, but will keep for a day or two in the fridge.)

Friday, June 03, 2016
Spring outings 2016
After our trip in January, we stuck to more local outings this spring. In February (which really felt like spring here), we visited the San Antonio Missions, which I’d been wanting to see for about 5 years! They are a UNESCO World Heritage site. We started at the southern end with Mission Espada and made our way north to Mission San Juan, Mission San José and, finally, Mission Concepción. We did all this on a Sunday morning, and I can confirm that all four churches are still in use today. If you are short on time and can only visit one, I’d recommend Mission San José, which was the most impressive.


In March, the Engineer’s father and his wife came for a visit, so we had a few outings with them. We of course went to the Alamo and the Riverwalk, but the highlight was the zoo. This time was much more fun than our visit a year ago, mainly because the Little Prince was ready for the zoo this year! He showed an interest in the animals, and kept saying how we had seen flamingoes, fish, bears, etc. We did get to see the okapi this year, as well as the new giraffes! It’s a father giraffe and his two sons who live there now. The downside is that the animals who used to be in that pen were moved, so the rhino and zebras get much smaller quarters than they used to, and I didn’t see any ostriches. Also, we were there on St-Patrick’s Day, in the middle of spring break, and as it turns out, it was the busiest day in the zoo’s history (as we learned in the following day’s paper). I do have to say that the crowds were impressive, and traffic in particular was insane. Keep that in mind if you want to visit San Antonio during spring break…


Also, on Easter, we had an unexpected outing to the Palladium movie theater, which housed a replica of the 1960’s Batmobile for the weekend. What a treat for me! If you’re a fan of the old series, check out this collection of bat-labels that appeared on the show.

Our April outing was to the King William Fair. King William is a beautiful neighborhood in San Antonio, with old Victorian-style houses and mature trees. I kept wanting to come back and gawk at them, but that isn’t something the Engineer is interested in, so I figured the fair (technically part of Fiesta) was killing two birds with one stone. As it turns out, it was a nice, kid-friendly fair, albeit a little generic (I guess fair food is pretty standard, although there were also interesting pop-up stores). I got to try chicken-fried bacon (because you only live once) as well as a vegan chocolate and peanut butter ice cream from Lick, both awesome. However, the crowds exceeded my expectations and made it a little unpleasant for our family of introverts. I think even event organizers were overwhelmed, because even though we got there pretty early, the official parking lot was full, as were all the other lots in the general area (we managed to find parking several streets away). Local residents probably have only one of two choices: embrace the chaos, or flee the city for the weekend. The owner of the house below had chosen the former approach, and we overheard her telling a passerby that they had gutted and renovated the entire house upon buying it.


We had planned to go to the aquarium in May, but we never found the time, so that’ll have to be postponed until late summer at the earliest.


In March, the Engineer’s father and his wife came for a visit, so we had a few outings with them. We of course went to the Alamo and the Riverwalk, but the highlight was the zoo. This time was much more fun than our visit a year ago, mainly because the Little Prince was ready for the zoo this year! He showed an interest in the animals, and kept saying how we had seen flamingoes, fish, bears, etc. We did get to see the okapi this year, as well as the new giraffes! It’s a father giraffe and his two sons who live there now. The downside is that the animals who used to be in that pen were moved, so the rhino and zebras get much smaller quarters than they used to, and I didn’t see any ostriches. Also, we were there on St-Patrick’s Day, in the middle of spring break, and as it turns out, it was the busiest day in the zoo’s history (as we learned in the following day’s paper). I do have to say that the crowds were impressive, and traffic in particular was insane. Keep that in mind if you want to visit San Antonio during spring break…


Also, on Easter, we had an unexpected outing to the Palladium movie theater, which housed a replica of the 1960’s Batmobile for the weekend. What a treat for me! If you’re a fan of the old series, check out this collection of bat-labels that appeared on the show.

Our April outing was to the King William Fair. King William is a beautiful neighborhood in San Antonio, with old Victorian-style houses and mature trees. I kept wanting to come back and gawk at them, but that isn’t something the Engineer is interested in, so I figured the fair (technically part of Fiesta) was killing two birds with one stone. As it turns out, it was a nice, kid-friendly fair, albeit a little generic (I guess fair food is pretty standard, although there were also interesting pop-up stores). I got to try chicken-fried bacon (because you only live once) as well as a vegan chocolate and peanut butter ice cream from Lick, both awesome. However, the crowds exceeded my expectations and made it a little unpleasant for our family of introverts. I think even event organizers were overwhelmed, because even though we got there pretty early, the official parking lot was full, as were all the other lots in the general area (we managed to find parking several streets away). Local residents probably have only one of two choices: embrace the chaos, or flee the city for the weekend. The owner of the house below had chosen the former approach, and we overheard her telling a passerby that they had gutted and renovated the entire house upon buying it.


We had planned to go to the aquarium in May, but we never found the time, so that’ll have to be postponed until late summer at the earliest.
Chocolate Curry Cupcakes
I realize I may have already lost some of you with that title, but if you’re still with me, you’re in for a treat. The inspiration for these cupcakes is Itsi Bitsi in Montreal, where Dear Sister bought assorted flavors for my bachelorette party (8 years ago already). The only flavor I remember was chocolate curry! It was unusual enough at the time that I’d never considered curry in desserts, though I’ve now seen more recipes along those lines, and I’ve also enjoyed “savory” spices mixed with chocolate in other dishes. So over the years, I tried to recreate these cupcakes, or at least come up with something that I’d make again, and I think I’ve got it! To be clear, this isn’t Itsi Bitsi’s recipe, and I don’t think the cupcakes even look similar (maybe theirs had a curry-yellow buttercream frosting, though I can’t remember clearly now). It took some tweaking: I started with 1 teaspoon of curry in the cupcakes, but it wasn’t noticeable at all then. This recipe calls for 2 tablespoons, which makes them almost savory. I only use mild curry, but even then, be warned that the flavor deepens over time, so the cupcakes will have a more pronounced curry taste if you eat them 2 days later (when freshly baked, it was certainly not overpowering, but after 2 days, it got almost spicy). For the base of the chocolate cake, I adapted my friend Jen’s excellent recipe for chocolate cream cupcakes (which is actually from America’s Test Kitchen). The recipe for the base of the frosting is from my favorite chocolate cake, from Minimalist Baker. These were such a hit that to wash them down, the Engineer used up in 2 days the amount of milk that normally lasts him 7 days… Be warned!
For the cupcakes
1 cup all-purpose flour
½ tsp. baking soda
¼ tsp. salt
½ cup boiling water
1/3 cup cocoa powder
1/3 cup semisweet chocolate chips
1 tsp. instant espresso
¾ cup sugar
½ cup lactose-free sour cream or plain Greek yogurt
½ cup vegetable oil
2 large eggs
1 tsp. vanilla extract
Adjust oven rack to middle position and preheat oven to 325 °F. Grease and flour a 12-cup muffin tin.
Combine flour, baking soda, and salt in bowl.
Whisk water, cocoa, chocolate chips, and espresso in large bowl until smooth. Add sugar, sour cream, oil, eggs, and vanilla and mix until combined. Whisk in flour mixture until incorporated. Divide batter evenly among muffin cups.
Bake until a toothpick inserted into a cupcake comes out with few dry crumbs attached, 18 to 22 minutes. Cool cupcakes in tin 10 minutes, then turn out onto wire rack and cool completely.
For the frosting
1 cup (16 Tbsp.) vegan margarine, softened
2 - 3 cups powdered sugar (I used 2 cups), sifted
1 tsp. curry
2/3 cup unsweetened cocoa powder
1 oz. (about ¼ cup) semisweet chocolate (dairy-free if desired), melted and slightly cooled
2 tsp. pure vanilla extract
~ ¼ cup lactose-free milk of choice (such as cow’s milk or almond milk)
Once the cupcakes have cooled, prepare frosting by beating together all ingredients until light and fluffy, adding the powdered sugar in small amounts until you reach your desired consistency and sweetness. If it becomes too thick, add more milk. If it's too thin, add more cocoa powder or powdered sugar. With the amounts indicated above, it was great! Not too sweet, and with only a subtle curry taste.


For the cupcakes
1 cup all-purpose flour
½ tsp. baking soda
¼ tsp. salt
½ cup boiling water
1/3 cup cocoa powder
1/3 cup semisweet chocolate chips
1 tsp. instant espresso
¾ cup sugar
½ cup lactose-free sour cream or plain Greek yogurt
½ cup vegetable oil
2 large eggs
1 tsp. vanilla extract
Adjust oven rack to middle position and preheat oven to 325 °F. Grease and flour a 12-cup muffin tin.
Combine flour, baking soda, and salt in bowl.
Whisk water, cocoa, chocolate chips, and espresso in large bowl until smooth. Add sugar, sour cream, oil, eggs, and vanilla and mix until combined. Whisk in flour mixture until incorporated. Divide batter evenly among muffin cups.
Bake until a toothpick inserted into a cupcake comes out with few dry crumbs attached, 18 to 22 minutes. Cool cupcakes in tin 10 minutes, then turn out onto wire rack and cool completely.
For the frosting
1 cup (16 Tbsp.) vegan margarine, softened
2 - 3 cups powdered sugar (I used 2 cups), sifted
1 tsp. curry
2/3 cup unsweetened cocoa powder
1 oz. (about ¼ cup) semisweet chocolate (dairy-free if desired), melted and slightly cooled
2 tsp. pure vanilla extract
~ ¼ cup lactose-free milk of choice (such as cow’s milk or almond milk)
Once the cupcakes have cooled, prepare frosting by beating together all ingredients until light and fluffy, adding the powdered sugar in small amounts until you reach your desired consistency and sweetness. If it becomes too thick, add more milk. If it's too thin, add more cocoa powder or powdered sugar. With the amounts indicated above, it was great! Not too sweet, and with only a subtle curry taste.


Batch of links - Abortion
Let me start by getting this off my chest: even if you believe that abortions done for reasons of “unplanned pregnancy” should only be done in the first trimester, you can’t flat-out ban abortions in later pregnancy, because those are usually done for very important medical reasons, like saving the life of the mother or not birthing a baby who wouldn’t survive outside the womb. This happened to a close friend of mine at almost 24 weeks of pregnancy, in Quebec, and despite the tragic outcome, I’m very happy that she had access to medical care that had her best interests (both physical and psychological) in mind. Plus, of course, to get back to unplanned pregnancies, you have to take into consideration the fact that when women have adequate access to health care, including contraception and prenatal care, the number of abortions drops anyway.
Now, if you have a moment, I highly recommend you watch John Oliver’s piece on abortion, because he always manages to be both funny and very informative. The piece summarizes the current controversies very well. You can also read an article on The Daily Beast published a little over a year ago, about the “craziest” (most restrictive) abortions bills passed since 2010.
Last year, a federal appellate court upheld House Bill 2, which states that Texas can require abortion clinics to meet the same building, equipment, and staff standards as hospitals. This sounds good in theory, until you realize that the law is actually unnecessary (the procedures done in abortion clinics are not the same as those done in most hospitals) and that this severely restricts the number of clinics in what is the second most populous state. The Supreme Court is currently divided on the issue, but a ruling isn’t due until late June. Roughly half of the abortion clinics in the state have closed already, and the majority of the rest depend on a favorable ruling to stay open. (On a related note: here’s a Rolling Stone article titled Lone-Star Crazy: How Right-Wing Extremists Took Over Texas.) (And also, this could lead to a situation like this one predicted by The Onion.)
Texas also wanted to cut Medicaid funding from Planned Parenthood (who is suing) because 3% of the organization’s expenses go towards abortion, which Republican lawmakers oppose. Of course, this directly penalized the poorest patients, who are most in need of medical services offered by Planned Parenthood (including the 97% of the funding that goes to medical exams, birth control, mammograms, etc.).
Missouri also has some pretty strict laws, including a 72-hour waiting period (the longest in the country). A bill was proposed a year ago to require the biological father’s permission before performing an abortion, effectively condemning rape victims to get consent from their abuser, but looking at Missouri abortion laws today, I don’t think that bill passed.
Indiana, though, passed a law banning abortions performed because of fetal genetic abnormalities. And yet, something tells me they won’t be subsidizing the health care of fetuses and babies born with severe defects, or psychological support for the parents…
Alabama just passed a bill that treats abortion clinics like sex offenders, meaning that they can’t be within 2,000 feet of an elementary or middle school. This would shut down two of the state’s five clinics (but those two alone provide 72% of abortions). Obviously, no other medical facilities are subject to the same rules!
Oklahoma state legislature just passed a bill that would make providing abortions a felony, which goes directly against Roe v. Wade. This won’t become the law unless the governor signs it into law, but she is expected to do so, given her record.
And it looks like a long stretch of cities in the South won’t have access to abortions after the first trimester, due to recent bills.
This may be because I’m from Quebec, but I really can’t understand why people would want their rights and medical care to regress to pre-1970s standards…
I feel like the only positive development lately is that the FDA expanded access to abortion by modifying its requirements regarding the abortion pill.
If you feel moved to help, there are several petition online for the various bills I mentioned, and you can always make a donation to the National Organization for Women.
[Update, June 27th, 2016: I am unbelievably happy to announce that the Supreme Court has struck down the Texas abortion clinic restrictions!]
Now, if you have a moment, I highly recommend you watch John Oliver’s piece on abortion, because he always manages to be both funny and very informative. The piece summarizes the current controversies very well. You can also read an article on The Daily Beast published a little over a year ago, about the “craziest” (most restrictive) abortions bills passed since 2010.
Last year, a federal appellate court upheld House Bill 2, which states that Texas can require abortion clinics to meet the same building, equipment, and staff standards as hospitals. This sounds good in theory, until you realize that the law is actually unnecessary (the procedures done in abortion clinics are not the same as those done in most hospitals) and that this severely restricts the number of clinics in what is the second most populous state. The Supreme Court is currently divided on the issue, but a ruling isn’t due until late June. Roughly half of the abortion clinics in the state have closed already, and the majority of the rest depend on a favorable ruling to stay open. (On a related note: here’s a Rolling Stone article titled Lone-Star Crazy: How Right-Wing Extremists Took Over Texas.) (And also, this could lead to a situation like this one predicted by The Onion.)
Texas also wanted to cut Medicaid funding from Planned Parenthood (who is suing) because 3% of the organization’s expenses go towards abortion, which Republican lawmakers oppose. Of course, this directly penalized the poorest patients, who are most in need of medical services offered by Planned Parenthood (including the 97% of the funding that goes to medical exams, birth control, mammograms, etc.).
Missouri also has some pretty strict laws, including a 72-hour waiting period (the longest in the country). A bill was proposed a year ago to require the biological father’s permission before performing an abortion, effectively condemning rape victims to get consent from their abuser, but looking at Missouri abortion laws today, I don’t think that bill passed.
Indiana, though, passed a law banning abortions performed because of fetal genetic abnormalities. And yet, something tells me they won’t be subsidizing the health care of fetuses and babies born with severe defects, or psychological support for the parents…
Alabama just passed a bill that treats abortion clinics like sex offenders, meaning that they can’t be within 2,000 feet of an elementary or middle school. This would shut down two of the state’s five clinics (but those two alone provide 72% of abortions). Obviously, no other medical facilities are subject to the same rules!
Oklahoma state legislature just passed a bill that would make providing abortions a felony, which goes directly against Roe v. Wade. This won’t become the law unless the governor signs it into law, but she is expected to do so, given her record.
And it looks like a long stretch of cities in the South won’t have access to abortions after the first trimester, due to recent bills.
This may be because I’m from Quebec, but I really can’t understand why people would want their rights and medical care to regress to pre-1970s standards…
I feel like the only positive development lately is that the FDA expanded access to abortion by modifying its requirements regarding the abortion pill.
If you feel moved to help, there are several petition online for the various bills I mentioned, and you can always make a donation to the National Organization for Women.
[Update, June 27th, 2016: I am unbelievably happy to announce that the Supreme Court has struck down the Texas abortion clinic restrictions!]
Wednesday, June 01, 2016
Vegan Chocolate Chip Cookies
I recently tried two recipes for vegan chocolate chip cookies; unlike last summer’s cookies, these don’t call for egg replacers, they were just conceived without eggs in the first place. What they had in common was mixing oil with sugar until you get a caramel-like consistency, which was important for the structure of the cookie (and that’s the reason why I don’t recommend substituting applesauce here). The first recipe was from Post-Punk Kitchen; the cookies were good, though I prefer the ones I normally make, so I’m not posting the recipe here.


The second recipe, though, from Sift & Whisk, called for a small amount of oats as well as chopped chocolate instead of chips; the result was a darker, tastier cookie. The dough was a bit dry and crumbly as I was working with it, and I still thought these were not my best cookies, but the Engineer loved them. That being said, I didn’t want to buy nut oils just for this, so I used canola oil instead of peanut oil, and olive oil instead of macadamia oil. Obviously this affected the taste, but these were good, and nut-free. They actually reminded me a bit of my Neiman-Marcus cookies, which I haven’t made since the 36-hour cookies came into my life 5 years ago – I’ll have to remedy that this summer.
And as I was typing up this post, I realized that I had another recipe for olive oil chocolate chip cookies, so I tried that one too, but even though they tasted fine, they spread out way too much. I also think there was too much sugar compared with the flour. So all this to say, this vegan Sift& Whisk recipe was the best of the bunch, and here it is below.
½ cup (50 g.) rolled oats
1½ cups (180 g.) all-purpose flour
1 tsp. baking powder
¾ tsp. baking soda
½ tsp. kosher salt
1 cup (170 g./6 oz.) roughly chopped vegan chocolate (I use semisweet or bittersweet)
½ cup (100 g.) granulated sugar
½ cup (110 g.) packed dark muscovado (or dark brown sugar)
5 Tbsp. peanut oil (or other neutral oil, like grapeseed or canola)
4 Tbsp. macadamia nut oil (or other flavorful oil, even olive oil)
¼ cup plus 1 Tbsp. water
Maldon sea salt, or other flaky sea salt, for sprinkling
Spread the oats on a baking sheet and toast in a 350 °F oven for 10-15 minutes, until fragrant. Allow to cool, then grind the oats into a fine powder in a spice grinder or blender. (Since this is such a small amount of oats, I used my spice grinder instead of the food processor, and I was amazed at how fast and efficient it was at pulverizing the oats!)
In a large bowl, whisk together oat flour, all-purpose flour, baking powder, baking soda, and salt. Add the chopped chocolate to the flour mixture and toss to coat.
In the bowl of a stand mixer, combine the sugars. Break up any lumps in the muscovado (or brown) sugar by running the mixer on low for a few seconds. Use your fingers or spoon to break up any lumps the mixer missed. Add both oils and the water. Mix on medium-high speed until smooth and fully combined, about 2 minutes.
Turn the mixer speed to low, add the chocolate and flour mixture, and mix until just combined. Remove the bowl from the stand mixer and scrape down the bowl just to make sure everything is combined evenly, but don’t overmix the dough. Cover the bowl with plastic wrap and refrigerate the dough for at least 12 hours (you can keep it refrigerated for a week, easily).
Preheat the oven to 350 °F. Line two half-sheet baking pans with silicone baking mats or parchment paper (I actually like baking them one sheet at a time, as needed). Remove the dough from the refrigerator and scoop the dough into 2-inch mounds, eight on each baking sheet (stagger the dough mounds so they don't spread into each other; my cookies were slightly smaller and I fit 12 per pan, for 2 pans total). Freeze the cookie dough mounds for 10 minutes. (If your freezer isn't very large, you can put all the dough mounds on one pan, freeze them, and then redistribute the frozen dough mounds between the two baking sheets before baking.)
Remove the cookie dough from the freezer and sprinkle the tops of the dough with sea salt. Bake for 13-15 minutes (12 minutes for me), rotating the pans from front to back and top to bottom halfway through baking. The cookies are done when the edges are set and the tops are still a tiny bit shiny. Cool the cookies on the pan for 3 minutes, then transfer the cookies directly to a wire rack to cool completely.


The second recipe, though, from Sift & Whisk, called for a small amount of oats as well as chopped chocolate instead of chips; the result was a darker, tastier cookie. The dough was a bit dry and crumbly as I was working with it, and I still thought these were not my best cookies, but the Engineer loved them. That being said, I didn’t want to buy nut oils just for this, so I used canola oil instead of peanut oil, and olive oil instead of macadamia oil. Obviously this affected the taste, but these were good, and nut-free. They actually reminded me a bit of my Neiman-Marcus cookies, which I haven’t made since the 36-hour cookies came into my life 5 years ago – I’ll have to remedy that this summer.
And as I was typing up this post, I realized that I had another recipe for olive oil chocolate chip cookies, so I tried that one too, but even though they tasted fine, they spread out way too much. I also think there was too much sugar compared with the flour. So all this to say, this vegan Sift& Whisk recipe was the best of the bunch, and here it is below.
½ cup (50 g.) rolled oats
1½ cups (180 g.) all-purpose flour
1 tsp. baking powder
¾ tsp. baking soda
½ tsp. kosher salt
1 cup (170 g./6 oz.) roughly chopped vegan chocolate (I use semisweet or bittersweet)
½ cup (100 g.) granulated sugar
½ cup (110 g.) packed dark muscovado (or dark brown sugar)
5 Tbsp. peanut oil (or other neutral oil, like grapeseed or canola)
4 Tbsp. macadamia nut oil (or other flavorful oil, even olive oil)
¼ cup plus 1 Tbsp. water
Maldon sea salt, or other flaky sea salt, for sprinkling
Spread the oats on a baking sheet and toast in a 350 °F oven for 10-15 minutes, until fragrant. Allow to cool, then grind the oats into a fine powder in a spice grinder or blender. (Since this is such a small amount of oats, I used my spice grinder instead of the food processor, and I was amazed at how fast and efficient it was at pulverizing the oats!)
In a large bowl, whisk together oat flour, all-purpose flour, baking powder, baking soda, and salt. Add the chopped chocolate to the flour mixture and toss to coat.
In the bowl of a stand mixer, combine the sugars. Break up any lumps in the muscovado (or brown) sugar by running the mixer on low for a few seconds. Use your fingers or spoon to break up any lumps the mixer missed. Add both oils and the water. Mix on medium-high speed until smooth and fully combined, about 2 minutes.
Turn the mixer speed to low, add the chocolate and flour mixture, and mix until just combined. Remove the bowl from the stand mixer and scrape down the bowl just to make sure everything is combined evenly, but don’t overmix the dough. Cover the bowl with plastic wrap and refrigerate the dough for at least 12 hours (you can keep it refrigerated for a week, easily).
Preheat the oven to 350 °F. Line two half-sheet baking pans with silicone baking mats or parchment paper (I actually like baking them one sheet at a time, as needed). Remove the dough from the refrigerator and scoop the dough into 2-inch mounds, eight on each baking sheet (stagger the dough mounds so they don't spread into each other; my cookies were slightly smaller and I fit 12 per pan, for 2 pans total). Freeze the cookie dough mounds for 10 minutes. (If your freezer isn't very large, you can put all the dough mounds on one pan, freeze them, and then redistribute the frozen dough mounds between the two baking sheets before baking.)
Remove the cookie dough from the freezer and sprinkle the tops of the dough with sea salt. Bake for 13-15 minutes (12 minutes for me), rotating the pans from front to back and top to bottom halfway through baking. The cookies are done when the edges are set and the tops are still a tiny bit shiny. Cool the cookies on the pan for 3 minutes, then transfer the cookies directly to a wire rack to cool completely.


Friday, May 27, 2016
Batch of links - Food waste
- Here are some statistics about food waste in America. Did you know that a whopping 40% of food produced is then wasted?
- Here’s a depressing short film about the sad life of a strawberry, from savethefood.com.
- Roughly 26% of produce is wasted before it even hits store shelves because it is deemed “ugly”. I think it would make more sense for grocers to sell it at a discount or donate it, assuming consumers won’t buy it as is. That being said, there’s actually evidence that ugly produce may be more nutritious.
- A college student has created an app that helps prevent food waste by connecting donors with people and organizations in need. In its first year, it saved 4,000 pounds of food from being wasted. Pretty impressive!
- In New York City, there’s a program called Rescuing Leftover Cuisine that matches restaurants with charities to prevent food waste. According to that article, a staggering 40% of food in the U.S. goes to waste each year. (Also, many restaurant owners are not aware of legislation in place that protects food donors from legal liability, except in cases of gross negligence; once they know about it, they are much more likely to give their unwanted leftovers to charitable organizations.)
- Suzy DeYoung has started La Soupe in Cincinnati, where she and her staff collect unsellable produce and make it into soup to feed the food-insecure.
- The town of Galdakao, in Spain, has a Solidarity Fridge where people can leave extra food and others can take what they need. There are rules (like anything homemade must be labeled with a date and thrown out after four days; no raw meat, fish or eggs) and volunteers clean the fridge as needed. It is such a success that other towns are following suit.
- Food waste is driving climate change.
- John Oliver had a great in-depth piece about food waste, including causes and possible solutions.
- France passed a law last year stating that supermarkets must donate unsold (but still edible) food to charities instead of throwing it away or destroying it. It also introduces a food waste program in schools and businesses to help curb waste in places other than supermarkets. Some critics of the law say that the real problem is overproduction, but I still think this is an awesome development.
- Dan Barber wants you to eat smarter, waste less. This article also talks about the honeynut squash, which is basically like a butternut, but with twice the flavor at half the size. You see, when farmers are asked to develop new types of vegetables, they are usually asked to make them contain more water, which makes them bigger and heavier (and therefore maximize profits, as produce is sold by weight and water is cheap). But this makes the vegetables bland. Dan Barber asked a farmer to develop a squash that would taste really good, and the farmer said it was the first time anyone had asked him to use taste as a criterion! I’d love to get my hands on one of those honeynut squashes…
- Finally, here are some tips to cut down on food waste in our households. Personally, I’m pretty good at not wasting ingredients – meaning that I plan a weekly menu that will use up ingredients I already have before they go bad, and we rarely deviate from the grocery list. However, I do throw out some prepared food now, mainly if the Little Prince doesn’t finish his plate. (I used to eat it so that it wasn’t wasted, but I ended up eating more than I needed and put on weight, so the best solution for me at this point is throwing out food that won’t be eaten. I wish we had a solidarity fridge in the neighborhood!)
- Here’s a depressing short film about the sad life of a strawberry, from savethefood.com.
- Roughly 26% of produce is wasted before it even hits store shelves because it is deemed “ugly”. I think it would make more sense for grocers to sell it at a discount or donate it, assuming consumers won’t buy it as is. That being said, there’s actually evidence that ugly produce may be more nutritious.
- A college student has created an app that helps prevent food waste by connecting donors with people and organizations in need. In its first year, it saved 4,000 pounds of food from being wasted. Pretty impressive!
- In New York City, there’s a program called Rescuing Leftover Cuisine that matches restaurants with charities to prevent food waste. According to that article, a staggering 40% of food in the U.S. goes to waste each year. (Also, many restaurant owners are not aware of legislation in place that protects food donors from legal liability, except in cases of gross negligence; once they know about it, they are much more likely to give their unwanted leftovers to charitable organizations.)
- Suzy DeYoung has started La Soupe in Cincinnati, where she and her staff collect unsellable produce and make it into soup to feed the food-insecure.
- The town of Galdakao, in Spain, has a Solidarity Fridge where people can leave extra food and others can take what they need. There are rules (like anything homemade must be labeled with a date and thrown out after four days; no raw meat, fish or eggs) and volunteers clean the fridge as needed. It is such a success that other towns are following suit.
- Food waste is driving climate change.
- John Oliver had a great in-depth piece about food waste, including causes and possible solutions.
- France passed a law last year stating that supermarkets must donate unsold (but still edible) food to charities instead of throwing it away or destroying it. It also introduces a food waste program in schools and businesses to help curb waste in places other than supermarkets. Some critics of the law say that the real problem is overproduction, but I still think this is an awesome development.
- Dan Barber wants you to eat smarter, waste less. This article also talks about the honeynut squash, which is basically like a butternut, but with twice the flavor at half the size. You see, when farmers are asked to develop new types of vegetables, they are usually asked to make them contain more water, which makes them bigger and heavier (and therefore maximize profits, as produce is sold by weight and water is cheap). But this makes the vegetables bland. Dan Barber asked a farmer to develop a squash that would taste really good, and the farmer said it was the first time anyone had asked him to use taste as a criterion! I’d love to get my hands on one of those honeynut squashes…
- Finally, here are some tips to cut down on food waste in our households. Personally, I’m pretty good at not wasting ingredients – meaning that I plan a weekly menu that will use up ingredients I already have before they go bad, and we rarely deviate from the grocery list. However, I do throw out some prepared food now, mainly if the Little Prince doesn’t finish his plate. (I used to eat it so that it wasn’t wasted, but I ended up eating more than I needed and put on weight, so the best solution for me at this point is throwing out food that won’t be eaten. I wish we had a solidarity fridge in the neighborhood!)
Grapefruit-Poppy Seed Loaf Cake with Yogurt Glaze
This recipe is from Bon Appétit. I made it for breakfast, though it would be a good snacking cake as well. The cake stays moist at room temperature for several days, thanks to the vegetable oil. We all liked it, including the Engineer (who doesn’t normally like grapefruit, but it was subdued enough here that he found it pleasant). The glaze is optional, but recommended.
1½ cups all-purpose flour
2 tsp. baking powder
¾ tsp. kosher salt, plus more
1 Tbsp. finely grated grapefruit zest
1 cup granulated sugar
2 large eggs, room temperature
⅓ cup vegetable oil
1 tsp. vanilla extract
¾ cup plus 1 Tbsp. plain Greek yogurt, divided
8 Tbsp. fresh grapefruit juice, divided
1 Tbsp. poppy seeds, plus more for sprinkling
½ cup powdered sugar, sifted
Preheat oven to 350 °F. Line an 8½x4½" loaf pan, preferably metal, with parchment paper, leaving overhang on the long sides, and lightly coat with nonstick spray.
Whisk flour, baking powder, and ¾ tsp. salt in a medium bowl.
Using your fingers, work grapefruit zest into granulated sugar in a large bowl until sugar starts to clump and mixture is very fragrant, about 1 minute. Add eggs, oil, and vanilla and beat with an electric mixer on high speed until light and thick, about 4 minutes. Reduce speed to low and mix in half of dry ingredients, then mix in ¾ cup yogurt. Mix in remaining dry ingredients followed by 5 Tbsp. grapefruit juice and 1 Tbsp. poppy seeds. Scrape batter into prepared pan and smooth top.
Bake cake until top is golden brown and a tester inserted into the center comes out clean, 50–60 minutes. Transfer pan to a wire rack. Poke holes in top of cake and brush remaining 3 Tbsp. grapefruit juice over top. Let sit 15 minutes, then run a knife around sides to loosen and use parchment paper to lift cake out of pan and onto rack. Remove parchment and let cool completely.
Whisk powdered sugar, remaining 1 Tbsp. yogurt, 1 tsp. water, and a pinch of salt in a medium bowl until smooth and drizzle over cake. Sprinkle with poppy seeds and let sit until glaze is set, about 30 minutes.


1½ cups all-purpose flour
2 tsp. baking powder
¾ tsp. kosher salt, plus more
1 Tbsp. finely grated grapefruit zest
1 cup granulated sugar
2 large eggs, room temperature
⅓ cup vegetable oil
1 tsp. vanilla extract
¾ cup plus 1 Tbsp. plain Greek yogurt, divided
8 Tbsp. fresh grapefruit juice, divided
1 Tbsp. poppy seeds, plus more for sprinkling
½ cup powdered sugar, sifted
Preheat oven to 350 °F. Line an 8½x4½" loaf pan, preferably metal, with parchment paper, leaving overhang on the long sides, and lightly coat with nonstick spray.
Whisk flour, baking powder, and ¾ tsp. salt in a medium bowl.
Using your fingers, work grapefruit zest into granulated sugar in a large bowl until sugar starts to clump and mixture is very fragrant, about 1 minute. Add eggs, oil, and vanilla and beat with an electric mixer on high speed until light and thick, about 4 minutes. Reduce speed to low and mix in half of dry ingredients, then mix in ¾ cup yogurt. Mix in remaining dry ingredients followed by 5 Tbsp. grapefruit juice and 1 Tbsp. poppy seeds. Scrape batter into prepared pan and smooth top.
Bake cake until top is golden brown and a tester inserted into the center comes out clean, 50–60 minutes. Transfer pan to a wire rack. Poke holes in top of cake and brush remaining 3 Tbsp. grapefruit juice over top. Let sit 15 minutes, then run a knife around sides to loosen and use parchment paper to lift cake out of pan and onto rack. Remove parchment and let cool completely.
Whisk powdered sugar, remaining 1 Tbsp. yogurt, 1 tsp. water, and a pinch of salt in a medium bowl until smooth and drizzle over cake. Sprinkle with poppy seeds and let sit until glaze is set, about 30 minutes.


Wednesday, May 25, 2016
Crêpes au chou frisé et au sirop d'érable
Je sais, je viens de vous faire un billet avec des crêpes… Enfin, ça, c’était des « pancakes » américaines, tandis que celles-ci sont vraiment plus de type « crêpes minces »! J’ai fait la recette sur un coup de tête, parce qu’il me restait un peu de chou frisé après avoir fait une salade. Il se trouve que c’est une recette sans gluten; je n’avais que 1 ¼ tasse de farine de quinoa, alors j’ai complété avec de la farine de pois chiches, et c’était délicieux! Le goût du quinoa se marie à merveille avec le sirop d’érable, et c’était juste assez sucré pour rester acceptable comme plat principal. Je n’avais pas de canard effiloché (les élevages de canards sont quand même beaucoup plus courants au Québec qu’au Texas, on s’entend), alors j’ai servi quelques crêpes avec un peu de bacon et une chiffonnade de feuilles de menthe. J’en ai mangé beaucoup nature également (il y avait plus d’une douzaine de crêpes en tout). Il s’agit d’une recette de J’aime l’érable.
1 ½ tasse de lait sans lactose
2 grosses feuilles de chou frisé (kale) sans la tige centrale, hachées
4 œufs
½ tasse de sirop d’érable
2 c. à soupe d’huile d’olive
1 ½ tasse de farine de quinoa
1 pincée de sel
Chauffer le lait dans une casserole à feu moyen. Ajouter le chou frisé, retirer du feu et laisser reposer 1 minute.
Verser le lait et le chou frisé dans le mélangeur électrique, puis ajouter le reste des ingrédients. Mélanger environ 1 minute jusqu’à l’obtention d’une texture lisse.
Badigeonner de beurre ou de margarine une poêle anti- adhésive d’environ 20 cm (8 po). Verser environ ¼ tasse de pâte, l’étendre et faire dorer la crêpe des deux côtés. Transférer dans une assiette et couvrir de papier aluminium pour éviter qu’elle sèche. Répéter avec le reste de la pâte.
Servir ces crêpes garnies de confit de canard effiloché, de laitue émincée, de menthe fraîche et de sauce BBQ maison ou du commerce (ou comme vous voulez).


1 ½ tasse de lait sans lactose
2 grosses feuilles de chou frisé (kale) sans la tige centrale, hachées
4 œufs
½ tasse de sirop d’érable
2 c. à soupe d’huile d’olive
1 ½ tasse de farine de quinoa
1 pincée de sel
Chauffer le lait dans une casserole à feu moyen. Ajouter le chou frisé, retirer du feu et laisser reposer 1 minute.
Verser le lait et le chou frisé dans le mélangeur électrique, puis ajouter le reste des ingrédients. Mélanger environ 1 minute jusqu’à l’obtention d’une texture lisse.
Badigeonner de beurre ou de margarine une poêle anti- adhésive d’environ 20 cm (8 po). Verser environ ¼ tasse de pâte, l’étendre et faire dorer la crêpe des deux côtés. Transférer dans une assiette et couvrir de papier aluminium pour éviter qu’elle sèche. Répéter avec le reste de la pâte.
Servir ces crêpes garnies de confit de canard effiloché, de laitue émincée, de menthe fraîche et de sauce BBQ maison ou du commerce (ou comme vous voulez).


Monday, May 23, 2016
Vegan Caesar Salad
This take on Caesar salad, which is both vegan and gluten-free, was very good! It was actually impressive how much it tasted like Caesar salad, even without anchovy paste. I omitted capers in my version. You can prepare each of the components ahead of time and refrigerate them separately, except for the chickpea croutons (which should stay on the countertop in an airtight container). The dressing will thicken when chilled, so it’s best to let it come to room temperature before using. This is a good recipe for a light lunch or a side dish; it is from Oh She Glows.
Don’t forget to soak ½ cup cashews overnight beforehand to make the dressing!
For the roasted chickpea croutons
1 (15-oz.) can chickpeas (or 1 ½ cups cooked), drained and rinsed
1 tsp. extra-virgin olive oil
½ tsp. fine grain sea salt
½ tsp. garlic powder
1 dash cayenne pepper (optional)
For the Caesar dressing (makes ¾ - 1 cup)
½ cup raw cashews, soaked overnight
¼ cup water
2 Tbsp. extra-virgin olive oil
1 Tbsp. lemon juice
½ Tbsp. Dijon mustard
½ tsp. garlic powder
1 small garlic clove (you can add another if you like it super potent)
½ Tbsp. vegan Worcestershire sauce (GF if necessary)
½ tsp. fine grain sea salt and pepper, or to taste
For the nut and seed “parmesan” cheese
1/3 cup raw cashews
2 Tbsp. hulled hemp seeds
1 small garlic clove
1 Tbsp. nutritional yeast
1 Tbsp. extra-virgin olive oil
½ tsp. garlic powder
fine grain sea salt, to taste
For the lettuce
1 small/medium bunch lacinato kale, destemmed (5 cups chopped)
2 small heads romaine lettuce (10 cups chopped)
For the chickpea croutons
Preheat oven to 400 °F. Drain and rinse chickpeas. Place chickpeas in a tea towel and rub dry (it's okay if some skins fall off). Place onto large rimmed baking sheet. Drizzle on oil and roll around to coat. Sprinkle on the garlic powder, salt, and optional cayenne. Toss to coat. Roast for 20 minutes, then gently roll the chickpeas around in the baking sheet. Roast for another 10 to 20 minutes, until lightly golden. They will firm up as they cool.
For the dressing
Add the cashews and all other dressing ingredients (except salt) into a high-speed blender, and blend on high until the dressing is super smooth. You can add a splash of water if necessary to get it blending. Add salt to taste and adjust other seasonings, if desired. Set aside.
For the “parmesan” cheese
Put cashews and garlic in a mini food processor and process until finely chopped. Now add in the rest of the ingredients and pulse until the mixture is combined. Salt to taste.
For the lettuce
Destem the kale and then finely chop the leaves. Wash and dry in a salad spinner. Place into an extra large bowl. Chop up the romaine into bite-sized pieces. Rinse and then spin dry. Place into bowl along with kale. You should have roughly 5 cups chopped kale and 10 cups chopped romaine.
For assembly
Add dressing onto lettuce and toss until fully coated. Season with a pinch of salt and mix again. Now sprinkle on the roasted chickpeas and the “parmesan” cheese. Serve immediately.

Don’t forget to soak ½ cup cashews overnight beforehand to make the dressing!
For the roasted chickpea croutons
1 (15-oz.) can chickpeas (or 1 ½ cups cooked), drained and rinsed
1 tsp. extra-virgin olive oil
½ tsp. fine grain sea salt
½ tsp. garlic powder
1 dash cayenne pepper (optional)
For the Caesar dressing (makes ¾ - 1 cup)
½ cup raw cashews, soaked overnight
¼ cup water
2 Tbsp. extra-virgin olive oil
1 Tbsp. lemon juice
½ Tbsp. Dijon mustard
½ tsp. garlic powder
1 small garlic clove (you can add another if you like it super potent)
½ Tbsp. vegan Worcestershire sauce (GF if necessary)
½ tsp. fine grain sea salt and pepper, or to taste
For the nut and seed “parmesan” cheese
1/3 cup raw cashews
2 Tbsp. hulled hemp seeds
1 small garlic clove
1 Tbsp. nutritional yeast
1 Tbsp. extra-virgin olive oil
½ tsp. garlic powder
fine grain sea salt, to taste
For the lettuce
1 small/medium bunch lacinato kale, destemmed (5 cups chopped)
2 small heads romaine lettuce (10 cups chopped)
For the chickpea croutons
Preheat oven to 400 °F. Drain and rinse chickpeas. Place chickpeas in a tea towel and rub dry (it's okay if some skins fall off). Place onto large rimmed baking sheet. Drizzle on oil and roll around to coat. Sprinkle on the garlic powder, salt, and optional cayenne. Toss to coat. Roast for 20 minutes, then gently roll the chickpeas around in the baking sheet. Roast for another 10 to 20 minutes, until lightly golden. They will firm up as they cool.
For the dressing
Add the cashews and all other dressing ingredients (except salt) into a high-speed blender, and blend on high until the dressing is super smooth. You can add a splash of water if necessary to get it blending. Add salt to taste and adjust other seasonings, if desired. Set aside.
For the “parmesan” cheese
Put cashews and garlic in a mini food processor and process until finely chopped. Now add in the rest of the ingredients and pulse until the mixture is combined. Salt to taste.
For the lettuce
Destem the kale and then finely chop the leaves. Wash and dry in a salad spinner. Place into an extra large bowl. Chop up the romaine into bite-sized pieces. Rinse and then spin dry. Place into bowl along with kale. You should have roughly 5 cups chopped kale and 10 cups chopped romaine.
For assembly
Add dressing onto lettuce and toss until fully coated. Season with a pinch of salt and mix again. Now sprinkle on the roasted chickpeas and the “parmesan” cheese. Serve immediately.

Friday, May 20, 2016
Batch of links
- BBC Food will close its digital platform, so I checked my bookmarks and printed the recipe I had saved online.
- The 15 most common counterfeit foods – and how to identify them. I must admit I’ve had trouble finding good honey lately…
- An interesting NPR article titled What is “natural” food? A riddle wrapped up in notions of good and evil. The FDA asked for the general public’s help to define the term “natural” so that they could come up with a legal definition for packaging. I’m really curious to see how that turns out! Next up, the FDA want to define “healthy”.
- Why does chocolate cost so much? A good explanation by Bon Appétit.
- Why does spicy food taste hot? A scientific explanation.
- The five rules of Tex-Mex, according to the Homesick Texan.
- What happens when a Japanese woodblock artist depicts life in London in 1866, despite never having set foot there.
- Apparently, Montreal’s Mile End is the coolest neighborhood in the world.
- Also, Town & Country magazine named Montreal as the food capital of North America.
- Public service announcement: Apple Music deletes your personal files from your internal hard drive as part of its NORMAL operation.
- Finally, two links about so-called female empowerment. I hadn’t quite been able to put into words my unease with what passes as female empowerment these days, which really is more about marketing than empowerment. These articles explain it well, though: From shopping to naked selfies: how “empowerment” lost its meaning, and Beyoncé is destroying your daughter, not empowering her.
- The 15 most common counterfeit foods – and how to identify them. I must admit I’ve had trouble finding good honey lately…
- An interesting NPR article titled What is “natural” food? A riddle wrapped up in notions of good and evil. The FDA asked for the general public’s help to define the term “natural” so that they could come up with a legal definition for packaging. I’m really curious to see how that turns out! Next up, the FDA want to define “healthy”.
- Why does chocolate cost so much? A good explanation by Bon Appétit.
- Why does spicy food taste hot? A scientific explanation.
- The five rules of Tex-Mex, according to the Homesick Texan.
- What happens when a Japanese woodblock artist depicts life in London in 1866, despite never having set foot there.
- Apparently, Montreal’s Mile End is the coolest neighborhood in the world.
- Also, Town & Country magazine named Montreal as the food capital of North America.
- Public service announcement: Apple Music deletes your personal files from your internal hard drive as part of its NORMAL operation.
- Finally, two links about so-called female empowerment. I hadn’t quite been able to put into words my unease with what passes as female empowerment these days, which really is more about marketing than empowerment. These articles explain it well, though: From shopping to naked selfies: how “empowerment” lost its meaning, and Beyoncé is destroying your daughter, not empowering her.
Thursday, May 19, 2016
Part 2 of the breakfast quest
It’s remarkable how similar thoughts I’m having regarding breakfast, as compared to a year ago, when I wrote about a breakfast quest for a good pancake recipe. I had been trying a bunch of non-pancake recipes, some that didn’t work (like this fennel-honey granola, which forced me to admit I just don’t like the texture of granolas that contain peanut butter). Others worked really well, but my blog doesn’t need another recipe for vegan marbled banana bread. Or peanutella, with which I fell in love because it’s so fantastic (just keep it at room temperature), but I forgot all about pictures. And then I remembered that I never got around to testing the pancake recipes that call for whipping egg whites, so I decided to tackle that project. I tested three: recipes by Clayton Miller, Laurent Jeannin, and J. Kenji López-Alt (from Serious Eats). In all cases, the night before, I mixed my dry ingredients and left them on the counter, then mixed the wet ingredients and left them in the fridge overnight next to the egg whites. In the morning, to make pancakes, I whipped the egg whites and mixed everything together. I dislike using my stand mixer before breakfast, but for pancakes, anyone who is still sleeping in should get up on the right side of the bed regardless.
Laurent Jeannin’s pancakes, while pretty, were very dry and not that good. I only got 6 pancakes out of the batch. Perhaps this French chef would be better at crêpes than pancakes? In any event, considering how finicky this recipe is (weighing egg whites and yolks, anyone?), it just wasn’t a winner.

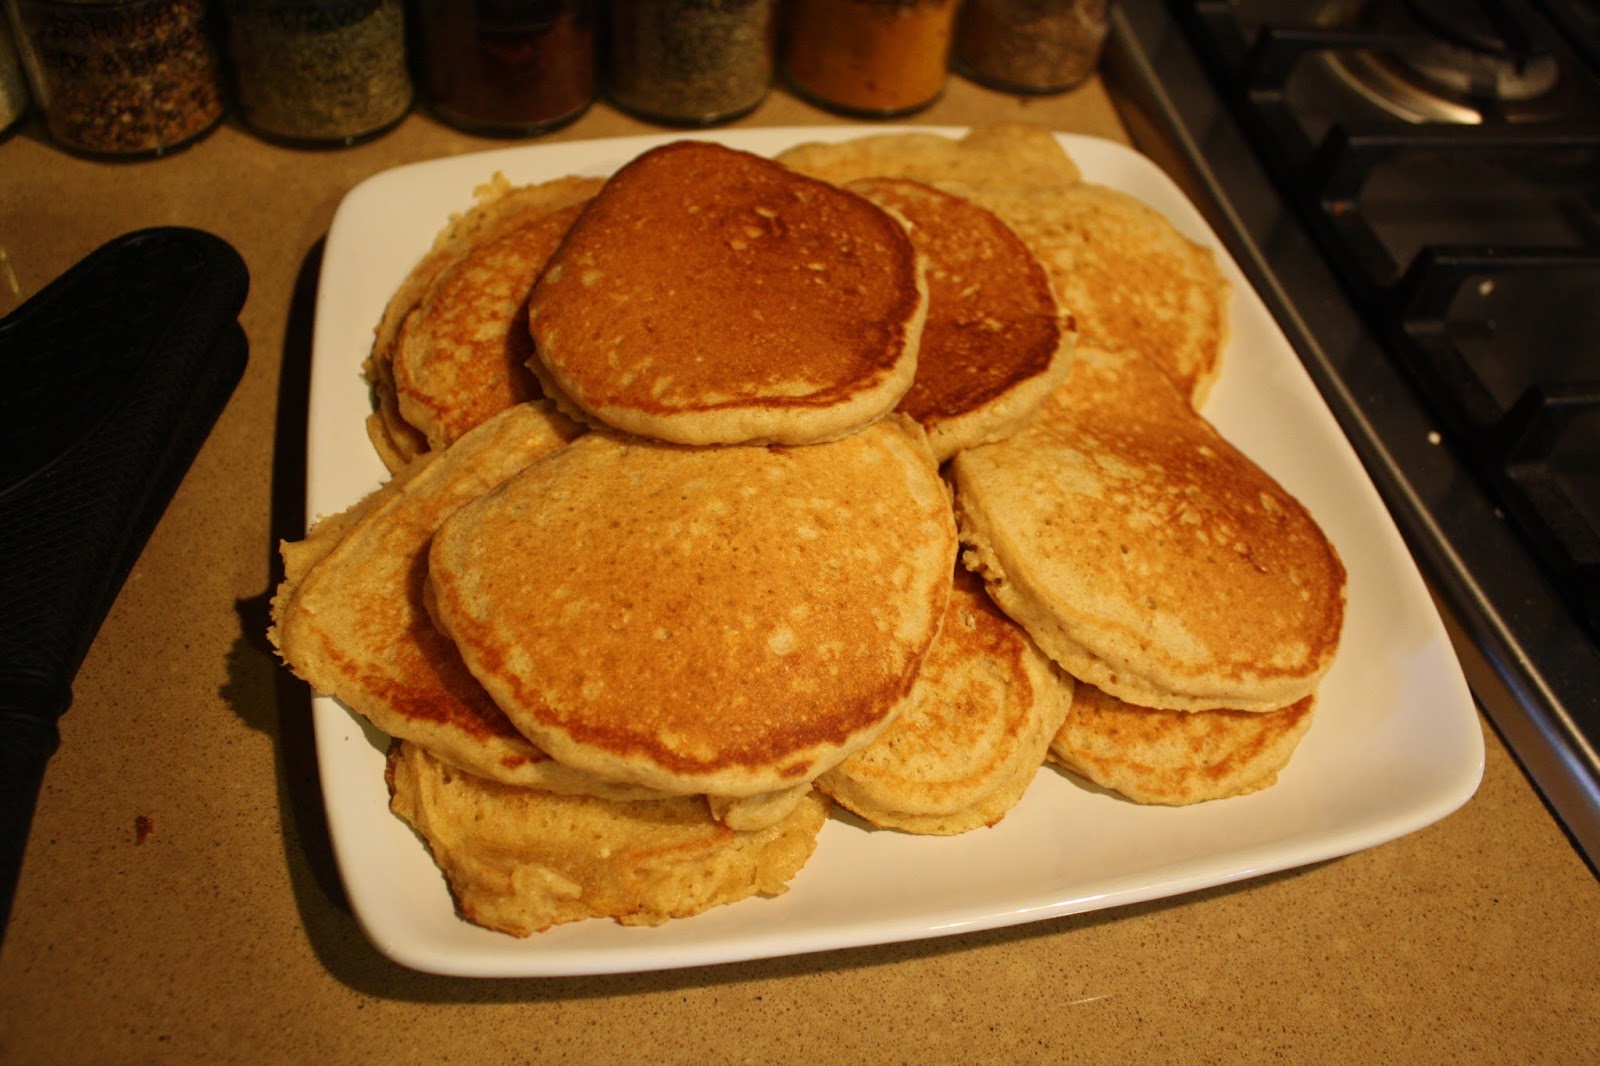
The most interesting recipe was Clayton Miller’s, which is actually for soufflé pancakes. (I heard about it via The Kitchn; their link is broken, but you can also find the recipe on Yahoo.) Each soufflé pancake is first cooked in a pan, then finished off in the oven. Because I have an inquisitive toddler in the way, opening and closing the oven door a few times for each pancake (especially given that I only had one oven-proof pan the right size) was not an option. I did make one as instructed, for scientific purposes, but the rest were made strictly in a pan, the old-fashioned way. I have to admit, though, that the baked soufflé pancake was a thing of beauty. It was certainly one of the best pancakes I’d ever had, and if at all feasible for you, that’s how I recommend making them. The yield is about 6-8 pancakes done the soufflé way, or 24 pancakes cooked stovetop (they freeze well); one soufflé pancake would be enough of a serving for me.
Clayton Miller’s Soufflé Pancakes
5 ½ cups flour (yes, really)
1/3 cup sugar
2 tsp. salt
1 Tbsp. baking powder
1 Tbsp. baking soda
2 cups lactose-free milk
2 ½ cups buttermilk (about 2-3 Tbsp. lemon juice + lactose-free milk)
2 whole eggs
2 eggs yolks
3 egg whites
Preheat oven to 350 °F.
Combine dry ingredients in large mixing bowl and set aside.
In a medium bowl, combine the milk, buttermilk, whole eggs, and egg yolks and whisk together until combined. Slowly stir the wet ingredients into dry ingredients. Do not over mix (this makes the pancakes tough). Set aside.
In a separate bowl, whisk the egg whites to medium peak then fold gently into the batter. Do not over mix.
Melt a tablespoon of butter in a 6-inch nonstick frying pan on medium. Swirl to coat sides. Butter should be golden and bubbling, but not brown or smoking. Pour one cup of batter into pan. You can add more or less depending on how thick you want the pancake. It will puff up, so don't fill pan more than ¾ of the way up the sides. Cook on the stovetop for one minute then place in the oven for 3 minutes. Flip pancake and place back into oven for about 2 more minutes or until cooked through (mine was still slightly underdone in the center after 2 minutes). Add more butter as necessary to coat pan and repeat. (You can also cook them entirely on the stovetop like regular pancakes, in which case you’d want to use closer to ¼ cup of batter for each pancake. Pictured first is the soufflé pancake, followed by the stovetop version.)


The third recipe I tried, Serious Eats’ Light and Fluffy Buttermilk Pancakes, was also a winner. That recipe calls for sour cream, which I’m sure you could replace with Greek yogurt, especially given that you don’t really taste it in the finished product. The original recipe also says it can be replaced with buttermilk. These are easier than the soufflé pancakes, so that may guide your choice on most mornings.
Serious Eats’ Light and Fluffy Buttermilk Pancakes
For the basic dry pancake mix
10 oz. (about 2 cups) all-purpose flour
1 tsp. baking powder
½ tsp. baking soda
1 tsp. kosher salt
1 Tbsp. sugar
For each batch of pancakes
2 large eggs, separated
1 ½ cups buttermilk (1-2 Tbsp. lemon juice + lactose-free milk)
1 cup (about 8 oz.) lactose-free sour cream (see note above)
4 Tbsp. unsalted butter or margarine, melted
For the dry pancake mix
Combine flour, baking powder, baking soda, salt, and sugar in a medium bowl and whisk until homogenous. Transfer to an airtight container. The mix will stay good for 3 months.
For each batch of pancakes
Place one batch of dry mix in a large bowl.
In a medium clean bowl, whisk the egg whites until stiff peaks form.
In a large bowl, whisk the egg yolks, buttermilk, and sour cream until homogenous. Slowly drizzle in the melted butter while whisking. Carefully fold in the egg whites with a rubber spatula until just combined. Pour the mixture over the dry mix and fold until just combined (there should still be plenty of lumps).
Heat a large heavy-bottomed nonstick skillet over medium heat for 5 minutes (or use an electric griddle). Add a small amount of butter or oil to the griddle and spread with a paper towel until no visible butter or oil remains. Use a ¼-cup dry measure to place 4 pancakes in the skillet and cook until bubbles start to appear on top and the bottoms are golden brown, about 2 minutes. Carefully flip the pancakes and cook on the second side until golden brown and completely set, about 2 minutes longer. Serve the pancakes immediately, or keep warm on a wire rack set on a rimmed baking sheet in a warm oven while you cook the rest (about 12 in all).


Laurent Jeannin’s pancakes, while pretty, were very dry and not that good. I only got 6 pancakes out of the batch. Perhaps this French chef would be better at crêpes than pancakes? In any event, considering how finicky this recipe is (weighing egg whites and yolks, anyone?), it just wasn’t a winner.

The most interesting recipe was Clayton Miller’s, which is actually for soufflé pancakes. (I heard about it via The Kitchn; their link is broken, but you can also find the recipe on Yahoo.) Each soufflé pancake is first cooked in a pan, then finished off in the oven. Because I have an inquisitive toddler in the way, opening and closing the oven door a few times for each pancake (especially given that I only had one oven-proof pan the right size) was not an option. I did make one as instructed, for scientific purposes, but the rest were made strictly in a pan, the old-fashioned way. I have to admit, though, that the baked soufflé pancake was a thing of beauty. It was certainly one of the best pancakes I’d ever had, and if at all feasible for you, that’s how I recommend making them. The yield is about 6-8 pancakes done the soufflé way, or 24 pancakes cooked stovetop (they freeze well); one soufflé pancake would be enough of a serving for me.
Clayton Miller’s Soufflé Pancakes
5 ½ cups flour (yes, really)
1/3 cup sugar
2 tsp. salt
1 Tbsp. baking powder
1 Tbsp. baking soda
2 cups lactose-free milk
2 ½ cups buttermilk (about 2-3 Tbsp. lemon juice + lactose-free milk)
2 whole eggs
2 eggs yolks
3 egg whites
Preheat oven to 350 °F.
Combine dry ingredients in large mixing bowl and set aside.
In a medium bowl, combine the milk, buttermilk, whole eggs, and egg yolks and whisk together until combined. Slowly stir the wet ingredients into dry ingredients. Do not over mix (this makes the pancakes tough). Set aside.
In a separate bowl, whisk the egg whites to medium peak then fold gently into the batter. Do not over mix.
Melt a tablespoon of butter in a 6-inch nonstick frying pan on medium. Swirl to coat sides. Butter should be golden and bubbling, but not brown or smoking. Pour one cup of batter into pan. You can add more or less depending on how thick you want the pancake. It will puff up, so don't fill pan more than ¾ of the way up the sides. Cook on the stovetop for one minute then place in the oven for 3 minutes. Flip pancake and place back into oven for about 2 more minutes or until cooked through (mine was still slightly underdone in the center after 2 minutes). Add more butter as necessary to coat pan and repeat. (You can also cook them entirely on the stovetop like regular pancakes, in which case you’d want to use closer to ¼ cup of batter for each pancake. Pictured first is the soufflé pancake, followed by the stovetop version.)


The third recipe I tried, Serious Eats’ Light and Fluffy Buttermilk Pancakes, was also a winner. That recipe calls for sour cream, which I’m sure you could replace with Greek yogurt, especially given that you don’t really taste it in the finished product. The original recipe also says it can be replaced with buttermilk. These are easier than the soufflé pancakes, so that may guide your choice on most mornings.
Serious Eats’ Light and Fluffy Buttermilk Pancakes
For the basic dry pancake mix
10 oz. (about 2 cups) all-purpose flour
1 tsp. baking powder
½ tsp. baking soda
1 tsp. kosher salt
1 Tbsp. sugar
For each batch of pancakes
2 large eggs, separated
1 ½ cups buttermilk (1-2 Tbsp. lemon juice + lactose-free milk)
1 cup (about 8 oz.) lactose-free sour cream (see note above)
4 Tbsp. unsalted butter or margarine, melted
For the dry pancake mix
Combine flour, baking powder, baking soda, salt, and sugar in a medium bowl and whisk until homogenous. Transfer to an airtight container. The mix will stay good for 3 months.
For each batch of pancakes
Place one batch of dry mix in a large bowl.
In a medium clean bowl, whisk the egg whites until stiff peaks form.
In a large bowl, whisk the egg yolks, buttermilk, and sour cream until homogenous. Slowly drizzle in the melted butter while whisking. Carefully fold in the egg whites with a rubber spatula until just combined. Pour the mixture over the dry mix and fold until just combined (there should still be plenty of lumps).
Heat a large heavy-bottomed nonstick skillet over medium heat for 5 minutes (or use an electric griddle). Add a small amount of butter or oil to the griddle and spread with a paper towel until no visible butter or oil remains. Use a ¼-cup dry measure to place 4 pancakes in the skillet and cook until bubbles start to appear on top and the bottoms are golden brown, about 2 minutes. Carefully flip the pancakes and cook on the second side until golden brown and completely set, about 2 minutes longer. Serve the pancakes immediately, or keep warm on a wire rack set on a rimmed baking sheet in a warm oven while you cook the rest (about 12 in all).


Tuesday, May 17, 2016
Biscuits moelleux à l'érable

Cette recette-là, je l’avais découpée dans un dépliant de J’aime l’érable du temps des fêtes. Je l’avais apportée au Canada l’été dernier, parce que certains ingrédients ne sont pas sur le marché local au Texas (les produits de l’érable). Mais il fallait aussi du fromage à la crème sans lactose, qui n’est qu’aux États-Unis… Alors, j’ai rapporté mes produits de l’érable ici et j’ai fait ma recette. Si vous n’avez pas accès au fromage à la crème sans lactose, vous avez deux options : le fromage à la crème avec cultures actives de Liberty (teneur en lactose réduite, mais il me faut quand même des Lactaid); ou du fromage à la crème végétalien. Une fois que j’avais décidé que je faisais ma recette, je n’ai pas trouvé de confiture de canneberges, même après avoir cherché dans plusieurs épiceries. C’est dans une allée de l’épicerie fine que j’ai décidé d’acheter une autre sorte de confiture à la fois sucrée et un peu acide, plutôt que d’essayer de trouver de la confiture de canneberges en ligne; j’ai donc acheté de la confiture de cerises et de framboises. J’avais donc ma tire d’érable, et puis j’ai fait mon propre beurre d’érable avec du sirop rapporté l’été dernier (recette ci-dessous).

Selon la recette d’origine, le rendement est de 18 biscuits assemblés (il s’agit de gâteaux-sandwichs de style « whoopie pie »), donc 36 biscuits cuits en tout, mais je n’en ai eu que 24. Je les ai faits cuire pendant la durée recommandée par la recette, soit 15 minutes, même si en théorie ils étaient un peu plus gros et auraient donc dû cuire plus longtemps. Malheureusement, ils sont sortis du four tout durs, alors que je m’attendais à des biscuits plus mous. De un, ça se mange bien mieux dans un gâteau-sandwich, et de deux, c’est quand même une recette de biscuits moelleux, c’est dans le titre! Je réduis donc le temps de cuisson ci-dessous. Je diminue aussi de moitié la quantité de sucre d’érable et de cannelle (dans lesquels il faut rouler les biscuits avant de les faire cuire), parce qu’il en est resté plus de la moitié et c’est du gaspillage de sucre d’érable (c’est assez cher comme ça, le sucre d’érable). J’ai aussi eu trop de glaçage au fromage à la crème, mais j’en ai utilisé un peu comme glaçage pour des petits gâteaux au chocolat et à la betterave, puisque l’érable et la betterave se marient très bien.
Donc : je ferai les choses différemment la prochaine fois, mais j’ai beaucoup aimé les goûts de ces biscuits-sandwichs, alors je pense que ça vaut la peine de recommencer.
Avec les restes de mon beurre d’érable maison, j’ai fait une autre recette du même dépliant nommée truffes aux amandes et à l’érable, mais je ne l’ai pas aimée, parce que ce ne sont pas des truffes. Une truffe, c’est fait à base de chocolat et ça fond dans la bouche, alors que là, il s’agissait de poudre d’amande mélangée à du beurre d’érable et roulée dans du cacao, donc à mâcher et pas chocolatée… Déception! Mais l’Ingénieur a beaucoup aimé. (Même chose pour ces petites bouchées noix de coco, lime et chocolat – il va falloir que je me résigne, ce n’est pas mon truc, même si ça a l’air bon.)

Pour le beurre d’érable (recettes-types ici et ici)
2 tasses de sirop d’érable (j’utilise du médium ou ambré)
¼ c. à thé huile de canola (facultatif)
1 pincée de sel (facultatif)
Dans une casserole profonde, faire bouillir le sirop d’érable (avec l’huile et le sel) jusqu’à ce que la température atteigne 235 °F.
Transférer immédiatement le sirop dans le bol de votre batteur sur socle, puis mettre le bol dans un bain de glace pour faire refroidir le sirop, sans remuer.
Avec le fouet plat, battre le sirop à vitesse lente jusqu’à ce qu’il devienne opaque, épais et beige pâle. (Cela m’a pris 10 ou 15 minutes, mais il peut falloir plus de temps, voire 30 minutes, surtout si on utilise un mélangeur électrique ou un fouet è la main.)
Transférer le mélange dans un pot en verre et garder au frigo (si le beurre se sépare, le mélanger à la main avant de l’utiliser). Vous obtiendrez environ 1 tasse de beurre d’érable, qui se garde facilement un mois au frigo.

Pour les biscuits
2 tasses de farine tout usage non blanchie
2 c. à thé de poudre à pâte
1 pincée de sel
1 tasse de tire d’érable
½ tasse de beurre ramolli (j’ai pris de la margarine)
1 œuf
1 c. à thé de vanille
¼ tasse de sucre d’érable
1 ½ c. à thé de cannelle
Pour le glaçage au beurre d’érable et la garniture
1 paquet de 250 g de fromage à la crème sans lactose, ramolli
¼ tasse de beurre d’érable
1 pincée de sel fin
1 tasse de confiture de canneberges (½ tasse suffisait pour moi)
Pour les biscuits
Préchauffer le four à 350 °F. Tapisser une tôle à biscuits de papier parchemin.
Tamiser ensemble les ingrédients secs et réserver.
À l’aide d’un batteur électrique, défaire en crème la tire d’érable et le beurre. Ajouter l’œuf et la vanille, puis battre encore 2 min. Ajouter les ingrédients secs et incorporer à la spatule. Réserver.
Dans un bol, mélanger le sucre d’érable avec la cannelle, puis réserver.
Former de petites boules de pâte d’environ 4 cm (1 ½ po). Les rouler dans le mélange de sucre d’érable et de cannelle. Disposer sur la tôle à biscuits et cuire au four pendant 10 min (15 minutes, c’était beaucoup trop). Laisser refroidir sur une grille.


Pour le glaçage et la garniture
À l’aide d’un batteur électrique, défaire en crème le fromage à la crème, le beurre d’érable et le sel.
Tartiner la moitié des biscuits refroidis de confiture de canneberges et l’autre moitié de crème au beurre d’érable. Coller les biscuits ensemble.


Saturday, May 14, 2016
Trempette chaude au fromage et aux épinards
Apparemment que c’est mon 1500e billet. Le 1400e date du mois d’octobre passé. J’ai l’impression qu’il doit y avoir une erreur de calcul là-dedans, mais je ne vais pas me mettre à douter des algorithmes de Google, quand même… Alors bon, il faut une bonne recette pour fêter ça!
Cette recette de Coup de Pouce est tout simplement géniale. En fait, quand on y goûte, ça crée une dépendance et c’est très difficile d’arrêter d’en manger! C’est vraiment excellent, comme au restaurant. J’ai par contre trouvé qu’il y avait un peu trop de fromage sur le dessus, alors je change les proportions ci-dessous pour en mettre davantage dans la trempette elle-même. On a servi ça avec des craquelins aux fines herbes, avec des craquelins nature, avec des bâtonnets de pain… Gâtez-vous!
6 tasses de jeunes feuilles d'épinard
1 tasse de fromage suisse sans lactose râpé
3 c. à soupe de parmesan râpé
½ paquet (soit 4 oz.) de fromage à la crème sans lactose ramolli
½ tasse de mayonnaise
½ tasse de crème sure sans lactose
1 gousse d'ail hachée finement ou râpée
sel et poivre, au goût
Dans une casserole d'eau bouillante salée, cuire les épinards 1 minute ou jusqu'à ce qu'ils aient ramolli. Bien égoutter. Laisser refroidir, puis couper en morceaux.
Dans un bol, mélanger le fromage suisse et le parmesan. Réserver.
Au robot culinaire, réduire les épinards, le fromage à la crème, la mayonnaise, la crème sure et l'ail en une préparation lisse. Saler et poivrer. Incorporer ½ tasse de la préparation de fromages râpés réservée. Verser le mélange dans un plat allant au four d'une capacité de 2 tasses. Parsemer du reste du mélange de fromages râpés. (La trempette se conservera jusqu'au lendemain au réfrigérateur. Ajouter alors 10 minutes au temps de cuisson.)
Cuire au four préchauffé à 400 °F pendant 20 minutes ou jusqu'à ce que le fromage soit doré et que la préparation soit bouillonnante. Servir chaud ou tiède.

Cette recette de Coup de Pouce est tout simplement géniale. En fait, quand on y goûte, ça crée une dépendance et c’est très difficile d’arrêter d’en manger! C’est vraiment excellent, comme au restaurant. J’ai par contre trouvé qu’il y avait un peu trop de fromage sur le dessus, alors je change les proportions ci-dessous pour en mettre davantage dans la trempette elle-même. On a servi ça avec des craquelins aux fines herbes, avec des craquelins nature, avec des bâtonnets de pain… Gâtez-vous!
6 tasses de jeunes feuilles d'épinard
1 tasse de fromage suisse sans lactose râpé
3 c. à soupe de parmesan râpé
½ paquet (soit 4 oz.) de fromage à la crème sans lactose ramolli
½ tasse de mayonnaise
½ tasse de crème sure sans lactose
1 gousse d'ail hachée finement ou râpée
sel et poivre, au goût
Dans une casserole d'eau bouillante salée, cuire les épinards 1 minute ou jusqu'à ce qu'ils aient ramolli. Bien égoutter. Laisser refroidir, puis couper en morceaux.
Dans un bol, mélanger le fromage suisse et le parmesan. Réserver.
Au robot culinaire, réduire les épinards, le fromage à la crème, la mayonnaise, la crème sure et l'ail en une préparation lisse. Saler et poivrer. Incorporer ½ tasse de la préparation de fromages râpés réservée. Verser le mélange dans un plat allant au four d'une capacité de 2 tasses. Parsemer du reste du mélange de fromages râpés. (La trempette se conservera jusqu'au lendemain au réfrigérateur. Ajouter alors 10 minutes au temps de cuisson.)
Cuire au four préchauffé à 400 °F pendant 20 minutes ou jusqu'à ce que le fromage soit doré et que la préparation soit bouillonnante. Servir chaud ou tiède.

Friday, May 13, 2016
Chocolate Cupcakes with Beet and Kale
I made these chocolate cupcakes with beet and kale a long time ago – according to my picture files, it was Valentine’s Day. The reason I didn’t post about them is because I made them with a tofu frosting. There are many recipes out there, but the one I was trying out was a silken tofu whipped topping, and I ended up making it three different times because it kept failing and I wanted to get it right. And this was more complicated than it sounds. The first time, I made it with leftover soft tofu that I was trying to use up (which I thought worked out well, since I was making these cupcakes to use up leftover kale in the first place). The result was basically liquid, though, and the recipe does call for extra-firm tofu. So I tried it again with extra-firm tofu, but it was an abject failure as well. Then, looking at the name of the recipe, I figured I needed to buy extra-firm silken tofu – it can be hard to find in stores, but it’s easy to buy online, and since the packaging is shelf-stable, it’s pretty much indestructible. But it was still a failure, so at that point, just forget it – three strikes and you’re out. As you can see from the pictures, it was still very liquid (even without adding any soy milk), and it didn’t even taste good.


Back to the cupcakes themselves. The yield was supposed to be 16 cupcakes, but I got a whopping 30 cupcakes, which I actually had to bake longer than what the recipe said. The most obvious explanation is that I had too much beet purée. The recipe only called for “2 medium beets”, without giving a weight, so that’s the kind of thing that was bound to happen! That being said, even though I could taste the beets, it really wasn’t an unpleasant taste, especially with the chocolate. I couldn’t taste the kale at all. The cupcakes had a nice dome when they came out of the oven, but then they deflated and were very moist and not too sweet. So I actually like these cupcakes, even though they didn’t come out as expected! I liked them plain and I’d consider a vanilla buttercream-type of frosting. They keep well in the freezer.
2 medium beets, greens and stems removed (see note above)
¼ cup water
1 cup cooked kale (I admit I had a bit less)
2 cups all-purpose flour
2/3 cup unsweetened cocoa powder
1 tsp. baking soda
½ tsp. baking powder
1 pinch of salt
¾ cup unsweetened applesauce
1 cup brown sugar
½ cup honey
1 tsp. vanilla extract
2 eggs, room temperature
1 ½ cups skim milk (I used almond milk)
your choice of frosting (optional)
Preheat oven to 375 °F. Place beets in a baking dish and roast for an hour, or until you can pierce with a knife of fork. Reduce heat in oven to 350 °F. Line a muffin tin with liners or grease with nonstick cooking spray (see note above – I used 2 standard muffin pans, which I had to switch out halfway through baking, and I made 4 more cupcakes after that).
Once beets have slightly cooled, peel the skins off. Cut into chunks and place in a blender or food processor. Add water and kale and blend until fully pureéd. Set aside.
In a small bowl, whisk the flour, cocoa powder, baking soda, baking powder and salt. Set aside.
In a large mixing bowl, beat the applesauce, sugar and honey together until mixed. Add eggs and vanilla and beat. Once mixed, add the beet and kale purée and stir with a wooden spoon to combine.
Add ½ of the dry mixture to the beet mixture and stir to mix. Add 1 cup of milk and mix. Add ¼ more dry mixture and stir. Add remaining milk and mix. Add the remaining dry mixture and stir to combine, careful not to overmix.
Fill the muffin cavities about 2/3 to 3/4 of the way full with batter. Bake for about 18 minutes, or until a toothpick inserted comes out clean (it took over 20 minutes for me). Let cool completely. Once cooled, frost with your favorite frosting and garnish with chocolate shavings, if desired.


Back to the cupcakes themselves. The yield was supposed to be 16 cupcakes, but I got a whopping 30 cupcakes, which I actually had to bake longer than what the recipe said. The most obvious explanation is that I had too much beet purée. The recipe only called for “2 medium beets”, without giving a weight, so that’s the kind of thing that was bound to happen! That being said, even though I could taste the beets, it really wasn’t an unpleasant taste, especially with the chocolate. I couldn’t taste the kale at all. The cupcakes had a nice dome when they came out of the oven, but then they deflated and were very moist and not too sweet. So I actually like these cupcakes, even though they didn’t come out as expected! I liked them plain and I’d consider a vanilla buttercream-type of frosting. They keep well in the freezer.
2 medium beets, greens and stems removed (see note above)
¼ cup water
1 cup cooked kale (I admit I had a bit less)
2 cups all-purpose flour
2/3 cup unsweetened cocoa powder
1 tsp. baking soda
½ tsp. baking powder
1 pinch of salt
¾ cup unsweetened applesauce
1 cup brown sugar
½ cup honey
1 tsp. vanilla extract
2 eggs, room temperature
1 ½ cups skim milk (I used almond milk)
your choice of frosting (optional)
Preheat oven to 375 °F. Place beets in a baking dish and roast for an hour, or until you can pierce with a knife of fork. Reduce heat in oven to 350 °F. Line a muffin tin with liners or grease with nonstick cooking spray (see note above – I used 2 standard muffin pans, which I had to switch out halfway through baking, and I made 4 more cupcakes after that).
Once beets have slightly cooled, peel the skins off. Cut into chunks and place in a blender or food processor. Add water and kale and blend until fully pureéd. Set aside.
In a small bowl, whisk the flour, cocoa powder, baking soda, baking powder and salt. Set aside.
In a large mixing bowl, beat the applesauce, sugar and honey together until mixed. Add eggs and vanilla and beat. Once mixed, add the beet and kale purée and stir with a wooden spoon to combine.
Add ½ of the dry mixture to the beet mixture and stir to mix. Add 1 cup of milk and mix. Add ¼ more dry mixture and stir. Add remaining milk and mix. Add the remaining dry mixture and stir to combine, careful not to overmix.
Fill the muffin cavities about 2/3 to 3/4 of the way full with batter. Bake for about 18 minutes, or until a toothpick inserted comes out clean (it took over 20 minutes for me). Let cool completely. Once cooled, frost with your favorite frosting and garnish with chocolate shavings, if desired.


Subscribe to:
Posts (Atom)