Monday, May 25, 2015

Mini Bacon and Cheese Quinoa Cups

I was looking for a quick and nutritious lunch that the Little Prince would eat, and these quinoa cups fit the bill perfectly! I had 2 ounces of bacon left in the fridge, so I used that instead of ham. I also used a bit more zucchini and cheddar than called for, so I added an egg and made a bigger batch – I ended up with 24 mini cups and 5 muffin-sized cups that I baked longer. I loved the result and the Little Prince ate it with gusto most of the time. These would be highly adaptable and I’m thinking of using this recipe as a blueprint for turning leftovers into lunch. Note that these freeze well, too.

2 cups cooked quinoa (about ¾ cup uncooked)
2 eggs
2 egg whites
1 cup zucchini, shredded
1 cup shredded extra-sharp cheddar cheese
½ cup diced ham (I used 2 oz. bacon)
¼ cup parsley, chopped
2 Tbsp. parmesan cheese
2 green onions, sliced
salt & pepper

Preheat oven to 350 °F. Liberally spray a mini muffin tin with non-stick spray.

Combine all ingredients in a large bowl and mix to combine. Spoon mixture to the prepared tin. Bake for 15-20 minutes, or until the edges of the cups are golden brown. Let cool for at least 5 minutes before removing from the mini muffin tin. (If using a regular muffin tin, bake for 25-30 minutes.)

Sunday, May 24, 2015

Sweet Potato and Apricot Cake


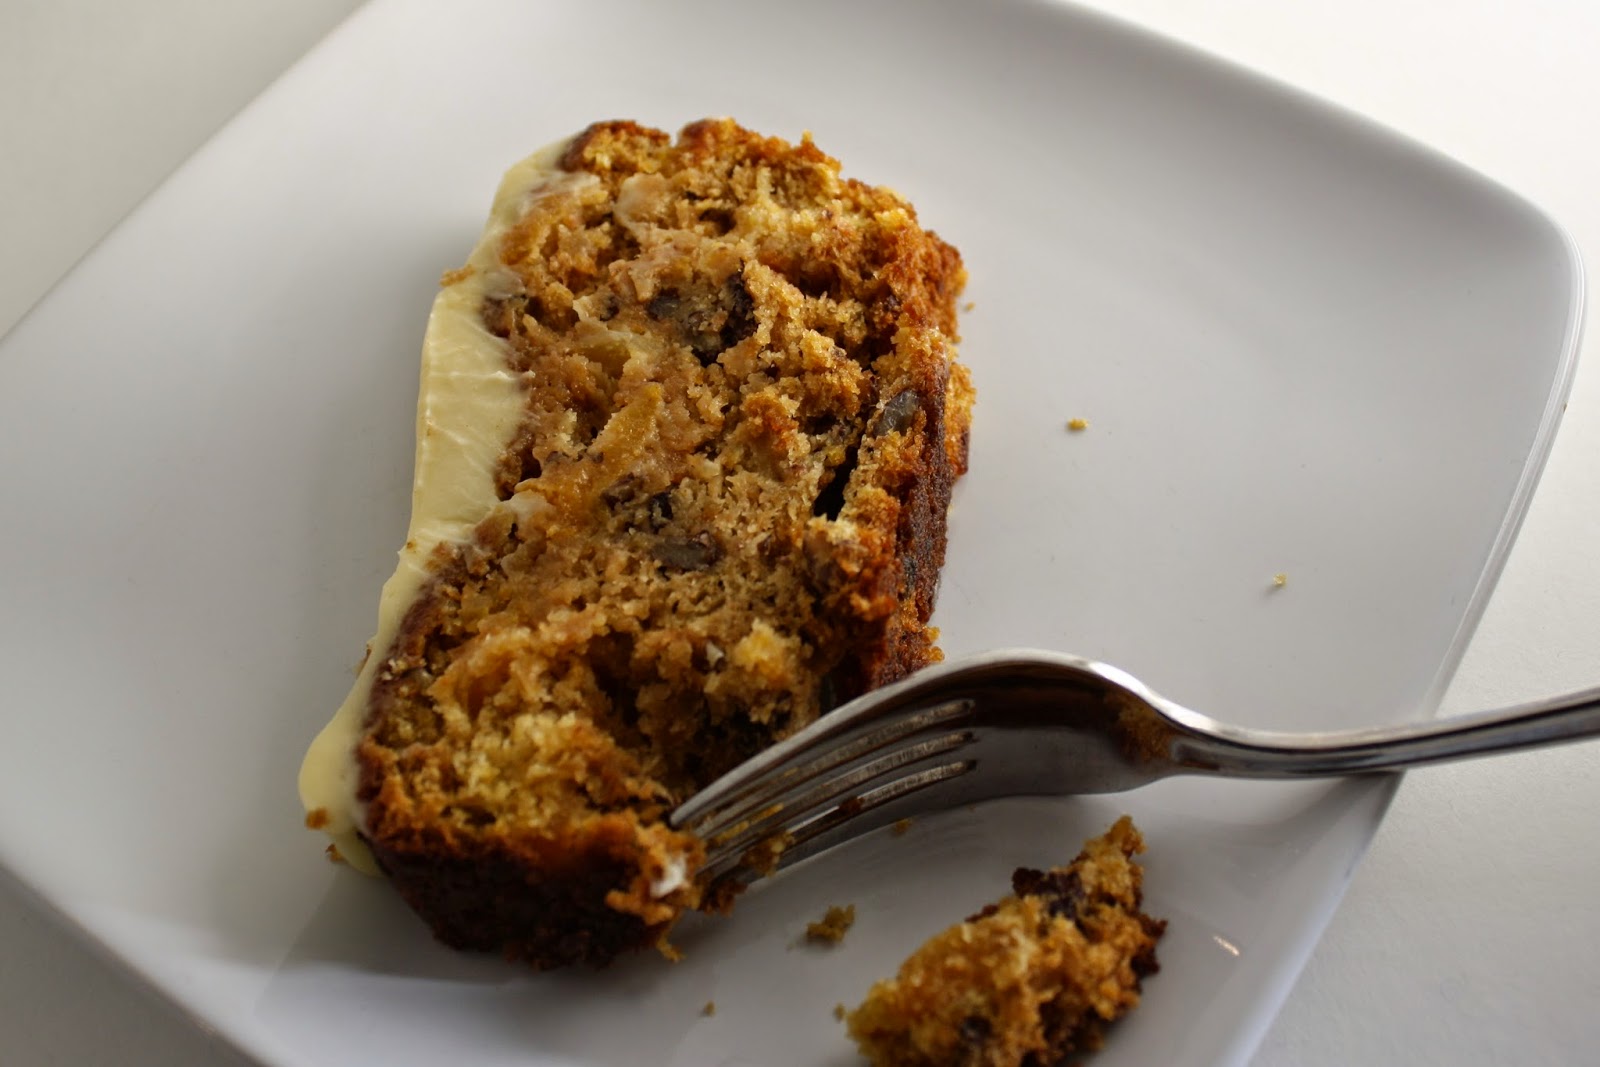
This loaf cake was just what the doctor ordered! I found the recipe on David Lebovitz’s blog, though he says it is adapted from a recipe by Alice Medrich. It helped us empty the pantry a bit by using up dried apricots and pecans (I’d say the latter are optional, but I didn’t mind them in this cake whereas I normally don’t like cakes with nuts, so it’s up to you). It allowed me to have some cream cheese frosting, now that Green Valley Organics make a lactose-free version. It was really good and not too sweet, which I liked. The cake itself was relatively nutritious, thanks to the sweet potato, which also served to keep the cake moist. I used all-purpose white flour for this (instead of the white whole wheat flour I normally use), because I figured there was enough fiber in this already and I didn’t want to make it heavier than necessary. It was pleasantly dense as it was. I also adapted it a bit, using apple juice instead of vermouth and baking it in a 9”x5” loaf pan instead of two 8”x4” pans – my version is below. Of course, the frosting is optional, but without it, I’d say this would be more of a breakfast item than a dessert.

For the cake
2/3 cup (4 oz./115 g.) finely-diced dried apricots
½ cup apple juice (or white vermouth)
2 cups (8 oz./225 g.) sifted all-purpose flour
¾ tsp. salt
1 tsp. baking soda
¼ tsp. baking powder
6 Tbsp. unsalted butter, cubed, at room temperature (I used cold margarine)
1 cup (200 g.) granulated sugar
½ cup (90 g.) packed light or dark brown sugar
zest of 1 lemon
1 large egg and 1 large egg white, at room temperature (I used 2 eggs)
1 cup (240 g.) sweet potato purée (I roasted a sweet potato at 425 °F for 1 hour)
1 cup (125 g.) toasted nuts (almonds, walnuts, pecans), coarsely chopped (optional)

For the cream cheese frosting
4 oz. (115 g.) lactose-free cream cheese, room temperature
2 Tbsp. (30 g.) unsalted butter or margarine, cubed, at room temperature
¼ tsp. vanilla extract
6 Tbsp. (52 g.) powdered sugar

To make the cake, marinate the apricot pieces in apple juice for at least 30 minutes. Drain, pressing the apricots gently to extract all the liquid. Reserve the liquid.

Preheat oven to 350 °F. Grease and flour a 9”x5” loaf pan. (The original recipe only said to grease the pan, but some of my cake stuck to it, so I would definitely flour it as well next time.)

In a medium bowl, whisk together the flour, salt, baking soda, and baking powder.

In the bowl of a stand mixer fitted with the paddle attachment, or in a large mixing bowl using a flexible spatula or spoon, cream the butter with the granulated and brown sugars, and lemon zest, until smooth and fluffy. Add the egg and the egg white and combine thoroughly. If using a stand mixer, stop the mixer and scrape down the side to make sure everything is incorporated. (The mixture may look curdled, which is fine.)

Mix in half of the flour mixture, then the drained vermouth and sweet potato purée, then the rest of the dry ingredients. Stir in the nuts (if using) and apricots.

Pour the batter into the prepared pan, smooth the top, and bake about 45 to 55 minutes, until a toothpick inserted into the center comes out clean. Remove from oven and cool completely.

Once cool, make the cream cheese frosting by beating the cream cheese with the butter and vanilla. Add the powdered sugar, mixing until smooth and lump free.

Run a knife around the outside of the cake and slip it out of the mold. Spread the cream cheese frosting on top with a knife or spatula. I kept the cake at room temperature for a few hours, then refrigerated it for a few days.

Tuesday, May 19, 2015

Strawberry and Honey Sorbet


Since I still had about 2 cups of strawberries to use, I decided to make a frozen dessert. I was leaning towards David Lebovitz’s vegan strawberry ice cream, but upon reading the recipe again, I realized that it would probably be hard as a rock. I thought that the liquid-to-fat ration would be too high, since he uses rice milk. So I ended up making this sorbet from The Kitchn: the use of honey instead of sugar keeps the sorbet softer in the freezer, and the addition of vodka helps, too, by lowering the freezing point. I’d heard about that trick and had always been afraid that I would taste it, but it was only 1 tablespoon here and I would never have guessed. I’ll be making this one again! The texture was fantastic, including after several days in the freezer. And it’s delicious, too!

(Note that I actually ran out of honey for this and I didn’t have agave nectar that day, so I used some maple syrup. I used more than ¼ cup total because my strawberries were actually pretty tart.)

1 pint (16 oz.) strawberries, hulled and quartered
¼ cup honey (if you are vegan, use agave nectar or maple syrup)
1 Tbsp. vodka (or flavored liqueur of choice), optional
juice from one lemon

Place the strawberries in a blender or food processor and purée until very smooth. Push the purée through a fine mesh sieve to remove some of the seeds. Whisk in the honey, vodka, and lemon juice. (This should be on the sweet side since freezing will dull the flavor.) Cover and chill the mixture.

Once the strawberry mixture is completely chilled, pour into the ice cream maker and freeze according to manufacturer's instructions. Return the sorbet to the freezer for a couple more hours to continue firming up.

Grain Salad with Mango and Creamy Avocado Dressing

This is one of those dishes that is greater than the sum of its parts. I was all the more surprised since I wasn’t actually expecting anything great. I made this for a few lunches one week, but I usually put more effort into dinner. But dinners had disappointed me (putting ginger in tomato-butter sauce is good, not great, and it turns out I’m not crazy about chicken khao soi). And Momofuku’s ginger-scallion noodles with tofu were good, but less than photogenic.


So now I thought I was just slapping a few things together for lunch, changing ingredients according to what I had on hand, and this salad blew me away. It was creamy and so satisfying! Even the dressing is made with avocado, it keeps really well for a few days (though I liked this dish better at room temperature than cold). The Little Prince even liked it once he decided to taste it (though that was only on one of the three days I served it).

For the dressing
1 ripe avocado, pitted and peeled
3 Tbsp. extra-virgin olive oil
2 Tbsp. lemon juice
1 tsp. sherry vinegar
1 tsp. kosher salt
freshly ground black pepper
¼ cup lactose-free Greek yogurt

For the salad
1 ½ cups raw einkorn (I used ¾ cup barley because that’s all I had; avoid “light” grains like quinoa)
¾ cup pepitas
1 cup sunflower sprouts or radish sprouts (I omitted them, but they would have been nice)
¾ cup chopped cilantro
¼ cup chopped flat-leaf parsley
2 ripe medium mangos, peeled and cut into ½-inch dice
½ tsp. kosher salt
1 avocado, diced (optional)

For the dressing
In the bowl of a food processor, combine the avocado, olive oil, lemon juice, vinegar, salt and a few grinds of pepper. Process until smooth. Add the yogurt at the end and process until combined. Taste and season with additional salt and pepper if desired.

For the salad
In a medium saucepan over medium-high heat, bring 3 cups of water to a boil. Then add 1 ½ cups einkorn and reduce heat to low. Simmer on low for 30-35 minutes, or until the grains have absorbed the water. Set aside to cool.

Meanwhile, preheat the oven to 350 °F and toast the pepitas until fragrant, about 5-7 minutes. Set aside to cool. (I prefer to do this in a dry pan.)

In a large salad bowl, combine the cooked and cooled grains, ½ cup of toasted pepitas, ¾ cups sprouts, cilantro, parsley, mango and salt. Fold in the avocado dressing and stir to combine. Top with remaining ¼ cup toasted pepitas and sprouts, as well as additional avocado if you'd like. Serve immediately. Store leftovers in an airtight container for up to 3 days. (I cut the avocado only before serving the salad, but the avocado dressing was fine mixed in and refrigerated for 3 days.)

Saturday, May 16, 2015

On the virtues of prepared carrots

I’ve been taking a few shortcuts in the kitchen lately, and I really like it. I decided that I didn’t want to spend time julienning carrots, even with the food processor, so I’ve been buying bags of prepared julienned carrots. This has been a lifesaver to get a quick, nutritious side dish on our plates when I was low on inspiration. (One might also consider a bag of prepared cauliflower florets when making a savory cauliflower cake, or simply for roasting.)

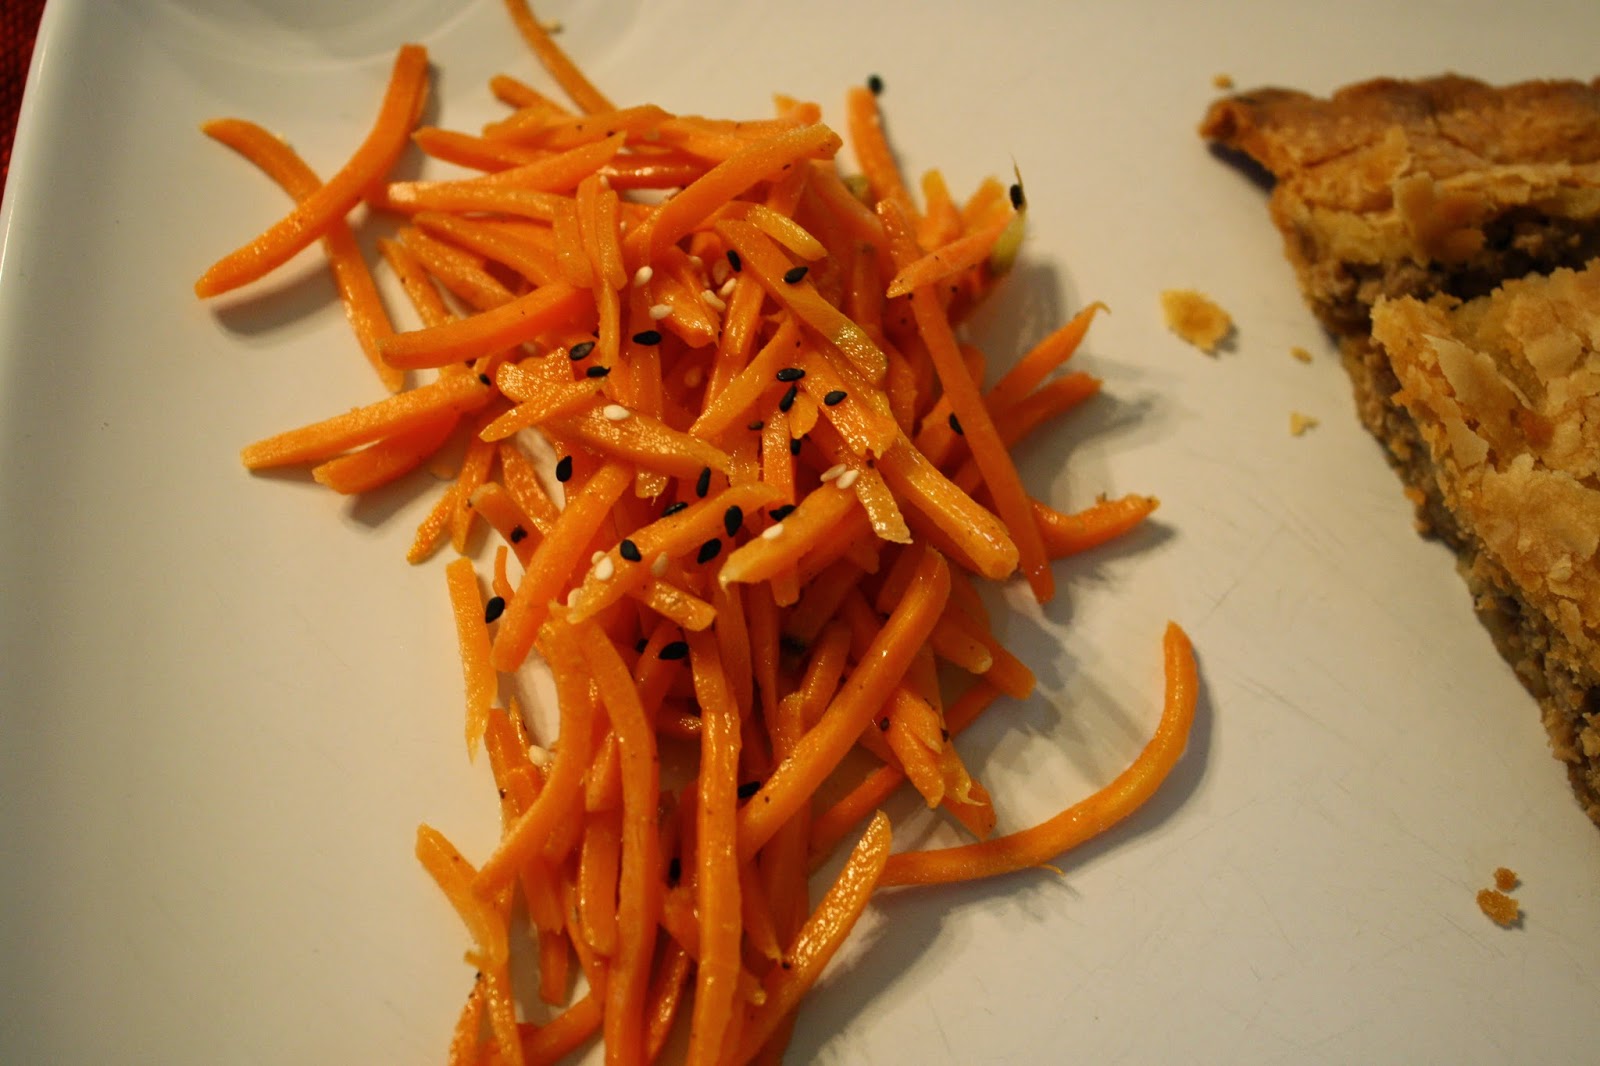
I made this Bon Appétit recipe for sesame carrots that I really liked. Essentially, you cook the julienned carrots in a pan for a few minutes using sesame oil, then season with kosher salt and freshly ground black pepper. Stupid-easy, and oh-so-good. I served this one with a tourtière that I had in the freezer.


I also made this recipe from The Kitchn for a carrot tahini salad with roasted spiced chickpeas. Not only was this delicious, but it kept really well (provided that the roasted chickpeas are stored separately in an air-tight container). I think it would be easy to adapt to what I have on hand, too, so I’ll keep this recipe handy. I served it here with quiche with quinoa crust.

For the roasted spiced chickpeas
1 (15-oz.) can chickpeas or 1 ½ cups cooked chickpeas, rinsed, drained, and patted dry
1 Tbsp. olive oil
¼ tsp. ground cumin
1/8 tsp. ground cinnamon
1/8 tsp. ground cayenne pepper
pinch of salt and pepper

For the dressing
1 clove garlic, minced or grated
¼ cup tahini
¼ cup lemon juice
2 Tbsp. olive oil
1 tsp. honey
1/8 tsp. ground cayenne (I used Korean pepper)
½ tsp. salt
2 Tbsp. minced parsley
water to thin if necessary

For the salad
3 cups shredded carrots (from 3 to 4 medium-sized carrots)
½ small red onion, finely diced
½ cup raisins
1 cup fresh parsley, minced
salt and pepper to taste

Preheat the oven to 425 °F. Toss the chickpeas with the oil, spices, salt, and pepper. Place on a prepared baking sheet and roast in the oven until lightly browned and crisp, 15 to 20 minutes. Shake the pan several times throughout baking. Remove from the oven and allow to cool. (You might even leave them in a bit longer than 20 minutes if you want them really crunchy.)

Combine all the ingredients for the dressing in a mixing bowl and whisk until smooth. (You can do this either by hand or with an immersion blender. Personally, I like doing this in a jar with a lid.) Add water if the dressing is too thick. Taste and adjust seasonings if need be.

In a large salad bowl, toss the shredded carrots, onion, raisins, and parsley with the dressing. Mix well. Season with a little salt and pepper. Right before serving, top with the chickpeas and enjoy.

Pumpkin Cupcakes with Maple Cinnamon Frosting


I made these cupcakes to use up some pumpkin purée I had left in the freezer. I liked them, but I have to admit that my first impression was an overload of cinnamon. I’d definitely use less next time, because it was competing with the pumpkin and maple flavors, so I changed the amounts below. That being said, I kept the cupcakes in the fridge, and they really got tastier over time, as the flavors had a chance to meld. I also love that I had a vegan frosting, though I admit I wish there had been less sugar in it. The original recipe was for 18 cupcakes, and I got 16.

For the pumpkin cupcakes
1 ½ cups all-purpose flour
1 tsp. baking powder
½ tsp. baking soda
¼ tsp. salt
½ tsp. ground cinnamon
½ tsp. ground ginger
¼ tsp. ground cloves
¼ tsp. ground nutmeg
½ cup butter, at room temperature (I used cold margarine)
½ cup granulated sugar
½ cup brown sugar
2 large eggs
¾ cup pumpkin purée
1 tsp. vanilla extract
½ cup buttermilk (i.e., lactose-free milk with a splash of lemon juice)

Preheat oven to 350 °F. Line 18 muffin cups with paper liners. (It turned out 16 was enough for me.)

In a medium bowl, whisk together flour, baking powder, baking soda, salt, cinnamon, ginger, cloves and nutmeg.

In a large bowl, cream together butter and sugars until light and fluffy. Beat in eggs, one at a time, followed by pumpkin purée and vanilla extract. Stir in half of the flour mixture, followed by the buttermilk. Stir in remaining flour mixture and mix just until no streaks of dry ingredients remain.

Divide batter evenly into 18 muffin cups, filling each about ¾ full (if you only have a 12 cup muffin pan, reserve the leftover batter and refill the pan once it has cooled to bake the remaining 6 cupcakes).
Bake for 18-20 minutes, or until a toothpick inserted into the center of the cake comes out clean. Turn out onto a wire rack to cool completely.

For the maple cinnamon frosting
1 cup margarine, at room temperature
¼ cup pure maple syrup (preferably medium or amber)
½ tsp. ground cinnamon (optional)
¼ tsp. salt
1 tsp. vanilla extract
2 ½ to 3 ½ cups confectioners’ sugar
1 Tbsp. lactose-free milk, if needed

In a large bowl, beat margarine to soften. Blend in maple syrup, cinnamon, salt, and vanilla. Gradually blend in the confectioner’s sugar until frosting has a thick, spreadable consistency. (In my case, I used a scant 2 ½ cups of sugar and no milk at all; it was still a bit soft for my liking, so I would have needed more sugar, but this was so sweet already!) Spread or pipe onto cooled cupcakes.

Another shepherd's pie

I finally got around to trying the shepherd’s pie that I had meant to make last fall. (I had accidently made the one from America’s Test Kitchen when I actually meant to make the one from Cook’s Country). It took a while because I made a detour via The Kind Life for a vegan version of a shepherd’s pie with a crust. (And I would have made the one from Minimalist Baker, too, if it weren’t for the fact that the men of the house are tired of lentils – I’ll save it for next winter.) The vegan crusted version didn’t work, though, because the filling was way too liquid (even after I thickened it with cornstarch AND strained it); it might have worked without a crust, but as it was, I expected a pie that holds together more. The leftovers were more solid, but I still don’t think I’d make it again.


The Cook’s Country version, though, is fantastic. It’s really everything you could want from a shepherd’s pie, to the point where I’ll have trouble going back to blander pâté chinois! Neither the Engineer nor I drink beer, so the beer for this recipe was chosen strictly based on its label, but I must say it worked well. The recipe calls for spreading beaten egg on the topping, to ensure its firmness. Personally, I’d say that’s a bit overrated and I probably wouldn’t bother with it next time, so I’m marking it as optional. I also used soy creamer instead of cream, but if I had access to lactose-free cream, I’d probably go for that. I’ll be sure to make this again – come to think of it, it would be a good dish to make when I have people over for dinner.


For the filling
2 Tbsp. unsalted butter or margarine
1 large onion, finely chopped
2 medium carrots, peeled and finely chopped
2 lbs. 85% lean ground beef
salt and pepper
5 Tbsp. all-purpose flour
1 Tbsp. tomato paste
¼ cup soy creamer
1 ¾ cups low-sodium chicken broth
¾ cup beer (non-alcoholic is fine; ours was a dark beer)
2 Tbsp. soy sauce
2 tsp. minced fresh thyme leaves
1 cup frozen peas

For the topping
2 ½ lbs. russet potatoes, peeled and cut into 2” pieces
table salt
2 Tbsp. unsalted butter or margarine, melted
1/3 cup soy creamer, warmed
ground black pepper
1 large egg, beaten (optional)

For the filling
Heat butter in large skillet over medium-high heat until foaming. Add onion and carrots and cook until soft, about 8 minutes. Add meat, ½ teaspoon salt, and ½ teaspoon pepper and cook, breaking up meat into small pieces with wooden spoon, until browned, about 12 minutes. Add flour and tomato paste and cook until paste begins to darken, about 1 minute.

Add creamer and cook until it spatters, about 1 minute. Add broth, beer, soy sauce, and thyme and simmer over medium heat, stirring frequently, until mixture is thick but still saucy, 15 to 20 minutes. (The mixture can be prepared ahead up to this point and refrigerated until needed.) Remove from heat, stir in peas, adjust seasonings, and transfer to broiler-safe 2-quart casserole dish.

For the topping
Adjust oven rack to upper-middle position and heat oven to 375 °F. Bring potatoes, ½ teaspoon salt, and water to cover to boil in large saucepan over high heat. Reduce heat to medium-low and simmer until tender, 15 to 20 minutes. Drain potatoes, return to saucepan, and mash potatoes with butter and creamer until smooth. Season with salt and pepper.

Spread potatoes over filling, using spatula to smooth top and sealing it against the edges. (This helps prevent liquid from bubbling up and overflowing, though personally I feel like this isn’t usually a problem. Then again, I always set the pan on a baking sheet before putting it in the oven.) Brush with egg, if using, and drag fork across top to make ridges. Bake until filling is bubbling, about 15 minutes. Turn on broiler and cook until top is golden brown, 3 to 5 minutes. Remove from oven and cool 10 minutes. Serve.

Thursday, May 14, 2015

Coconut Sorbet with Strawberry Rhubarb Sauce


I’ve had more bad luck with desserts since the chocolate hazelnut cake. I tried a vanilla chia seed pudding that was inoffensive at best – it would have been better as a vehicle to show off fruit or sauce rather than a stand-alone dessert. I made one last recipe from 100 recettes pour toi mon cœur (which I talked about here, among other places). Or at least, it’s probably the last, because even though I’ve still got one bookmarked, the nine I made so far were less than stellar. After reading this article (in French), I’m coming away with the impression that my initial assessment was correct and that some of the chefs simply made these up on the fly, were forced to make substitutions and didn’t bother testing all of them. The dessert I had tried this time was blueberry and pistachio crêpes with ramekins of chocolate pudding: the crêpes were a complete flop if made as instructed (with the topping added in the pan), the chocolate pudding was lackluster, and the servings were just too big. None of it was make-again-good.


Then, I bought a half-flat of strawberries at the Poteet Strawberry Festival. I started by making a low-sugar strawberry pie with oats in the crust and apple juice concentrate as a sweetener. I had been looking forward to that recipe for a long time, and I knew I needed fresh strawberries in season to make it, so this was the perfect occasion. Unfortunately, that pie was a complete failure. The dough was hell to work with and not even very good (despite the oats), and the filling never gelled like it should have. This used up half my strawberries, and I froze the rest.


But then, then, there was this strawberry sauce. I didn’t want to use up all my remaining strawberries, so I only used 2 cups. Since they were actually pretty tart, I left all other quantities the same, including sugar. It was the Best. Thing. Ever. (The word I wrote down for it at the time was “fanta-bulous.”) It tasted like spring, and the sorbet was almost an afterthought in that dish. I did, however, run out of strawberry sauce long before I ran out of sorbet, so I can attest to the fact that this sorbet is actually great on its own, even after a few weeks in the freezer – it gets hard, but not rock-hard; I don’t even have to let it thaw before I can scoop it out. It’s also fantastic with chocolate sauce. As for the pistachios, they look great, but I preferred to omit them in later servings. The recipe is from Sara Forte’s new cookbook, but I found it via Not Without Salt.

For the sorbet
3 cups coconut milk (2 13-oz. cans), divided
2/3 cup natural cane sugar
1 Tbsp. brown rice syrup
1 pinch of sea salt
½ tsp. pure vanilla extract
1 ½ Tbsp. cornstarch

For the sauce
4 cups chopped ripe strawberries (I only used 2 cups)
¾ cup diced rhubarb
1 pinch of salt
¼ cup natural cane sugar
½ Tbsp. grated fresh ginger (optional; it sounded good, but I omitted it)
½ cup pistachios, finely chopped

In a medium pot, warm 2 cups of the coconut milk, the sugar, brown rice syrup, and a pinch of salt. Simmer, stirring occasionally over medium heat until the sugar is dissolved.

In a large bowl, add the remaining cup of coconut milk and stir in the vanilla and cornstarch to dissolve. Slowly stir the warm coconut milk into the coconut-cornstarch mixture. Set the bowl in the fridge to cool completely. Once cooled, churn the mixture in your ice cream maker according to the manufacturer’s instructions. Leave the mixture to set fully in the freezer. (At this point, it had an awesome soft-serve consistency.)

For the sauce, in a heavy saucepan over medium low heat, combine the strawberries, rhubarb, a pinch of salt, and the sugar. Leave everything to very gently simmer for about 20 minutes. Give it a stir and barely simmer again, stirring occasionally, for 10 minutes longer. You will have chunks of fruit between a loose liquid; this will set more as it cools to become a thicker sauce. Add the ginger (if using) and allow the mixture to cool, uncovered, to room temperature. The sauce can be kept, covered, in the fridge for 1 week.

Serve the sundaes with a puddle of the sauce, a few scoops of sorbet, another drizzle of sauce, and pistachios on top.

Sunday, May 10, 2015

Baked Southwestern Eggrolls with Guacamole

I made these baked southwestern eggrolls with guacamole not too long ago and never got around to posting about them. They were very easy to make, and a great way to sneak spinach in our diet. They were also delicious! The Engineer called the meal “inventive,” though I’d like to point out that he meant it as a compliment. The Little Prince was not impressed at first (poor kid dislikes beans, corn and avocados), but he came around on the second day and actually started eating most of the rolls, leaving the black beans on his tray. We liked the rolls as they were, though I wouldn’t hesitate to swap some of the spinach for chopped red bell pepper and perhaps increase the amount of cheese a bit. I got 22 rolls from this recipe; they might have come out more golden if I had brushed them with olive oil instead of spraying them.


I realize that I haven’t posted my “new” go-to guacamole recipe, which I started making a year ago. I found it on this website, where it was presented as a copy-cat recipe for Chipotle’s guacamole. This is somewhat timely, as Chipotle revealed its actual recipe just recently. But it’s not quite the same as the one I was making, and to tell you the truth, as much as I like Chipotle’s guacamole, I’ll keep making it my way at home. The main difference is that the recipe I use calls for both lemon juice and lime juice, for both acidity and flavor. I omit the jalapeño in my version, below. Note that I tend to eyeball the amounts and course-correct after tasting it.


For the baked southwestern eggrolls
2 cups frozen corn, thawed
1 can (15oz.) black beans, rinsed and drained
1 package (10 oz.) frozen chopped spinach, thawed and squeezed dry
1½ cup shredded lactose-free cheese (I used extra-sharp cheddar, but vegan cheese would work, too)
4 green onions, chopped
¼ cup chopped cilantro
1 tsp. ground cumin
½ tsp. chili powder
1 tsp. salt
½ tsp. pepper
¼ tsp. cayenne red pepper (I used Korean pepper)
1 package (21) egg roll wrappers, thawed (mine had more wrappers)

Preheat the oven to 425 °F.

In a large bowl, combine everything but the egg roll wrappers. Place about ¼ cup of the mixture in the center of one egg roll wrapper. Fold bottom corner over filling. Fold sides toward center over filling and continue to roll tightly to seal (see directions on egg roll wrapper if necessary). Dip your finger in a small bowl of water and moisten the remaining corner, then press it down to seal the roll. Repeat.

Place seam-side down on a baking sheet coated with cooking spray. Brush tops of egg rolls lightly with olive oil. Bake for 10-15 minutes until lightly brown, turning them halfway through baking.

Serve warm, ideally with guacamole (and hot sauce or salsa if you wish).

For the guacamole
3 ripe avocados
½ cup finely chopped red onion
½ cup chopped cilantro
1 ½ Tbsp. lemon juice
1 ½ tsp. lime juice
¼ tsp. kosher salt

Mix all the ingredients, mashing the avocado enough that only some chunky pieces remain. Taste and adjust seasonings accordingly.

Monday, April 20, 2015

Cheesemonger's Mac & Cheese


This is the last mac and cheese recipe for a while, I promise. That’s what happens when you try to find your go-to recipe – a lot of testing various things to see how you like them. The basics of mac and cheese are to make a roux, add milk, add grated cheese and mix until it forms a sauce, then mix with cooked pasta. For a stovetop version, serve immediately; for a baked version, put it in a baking dish, top with cheese and/or breadcrumbs, bake and serve. And yet there are so many variations it’s mind-boggling! This one if from Bon Appétit. It was delicious, though I must confess I forgot to top it with the reserved cheese – I’m sure it would have been even better then! The main caveat here is that it calls for a lot of brie, and if you get the quality stuff, you can expect to spend $20 on brie alone. So it’s not an everyday dish, sadly. That being said, it wasn’t bland like many versions can be – the pungent brie was toned down a bit, but still made everything taste delicious, and it went really well with the sharp cheddar and gruyère. Note that I didn’t have ramequins the right size, so I made the whole thing in a 9”x13” dish and it worked well.

1 ½ cups coarsely grated lactose-free gruyère cheese
1 ½ cups coarsely grated lactose-free sharp cheddar cheese
1 ½ cups diced rindless Brie (cut from a 1-lb. wedge)
5 Tbsp. butter or margarine, divided
¼ cup all-purpose flour
2 tsp. chopped fresh thyme leaves
¾ tsp. (scant) nutmeg
4 cups lactose-free whole milk
1 ¾ cups fresh breadcrumbs made from crustless French bread
1 lb. penne pasta (or short pasta of your choice)

Cook pasta in boiling salted water until tender but firm to bite. Drain when ready.

Meanwhile, mix all cheeses. Set aside 1 cup for topping; cover and chill. (Do your best not to forget that cup in the fridge…)

Melt 4 tablespoons butter in large saucepan over medium heat. Add flour and stir until mixture turns golden brown, about 4 minutes. Add thyme and nutmeg. Gradually whisk in milk. Simmer until thickened and smooth, stirring often, about 4 minutes. Add cheeses from large bowl. Stir until melted and smooth.

Melt remaining 1 tablespoon butter in heavy large skillet over medium-high heat. Add breadcrumbs; toss. Stir until golden, about 2 minutes. Transfer to plate.

Preheat oven to 375 °F.

Transfer the drained pasta to a large bowl. Pour cheese sauce over; toss. (This was still soupier than I expected, but it reached the right consistency in the oven.) Divide among eight 1 ¼-cup custard cups (or a 9”x13” baking dish). Sprinkle with 1 cup cheese (don’t forget!). Place cups on rimmed baking sheet. Cover with foil; bake 15 minutes. Uncover. Sprinkle with breadcrumbs. Bake pasta until beginning to bubble and tops are golden, about 20 minutes.

Miso Pumpkin Soup

This recipe from The Kitchn is a really great version of squash soup. I made it with butternut squash, because that’s what is most readily available at this time of the year, but other types of winter squash would work really well. I love that the vegetables are roasted before going in the soup (even though my version recommends roasting them longer than the original recipe did), as this gives them great flavor. I used a white miso paste that is very mellow and barely discernable. I didn’t have shichimi togarashi, so I completely winged it with Korean pepper, sesame seeds and lemon juice, along with green onions for garnish. The Little Prince can’t handle a spoon well enough to feed himself, but once he allowed me to feed him, he really liked this too!

2 lbs. kabocha, pumpkin, or butternut squash
1 lb. sweet potatoes
4 cloves garlic, peeled
3 Tbsp. olive oil, divided
salt and freshly ground black pepper
1 shallot, chopped
2 tsp. freshly grated ginger
3 Tbsp. mellow white or yellow miso (gluten-free if necessary)
5-6 cups vegetable stock
2 tablespoons chopped chives or scallions
½ tsp. shichimi togarashi, for garnish (see note above)

Preheat oven to 450 °F.

Seed the pumpkin and cut it into small cubes. If the pumpkin is easy enough to peel raw, such as a butternut squash, peel it before cutting and roasting. (A pumpkin with a harder skin, such as a kabocha, may be cut and roasted and the peel removed afterwards.) Peel and cube the sweet potato as well.

Combine the pumpkin, sweet potatoes, and garlic on a baking sheet, toss with 2 tablespoons of olive oil, and sprinkle with salt and pepper. Roast in the oven until the pumpkin and sweet potatoes are tender when pierced with a knife, about 45 minutes, tossing halfway through. If you left the pumpkin skins on, peel when cool enough to handle.

Heat the remaining tablespoon of olive oil in a large pot over moderate heat. Add the shallots and ginger and cook until softened. Add the miso and vegetable stock and stir until dissolved. (I recommend adding 5 cups of stock at first; once the soup is puréed, if you want it more liquid, it’s easy enough to add more stock, but the reverse isn’t true.) Add the roasted vegetables and simmer for 15 minutes. Turn down the heat if necessary to avoid boiling, as this can impair the flavor of the miso.

Purée the soup using an immersion blender, or purée in batches in a blender or food processor.

To serve, garnish with chives and a sprinkle of shichimi togarashi.

Sunday, April 19, 2015

Chocolate Hazelnut Cake

It’s been a while since I posted a dessert recipe, mainly because the ones I’ve made lately have been lackluster. I’ll list them, not because I think you care, but because these posts serve as a sort of record-keeping for me, so for my own reference, here’s what I tried. There were salted peanut butter chocolate chunk oat bars, which were supposed to be a breakfast item, but were so goram sweet that they were too much even for dessert. A coconut chocolate cake had much less sugar, but while the Engineer loved it and compared it to a macaroon in cake form, I only found it ho-hum at best. Then I made maple cake pops with maple cookies, marshmallow crème and white chocolate. Disaster! The consistency of the pops was all wrong and they fell apart when I tried to put them on sticks. So I made balls instead, but the recipe should have called for adding something like coconut milk to the melted white chocolate, because it was not at all the right consistency for dipping (and there wasn’t even enough of it to do the whole batch). Again, those pops were too sweet for my liking, which is saying a lot. Next time, I’ll make actual cake pops, not imitation cookie pops. (I’ll also have to figure something out for a cake pop stand, because it turns out that my strainer’s holes are too small the prop up the cake pop sticks. I used a cheese grater, but it was less than ideal and probably couldn’t hold much more than a dozen at a time. I’m open to ideas that don’t involve me buying a block of floral foam.)

So this brings us to this chocolate hazelnut cake. To tell you the truth, this one initially disappointed me too, but I now realize that it was my expectations of it that weren’t met. You see, the recipe called for cutting the cake into two layers. However, perhaps my cake was flatter than the original (the center did collapse, after all) or perhaps my hazelnuts weren’t ground finely enough, but this proved absolutely impossible. The cake crumbled apart when I tried it, so I aborted the mission. This means that I had to improvise: the vegan chocolate buttercream that was meant to be sandwiched between both layers ended up smeared on top of the cake, filling the crater in the center, and I poured the ganache directly on top of it, without having enough on the sides of the cake to even consider covering them in hazelnut meal. (Just for fun, you should check out the original recipe at the link to see how nice her cake looked!) My result wasn’t pretty; I found the crumb a bit gritty and uncooperative, and I would have needed more ganache to get better coverage. That being said, if I hadn’t seen what the cake was “supposed” to look like, I would have been more at peace with my version! And it was actually very good. I think if I make it again, I’ll make sure to process the hazelnuts a bit more, I’ll put the buttercream on top of the cake, and I’ll drizzle it with ganache (instead of evenly covering the whole thing with it). That’s what I’m recommending below, if you want to try this cake.

For the chocolate hazelnut cake
1 ½ cups hazelnut meal
¾ cup all-purpose gluten free flour blend
½ cup cocoa powder
1 tsp. baking powder
½ tsp. baking soda
½ tsp. sea salt
½ cup non-dairy milk, room temperature
½ cup water
2 tsp. white vinegar
½ cup dairy-free chocolate chips
¼ cup coconut oil
1 cup organic cane sugar
1 ½ tsp. pure vanilla extract

For the chocolate buttercream
2 Tbsp. Earth Balance margarine
2 Tbsp. non-hydrogenated vegetable shortening
2 cups organic powdered sugar, sifted
1 Tbsp. cocoa powder
2-3 Tbsp. non-dairy creamer
½ tsp. pure vanilla extract

For the chocolate ganache
1 cup dairy-free chocolate chips
¼ cup non-dairy creamer

For the chocolate hazelnut cake
Preheat oven to 350 °F. Prepare an 8-inch round cake pan by spraying with non-stick cooking spray and lining bottom with parchment paper (I used a springform pan and recommend it).

Sift together hazelnut meal, flour blend, cocoa powder, baking powder, baking soda and salt. Set aside.

In large mixing bowl, stir together milk, water and vinegar until curdled.

In small microwave-safe bowl, add chocolate chips and coconut oil. Microwave on medium-low for 30 seconds. Stir and microwave an additional 15 seconds. Stir until chocolate chips are completely melted. (I did this on a double boiler.) Add to milk mixture, along with sugar and vanilla. Blend well. Add flour mixture and stir until combined. Pour into prepared cake pan.

Bake cake for 32-35 minutes or until toothpick inserted in center comes out clean. Place cake on cooling rack for 10 minutes. Remove from pan and allow to cool completely.

For the chocolate buttercream
Beat together margarine and shortening for 1 minute in large bowl of standing mixer. Add powdered sugar, cocoa powder, 2 tablespoons creamer and vanilla. Add another tablespoon of coffee creamer if needed. Beat buttercream until light and fluffy.

Place cake on serving platter or cake stand. Top with buttercream. Place in refrigerator for 30 minutes.

For the chocolate ganache
Mix chocolate chips and creamer in small bowl. Place in microwave for 30 seconds on low, stir. Microwave for another 15 seconds. Whisk until chocolate chips are completely melted and ganache is smooth. (Again, a double boiler works well, too.) Pour ganache over the top of chilled cake. It sets fairly quickly, so if you want to use a spatula to smooth it out, do so immediately. Otherwise, you can drizzle it in a pattern of your choosing.

Wednesday, April 15, 2015

Pommes de terre rattes rôties à l'érable


J’ai fait quelques plats de pommes de terre dont je ne vous ai pas parlé. Pourtant, ils étaient bons, mais simplement pas photogéniques. Admettons quand même que c’est rarement photogénique, une patate, hein? Il y a eu une recette indienne, des pommes de terre à la farine de pois chiches et aux graines de pavot, puis ensuite une casserole de pommes de terre avec crème sure et fromage (un vrai délice que je ressortirai sûrement à l’Action de Grâce). La plus récente, par contre, je la partage. Elle est tirée du site J’aime l’érable . ca. Il faut faire cuire les pommes de terre au four longtemps, mais le temps de préparation actif est minime, ce qui me plaît. Je n’ai pas trouvé de pommes de terre rattes, alors j’ai pris de petites pommes de terre à chair jaune – c’est quand même facile à adapter, cette recette. Elles sont servies ici avec des boulettes de viande et du minibrocoli.

1 kg (2,2 lb) de pommes de terre rattes, lavées
¼ tasse de gras de canard
2 c. à soupe de sirop d’érable
3 branches de thym ou de romarin frais
gros sel de mer et poivre du moulin, au goût

Placer la grille au centre du four. Préchauffer le four à 350 °F.

Tapisser une grande plaque à cuisson de papier aluminium. Mélanger tous les ingrédients, puis saler et poivrer.

Cuire au four environ 1 heure 15 minutes en remuant fréquemment pendant la cuisson.

Tuesday, April 14, 2015

Lemon Braised Chicken and Beans with Mint Pesto

I had put off this recipe from The Kitchn for a long time, mostly because I don’t want to cook with dried beans at this point (I don’t have enough space in the pantry to keep them on hand anymore). The recipe calls for a lot of mint, too, and I was hoping the mint in my garden would grow enough for it, but I decided that given the hot climate, summer probably wasn’t going to help things. I felt that this would be a great seasonal recipe, though, in the sense that it seems like a transition between spring and summer, so I forged ahead. (If you don’t have that kind of weather yet, don’t feel jealous; I’ll be roasting down here when you enjoy pleasant summer weather, and you can make that chicken then.)

I ended up using mint from the grocery store, and I again referred to this article from Serious Eats to figure out I needed 3 cans of beans instead of 1 pound of dried beans (and no water). I also omitted the dill, because I’m not crazy about it. Anyway, the result was fantastic! The beans were a creamy, lemony delight, and pretty much overshadowed the chicken, as good as it was. We had lots of leftovers, too, as the recipe makes about 6 to 8 servings. My version is below. If you feel like it, you could use basil instead of mint for the pesto. It would change the taste, but it would still be wonderful. Note that while the dish cooks for a long time, it’s mostly hands-off and very easy to make.

For the mint pesto
4 packed cups mint leaves (or basil, see note above)
1/3 cup blanched almonds (optional)
2 garlic cloves, roughly chopped
¼ cup olive oil, plus more if necessary
kosher salt and freshly ground black pepper

Blend all the ingredients in a small food processor until finely chopped. If not using immediately, store in the refrigerator with plastic wrap completely covering and touching the surface of the pesto to prevent oxidization.

For the chicken
2 Tbsp. olive oil
4 cloves garlic, minced
1 small white onion, diced
3 cans (15 oz. each) cannellini beans, drained and rinsed
2 lemons
2 lbs. boneless skinless chicken thighs
kosher salt and freshly ground black pepper
4 sprigs fresh thyme

Heat the oven to 350 °F. In a 4-quart (or larger) Dutch oven or heavy ovenproof pot, heat the oil over medium heat. Add the garlic and onion and cook for 5 to 7 minutes, stirring frequently, until they are tender and the onion is nearly translucent. Add the beans and stir to coat the beans with the garlic, onion, and oil. Turn off the heat.

Take a sharp vegetable peeler and carefully peel one of the lemons. Peel it in wide strips, taking care that you remove only the top yellow layer of peel and not any of the bitter white pith. Add all of this shaved lemon peel to the beans and stir. Juice the lemon and add the juice to the beans. (Reserve the second lemon for later.)

Pat the chicken dry, and lightly salt and pepper it. Lay it on top of the beans in the Dutch oven. Lay the thyme sprigs on top (I used just the leaves and not the sprigs, but do as you wish). Cover the pot and put it in the oven. Bake for 1 ½ hours, or until the beans are very tender and creamy.

Remove the lid from the pot, and take out the chicken and put it to the side on a plate. Remove the thyme stalks (or just leave the thyme leaves right in there, it’s fine). Zest and juice the second lemon, and stir the zest and juice into the beans. Shred or chop the chicken and place it back on top of the beans. Top with the mint pesto and serve, ideally with good bread to soak up the sauce.

Monday, April 13, 2015

Savory Cauliflower Cake


I’ve seen this recipe by Yotam Ottolenghi a lot lately – I found it on Serious Eats, but last week it was also on Gluten-Free Girl’s Instagram feed, for example. The name of it was originally cauliflower cake, but that seemed misleading to me, as if it should be sweet. It’s not, it’s definitely a main course. It’s halfway between a cake and a frittata – there’s no crust as there would be in a quiche, but there’s enough flour that the inside is closer to batter than omelet. So I’m calling a savory cake, for lack of a better word. In any event, the cauliflower almost disappears in there; the result is a delicious dish, and pretty to boot! We all loved it, even those of us who normally don’t like cauliflower. Note that I couldn’t procure nigella seeds in a brick-and-mortar store, so I replaced them with black sesame seeds.

1 small cauliflower, leaves removed, broken into 1¼-inch/3-cm florets (1 lb./450 g.)
1 medium red onion, peeled (6 oz./170 g.)
5 Tbsp. olive oil
½ tsp. finely chopped rosemary
7 eggs
½ cup/15 g. basil leaves, chopped
1 cup/120 g. all-purpose flour, sifted
1 ½ tsp. baking powder
1/3 tsp. ground turmeric
5 oz./150 g. coarsely grated parmesan or another mature cheese
melted unsalted butter or margarine, for brushing
1 Tbsp. white sesame seeds
1 tsp nigella seeds (see note above)
salt and black pepper

Preheat the oven to 400 °F. Line the base and sides of a 9 ½-inch/24-cm springform cake pan with parchment paper. Brush the sides with melted butter, then mix together the sesame and nigella seeds and toss them around the inside of the pan so that they stick to the sides. Set aside.

Place the cauliflower florets in a saucepan and add 1 teaspoon salt. Cover with water and simmer for 15 minutes, until the florets are quite soft. They should break when pressed with a spoon. Drain and set aside in a colander to dry.

Cut 4 round slices, each ¼-inch/5 mm thick, off one end of the onion and set aside. Coarsely chop the rest of the onion and place in a small pan with the oil and rosemary. Cook for 10 minutes over medium heat, stirring from time to time, until soft. Remove from the heat and set aside to cool. Transfer the onion to a large bowl, add the eggs and basil, whisk well, and then add the flour, baking powder, turmeric, parmesan, 1 teaspoon salt, and plenty of pepper. Whisk until smooth before adding the cauliflower and stirring gently, trying not to break up the florets.

Pour the cauliflower mixture into the prepared pan, spreading it evenly, and arrange the reserved onion rings on top. Place in the center of the oven and bake for 45 minutes, until golden brown and set; a knife inserted into the center of the cake should come out clean. Remove from the oven and leave for at least 20 minutes before serving. It needs to be served just warm, rather than hot, or at room temperature.

Monday, April 06, 2015

Passover Sweet & Sour Meatballs

Here’s a timely post, for once: Passover! I thought I’d round up a few links: A Food Lover’s Guide to Passover and how to clean one’s kitchen for Passover (which is more thorough than many spring cleanings, and I love that). I was going to throw in another one with a funny Haggadah from 2010, but upon reading it again, it’s not that funny, so I’ll spare you.

It occured to me that I never got around to posting these Passover meatballs, even though I mentioned them before. So, the recipe IS in Second Helpings, Please!, but on page 208, in the Passover section (makes sense, right?). They’re very easy to make, they just need to simmer for a long time (about 2 hours total). We all love these meatballs! If you’re making them when it’s not Passover (or if you’re not celebrating Passover), you can probably just use breadcrumbs instead of seeking out matzo meal. My mother-in-law often serves these with rice, but I served them with carrots and chickpeas last time and with potatoes (recipe to come) and broccolini tonight.

2 lbs. minced meat
2 eggs
salt and pepper, to taste
½ tsp. garlic powder
¼ cup water
3 Tbsp. matzo meal
20-oz. tin of tomato juice
1 cup ketchup
½ cup sugar
few grains sour salt (I use sea salt)

Combine meat, eggs, seasoning, water, and matzo meal and mix well. Form tiny balls. Combine remaining ingredients in a large saucepan and bring to a boil. Add meatballs. Cover and simmer for 1 ½ hours. Remove cover and simmer ½ hour longer.

Friday, April 03, 2015

Batch of links - Food allergies

- I knew that pink peppercorns weren’t true pepper, but are often considered that way (similarly, fresh corn is considered a vegetable even though it is a grain, and quinoa is considered a grain even though it is a seed). Here’s something I didn’t know: pink peppercorns are actually related to cashews and can cause a reaction in people with tree nut allergies. This is really important to know, as many labels lack that warning (!) and restaurant chefs may not be aware of it.

- While we’re talking spices: the FDA says that recent shipments of cumin, both ground and whole, have tested positive for undeclared peanut protein. I’m really glad they caught this!

- This post is mostly for parents of a child with food allergies: Don’t panic. Make a plan. And here’s a good example of an emergency care plan, in PDF form.

- Learn how to recognize the signs and symptoms of an allergic reaction (it’s a useful document because it goes further than the typical hives and swelling that we all associate with an anaphylactic reaction).

- Another one for parents: the truth about having children with food allergies. This made me realize that I need to be careful what snacks I bring to the playground, even if it’s just for my (thankfully non-allergic) child, because what if he had cross-contaminants on his hands and got them on the play equipment for an allergic child to touch?

- And 25 things only a food allergy parent would understand (I sympathize).

- We now have even more data on the fact that introducing allergens early actually reduces the risk of allergies later on in life. Alice Park wrote an article about it in a Time magazine earlier this month, which had data I knew already (“3 times more peanut allergies since 1997”) along with some I hadn’t seen before (actual numbers like an “86% lower allergy risk when infants ate peanuts” – this study was done on children who had eczema and egg allergies and whose immune system was already primed to react to antigens). It also explains that the body comes in contact with allergens in two different ways, either through skin contact or through ingestion. It would appear that a good balance of those two pathways helps reduce the risk of allergies, and that the body is more likely to perceive an allergen on the skin (like through a mother’s kiss) as a threat, while being more likely to accept an allergen through the gut on the first encounter. I couldn’t find the online version, but there’s a very similar article published a few weeks earlier that is much more detailed, and I think the print version is actually a summary of it. Here’s the online version.

- I’m not a complete downer, however. Did you know that there are promising desensitization therapies for peanut proteins being researched right now? One is a skin patch being developed by a French team, who might expand the treatment to other allergies if it is successful (it might be on the market in a few years). The other involves probiotics and has already had successful human trials in Australia (more details here).

- Also, chef Brooks Headley recently wrote an article in Bon Appétit on why people of his profession should embrace allergies and dietary restrictions. This was very refreshing to hear, and I wish more chefs would follow suit (I know it hasn’t always been my experience, but then again I rarely ask for accommodations and try to eat around my restriction, since it isn’t life-threatening). It also seems to have struck a chord with readers, as positive comments are still coming in.

Thursday, April 02, 2015

Sauce bolognaise aux lentilles

Bon, vous allez trouver que ça fait un peu répétitif, deux recettes de pâtes avec sauce tomate et viande, d’affilée. Mais vous saurez que celle des boulettes de dinde au pesto, je l’ai faite il y a quelques semaines, et celle-ci, je l’ai sortie du congélateur pour le souper d’hier. Je l’avais faite il y a des mois de ça, et je n’en avais jamais parlé parce que je pensais être la seule qui avait aimé ça. Mais hier soir, eh bien, le Petit Prince, après avoir boudé son assiette un bon moment, s’est décidé à goûter et a conclu qu’il aimait assez ça pour apprendre à dire le mot « sauce ». Et l’Ingénieur a garni son assiette de Cholula et il a adoré (même qu’il ne se souvenait pas vraiment y avoir goûté auparavant). Alors voilà, c’est une sauce qui saura plaire à tous, ou du moins, la deuxième fois. Elle n’est pas végétarienne, mais elle contient quand même moins de viande qu’une sauce bolognaise traditionnelle, et plus de légumes. Et puis, c’est bon pour la santé, les lentilles! Je l’ai adaptée de Coup de Pouce. Je vous confirme que la sauce se congèle très bien! Vous en aurez environ 2 litres.

1 c. à soupe d'huile d'olive
1 oignon coupé en dés
1 gousse d'ail broyée
1 poivron rouge haché
1 contenant de champignons, coupés en quartiers (10 oz./284 g)
12 oz. (375 g) de bœuf haché maigre
1 tasse de lentilles rouges sèches, rincées
1 boîte (28 oz./796 ml) de tomates broyées
1 tasse de sauce tomate (j’en avais une boîte de 15 oz.)
1 tasse d'eau
2 c. à soupe de pâte de tomates
½ c. à thé de sel
½ c. à thé de poivre noir du moulin
1 c. à soupe d'origan frais, haché
1 c. à soupe de basilic frais, haché
1 c. à soupe de persil frais, haché

Dans une grande casserole, chauffer l'huile à feu moyen. Ajouter l'oignon et l'ail et cuire, en brassant, pendant environ 3 minutes ou jusqu'à ce qu'ils aient ramolli. Ajouter le poivron et les champignons et cuire, en brassant, pendant 5 minutes. Ajouter le bœuf haché et cuire, en défaisant la viande à l'aide d'une cuillère de bois, pendant environ 5 minutes ou jusqu'à ce qu'il ait perdu sa teinte rosée.

Dans la casserole, ajouter les lentilles, les tomates, la sauce tomate, l'eau, la pâte de tomates, le sel et le poivre et bien mélanger. Porter à ébullition. Réduire à feu doux, couvrir et laisser mijoter, en brassant de temps à autre, de 40 à 50 minutes ou jusqu'à ce que la sauce ait épaissi. Incorporer l'origan, le basilic et le persil et poursuivre la cuisson pendant 10 minutes. Servir avec vos pâtes préférées, avec ou sans fromage.

Wednesday, April 01, 2015

Turkey Pesto Meatballs

I made another recipe from Weelicious, and once again, it was a hit. The Engineer and the Little Prince both love meatballs, and I think that their popularity at the table makes me love them too, even though I didn’t often think to make them before. The only problem I ran into was that the meatballs were undercooked when I followed directions, so I upped the temperature and left them in there longer until my thermometer indicated that they were done. A quick search in the comments on the blog revealed that others ran into the same issue. I fixed it in my version below – my way worked for me, but another reader suggested baking at 400 °F for 20 minutes. If you want to make these dairy-free, use dairy-free pesto and either substitute nutritional yeast for the parmesan or omit it altogether. For the tomato sauce, store-bought is fine; I’d suggest doctoring it with some herbs and spices if necessary. I served these with orzo.

1 ¼ lbs. lean ground turkey
¼ cup pesto
¼ cup breadcrumbs
¼ cup parmesan cheese
1 tsp. salt
2 cups tomato sauce (such as marinara)

Preheat oven to 350 °F (see note above).

Place all the ingredients (except for the tomato sauce) in a bowl and using your hands, combine until everything is incorporated.

Using about 1 tablespoon of the mixture per meatball, roll into balls and place on a plate.

Pour the marinara sauce into a 9”x9” pan (I think I used a 9”x13” pan, actually) and top with the meatballs.

Cover the baking pan with foil and bake for 20-25 minutes. Uncover, increase the temperature to 450 °F and bake an additional 10 minutes, or until the meatballs are cooked through.