J’ai eu l’occasion de faire trois tricots pour deux bébés récemment, alors je vous en fais part ici.
Tout d’abord, pour Nia Ray, la petite fille d’un collègue de l’Ingénieur, un chapeau et un chandail avec manches en raglan, et petits boutons en forme d’étoile. Le patron est tiré du livret Early Arrivals 3 de Sirdar, que j’ai déjà utilisé auparavant, mais j’ai essayé un nouveau modèle ce coup-ci. J’ai eu de la misère à faire les manches correctement, il a fallu que je m’y reprenne à plusieurs fois, mais j’ai fini par y arriver avec un résultat tout à fait satisfaisant. La laine est de la Debbie Bliss Rialto.
Les deux autres patrons, pour la petite Joanie, sont tous deux tirés d’un vieux numéro (106.131 : Explications tricot – Créations 2003-2004) de Bergère de France; il s’agit d’un cardigan avec un motif en genre de dentelle dans le haut (laine Kashmir Baby de Louisa Harding) ainsi que d’un manteau à capuche en point mousse (laine On Your Toes de Kertzer). Le chapeau rose, quant à lui, est fait avec un patron gratuit que j’essayais aussi pour la première fois et que j’ai beaucoup aimé.
Tous les boutons viennent d’Etsy. Je suis particulièrement fière d’avoir déniché deux lots de cinquante boutons chacun (ceux en forme d’étoile et ceux en bois), à très bon prix (moins de 10 $ chacun, livraison comprise). Ils sont assez polyvalents pour que je puisse les utiliser pour bien des projets différents!
Friday, March 23, 2012
Two tunics, on the cheap
I was inspired by this post on Jejune.net to use an old bed sheet as fabric for making clothes. Sadly, it probably wouldn’t even have occurred to me if I hadn’t seen it done before, despite all the online tutorials for toddler dresses made from pillowcases. I didn’t have any old bed sheets lying around (and if I’d had any and had been willing to part with them, I might I have been so sick of them that I would have refused to actually wear them!), but I found a nice purple flat sheet at the Salvation Army for $2.99. It’s good quality fabric, much cheaper than if I bought it by the yard at a fabric store, and was only a little ripped at the seams on top and had a small tear in the bottom; the rip was easy to fix, and the tear was easy to avoid. It was a single twin sheet, not even a set, and I got two tops out of it.
The first was a Simplicity pattern for a top with a gathered front and small cap sleeves gathered with elastic. I adapted it so that I could use the top band of the sheet as the belt on the top, keeping the shiny ribbon detail from the sheet to embellish the belt. I’m more or less pleased with the result. I like the look of the top, and really what I dislike about it isn’t visible from the outside. You see, the pattern did call for nicely finished seams around the neck and sleeves thanks to the use of bias tape (this is the trick that I reused for my pyjama), but it left other seams looking entirely horrible, mainly the one under the bust (plus a bit of the neckline that just didn’t line up and from which a piece of elastic is visible on one side). I realize that no one but me will see it, and even then, not most of the time, but I feel so much better about the clothes I make when they look properly finished! Anyway, now that summer has started here (well, officially it’s spring, but I’m Canadian, so this is getting warm), I’m sure I’ll have plenty of occasions to wear it.
I used up the leftover fabric to make a simple cotton tunic, from a free tutorial found on A Beautiful Mess. It’s a bit of a paradox, though, because I’ve come to realize that patterns that sound really easy because the directions are vague and super simple often end up being more of a hassle to make. Sure, you don’t have to cut your fabric as precisely as a pattern, and you’ve got more room for error, but that also means that it’s much harder to get a proper fit! I had to try on this top several times and do a lot of adjusting before I was happy with it (whereas a pattern in my size would have been much faster to assemble correctly right away). That being said, the measurements were generous enough that it allowed me to use up the rectangle of fabric that I had left, and once I use a belt to cinch the waist of the tunic, it looks pretty good.
Total cost of both projects together: $2.99 for the fabric, $2.79 for the thread, $0.99 for the Simplicity pattern and maybe $0.25 worth of ¼-inch elastic, for a grand total of just over $7.00 plus taxes. For two tops! I’m now keeping an eye open for old sheets at discount stores.
The first was a Simplicity pattern for a top with a gathered front and small cap sleeves gathered with elastic. I adapted it so that I could use the top band of the sheet as the belt on the top, keeping the shiny ribbon detail from the sheet to embellish the belt. I’m more or less pleased with the result. I like the look of the top, and really what I dislike about it isn’t visible from the outside. You see, the pattern did call for nicely finished seams around the neck and sleeves thanks to the use of bias tape (this is the trick that I reused for my pyjama), but it left other seams looking entirely horrible, mainly the one under the bust (plus a bit of the neckline that just didn’t line up and from which a piece of elastic is visible on one side). I realize that no one but me will see it, and even then, not most of the time, but I feel so much better about the clothes I make when they look properly finished! Anyway, now that summer has started here (well, officially it’s spring, but I’m Canadian, so this is getting warm), I’m sure I’ll have plenty of occasions to wear it.
I used up the leftover fabric to make a simple cotton tunic, from a free tutorial found on A Beautiful Mess. It’s a bit of a paradox, though, because I’ve come to realize that patterns that sound really easy because the directions are vague and super simple often end up being more of a hassle to make. Sure, you don’t have to cut your fabric as precisely as a pattern, and you’ve got more room for error, but that also means that it’s much harder to get a proper fit! I had to try on this top several times and do a lot of adjusting before I was happy with it (whereas a pattern in my size would have been much faster to assemble correctly right away). That being said, the measurements were generous enough that it allowed me to use up the rectangle of fabric that I had left, and once I use a belt to cinch the waist of the tunic, it looks pretty good.
Total cost of both projects together: $2.99 for the fabric, $2.79 for the thread, $0.99 for the Simplicity pattern and maybe $0.25 worth of ¼-inch elastic, for a grand total of just over $7.00 plus taxes. For two tops! I’m now keeping an eye open for old sheets at discount stores.
Pâtes cacao et courgette, méthode par absorption
Je suis tombée sur cette recette en lisant le blogue Chocolate & Zucchini, qui porte bien son nom. J’ai des recettes de dessert qui combinent chocolat et courgette (et seigneur, je devrais prendre le temps de faire mon gâteau chocolat-courgettes et d’en partager la recette ici), mais je n’avais jamais vu de recette salée avant celle-ci. De plus, elle se distingue car les pâtes sont cuites par absorption, comme un risotto, plutôt que bouillies dans un gros chaudron et égouttées. La prochaine fois, par contre, je pense diminuer la quantité de bouillon et utiliser davantage d’eau à la place, car mes pâtes avaient un malheureux air de macaroni chinois! Je pense aussi que ce serait génial avec de l’orzo. J’ai fait rôtir mes éclats de fève de cacao à la poêle, et la prochaine fois, je les briserai en plus petits morceaux avec un mortier et un pilon (ou un moulin à épices). Cela dit, c’était absolument délicieux! L’Ingénieur a mis ses deux pouces en l’air et a déclaré ce plat digne d’un restaurant. La recette ci-dessous faite deux portions.
2 c. à soupe d’huile d’olive
4 gousses d’ail, pelées et émincées (je les ai râpées)
200 g (7 oz) de pâtes courtes, comme des penne, des fusilli ou des ricciole
2 à 3 tasses de bouillon de légumes ou d’eau, très chaud(e)
1 ou 2 petites courgettes, coupées en petits bâtonnets (à la râpe ou à la mandoline)
sel et poivre
1 ½ c. à thé d’éclats de fève de cacao, rôties au goût, puis écrasées au pilon
parmesan râpé
Faire chauffer l’huile dans une grande poêle. Ajouter l’ail et faire cuire une minute à feu moyen, en mélangeant fréquemment, jusqu’à ce que le tout sente bon. Ajouter les pâtes et continuer à mélanger pendant deux minutes. Ajouter 2 tasses de bouillon ou d’eau, assez pour juste couvrir les pâtes, et baisser le feu à moyen-doux. Couvrir et laisser mijoter pendant 10 minutes, en mélangeant de temps à autre. Une fois la cuisson commencée depuis 5 minutes, ajouter les courgettes ainsi que du sel et du poivre, au goût. Après 10 minutes, goûter aux pâtes pour voir si elles sont prêtes; si elles ne le sont pas tout à fait et que le liquide a été absorbé, ajouter un peu plus de bouillon ou d’eau et faire cuire encore quelques minutes avant de goûter de nouveau. Ajuster l’assaisonnement. Mettre dans deux bols, saupoudrer d’éclats de fève de cacao et de parmesan, puis servir aussitôt.
Southwestern Stuffed Peppers
The Engineer and I have found a source of (more) ethical beef at our local grocery store. It’s a brand called Dakota Beef, and our store carries both its ground beef and beef sirloin. It’s still very little choice compared to the vast array of meats available, but it’s a good start. The cows are humanely raised on organic pastures, their diet is entirely vegetarian, and they aren’t given any hormones or antibiotics. My non-scientific observation is that ethical meat costs about twice as much as the “regular” kind, but since we eat about half as much meat as we did last year, our total grocery bills are comparable, and we live in a way that’s closer to our values. So that’s the ground beef we used for this recipe from Real Simple.
We both really liked these stuffed bell peppers. I particularly like that the meal has protein, grains and vegetables all in one, while the Engineer likes the primal feeling of eating the container! I topped them with plain Greek yogurt, as the recipe suggested, and was surprised to realize that it really did feel like rich sour cream. I’m not sure if it’s because I hardly ever eat sour cream anymore or if it’s because yogurt should in fact be regarded as more than just a healthier substitute in this scenario, but it worked out wonderfully.
1 cup long-grain white rice
1 Tbsp olive oil
6 scallions, thinly sliced, white and green parts divided
½ lb ground beef chuck
1 cup frozen corn
1 4.5-oz can chopped green chilies (optional, I omitted that)
1 tsp ground cumin
4 oz sharp cheddar cheese, grated (1 cup)
kosher salt and black pepper
4 large bell peppers, halved lengthwise, ribs and seeds removed
½ cup plain low-fat Greek yogurt
salsa, for serving (optional)
Heat oven to 375 °F. Cook the rice according to the package directions.
Heat the oil in a large skillet over medium-high heat. Add the scallion whites and beef and cook, breaking the beef up with a spoon, until no longer pink, 3 to 5 minutes. Stir in the corn, chilies, cumin, cooked rice, ½ cup of the Monterey Jack, ½ teaspoon salt, and ¼ teaspoon black pepper.
Arrange the bell peppers, cut-side up, in a 9-by-13-inch baking dish or pan lined with tin foil. Divide the beef mixture among the bell peppers, add ½ cup water to the dish, tightly cover the dish with foil, and bake until the bell peppers are soft, 30 to 40 minutes. Uncover, sprinkle with the remaining ½ cup of cheese, and bake until browned, 5 to 7 minutes more.
Spoon yogurt over the bell peppers and top with the salsa and scallion greens.
Flaky Cheddar and Ham Biscuits
Alright, so my schedule cleared up a bit, and I decided to play catch-up with all those recipes I’ve made lately. I was hesitant about posting this biscuit recipe, because they looked like a complete flop when they came out of the oven – the melted cheese had oozed everywhere, while the biscuits themselves were flat and pale. However, I bit into one, and dang it if it isn’t the flakiest biscuit I’ve made! It also tasted fantastic. What I did change in the recipe was to use flour and corn starch instead of cake flour, but I’ve done that before without my baked goods suffering any ill effects, so I don’t think that was the problem. I’ll give you both options below. Next time, though, I’ll grate the cheese instead of cubing it, and I’ll put the biscuits in the fridge for a while before I bake them, and hopefully that will help the cheese stay in its place. Note that I used butter, so these aren’t really lactose-free.
I served them with a roasted butternut squash and red lentil soup, which was only so-so. I mean, I’ve made better squash soup AND better red lentil soup, so this one literally wasn’t bringing anything to the table and I won’t be talking about it any further.
1 ¼ cups all-purpose flour (see directly below)
¾ cup cake flour (OR a TOTAL of 1 ¾ cups all-purpose flour + 2 Tbsp corn starch)
½ tsp baking soda
¼ tsp salt
8 Tbsp salted butter, very cold even frozen works
¾ cup buttermilk (or lactose-free milk with a splash of lemon juice)
½ cup sharp cheddar cheese
½ cup ham
Preheat the oven to 450 °F. In a medium-sized bowl, measure out the flours, baking soda, and salt. Stir well and set aside.
Using the largest hole on a box cheese grater, grate the cold butter onto a plate or cutting board. After grating, place the plate or cutting board with the butter into the freezer while you complete the next step.
Dice the ham and cheese into very small cubes, about ¼" in size (actually, I should grate the cheese). Add the ham and cheese to the flour mixture and toss to coat and evenly distribute the diced bits.
Remove the butter from the freezer and stir into the flour mixture, taking care to evenly distribute so as not to have any overly large clumps stuck together. Stir in the buttermilk until the mixture comes together and is moist.
Turn the dough out onto a floured surface and knead a few times until you can form a rough ball. Flatten the dough into a circle about ½" in thickness. Using a biscuit cutter or a drinking glass (about 3" in diameter for the listed baking time) turned upside down, cut as many rounds as you can. Using the dough scraps, form another circle of the same thickness. Repeat cutting until you have used all the dough.
Place the biscuits on a parchment paper-lined baking sheet (which I suggest putting in the fridge for a while) and bake at 450 °F for 10-12 minutes. The biscuit tops should be lightly browned. Serve immediately.
I served them with a roasted butternut squash and red lentil soup, which was only so-so. I mean, I’ve made better squash soup AND better red lentil soup, so this one literally wasn’t bringing anything to the table and I won’t be talking about it any further.
1 ¼ cups all-purpose flour (see directly below)
¾ cup cake flour (OR a TOTAL of 1 ¾ cups all-purpose flour + 2 Tbsp corn starch)
½ tsp baking soda
¼ tsp salt
8 Tbsp salted butter, very cold even frozen works
¾ cup buttermilk (or lactose-free milk with a splash of lemon juice)
½ cup sharp cheddar cheese
½ cup ham
Preheat the oven to 450 °F. In a medium-sized bowl, measure out the flours, baking soda, and salt. Stir well and set aside.
Using the largest hole on a box cheese grater, grate the cold butter onto a plate or cutting board. After grating, place the plate or cutting board with the butter into the freezer while you complete the next step.
Dice the ham and cheese into very small cubes, about ¼" in size (actually, I should grate the cheese). Add the ham and cheese to the flour mixture and toss to coat and evenly distribute the diced bits.
Remove the butter from the freezer and stir into the flour mixture, taking care to evenly distribute so as not to have any overly large clumps stuck together. Stir in the buttermilk until the mixture comes together and is moist.
Turn the dough out onto a floured surface and knead a few times until you can form a rough ball. Flatten the dough into a circle about ½" in thickness. Using a biscuit cutter or a drinking glass (about 3" in diameter for the listed baking time) turned upside down, cut as many rounds as you can. Using the dough scraps, form another circle of the same thickness. Repeat cutting until you have used all the dough.
Place the biscuits on a parchment paper-lined baking sheet (which I suggest putting in the fridge for a while) and bake at 450 °F for 10-12 minutes. The biscuit tops should be lightly browned. Serve immediately.
Wednesday, March 21, 2012
Good news for foodies... right?
For the past year or so, there have been rumors of Trader Joe’s opening a store in San Antonio. We heard that they were eying a spot at the Quarry, perhaps in the location left bare by the bookstore that went out of business, but that fell through. I’ve only heard good things about Trader Joe’s, so part of me is excited by the prospect of having one of their stores here, but at the same time, I was very relieved that they wouldn’t be opening RIGHT NEXT to Whole Foods.
A week and a half ago, when the Engineer and I were actually pulling out of the Whole Foods parking lot, I noticed across the street that the building where West Elm used to be was empty. I thought that was too bad, because I liked their stuff – even though it was somewhat overpriced. This morning, however, breaking news: Trader Joe’s has acquired that spot and will be opening a store there later this year. The location is really trendy, and I suppose that as a foodie, I should be thrilled. But I can’t help but think they will be taking away business from Whole Foods, and that is something I really don’t like. Some experts think there’s room for both in the market, though. And it’s true that Trader Joe’s is mostly focused on stocking “innovative, hard-to-find, great-tasting foods”, perhaps somewhat like Central Market, whereas Whole Foods additionally takes things further in the direction of ethical and natural products – though neither store sells products with artificial colors/flavors/preservatives, GMOs, MSG, trans fats, etc. Hopefully, each store will specialize in things the other doesn’t sell, which should help keep everybody well in the black. (Because I would sure hate to see Whole Foods suffer from this.)
For those of you who still don’t have a Trader Joe’s and have grown accustomed to products you now can’t find, keep in mind that there’s at least one delivery service that can ship Trader Joe’s goods to you (it is not affiliated with Trader Joe’s, and obviously will be limited to dry goods, but it might be worth it to some).
A week and a half ago, when the Engineer and I were actually pulling out of the Whole Foods parking lot, I noticed across the street that the building where West Elm used to be was empty. I thought that was too bad, because I liked their stuff – even though it was somewhat overpriced. This morning, however, breaking news: Trader Joe’s has acquired that spot and will be opening a store there later this year. The location is really trendy, and I suppose that as a foodie, I should be thrilled. But I can’t help but think they will be taking away business from Whole Foods, and that is something I really don’t like. Some experts think there’s room for both in the market, though. And it’s true that Trader Joe’s is mostly focused on stocking “innovative, hard-to-find, great-tasting foods”, perhaps somewhat like Central Market, whereas Whole Foods additionally takes things further in the direction of ethical and natural products – though neither store sells products with artificial colors/flavors/preservatives, GMOs, MSG, trans fats, etc. Hopefully, each store will specialize in things the other doesn’t sell, which should help keep everybody well in the black. (Because I would sure hate to see Whole Foods suffer from this.)
For those of you who still don’t have a Trader Joe’s and have grown accustomed to products you now can’t find, keep in mind that there’s at least one delivery service that can ship Trader Joe’s goods to you (it is not affiliated with Trader Joe’s, and obviously will be limited to dry goods, but it might be worth it to some).
Monday, March 19, 2012
Tejas Steakhouse & Saloon
Hi y’all! Sorry I’ve been slacking on the posts, but I’ve been a bit busy lately; now that I have my green card, I’ve been able to start freelancing again, and I’m in the middle of a contract right now. However, we just hosted the Legal Chef and his wife, E., for a long weekend, and we’ve been to a restaurant that I have to share (two, really, but I’ll only write about the recent discovery today). It’s called the Tejas Steakhouse & Saloon, and was recommended to us by the owner of our dog Darwin’s best friend, Sarge. This place serves authentic Texas cooking, and on Saturdays from March to November, there’s a pro rodeo followed by a live band!
We got there on Saturday evening, close to 7:30 pm, and the place was really hopping. It’s a bit surprising at first, because the restaurant seems to be in the middle of nowhere (there are fields all around, no streetlights, and the only signs of life are the occasional farm animal, then you round a corner and there’s a sea of cars parked all over the place). We parked in a field patrolled by sheriff’s deputies and made our way to the restaurant. In hindsight, patronizing only the restaurant that evening was a bit of a mistake; we should have gotten there earlier for dinner, then stayed for the rodeo (which is $10 per person). We did get a reservation for a table on the patio, though, so we got to soak up the atmosphere. It was like everyone was there, wearing cowboy boots, cowboy hats, and plaid. I spotted a cowboy ambling about with a coiled rope in one hand, so I assumed it was a lasso, until he got closer and I realized it was an extension cord. A modern cowboy, I guess.
So we’ve established that the mood is high in local color and quite entertaining. Now on to the food! The reason we were there was the steak: before coming in from Toronto, the Legal Chef had requested a 72-oz steak. As far as I know, those are only served in one place in Amarillo, and even that’s a gimmick. The Tejas Steakhouse, though, has a 56-oz steak on the menu, the biggest I’ve seen advertised. Sadly, the Legal Chef wimped out and ordered a 22-oz T-bone steak. E. had an 8-oz tenderloin steak, the Engineer had the Tejitas (Texas-style fajitas), and I had my first chicken-fried steak. While I’m happy that I tried it once, I think the hype isn’t really worth it, and I’ll probably get a tenderloin or a burger next time (the steakhouse also serves soups, salads, sandwiches, and "critters they don’t rope”, i.e. chicken and fish). But to me, the revelation of the night was the starter of pan de Tejas, the original cowboy camp flatbread: “our version is topped with a pesto-like ‘mash’, cheese, and greens, for a rich, salad-like appetizer” It was absolutely fantastic! There were tomatoes, goat cheese, mixed baby greens and balsamic vinegar on this thing, and I could have eaten the entire plate by myself. Plus, the table gets free rolls that are warm, somewhat lemony, and full of grated cheese and cracked pepper – delicious!
This place is not only the perfect restaurant for guests, but I think the Engineer and I will be going there on occasion by ourselves. We were overjoyed with the atmosphere and the food!
We got there on Saturday evening, close to 7:30 pm, and the place was really hopping. It’s a bit surprising at first, because the restaurant seems to be in the middle of nowhere (there are fields all around, no streetlights, and the only signs of life are the occasional farm animal, then you round a corner and there’s a sea of cars parked all over the place). We parked in a field patrolled by sheriff’s deputies and made our way to the restaurant. In hindsight, patronizing only the restaurant that evening was a bit of a mistake; we should have gotten there earlier for dinner, then stayed for the rodeo (which is $10 per person). We did get a reservation for a table on the patio, though, so we got to soak up the atmosphere. It was like everyone was there, wearing cowboy boots, cowboy hats, and plaid. I spotted a cowboy ambling about with a coiled rope in one hand, so I assumed it was a lasso, until he got closer and I realized it was an extension cord. A modern cowboy, I guess.
So we’ve established that the mood is high in local color and quite entertaining. Now on to the food! The reason we were there was the steak: before coming in from Toronto, the Legal Chef had requested a 72-oz steak. As far as I know, those are only served in one place in Amarillo, and even that’s a gimmick. The Tejas Steakhouse, though, has a 56-oz steak on the menu, the biggest I’ve seen advertised. Sadly, the Legal Chef wimped out and ordered a 22-oz T-bone steak. E. had an 8-oz tenderloin steak, the Engineer had the Tejitas (Texas-style fajitas), and I had my first chicken-fried steak. While I’m happy that I tried it once, I think the hype isn’t really worth it, and I’ll probably get a tenderloin or a burger next time (the steakhouse also serves soups, salads, sandwiches, and "critters they don’t rope”, i.e. chicken and fish). But to me, the revelation of the night was the starter of pan de Tejas, the original cowboy camp flatbread: “our version is topped with a pesto-like ‘mash’, cheese, and greens, for a rich, salad-like appetizer” It was absolutely fantastic! There were tomatoes, goat cheese, mixed baby greens and balsamic vinegar on this thing, and I could have eaten the entire plate by myself. Plus, the table gets free rolls that are warm, somewhat lemony, and full of grated cheese and cracked pepper – delicious!
This place is not only the perfect restaurant for guests, but I think the Engineer and I will be going there on occasion by ourselves. We were overjoyed with the atmosphere and the food!
Monday, March 12, 2012
The Cheesecake Factory - Or Anna M., you don't know what you've started
One of our friends from Montreal, Anna M., loves going to the Cheesecake Factory when she’s in the States. Any time she visits a city with a Cheesecake Factory location, she makes it a point to go. We’d heard of the place, of course, but we had never been. I mean, I’m lactose-intolerant, and until recently, the Engineer thought he didn’t like cheesecake (it turns out he doesn’t like bad cheesecake, but the ones he’s been making himself are fabulous), so a place named after that dessert didn’t appeal to either one of us. But of course, they serve things other than dessert – as a matter of fact, their menu is frighteningly long and varied and even includes a “SkinnyLicious” section for healthier fare. Plus, the characters in one of my favorite shows hang out there all the time. So we decided to check it out last night.
Man oh man! Where to start… First of all, the place was really busy, though it’s big enough that turnover was quick for two people. The décor was trendier than I had expected, and the waitresses weren’t wearing the cheesy (sorry) yellow vest I had seen on the show (though we were in the bar section, not in the family restaurant side). It’s a good thing we’d had a few minutes to look at the menu outside the restaurant, so we had a rough idea of what to order. We started with an appetizer of avocado rolls, which were served with a tamarind-cashew dipping sauce that was absolutely divine. I tried to identify ingredients (chili, cumin, cilantro, honey?), then realized that they actually sell sauces and dressings used in their dishes, so we came home with a jar of it. Unfortunately, it was jarred on the sport by a waiter and so doesn’t have a tag with a list of ingredients – though now that I know it’s called tamarind-cashew, that gives me extra clues. The rolls were fabulous, too. We also got free bread, which was really good, but I kept my intake down to one piece because I knew I still had a main dish to tackle.
The Engineer had the spicy cashew chicken, which was good, but slightly too spicy for my enjoyment – more for him. I took Lactaid and had the Monterey cheeseburger: avocado, melted jack cheese, arugula and red onion, with honey-mustard mayonnaise, on a brioche bun (my favorite); it had me at arugula. It was absolutely delicious, to the point where it’s now giving serious competition to what I had previously considered the best burger in town (at the County Line, though I couldn’t tell you why I never got around to talking about it here). The fries weren’t really that great, but the burger was so fantastic that I don’t care. What really stole the show, though, was the Engineer’s Oreo milkshake. I started with only a sip and was blown away; I had an immediate craving for Oreos, since I couldn’t have the shake (too much lactose). After I had my Lactaid for the burger, though, once I had declared defeat, I wanted one last sip of the shake, which I then couldn’t put down and I drained the whole glass. I’m lucky I have such a generous husband! Our dinners were so good that we really didn’t care that we hadn’t saved room for cheesecake (though they have some amazing varieties, including a red velvet cheesecake that was trying to seduce me from the refrigerated display).
We’ll definitely be going back to the Cheesecake Factory, though ideally, we’ll try to find a time that’s less crowded. I’ll have to conduct further testing before declaring a winner in the burger department, and there’s so much more to explore on the menu!
Man oh man! Where to start… First of all, the place was really busy, though it’s big enough that turnover was quick for two people. The décor was trendier than I had expected, and the waitresses weren’t wearing the cheesy (sorry) yellow vest I had seen on the show (though we were in the bar section, not in the family restaurant side). It’s a good thing we’d had a few minutes to look at the menu outside the restaurant, so we had a rough idea of what to order. We started with an appetizer of avocado rolls, which were served with a tamarind-cashew dipping sauce that was absolutely divine. I tried to identify ingredients (chili, cumin, cilantro, honey?), then realized that they actually sell sauces and dressings used in their dishes, so we came home with a jar of it. Unfortunately, it was jarred on the sport by a waiter and so doesn’t have a tag with a list of ingredients – though now that I know it’s called tamarind-cashew, that gives me extra clues. The rolls were fabulous, too. We also got free bread, which was really good, but I kept my intake down to one piece because I knew I still had a main dish to tackle.
The Engineer had the spicy cashew chicken, which was good, but slightly too spicy for my enjoyment – more for him. I took Lactaid and had the Monterey cheeseburger: avocado, melted jack cheese, arugula and red onion, with honey-mustard mayonnaise, on a brioche bun (my favorite); it had me at arugula. It was absolutely delicious, to the point where it’s now giving serious competition to what I had previously considered the best burger in town (at the County Line, though I couldn’t tell you why I never got around to talking about it here). The fries weren’t really that great, but the burger was so fantastic that I don’t care. What really stole the show, though, was the Engineer’s Oreo milkshake. I started with only a sip and was blown away; I had an immediate craving for Oreos, since I couldn’t have the shake (too much lactose). After I had my Lactaid for the burger, though, once I had declared defeat, I wanted one last sip of the shake, which I then couldn’t put down and I drained the whole glass. I’m lucky I have such a generous husband! Our dinners were so good that we really didn’t care that we hadn’t saved room for cheesecake (though they have some amazing varieties, including a red velvet cheesecake that was trying to seduce me from the refrigerated display).
We’ll definitely be going back to the Cheesecake Factory, though ideally, we’ll try to find a time that’s less crowded. I’ll have to conduct further testing before declaring a winner in the burger department, and there’s so much more to explore on the menu!
Thursday, March 08, 2012
Carrot Salad with Coriander and Sesame Salt
This recipe was originally published in Bon Appétit as a beet and carrot salad. However, I’m not crazy about raw beets, so I decided to use a mix of orange and purple carrots instead. This keeps the nice color of the salad, but is more to my taste. If your carrots have purple peel and orange flesh, you can use only those instead of throwing in orange carrots. The recipe below makes a lot, about 8 servings as a side dish (fewer if you’re having only salad for lunch, for example); feel free to halve the recipe. I loved the finished result, and the sea salt with sesame seeds sprinkled on top of the salad really made it come alive. I served some as a side dish to a frittata, and had some plain for lunch.
3 ½ Tbsp minced shallot
3 Tbsp plus 2 tsp apple cider vinegar
½ tsp finely grated orange zest plus 2 Tbsp fresh orange juice
1 Tbsp white miso (fermented soybean paste)
1 tsp finely grated peeled fresh ginger
¼ cup extra-virgin olive oil (I used the last of my avocado oil here instead)
1 ½ tsp coriander seeds
2 Tbsp sesame seeds
¾ tsp coarse kosher salt
2 lbs of carrots, a mixture of orange and purple
Whisk shallot, vinegar, orange zest and juice, miso, and ginger in a medium bowl. Let stand 10 minutes to allow flavors to blend. Gradually whisk in oil.
Toast coriander seeds in small skillet over medium heat until beginning to brown, about 2 minutes. Cool. Transfer to spice mill; process until coarsely ground. Add sesame seeds to same skillet. Toast over medium heat until golden brown, about 3 minutes. Add ¾ tsp coarse salt; stir 30 seconds. Transfer sesame salt to small bowl and cool.
Using shredding disc on processor or a box grater, coarsely grate carrots. Transfer vegetables to large bowl. Add enough dressing to coat lightly. Add coriander and 1 Tbsp sesame salt. Toss to coat. Let marinate at room temperature 30 minutes. Season salad to taste with salt and pepper.
Toss salad, adding additional dressing, if desired. Sprinkle with remaining sesame salt and serve.
Potato, Ham and Spinach Frittata
This recipe is from Real Simple. I usually don’t like too much cooked spinach, but this had just the right amount; it blended in nicely with the other ingredients, and the whole dish was really satisfying. A word of advice: don’t be a hero. Use the slicer blade on your food processor to slice the potatoes and the shredding disc to grate the cheese! If you do that, the frittata is really easy to make, and it’s also a low-calorie dish. I served it with a carrot salad, but it would be fine on its own, too.
3 Tbsp olive oil
2 small russet potatoes (about ¾ lb), peeled and thinly sliced
1 small onion, thinly sliced
9 large eggs
kosher salt and black pepper
1 10-oz package frozen chopped spinach, thawed and squeezed of excess liquid
4 oz extra-sharp white cheddar (lactose-free), grated (about 1 cup)
4 oz thinly sliced deli ham, cut into 2-inch pieces
Heat oven to 400 °F. Heat 2 Tbsp of the oil in a large ovenproof nonstick skillet over medium heat. Add the potatoes and onion and cook, tossing occasionally, until the potatoes are tender, 12 to 15 minutes.
Meanwhile, in a large bowl, whisk together the eggs, ½ teaspoon salt, and ¼ teaspoon pepper. Mix in the spinach, cheddar, and ham.
Add the egg mixture to the skillet, stir once, and transfer the skillet to oven. Cook until the eggs are set, 12 to 14 minutes.
Baked Oatmeal with Chocolate Chips
When we were in Montreal over the holidays, our friend the Actor made a pan of baked oatmeal to which he added chocolate chips. When I asked about the recipe, our friend Jen gave it to me – it was originally baked oatmeal with dried cherries (which sound great with the almond extract in there, admittedly) and the Actor just used chocolate chips instead. I made this recipe several times, tinkering with it, since all I have are rolled oats, not quick oats. I’ve got two versions to share with you, but only one which I’ll write down below.
If you want to make oatmeal that is still slightly mushy, then follow the recipe at the link above, simply using chocolate chips instead of cherries, rolled oats instead of quick oats, and a greased 8-inch square baking dish instead of ramekins (phew!), then increase the baking time to about 50 to 60 minutes. I also cut the amount of chocolate chips to ¼ cup with success, but for some reason I forgot about that and made the last few batches with the full amount, so that’s what the pictures show. On occasion, I used miniature chips, though they tend to melt more completely into the oatmeal than regular-sized chips (this can be a pro or a con, depending on your point of view).
Otherwise, here’s a version where the oats are a bit drier (though still wonderfully soft when warm) and with a bit less sugar. I’m really enjoying eating this for breakfast, and I may even get around to making it with the dried cherries. But until then, this is perfect!
½ cup dark chocolate chips (or dried cherries)
½ cup rolled oats (or quick oats)
2 Tbsp sugar
a pinch of salt
1 ½ cups lactose-free milk
1 egg
½ tsp almond extract (use artificial almond extract if you have nut allergies)
Preheat oven to 350 °F. Grease four ramekins.
Combine chocolate chips, oats, sugar and salt in a medium bowl. Stir in milk, egg and almond extract. Divide mixture evenly between ramekins and place them on a baking sheet lined with tin foil or parchment paper.
Bake 30 to 40 minutes or until centers are still slightly soft. Serve warm.
If you want to make oatmeal that is still slightly mushy, then follow the recipe at the link above, simply using chocolate chips instead of cherries, rolled oats instead of quick oats, and a greased 8-inch square baking dish instead of ramekins (phew!), then increase the baking time to about 50 to 60 minutes. I also cut the amount of chocolate chips to ¼ cup with success, but for some reason I forgot about that and made the last few batches with the full amount, so that’s what the pictures show. On occasion, I used miniature chips, though they tend to melt more completely into the oatmeal than regular-sized chips (this can be a pro or a con, depending on your point of view).
Otherwise, here’s a version where the oats are a bit drier (though still wonderfully soft when warm) and with a bit less sugar. I’m really enjoying eating this for breakfast, and I may even get around to making it with the dried cherries. But until then, this is perfect!
½ cup dark chocolate chips (or dried cherries)
½ cup rolled oats (or quick oats)
2 Tbsp sugar
a pinch of salt
1 ½ cups lactose-free milk
1 egg
½ tsp almond extract (use artificial almond extract if you have nut allergies)
Preheat oven to 350 °F. Grease four ramekins.
Combine chocolate chips, oats, sugar and salt in a medium bowl. Stir in milk, egg and almond extract. Divide mixture evenly between ramekins and place them on a baking sheet lined with tin foil or parchment paper.
Bake 30 to 40 minutes or until centers are still slightly soft. Serve warm.
Tuesday, March 06, 2012
Pasta e Fagioli
After I wrote that I want to eat less meat, my friend Jen sent me her recipe for pasta e fagioli. We tried it recently, and really liked it! It’s easy to prepare and is quite versatile, as you can use whatever vegetables you have on hand, and you can even add broth to make it into a soup. On the picture, you can’t quite tell apart the pasta from the white beans, but let me assure you that the combination was very good. You could probably use red beans if you prefer, like in my green bean and pasta salad.
3 Tbsp olive oil
1 large onion, chopped
2 carrots, sliced into half-moons
2 celery stalks, sliced
2 garlic cloves, minced
2 small zucchini, sliced into half moons (I didn’t use those)
½ lb spinach (or 5 leaves chard, coarsely chopped; I used leftover escarole)
3 cups chopped plum tomatoes with liquid (i.e., a 28-oz can)
15-oz can white kidney beans (with liquid)
¼ cup chopped fresh parsley
2 Tbsp chopped fresh basil leaves (or 1 tsp dried)
oregano, parsley or herbs of your choice
1 lb short chunky pasta (ziti, spirals or shells)
grated parmesan (optional)
Heat olive oil in a large pot. Sauté the onion, carrots, and celery for a few minutes. Add the garlic, zucchini, and any dried herbs you’re using. Sauté, stirring occasionally.
A few minutes later, add the spinach or chard and cook until just wilted. Mix in the tomatoes and white beans. Add water to make it the consistency you like. Flavor with parsley, fresh herbs and black pepper. Simmer gently for 15-20 minutes while you cook the pasta.
Cook the pasta al dente in a large pot of boiling water. Drain. Serve pasta topped with sauce (I mixed it all together). Top with grated parmesan if desired.
3 Tbsp olive oil
1 large onion, chopped
2 carrots, sliced into half-moons
2 celery stalks, sliced
2 garlic cloves, minced
2 small zucchini, sliced into half moons (I didn’t use those)
½ lb spinach (or 5 leaves chard, coarsely chopped; I used leftover escarole)
3 cups chopped plum tomatoes with liquid (i.e., a 28-oz can)
15-oz can white kidney beans (with liquid)
¼ cup chopped fresh parsley
2 Tbsp chopped fresh basil leaves (or 1 tsp dried)
oregano, parsley or herbs of your choice
1 lb short chunky pasta (ziti, spirals or shells)
grated parmesan (optional)
Heat olive oil in a large pot. Sauté the onion, carrots, and celery for a few minutes. Add the garlic, zucchini, and any dried herbs you’re using. Sauté, stirring occasionally.
A few minutes later, add the spinach or chard and cook until just wilted. Mix in the tomatoes and white beans. Add water to make it the consistency you like. Flavor with parsley, fresh herbs and black pepper. Simmer gently for 15-20 minutes while you cook the pasta.
Cook the pasta al dente in a large pot of boiling water. Drain. Serve pasta topped with sauce (I mixed it all together). Top with grated parmesan if desired.
Wonderful Olive Oil and Maple Granola
I love a good granola recipe. I’ve posted several before, my favorites of which are the seven-year granola, the French granola with chocolate chips, the fantastic maple granola, and my Mom’s croque-nature. I’ve got another favorite to add to the list now, thanks (once again) to Molly Wizenberg. It combines two techniques I’ve tried before, i.e. using olive oil for a bit of a savory touch and using maple syrup as a sweetener. It’s also got pumpkin seeds and sunflower seeds, and my favorite nut, pecans. Plus coconut chips, and big grains of salt instead of table salt. Basically, it’s got everything, and you should make it for breakfast right now because it’s really wonderful.
3 cups rolled oats
1 cup raw hulled pumpkin seeds
1 cup raw hulled sunflower seeds
1 cup unsweetened coconut chips
1 ¼ cup raw pecans, whole or chopped
½ cup light brown sugar
1 tsp kosher salt (I used sea salt)
¾ cup maple syrup, preferably Grade B
½ cup olive oil
Preheat the oven to 300 °F. Line a large rimmed baking sheet with parchment paper or grease a large roasting pan.
In a large bowl, combine the oats, pumpkin seeds, sunflower seeds, coconut chips, pecans, light brown sugar, and salt. Stir to mix. Add the olive oil and maple syrup, and stir until well combined. Spread the mixture in an even layer on the prepared sheet pan. Bake, stirring every 15 minutes, until the granola is golden brown and toasted, about 45 minutes. Remove the granola from the oven, and season with more salt to taste (I didn’t). Cool completely, stirring every once in a while to prevent excessive clumping. If you'd like, stir in some dried cherries or apricots (again, I didn’t this time). Store in an airtight container.
Pyjama, from two sources
My most recent sewing project was a pyjama. I had seen some nice printed fabric on sale and jumped on the occasion by buying three yards of it, then I bought 1 yard of coordinating fabric. Since the pink print wasn’t really something I’d wear as a shirt or a dress, but I still liked it, a pyjama seemed like the perfect thing. I looked through the sewing books I’ve got and settled on two patterns: one for lounge pants from Sewing Green and one for a nightie top from One-Yard Wonders. I’m starting to realize, though, that patterns from books and patterns printed from online sources are more often inaccurate than patterns bought by the unit (this is also the case with the project I’m currently working on; more on that later).
In this case, I only realized after cutting the fabric for the pants that the seam allowance was just ¼ inch. Most patterns I’ve worked with so far had between ½ inch and 5/8 inch for the seam allowance, which is enough for French seams, but ¼ inch is not. I did the French seams anyway at first, and while I could still put on the pants, they looked a bit tight and were not as comfy as one would want for pyjamas. So I ripped the seams and sewed the fabric right sides together, then I ended up making the inside seams pretty with single-fold bias tape (this is a trick I picked up in my last project, which I’ll post about soon). For the side seams, I just rolled the bias tape onto itself to avoid visible thread on the outside; for the crotch, I laid it flat on the seam and sewed both edges directly onto it, since the original pattern had me sew the seam trim flat with two seams anyway – my way may be more complicated, but I think the finished result is much prettier. And this is starting to matter to me; I like patterns that account for the inside finish as well. Trouble really came for the cuff of the pants: the pattern, which I cut out exactly as printed in the book, was actually 2 ½ inches too short for the cuff. I couldn’t fix it, so I had to cut a new piece of fabric, after some measuring. I’ve never had this problem with a pattern sold by the unit! The instructions for assembly had me confused, because I felt they weren’t clear at all, but I figured them out. In the end, though, I’m really happy with this pair of pants. They look good and are comfortable, so I’ll definitely wear them and perhaps make more.
As for the top, it’s a little more revealing than I had hoped. I can wear it around the house when my husband is the only one who’ll see it, but I’m not really comfortable with it. There was an added problem with it: I cut the fabric exactly as required by the pattern, without questioning anything, and made the rookie mistake of not accounting for the direction of the pattern. So the print isn’t in the same direction on the pant leg as on the stomach! Then again, it’s supposed to be diagonal on the bust area anyway. Also, once I realized my mistake, I measured the fabric I had left and realized that even if I had wanted to, I couldn’t have cut the stomach and back pieces with the correct orientation in the yard of fabric I had left. So it was originally my mistake, but I couldn’t have fixed it anyway. I did have enough contrasting fabric to make all the double-fold bias tape needed, though, and I liked the finished look it gave the garment (too bad there’s still one seam with an unfinished look under the bust).
In the end, I think the nightie top will stay in my drawer a lot, but I’ll find something nice to wear with the pants, perhaps a tank top I already own. My total expense: 3 yards of linen-cotton blend on sale at $4.89/yard on Fabric.com, one yard of cotton on sale at $5.60/yard, 2 spools of thread for about $5.50 and a few dollars of elastic, for a total of about $30.00. Not bad!
Sunday, March 04, 2012
My Warm Apple Cobbler with Miso
Normally, when the Engineer and I have dinner guests, that’s not the night I’ll be trying out a new recipe for the first time. There’s always the slight possibility it’ll fail, and then you’re left with a mess on your hands instead of dinner. Last winter, though, we invited one of the Engineer’s colleagues and his wife over for dinner, and I decided to make this apple cobbler from Bon Appétit, because it looked so warm and homey, yet had a “secret” ingredient: miso. I had never seen miso in a sweet recipe before, so I was intrigued. When I served the cobbler, though, I was disappointed, because the wedges of apples were undercooked, yet the topping was already a little too brown. That being said, I just loved the topping itself, as the miso gave it a discreet umami flavor, which was more of a je-ne-sais-quoi that anything one would pick out. So I decided to keep the recipe and tinker with it.
Then, Molly Wizenberg posted the recipe for Nigel Slater’s apple crumble on Orangette, titling it “This one does something interesting”. Indeed it does: the apples are cooked on the stovetop before being added to the baking dish, topped and put in the oven. So I decided to create a hybrid dessert, with Mr. Slater’s method for the apple filling and Bon Appétit’s miso topping, along with nutmeg instead of cinnamon for the apple filling, and a reduced baking time. It was much better, but I must admit that I never did achieve the beautiful golden, dough-y crust in the magazine photo. Interestingly, the Bon Appétit recipe does say it’s a streusel topping, which is technically what I got, but the picture makes it look almost like cake dough with a crispy top, like a cobbler. But really, the nice golden cobbler is what I wanted in the first place.
So then I fiddled with the topping ingredients for a while, adapting them from one recipe only to end up with a failure, and finally finding the right one: the basic recipe from À Bon Verre, Bonne Table for their spiced rhubarb cobbler (also delicious, btw). I added the interesting ingredients from the original recipe (ground ginger, cinnamon, and the white miso). Success! It was delicious, and the Engineer even had seconds.
So here we are: MY warm apple cobbler with miso topping, adapted and perfected from various sources. I scaled down the recipe to make a small cobbler in an 8-inch square baking dish; you can just double it and make it in a large oval or rectangular dish. For the apples, I recommend a mixture, ideally some that will hold their shape and some that will fall apart. The Bon Appétit recipe recommends Granny Smith and Fuji; I used four Braeburns the second time, and I even threw in a pear once, but last time (the final, winning batch), I used two Fuji apples and two Jonagold.
For the apple filling
4 medium apples, peeled, cored and cut into 1-inch chunks
juice and zest of a lemon
1/3 cup sugar (or ¼ cup, if your apples are sweet and you reduce the amount of lemon juice a bit)
1 tsp vanilla extract
¼ tsp nutmeg
2 Tbsp unsalted butter or margarine
Grease an 8-inch square baking dish.
Peel and core the apples, cut them into rough 1-inch chunks, and toss them with the juice and zest of the lemon, the sugar, the vanilla and the nutmeg.
Warm a skillet over medium-high heat. Add the butter, and when it stops foaming, dump in the apples and their juices. Nudge the apples around so that they lie in a single layer, and then leave them alone for a while. The juices will thicken to a syrup that coats the fruit, and the fruit should get golden in patches. Stir gently once or twice, cooking until the apples have a little color. (This may take longer than you’d expect.) They should smell sensational.
Turn the apples and any caramelly juices out of the skillet into the greased baking dish. If there are any sticky bits left in the skillet, add a squeeze of lemon juice and/or a splash of water, and stir until they dissolve. Add to the apples.
For the miso topping
1 cup all-purpose flour
½ cup sugar
1 ½ tsp baking powder
½ tsp salt
¼ tsp ground ginger
¼ tsp Ceylon cinnamon
1 ½ Tbsp sweet white miso
¼ cup unsalted butter or margarine, melted
1/3 cup lactose-free milk, at room temperature
1 egg, at room temperature
Preheat the oven to 350 °F.
Sift together the flour, sugar, baking powder, salt, ground ginger and cinnamon.
Combine melted butter, miso and milk. Whisk the egg into the milk mixture and pour on the flour mixture. Mix only until not streaks remain – the batter will look like thick pancake batter.
Pour spoonfuls of the batter on the apples, leaving small spaces between each spoonful for the batter to expand.
Bake for 30 to 35 minutes, until a toothpick inserted in the topping comes out clean. Serve warm.
Saturday, March 03, 2012
Vegetarian Carbonara with Sundried Tomatoes
I found this recipe on The Chubby Vegetarian; the pork is replaced with smoked sundried tomatoes (or plain sundried tomatoes, in my case). I have to say that it tasted remarkably close to the original! This recipe called for mixing the eggs with milk before incorporating them in the pasta, but next time, I will omit the milk entirely, because the eggs never quite coagulated like I wanted them to (whereas I never have a problem when I use eggs, instead of eggs and milk, in my regular carbonara). I rewrote the recipe below to reflect that. Perhaps I would also be more generous with the cheese and mix some into the pasta. The Engineer said he felt the dish was missing some kind of fresh herb to round it out, but I feel that if I add herbs, it will no longer be a pasta carbonara – not to say it wouldn’t be good.
3 eggs
2 Tbsp olive oil
¼ cup shallots, minced
a few sundried tomatoes (ideally smoked), minced
½ cup dry white wine
2 roma tomatoes, peeled (if you have the patience) and diced
Sea salt and cracked black pepper
A pinch of cane sugar
A dash of champagne vinegar
2 servings of dry spaghetti (or long pasta)
pecorino romano or parmesan, to taste
Place eggs in a bowl of warm water; this will raise the temperature of the eggs and is key to getting the creamy consistency associated with carbonara. Place a pot of salted water on to boil for the pasta.
In a large frying pan over medium-high heat, sauté shallots and sundried tomatoes in olive oil until shallots start to brown. Add the wine and reduce until most of the moisture has evaporated. Add the romas, salt, pepper, sugar and vinegar to the pan and stir.
Break the eggs and mix them in a bowl. Set aside.
Meanwhile, cook pasta according to package instructions. Place cooked pasta directly in the pan with the tomato mixture and immediately add egg mixture. Turn the heat off of the pan but keep it on the stove. Mix for a few minutes until sauce sticks to the noodles and is thick and creamy. Garnish with grated cheese; serve immediately.
Quinoa and Beet Pancakes
The title “Quinoa and Beet Pancakes” sounds descriptive in an objective kind of way. It doesn’t say how great they are. But titles like “Wonderful Quinoa and Beet Pancakes” or “Quinoa and Beet Pancakes To Die For” might not have their places in a serious cookbook… Kim Boyce’s Good to the Grain, by the way, is probably one of the best cookbooks I have. I don’t get to use my cookbooks nearly enough, but that’s another story.
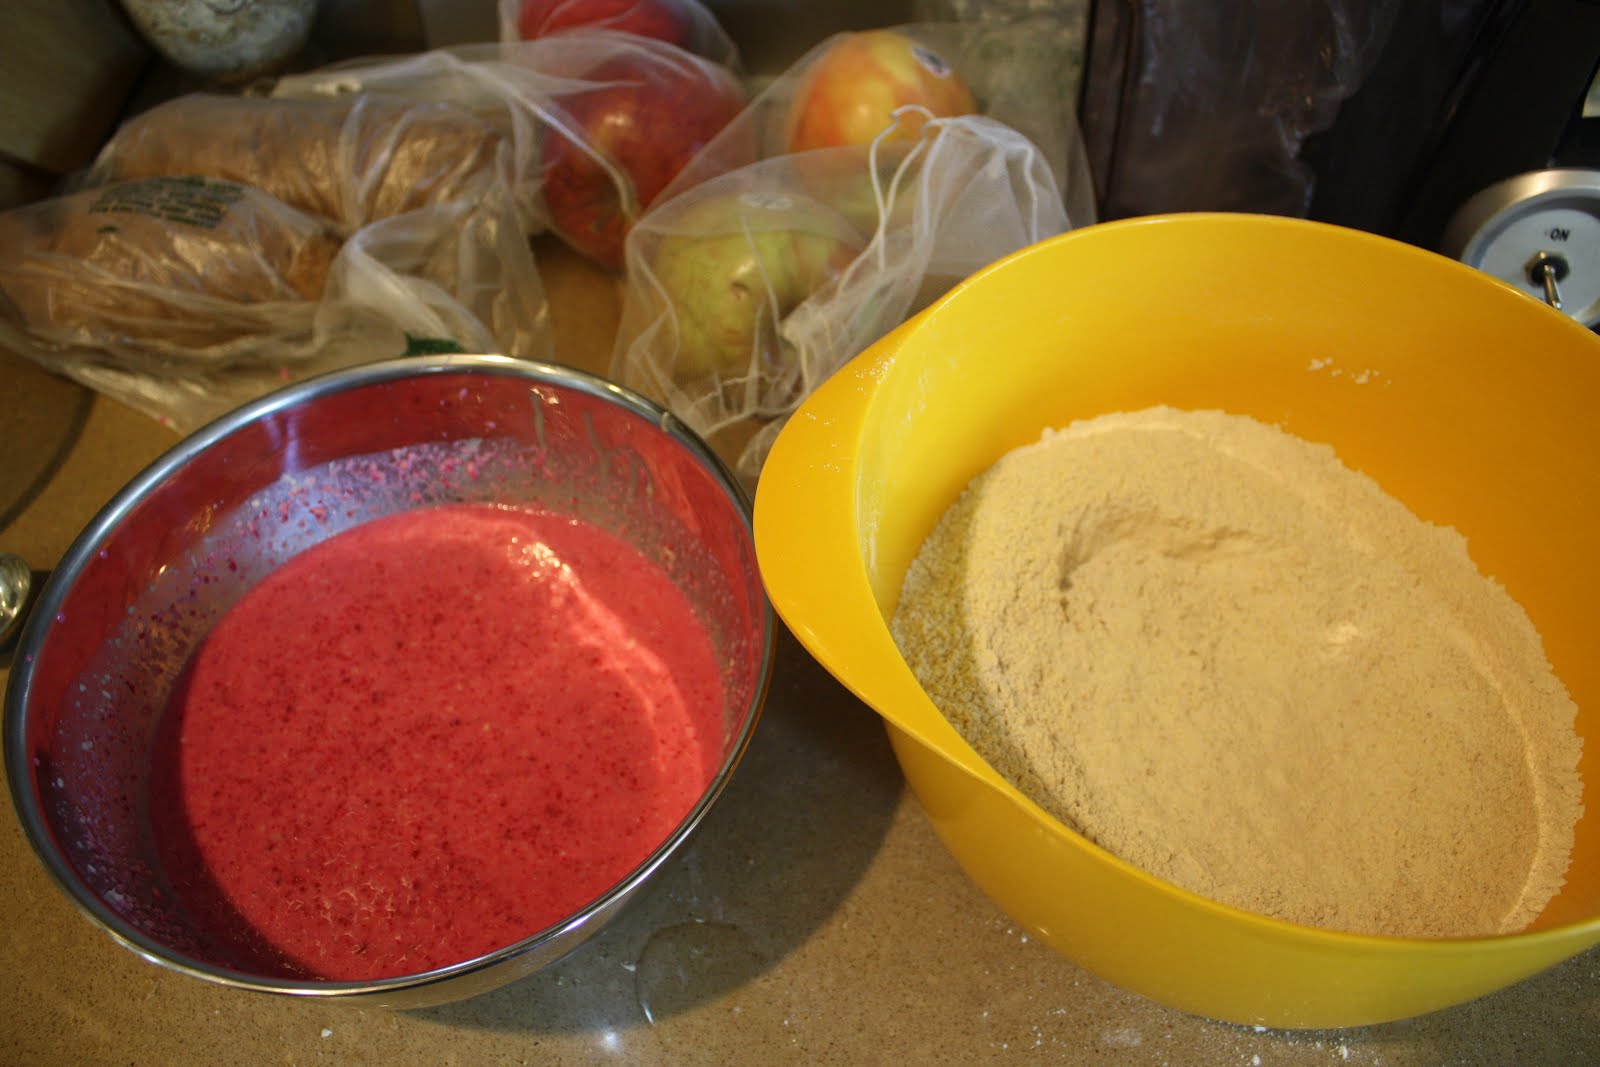
I was looking to use some of my quinoa flour, because it had been sitting in my pantry for a while. I spotted this recipe in Good to the Grain, and when I realized I already had some beet purée in the freezer, this was a sure thing. The original recipe also calls for ½ cup whole wheat flour and 1 cup all-purpose flour, but I used 1 ½ cups white whole wheat flour, with great results. Once the batter was made, I did add a little milk to get a better consistency, though this might depend on exactly how much beet purée you have. The result was a truly delicious, quite fluffy pink pancake. The quinoa and beet complement each other very well and are both somewhat earthy, though you have to know there’s beet in there to taste it (if you present these to your kids and call them pink pancakes, they’ll never know there’s a vegetable in them). I served them with maple syrup, and they were wonderful; we both really loved them. That being said, I think they were even better the next day! I froze the leftovers for a lazy morning.
3 medium-small red beets
½ cup quinoa flour
½ cup whole-wheat flour
1 cup all-purpose flour
3 Tbsp dark brown sugar
1 Tbsp baking powder
¾ tsp kosher salt
1 ½ cups lactose-free whole milk
1/3 cup lactose-free plain Greek yogurt
3 Tbsp unsalted butter or margarine, melted and cooled slightly
1 egg
Preheat the oven to 400 ˚F. Place the beets in a glass or metal baking dish with about ½ cup water in the bottom. Cover with aluminum foil and roast until very tender, about 1 hour. Cool, peel, and purée the beets in a food processor or blender until smooth. You will need ½ cup of beet purée (any remaining purée can be frozen for another time).
Sift the dry ingredients into a large bowl, pouring back into the bowl any bits of grain or other ingredients that may remain in the sifter.
In a medium bowl, whisk together the milk, yogurt, melted butter, egg, and ½ cup of beet purée until smooth. Using a spatula, add the wet ingredients to the dry ingredients and gently combine. The batter should be the consistency of lightly whipped cream and crimson in color. (Although the batter is best if used immediately, it can sit for up to 1 hour on the counter or overnight in the refrigerator. When you return to the batter, it will be very thick and should be thinned, 1 tablespoon at a time, with milk–take great care not to overmix.)
Heat a 10-inch cast-iron pan or griddle over medium heat until water sizzles when splashed onto the pan. Rub the pan generously with butter or oil. Working quickly, dollop ¼-cup mounds of batter onto the pan, 2 or 3 at a time. Once bubbles have begun to form on the top side of the pancakes, flip them over and cook until the bottom is dark golden-brown, about 5 minutes total. Wipe the pan with a cloth before griddling the next batch. Rub the pan with butter or oil and continue with the rest of the batter. If the pan is too hot or not hot enough, adjust the flame accordingly to keep results consistent.
Serve the pancakes hot, straight from the skillets, with a pitcher of warm maple syrup, encouraging your guests to pour as they please.
I was looking to use some of my quinoa flour, because it had been sitting in my pantry for a while. I spotted this recipe in Good to the Grain, and when I realized I already had some beet purée in the freezer, this was a sure thing. The original recipe also calls for ½ cup whole wheat flour and 1 cup all-purpose flour, but I used 1 ½ cups white whole wheat flour, with great results. Once the batter was made, I did add a little milk to get a better consistency, though this might depend on exactly how much beet purée you have. The result was a truly delicious, quite fluffy pink pancake. The quinoa and beet complement each other very well and are both somewhat earthy, though you have to know there’s beet in there to taste it (if you present these to your kids and call them pink pancakes, they’ll never know there’s a vegetable in them). I served them with maple syrup, and they were wonderful; we both really loved them. That being said, I think they were even better the next day! I froze the leftovers for a lazy morning.
3 medium-small red beets
½ cup quinoa flour
½ cup whole-wheat flour
1 cup all-purpose flour
3 Tbsp dark brown sugar
1 Tbsp baking powder
¾ tsp kosher salt
1 ½ cups lactose-free whole milk
1/3 cup lactose-free plain Greek yogurt
3 Tbsp unsalted butter or margarine, melted and cooled slightly
1 egg
Preheat the oven to 400 ˚F. Place the beets in a glass or metal baking dish with about ½ cup water in the bottom. Cover with aluminum foil and roast until very tender, about 1 hour. Cool, peel, and purée the beets in a food processor or blender until smooth. You will need ½ cup of beet purée (any remaining purée can be frozen for another time).
Sift the dry ingredients into a large bowl, pouring back into the bowl any bits of grain or other ingredients that may remain in the sifter.
In a medium bowl, whisk together the milk, yogurt, melted butter, egg, and ½ cup of beet purée until smooth. Using a spatula, add the wet ingredients to the dry ingredients and gently combine. The batter should be the consistency of lightly whipped cream and crimson in color. (Although the batter is best if used immediately, it can sit for up to 1 hour on the counter or overnight in the refrigerator. When you return to the batter, it will be very thick and should be thinned, 1 tablespoon at a time, with milk–take great care not to overmix.)
Heat a 10-inch cast-iron pan or griddle over medium heat until water sizzles when splashed onto the pan. Rub the pan generously with butter or oil. Working quickly, dollop ¼-cup mounds of batter onto the pan, 2 or 3 at a time. Once bubbles have begun to form on the top side of the pancakes, flip them over and cook until the bottom is dark golden-brown, about 5 minutes total. Wipe the pan with a cloth before griddling the next batch. Rub the pan with butter or oil and continue with the rest of the batter. If the pan is too hot or not hot enough, adjust the flame accordingly to keep results consistent.
Serve the pancakes hot, straight from the skillets, with a pitcher of warm maple syrup, encouraging your guests to pour as they please.
Subscribe to:
Posts (Atom)