Wednesday, May 20, 2020

Sweet Potato Salad with Pepita Dressing

This sweet potato salad with pepita dressing was so good! Right up my alley, too, what with roasted sweet potatoes, pepitas and avocados! You could also add cheese such as cotija or feta (just make sure it’s lactose-free, and obviously the dish is no longer vegan at that point). I didn’t bother presenting the whole thing on a tray, I just plated it right away, and used a second avocado the next day. It was a great lunch – the Little Prince ate a few sweet potatoes, while the Fox gobbled up the avocado, but I liked all of it.

2 lbs (about 4 medium) sweet potatoes
6 Tbsp. olive oil
1 ½ tsp. kosher salt
freshly ground black pepper
¼ cup pepitas (hulled pumpkin seeds), raw or roasted
1 tsp. mild (Aleppo-style) or hot red pepper flakes, or less to taste
2 limes
1 15-oz can black beans
1 large avocado
1 big handful fresh cilantro
4 thin scallions
1 cup crumbled lactose-free cotija (optional)

Heat oven to 400 °F. Cut potatoes in half lengthwise, and then into ¼-inch half-moon slices. Coat a large baking sheet with 1 tablespoon of the olive oil (I personally prefer to line my baking sheet with tin foil and toss the potatoes with oil and seasonings before putting them on the sheet). Scatter sweet potatoes over and toss them with another 1 to 2 tablespoons olive oil, 1 ½ teaspoons kosher salt, and many grinds of black pepper. Spread them evenly in pan; they won’t fit in one single layer at this point and that’s fine as they shrink as they roast. Roast for 20 minutes, until browned underneath, then flip potatoes and roast another 15 minutes, until all of the pieces are tender and have brown spots.

While potatoes roast, combine pepitas with 3 tablespoons olive oil (or a bit less) in a small skillet and warm over medium heat. Let pepitas sizzle in oil for 1 to 2 minutes but keep a close eye on them; raw ones may be able to handle more time, but already roasted ones will need less to get one shade darker. Remove from heat, season with salt to taste plus red pepper flakes. Set aside until potatoes are ready.

Drain and rinse your black beans. Halve avocado and remove the pit. Leave halves in their skin and cut avocado into thin slices, not cutting through the skin. Roughly chop cilantro, thinly slice scallions (white and green), and halve your limes, cutting one further into wedges. Squeeze one lime wedge over avocado to keep it from browning.

When potatoes are ready, immediately spoon pepitas and oil over potatoes, and squeeze the juice of your lime halves over. Scatter tray with black beans. Use a spoon to remove avocado slices in sections and fan them out over the tray. Sprinkle pan with cilantro and scallions, plus cotija if you’re using it. Season well with additional salt and pepper.

Scoop sections of potatoes and their toppings onto plates, serve with extra lime wedges, and eat right away. (For leftovers, I recommend taking the salad out of the fridge and letting it come close to room temperature before chopping up another avocado and assembling everything.)


Tuesday, May 19, 2020

Galettes à la mélasse


J’ai vu cette recette sur le site de Ricardo et je me suis dit que je voulais une recette traditionnelle comme ça! J’ai fait cuire les galettes moins longtemps, afin qu’elles restent moelleuses, et c’était délicieux! J’ai obtenu 17 galettes, et elles se conservent quelques jours dans un contenant hermétique.

2 ½ tasses (375 g.) de farine tout-usage
1 c. à thé de bicarbonate de soude
1 c. à thé de poudre à pâte
½ c. à thé de cannelle moulue
½ c. à thé de gingembre moulu
1 pincée de clou de girofle moulu
1 pincée de sel
½ tasse (1 bâton) de beurre sans lactose ou de margarine, à la température de la pièce
¾ tasse de cassonade
½ tasse de mélasse
1 œuf
2 c. à soupe de lait sans lactose

Placer la grille au centre du four. Préchauffer le four à 350 °F. Tapisser deux plaques à biscuits de papier parchemin.

Dans un bol, mélanger la farine, le bicarbonate, la poudre à pâte, les épices et le sel. Réserver.

Dans un autre bol, crémer le beurre avec la cassonade et la mélasse au batteur électrique. Ajouter l’œuf et bien mélanger. À basse vitesse ou à la cuillère de bois, incorporer les ingrédients secs en alternant avec le lait.

À l’aide d’une cuillère à crème glacée d’environ ¼ tasse, répartir 7 boules de pâte sur chaque plaque en les espaçant de 6,5 cm (2 ½ po).

Cuire au four, une plaque à la fois, environ 15 minutes. Laisser refroidir complètement sur une grille.

Monday, May 18, 2020

Chicken Vegetable Soup

I decided to try my luck with soups again, now that the Fox has more dexterity. I had bookmarked this one on Orangette ages ago and circled back to it because it was described as something that cooks down to almost a stew. Turns out that didn’t happen, but still, it was a much bigger success than I anticipated! I had peeled the zucchini to make it an easier sell with the kids, and it ended up practically melting in my mouth. The Little Prince actually said that he *liked* the green things (!) and had seconds. The Fox, who got a bowl with mostly bite-sized solid foods and just a little broth, ate ALL his vegetables (though not the chicken). So I’ll have to make it again!

For the chicken broth, I used organic Better Than Bouillon (which some chefs refer to as “meat paste”), but if you’ve got homemade stock on hand, go for it! The original recipe calls for a chayote, but we’re in a pandemic and I’m doing my best with what I’ve got, so I didn’t use it.

roughly 3 pounds (1.4 kg) chicken parts
2 quarts (roughly 8 cups) chicken broth, or enough to cover the chicken in the pot
4 whole garlic cloves, smashed under the side of a knife
4 carrots, peeled and cut into 2-inch chunks
4 small or 2 medium zucchini, cut into 2-inch batons (I peeled mine)
1 chayote, peeled and cut into 2-inch chunks (optional; I didn’t use it)
½ bunch cilantro sprigs, bundled with twine if you want
leaves from a few mint sprigs
kosher salt, to taste

Put the chicken and broth in a Dutch oven or other 5-quart pot. Bring to a boil over high heat. Skim away any foam that rises to the surface. Adjust heat to a very gentle simmer, and then add garlic, carrots, zucchini, chayote (if using), herbs, and a good pinch of salt. Cook for about 40 minutes, or until the chicken is cooked through and vegetables are meltingly tender. Remove the chicken pieces, allow to cool as needed, and then coarsely shred the meat. Return the meat to the pot, taste for salt, and serve.

Sunday, May 17, 2020

Baked Oatmeal with Caramelized Pears and Vanilla Cream

Just like my earlier apple crisp, this breakfast is great for confinement because we still had pears and oatmeal flakes at the grocery store. I didn’t have lactose-free cream, however, so I used coconut milk instead, but lactose-free milk would work in a pinch. Also, I didn’t have any more vanilla beans, but I made it work with vanilla bean paste. I really enjoyed it, and so did the Engineer, but sadly my kids refused to even taste it – their loss! The recipe is from Smitten Kitchen Every Day.

For the vanilla sugar
½ cup + 2 Tbsp (125 g) sugar
½ vanilla bean

For the pears
2 Tbsp. lactose-free butter or margarine
3 pears (preferably d’Anjou, Forelle, or firm Bartletts)
1 lemon

For the oatmeal
1 cup lactose-free milk
1 cup water
2 Tbsp. lactose-free butter or margarine
2 large eggs
1 ½ tsp. coarse or kosher salt
2 tsp. baking powder
3 cups (240 g) rolled oats

To finish
lactose-free cream or coconut milk


For the vanilla sugar
Place the sugar in a small bowl. Split the vanilla bean, scrape the seeds into the sugar, and use your fingertips to distribute the seeds throughout; the abrasion helps release more flavor. Save the pod: there’s tons more flavor to be had, and we’re going to use it.

Heat the oven to 400 °F. While it’s heating, place butter in a 9-by-13-inch or equivalent-sized baking dish in the oven to let it melt.

For the pears
Finely grate the zest of half of your lemon and set it aside; you’ll use it later. Juice the whole lemon, you’ll use it now. Peel the pears, split them lengthwise, and remove cores and any thick-looking stems. Toss the pears with the lemon juice. Remove the baking dish with melted butter from the oven, and sprinkle ½ cup vanilla sugar into it. Arrange the pears, cut side down, over the sugar, and drizzle with any lemon juice left in bowl. Cover tightly with foil and bake for 20 minutes. Then remove foil and bake another 10 minutes.

For the oatmeal
Meanwhile, whisk the milk, water, butter, eggs, salt, and reserved zest together in a large bowl. Sprinkle the baking powder over these and stir to combine; add oats and stir again.

Use a thin spatula to turn the pears over carefully, spooning as much sauce from the pan over the pears as they will hold. Reduce heat to 350 °F. Dollop the oat mixture around the pears in the pan. Return the dish to the oven and bake for 20 to 25 minutes, or until the pears are soft and the oatmeal edges are golden brown.

For the vanilla cream
Bring the cream, remaining vanilla sugar, and reserved empty vanilla bean pod to a simmer in a saucepan. Simmer 5 minutes, reducing to ¾ cup. Chill the mixture if you prefer cold cream on your hot oatmeal.

To serve, scoop one pear half and its surrounding oatmeal into a bowl, and drizzle with 1 to 2 tablespoons vanilla cream. Refrigerate leftovers until needed, up to one week, warming one portion at a time.

Friday, May 15, 2020

Batch of links

- Even though things are almost back to normal in grocery stores here, there are still occasional ingredient shortages… Did you see Smitten Kitchen’s list of meals you can make from pantry staples?

- There’s also an app to figure out what to make based on the ingredients you have on hand: SuperCook.

- An interview with Samin Nosrat about her new podcast, Home Cooking.

- Four foodies to follow on Instagram and the kitchen hacks they swear by, in Parents magazine.

- I *loved* Postcards – A Love Story (which also contains prompts for writing postcards as well as ideas for displaying the ones you receive).

- I also loved this photo series, of pictures the photographer took of her parents waving goodbye every time she left their house, over decades.

- Dr. Karen Daniels is a physicist who studies the mathematics and mechanics of knitting. As this article explains, “knitting is coding and yarn is programmable”. (This article was also good.) If you’re curious, here is her favorite pattern, the Dragon of Happiness shawl.

- Interestingly, knitting was once used by spies to encode messages.

- Knitting also has physical and emotional benefits. It can help one get over digital overload. Heck, here are 46 facts about knitting. Probably the most surprising to the general population is that knitting used to be a male activity.

- I also really enjoyed this article about Yasemin Esmek, the woman who knit the sweaters for the movie A Beautiful Day in the Neighborhood. It took her nine weeks to knit the six cardigans, and now I have a bunch of questions like, How many hours a day? And how much does that gig pay? (If you want to buy a machine-made one, I think these are your best bet.)

- There was also this article about Jenn Monahan, the woman who knit some pieces for 2019’s Little Women. (And while we’re at it, here’s An Oral History of the 1994 Adaptation, because I lost track of how many times I saw it.)

- This essay titled My Appetites certainly went places I didn’t expect.

- My neighbors started a Little Free Library on their driveway during confinement. My kids like to pick up or drop off a book when we walk by, and I picked up a few magazines last week. One had this article about a program in which female inmates record themselves reading a story, and the recording is then sent to their kids.

- Finally, I really enjoyed this interview with Adriene Mishler, she of Yoga with Adriene. I love her yoga practices because she is down-to-earth and mellow, and her videos are perfect for a beginner (unlike, say, this 21-day yoga challenge with which I just couldn’t keep up). She also has practices for more advanced people, but I’m still working on basics. I actually started working out on weekdays last year, and eventually moved to a steady schedule of 3 Beach Body workouts (email me if you want my coach’s coordinates) and 2 practices of Yoga with Adriene each week, during my son’s nap after lunch. The yoga was my favorite part. Sadly, since my oldest is out of school and my youngest stopped napping at the same time, I haven’t been able to work out since mid-March, but I want to make the time for Yoga with Adriene again.

Wednesday, May 13, 2020

Croustade aux pommes


Une croustade aux pommes, c’est un dessert parfait en temps de pandémie. On a des pommes, on a des flocons d’avoine, c’est beau. Bon, au printemps au Texas, j’ai dû prendre des pommes Jazz au lieu de celles demandées dans la recette, mais c’était délicieux quand même!

450 g (1 lb) de pommes Cortland, pelées, épépinées et coupées en dés
450 g (1 lb) de pommes McIntosh, pelées, épépinées et émincées
1 tasse (210 g) de cassonade légèrement tassée
½ tasse (1 bâton) de beurre sans lactose, à température de la pièce
½ tasse (75 g) de farine tout-usage
½ tasse (50 g) de flocons d’avoine à cuisson rapide
¼ tasse (25 g) de gros flocons d’avoine
1 pincée de sel

Placer la grille au centre du four. Préchauffer le four à 350 °F. Beurrer un moule carré de 20 cm (8 po).

Dans un bol, mélanger les deux variétés de pommes avec la moitié de la cassonade (105 g/½ tasse). Répartir dans le moule.

Dans le même bol, mélanger le reste de la cassonade avec le beurre, la farine, les deux types de flocons d’avoine et le sel jusqu’à ce que la préparation soit tout juste humectée et colle ensemble sous la pression des doigts. Couvrir les pommes du croustillant.

Cuire au four 50 minutes ou jusqu’à ce que le croustillant soit doré, et les pommes, cuites. Laisser tiédir 1 heure avant de servir.

Beef Bulgogi Tacos

This recipe is from Deb Perelman’s Smitten Kitchen Every Day (great book, BTW). I wasn’t originally going to talk about these, because they seem simple enough, but then I served them and lo and behold, the Little Prince now likes lettuce! Well, only when it’s dressed like this and served in tacos, but still, it’s a start. I doubled the amounts for the filling to get leftovers; I recommend dressing the lettuce only before serving it, though, so store leftover lettuce and dressing separately in the fridge.

For the filling (makes 8 small tacos; don’t hesitate to double the quantities)
1 lb. ground beef
1 large garlic clove, minced
one 1- to 2-inch piece of fresh ginger, peeled and minced
¼ cup low-sodium soy sauce
2 Tbsp. brown sugar
3 Tbsp. rice vinegar
1 Tbsp. toasted sesame oil
Red pepper flakes, gochujang, or sriracha (to taste)

For serving
2 cups thinly sliced lettuce (I use romaine)
1 Tbsp. lime juice
1 ½ Tbsp. toasted sesame oil
salt
1 scallion, thinly sliced
8 small flour tortillas
diced tomatoes
kimchi (I omitted it)
fresh cilantro leaves
sesame seeds
lime wedges

Heat a large skillet over medium-high heat. Once it’s hot, add the ground beef and use a spoon or spatula to break it up, cooking the beef until browned, 7 to 10 minutes. Drain any excess grease. Add the garlic, ginger, soy sauce, brown sugar, rice vinegar, and sesame oil to the pan and simmer, stirring, for 2 minutes. Add red pepper flakes, gochujang, or sriracha to taste.

Toss the lettuce, lime juice, sesame oil, and scallions in a medium bowl to evenly coat. Season to taste with salt.

Warm the flour tortillas individually in a dry skillet (or in a stack in the microwave). Scoop the beef onto each tortilla with a slotted spoon, draining any excess juices as you do. Garnish with the salad mixture, tomatoes, kimchi, cilantro, and sesame seeds, and squeeze extra lime wedges over them if desired.

Tuesday, May 12, 2020

Pouding chômeur au cari

Cet hiver, j’ai fait un pouding chômeur cet hiver avec des citrons Meyer de mon jardin. Il s’agissait d’une recette du magazine 3 fois par jour, semblable à celle-ci, mais avec des citrons Meyer et du chocolat blanc. Et… j’ai trouvé ça vraiment moyen. Et « moyen », c’est toujours décevant quand on a des quantités limitées de sirop d’érable en stock! Mais j’ai ensuite essayé un pouding chômeur érable et cari parce qu’il paraît que ces deux ingrédients ont des profils de saveur semblables. (Et pourtant, ce n’est pas dans La Bible des saveurs…)

Ça ne bat pas celui du Pied de Cochon, mais quand même, c’est très bon! On ne devine pas l’ingrédient mystère, on dirait plutôt que le dessert a un petit je-ne-sais-quoi. Pour les intéressés, la recette avait été créée pour être dégustée avec un verre de cidre de glace du Domaine Pinnacle.

Pour la sauce
1 tasse de cassonade
1 tasse de sirop d’érable
1 tasse d’eau bouillante
¼ tasse de beurre sans lactose ou de margarine

Pour la pâte
1 ½ tasse de farine
1 c. à thé de poudre à pâte
1 ½ c. à thé de poudre de cari
1 pincée de sel
¼ tasse de beurre sans lactose ou de margarine, à la température de la pièce
1 tasse de sucre
1 œuf
1 tasse de lait sans lactose

Pour la sauce
Mélanger tous les ingrédients dans une casserole. Amener à ébullition et faire chauffer, en mélangeant, pendant 2 minutes. Fermer le feu et réserver.

Pour la pâte
Préchauffer le four à 325 °F. Graisser un moule de 8" x 12".

Dans un petit bol, mélanger la farine, la poudre à pâte, la poudre de cari et le sel. Réserver.

Avec un batteur électrique, mélanger le beurre, le sucre et l’œuf jusqu’à homogénéité. Ajouter, en alternant, le mélange sec réservé et le lait, en battant après chaque ajout.

Mettre la pâte dans le moule préparé. Verser doucement la sauce réservée sur le dessus, sans mélanger. Cuire au four pendant 45 minutes.

White Pesto Pasta

I really like pasta. Sometimes I make something homey, like these Old-World manicotti, but often I want something simpler. I tried a recipe from 3 fois par jour which was, seemingly, a simple sauce made with red lentils and walnuts, mixed with ricotta, and served with broken-up lasagna pasta. It sounded great in theory, but it made an obscene amount of sauce (it was meant for 2 servings of pasta, and I ate more than that, and still put 2 containers in the freezer), and it was bland. I eventually doctored up the rest of the sauce with butter (channeling my inner Marcella Hazan), herbs, and meatballs.

The simple recipe that was the best in recent memory was Bon Appétit’s white pesto pasta. It’s supposed to serve 4, but with 1 pound of pasta, it was certainly enough for 2 meals for us. I really liked this! It’s easy to make (once you’ve got your lactose-free ricotta, and even that is more of a mental hurdle than a physical one) – it all goes in one bowl, no food processor needed!

I’m reprinting my recipe for lactose-free ricotta below; note that it makes about twice as much as you need for this dish.

For the ricotta (yield: about 8 oz.)
3 cups lactose-free whole milk
1 cup lactose-free cream (if unavailable, use 1 more cup lactose-free whole milk and see note above)
½ tsp coarse sea salt
3 Tbsp. freshly squeezed lemon juice

Pour the milk, cream and salt into a 3-quart nonreactive saucepan. Attach a candy or deep-fry thermometer. Heat the milk to 190 °F, stirring it occasionally to keep it from scorching on the bottom. Remove from heat and add the lemon juice, then stir it once or twice, gently and slowly. Let the pot sit undisturbed for 5 minutes.

Line a colander with a few layers of cheesecloth and place it over a large bowl (to catch the whey). Pour the curds and whey into the colander and let the curds strain for at least an hour. At an hour, you’ll have a tender, spreadable ricotta. At two hours, it will be spreadable but a bit firmer, almost like cream cheese. (It will firm as it cools, so do not judge its final texture by what you have in your cheesecloth.) Discard the whey, or, if you’re one of those crafty people who use it for other things, of course, save it. Use the ricotta right away or transfer it to an airtight container and refrigerate until ready to use.

For the white pesto pasta
½ cup walnuts (honestly, I think pecans would work too)
kosher salt
4 oz. lactose-free ricotta (see above)
zest of 1 lemon
1 garlic clove, finely grated
2 tsp. finely chopped oregano
2 oz. finely grated parmesan (about 1 ½ cups), plus more for serving
¼ cup extra-virgin olive oil
freshly ground black pepper
1 lb. tube- or rod-shaped pasta (such as rigatoni or spaghetti)

Preheat oven to 350°. Toast walnuts on a rimmed baking sheet, tossing once, until golden brown, 6–8 minutes. Let cool, then finely chop. Bring a large pot of generously salted water to a boil.

Vigorously mix walnuts, ricotta, lemon zest, garlic, oregano, and 2 oz. parmesan in a large bowl until well combined. Add oil 1 Tbsp. or so at a time, stirring well after each addition, until all the oil is incorporated. Season pesto with salt and pepper.

Cook pasta in pot of boiling water, stirring occasionally, until al dente. Scoop 1 cup pasta cooking liquid into bowl with pesto and stir gently to combine (it’s okay if some of the pesto is still in small clumps). Using a spider, tongs, or slotted spoon, transfer pasta directly to bowl with pesto. Mix energetically until pesto thickens enough to lightly coat pasta, about 2 minutes; the pasta should have sauce clinging to it but there should also be some extra sauce that collects in bottom of bowl.

Divide pasta among bowls and serve with more parmesan alongside for sprinkling over.

Monday, May 11, 2020

Minigâteaux bundt cardamome et pavot

Ce dessert, ça a été un délicieux désastre. C’est que la recette d’origine parle de 6 moules à gâteaux bundt miniatures, mais en fait, il en faudrait 12. Quand j’ai vu que j’avais trop de pâte pour 6, j’en ai utilisé 8, et même là, ça a débordé de partout! De plus, il faudrait fariner les moules en plus de les beurrer. Cependant, c’était tellement bon que je pense en refaire… avec mes modifications, bien entendu (j’ai aussi changé un peu la glace à la fleur d’oranger). Ça aurait été plus joli avec des pistaches concassées et des pétales de rose séchés pour décorer, mais je n’en avais pas.

Pour les gâteaux
2 tasses de farine
1 tasse de semoule de maïs fine
3 c. à soupe de graines de pavot
2 c. à thé de cardamome moulue
1 c. à thé de poudre à pâte
1 c. à thé de bicarbonate de sodium
½ c. à thé de sel
¼ c. à thé de curcuma
1 tasse de beurre sans lactose non salé ramolli
2 tasses de sucre
2 c. à soupe de zeste de citron râpé
4 œufs
¾ tasse de crème sans lactose ou de lait de coco

Pour la glace à la fleur d’oranger
1 tasse de sucre glace, tamisé
2-4 c. à soupe de crème sans lactose ou de lait de coco
1 c. à thé d’eau de fleur d’oranger
pistaches concassées et pétales de rose séchés, pour décorer (facultatif)


Pour les minigâteaux
Préchauffer le four à 350 °F. Beurrer et fariner généreusement 12 moules à gâteau bundt miniatures.

Dans un bol, à l’aide d’un fouet, mélanger la farine, la semoule de maïs, les graines de pavot, la cardamome, la poudre à pâte, le bicarbonate, le sel et le curcuma.

Dans un grand bol, à l’aide du batteur électrique, battre le beurre avec le sucre et le zeste de citron jusqu’à ce que le mélange soit crémeux. Incorporer les œufs, un à la fois, en battant jusqu’à ce que le mélange soit homogène. Ajouter les ingrédients secs en alternant avec la crème. Répartir la pâte dans les moules préparés.

Cuire au four pendant 25 minutes ou jusqu’à ce qu’un cure-dents piqué au centre des gâteaux en ressorte propre. Déposer les moules sur une grille et laisser refroidir légèrement. Démouler les gâteaux sur la grille et laisser refroidir complètement.

Pour la glace à la fleur d’oranger
Mélanger le sucre glace, 2 c. à soupe de lait de coco et l’eau de fleur d’oranger. Ajouter 1-2 c. à soupe de lait de coco au besoin (moi, j’ai trouvé que la consistance de la glace était bien assez liquide comme ça sans en rajouter).

Une fois les gâteaux refroidis, les arroser de la glace. Garnir de pétales de rose et de pistaches, si désiré́.

Pappardelle au bœuf braisé et à la courge

Je voulais faire un bouilli de bœuf. J’avais essayé cette recette d’America’s Test Kitchen, mais malheureusement, on a tous été très déçus. Par contre, les pappardelle au bœuf braisé et à la courge de Ricardo, ça a été tout un succès! J’ai utilisé un paquet de 16 onces de pâtes, mais je pense que 12 onces auraient suffi, alors la prochaine fois j’achèterai peut-être un paquet de 12 onces (le genre qui contient des légumes ou des céréales complètes, par exemple).

450 g (1 lb) de palette de bœuf désossée et coupée en petits cubes
2 c. à soupe d’huile végétale
1 oignon, haché
1 carotte, coupée en petits dés
1 branche de céleri, coupée en petits dés
3 gousses d’ail, hachées
2 c. à soupe de pâte de tomates
1 tasse de vin rouge
1 ¼ de fond de veau (j’ai pris du bouillon de bœuf)
½ tasse de parmesan frais râpé
¼ tasse de persil plat, ciselé
1 citron, le zeste râpé finement
350 g (2 ½ tasses) de courge butternut, coupée en petits dés
340 g (12 oz) de pappardelle (vois note plus haut)

Placer la grille au centre du four. Préchauffer le four à 350 °F.

Dans une grande casserole, à feu moyen-élevé, dorer la moitié du bœuf à la fois dans l’huile. Saler et poivrer. Réserver sur une assiette.

Dans la même casserole, à feu moyen, dorer l’oignon, la carotte, le céleri et l’ail 2 minutes. Ajouter la pâte de tomates et cuire 1 minute en remuant. Déglacer avec le vin et réduire de moitié. Remettre la viande et ajouter le fond de veau. Porter à ébullition et couvrir. Cuire au four 2 heures ou jusqu’à ce que la viande soit tendre, en ajoutant la courge pour la dernière demi-heure de cuisson. (Honnêtement, ce serait délicieux avec de la courge rôtie aussi.)

Retirer du four. Effilocher la viande en l’écrasant à l’aide d’une cuillère de bois (je ne l’ai pas fait). Réserver.

Entre-temps, dans un petit bol, mélanger le parmesan, le persil et le zeste de citron. Réserver.

Dans une grande casserole d’eau bouillante salée, cuire les pâtes al dente. Prélever 1 tasse d’eau de cuisson. Égoutter les pâtes et les ajouter au bœuf. Ajouter ½ tasse de l’eau de cuisson et la moitié du mélange de parmesan. Réchauffer 1 minute en remuant pour bien enrober les pâtes de la sauce. Ajouter plus d’eau de cuisson au besoin. Rectifier l’assaisonnement. Répartir dans des assiettes et garnir du reste du mélange de parmesan.

Sunday, May 10, 2020

Pancakes with Mini Chocolate Chips

I got this recipe when I was at HEB, before the pandemic (before Valentine’s Day, actually); it was next to a bag of flour in the baking aisle, and even though I wasn’t looking for a pancake recipe, it spoke to me, so I tore off a copy and brought it home. I made it once, and possibly for the first time of my life, I ran out of baking powder and only had not-quite-half the required amount. I googled how to substitute for it and ended up using a mixture of 2 parts cream of tartar to 1 part baking soda, but I believe my cream of tartar was stale. So the first batch failed, but it was my fault. Then I put both baking soda and cream of tartar on my grocery list, as well as miniature chocolate chip, which I felt would work better (I reduced the amount accordingly and wrote it below). I made the pancakes again, and this time they were really, really good.

When I make pancakes, I mix the dry ingredients and leave them out on the counter overnight, while the wet ingredients go in the fridge. All I have to do in the morning is mix them together and cook pancakes.

2 cups all-purpose flour
¾ cup sugar
2 Tbsp. baking powder
½ tsp. cinnamon (optional)
½ tsp. kosher salt
3 large eggs
1 ½ cups lactose-free milk
1 tsp. vanilla
¾ cup miniature chocolate chips

In a large bowl, sift together flour, sugar, baking powder, cinnamon, and salt. Whisk to combine. In another bowl, beat eggs together with milk and vanilla.

Pour wet ingredients into dry and whisk until combined with no dry spots – don't over mix. Fold in chocolate chips. Let rest for 5 minutes.

While batter rests, heat a skillet or griddle over medium heat. Spray with non-stick spray and portion out 2-ounce (¼-cup) scoops of pancake batter, leaving space between each pancake.

Cook for 2 minutes per side or until bubbles appear and pop in the center of the pancakes. After flipping, cook for 2 more minutes. Continue with remaining batter. Serve immediately with your favorite toppings (maple syrup or fruit were good, but these were actually great on their own!).

Saturday, May 09, 2020

Sheet Pan Chicken Meatballs with Turmeric and Chickpeas

My family likes meatballs. When I saw these sweet and sour sesame chicken meatballs from a trusted source, I thought they looked delicious, but they turned out to be an absolute disaster. There was way too much pomegranate molasses and it was very off-putting. But then another chicken meatball recipe caught my eye, as well as a sheet pan chicken recipe that had the same flavor profile (turmeric, chickpeas, red onions) – and now that I’m looking at it more closely, I realize that the meatballs are adapted from the whole chicken pieces recipe. The meatballs were a bit more trouble to make, and they turned out a bit less flavorful than the chicken pieces. However, the chicken pieces are a bit harder to serve (especially when you have to cut the meat for kids in addition to yourself). You might want to take a look at both recipes, depending on your criteria at the time; the meatballs (recipe below) are from Deb Perelman in Smitten Kitchen, while the chicken pieces are from Alison Roman in New York Times Cooking (via Chrissy Teigen, and just now before posting I saw this and feel awkward).


I doubled the recipe below to get a total of over 50 meatballs, but left the chickpeas as is, which gave us two full meals plus leftovers (I could have frozen some meatballs, but we ended up eating them for lunch). I also dislike roasted chickpeas when they are very crisp; I prefer them warmed through, so I put them in the oven for a shorter time than called for (my version is below). I’m also omitting the raw onion, as that was too much for us; it would be great pickled, though. If you go that route, make quick pickles with half of the sliced onion and roast the other half as stated. The dish was great! I served it with flat bread and a green salad, and rice would have been good as well. Note that the original recipe says that to make the meatballs dairy-free, you can replace the ¼ cup yogurt with 2 tablespoons water and omit the yogurt sauce.

For the chickpeas
2 (15-oz.) cans of chickpeas, drained and rinsed
1 Tbsp. fennel seed
1 tsp. ground cumin
1 tsp. ground turmeric
1 large red onion, thinly sliced (see note above)
2 Tbsp. olive oil
kosher salt and freshly ground black pepper

For the chicken meatballs (I doubled this)
1 lb. ground chicken or ground turkey
½ cup panko, or another plain, dry breadcrumb
¼ cup plain lactose-free yogurt
2 Tbsp. water
1 tsp. kosher salt
1 large egg
2 garlic cloves, minced
½ tsp. ground coriander
½ tsp. ground cumin
½ tsp. ground turmeric
¼ tsp. red pepper flakes, or to taste (I used Korean pepper)
2 Tbsp. chopped cilantro, flat-leaf parsley or mint leaves, or a mix thereof, plus more to garnish

To serve
1 Tbsp. lemon juice
¾ cup plain lactose-free yogurt
toasted pita wedges
rice, green salad, or side of your choice

Preheat oven to 400 °F. Cover a large baking sheet with aluminum foil, to facilitate cleanup.

Combine chickpeas, fennel seed, cumin, turmeric and red onion slices (see note above) on a rimmed baking sheet. Drizzle with olive oil, season with salt and pepper and toss to coat. (At this point, the original recipe had you roast them for 25 minutes, but I set them aside.)

Meanwhile, make meatball mixture. Mix all ingredients in a large bowl with a fork or (my recent discovery) a potato masher to mix. Form into 1.75-inch meatballs; I used my smallest cookie scoop and made meatballs that had a heaping tablespoon in each.

If you had started roasting the chickpeas already, remove them from the oven and push them to the sides of the pan so that you can grease the center and put the chicken meatballs on it. Otherwise, lightly oil the pan and place the meatballs in the center and the chickpeas all around them. Place baking sheet in oven and bake 10 to 15 minutes, or until meatballs are cooked through (I left everything in for 20 minutes).

Combine yogurt with lemon juice and season with salt and pepper; set aside.

When meatballs are cooked, scatter remaining fresh herbs over the tray. Serve with lemony onions and yogurt, and toasted pita wedges.

Spiced Apple Coconut Muffins

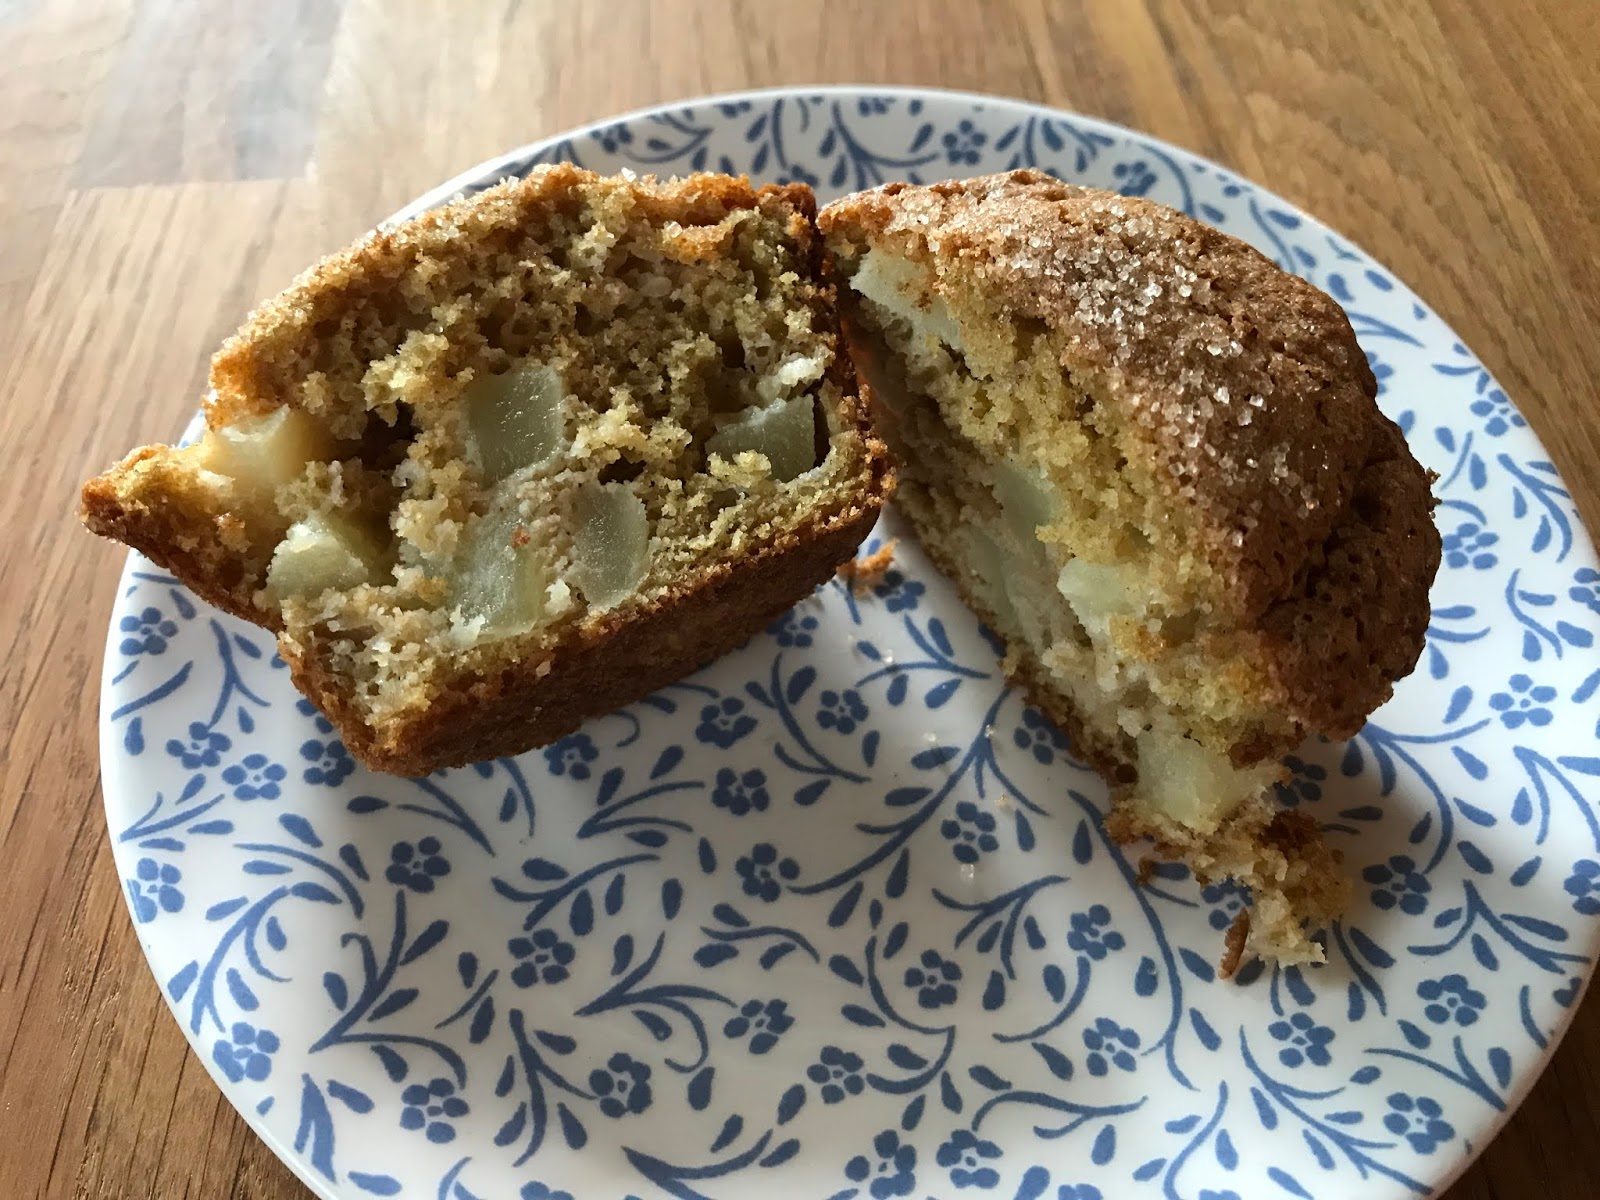
The Engineer asked me for apple muffins months ago. I tried a recipe (see here), but he said that those weren’t what he had in mind. I realized that I really did not know what he had in mind, so I asked him to find some recipes for me. He came up with two, and I think we have a winner.


I tried the whole wheat apple muffins (photo above). They smelled fantastic, but the Engineer felt that there was too much of a contrast of textures here, with the apple chunks, and he preferred the spiced apple coconut muffins below. I didn’t make them exactly as called for, because I couldn’t bring myself to add glaze on a crumb topping, especially considering that this is supposed to be breakfast, not dessert. That being said, they were delicious! I got 14 muffins in all.

For the topping
1/3 cup packed light brown sugar
1 Tbsp. granulated sugar
1 tsp. ground cinnamon
¼ cup lactose-free butter or margarine, melted
½ cup flour
¼ cup coconut flakes

For the muffin batter
1¾ cups all-purpose flour
1 tsp. baking soda
1 tsp. baking powder
1 tsp. Chinese five-spice powder
½ tsp. salt
½ cup (1 stick) lactose-free butter or margarine, softened to room temperature
½ cup packed light brown sugar
¼ cup granulated sugar
2 large eggs
½ cup lactose-free sour cream
2 tsp. vanilla extract
¼ cup coconut milk
1½ cups peeled and chopped apples (½ inch chunks), approximately 2 small apples

For the glaze (I didn’t make it)
½ cup confectioner’s sugar
2 Tbsp. coconut milk
¼ tsp. vanilla extract


For the topping
Combine all topping ingredients in a small bowl, stirring well to combine until the mixture is thick and crumbly. Set aside.

For the muffins
Preheat oven to 425 °F. Line a standard-sized muffin tin with paper liners or grease the tin (I got 14 muffins in all, but it might be wise to start with a standard 12-muffin tin).

In a medium bowl, combine flour, baking soda, baking powder, five-spice powder and salt. Set aside.

In the bowl of a stand mixer fitted with a paddle attachment, cream the butter on high for 1 minute. Scrape down the sides of the bowl. Add both the brown sugar and granulated sugar and beat on high for approximately 2 minutes, again scraping down the sides and bottom of the bowl as needed to ensure the mixture is well mixed.

Add the eggs, sour cream and vanilla extract. Mix well on medium-high speed.

Remove the mixing bowl from the mixer and using a wooden spoon or stiff rubber spatula, stir in the reserved flour mixture. Pour in the coconut milk and again stir to combine, leaving little lumps in the batter. Add the apples and again stir gently to combine.

Spoon the batter into the prepared muffin tins, evenly dividing the batter among the 12 (or more) tins. Sprinkle large chunks of the topping on the batter in the tins, evenly dividing among all tins.

Bake muffins for 5 minutes at 425 °F. Then, leaving the oven door closed and the muffins still in the oven, reduce the heat to 350 °F. Bake for another 15-20 minutes or until a toothpick inserted into the center of the muffin comes out clean (for me, 13 minutes was enough for that second round).

After you remove the muffins from the oven, allow them to cool slightly in the pan while you prepare the glaze.

For the glaze

While the muffins cool slightly, whisk together all of the glaze ingredients, adding more coconut milk as necessary to thin the glaze.

With a spoon, drizzle the glaze over the warm muffins before cooling completely.

Friday, May 01, 2020

Lemon-Pistachio Loaf

I had the Engineer buy a bag of pistachios from the bulk section at the grocery store, so that I could finally try a bunch of pistachio recipes I had been putting off. This lemon-pistachio loaf was a hit! Note that because it contains no eggs, you have to let it cool completely before removing it from the pan, otherwise it might fall apart (but its texture was great once cooled!).

¾ cup (100 g) raw pistachios
zest of 2 lemons
1¾ cups (220 g) all-purpose flour
1 cup (200 g) granulated sugar
2 tsp. baking powder
¾ tsp. kosher salt
5 Tbsp. extra-virgin olive oil
⅓ cup vegetable oil
½ cup water
5 to 7 Tbsp. fresh lemon juice, divided
2 cups powdered sugar

Place a rack in middle of oven; preheat to 325 °F. Grease a 9x5" loaf pan, then line with parchment paper, leaving overhang on long sides. Grease the parchment paper (for insurance and an easy release).

Pulse pistachios in a food processor until finely ground (it’s okay if some of the pieces are a bit larger). Set aside a heaping tablespoonful.

Whisk lemon zest, flour, granulated sugar, baking powder, salt, and remaining pistachios in a large bowl.

Whisk olive oil, vegetable oil, water, and 2 Tbsp. lemon juice in a small bowl to combine. Pour oil mixture into dry ingredients and fold with a rubber spatula to combine. Be very careful not to overmix (this batter contains a high ratio of liquid, which means it can get gummy if overworked). Transfer to prepared pan and use a spatula to distribute batter; batter should come halfway up the sides.

Bake cake until golden brown all over, it springs back when gently pressed, and a tester inserted into the center comes out clean, 50–60 minutes. It's okay if your cake has dipped a little in the center. Transfer pan to a wire rack and let cake cool completely in pan, at least 2 hours. Using parchment overhang, lift cake out of pan and place on rack. Peel away parchment.

Whisk powdered sugar and 3 Tbsp. lemon juice in a medium bowl, drizzling in remaining 2 Tbsp. lemon juice as needed until you have a thick but pourable glaze. Pour glaze over cake, letting it drip down the sides (if your cake has dipped, you can always glaze the flat underside instead of the top). Immediately top cake with reserved pistachios, then let sit until glaze is set, at least 30 minutes.

Mini-gâteaux aux framboises et aux pistaches


J’avais plusieurs recettes que j’écartais toujours quand venait le temps de faire mon menu, parce que c’étaient des desserts à la pistache et que des pistaches, je n’en avais pas. Et puis un jour je me suis dit que c’était complètement ridicule comme raisonnement (en fait, ce n’était plus un raisonnement, c’était devenu une habitude par la force des choses), et puis que crime, j’avais juste à en acheter, des pistaches! Alors j’en ai acheté tout plein en vrac et là, je cuisine des desserts à la pistache. Ces mini-gâteaux peuvent aussi être servis comme collation, voire comme déjeuner. Dans la recette ci-dessous, j’ai éliminé la vanille pour la remplacer par une quantité égale d’eau de fleur d’oranger, qu’on ne goûtait presque pas sinon. J’ai obtenu 24 mini-gâteaux.

1 tasse de farine
¾ c. à thé de poudre à pâte
¼ c. à thé de sel
¼ tasse de beurre sans lactose ou de margarine, à la température de la pièce
½ tasse de sucre
1 œuf
2 c. à thé d’eau de fleur d’oranger (voir note plus haut)
½ tasse de lait sans lactose
½ tasse de pistaches hachées
1 tasse de framboises congelées

Préchauffer le four à 350 °F. Graisser 24 moules à muffins miniatures.

Dans un bol, mélanger la farine, la poudre à pâte et le sel. Réserver.

Dans un autre bol, à l’aide d’un batteur électrique, battre le beurre et le sucre 5 minutes ou jusqu’à ce que le sucre soit dissous. Ajouter l’œuf, la vanille et l’eau de fleur d’oranger, puis battre jusqu’à ce que le mélange soit pâle et léger.

Incorporer les ingrédients secs à la préparation crémeuse, en alternant avec le lait. À l’aide d’une cuillère de bois, ajouter les pistaches et les framboises, et remuer délicatement.

Répartir la pâte dans les moules à muffins miniatures (les remplir aux trois quarts). Cuire au four de 20 à 22 minutes ou jusqu’à ce qu’un cure-dents inséré au centre des gâteaux en ressorte propre. (Cela semble beaucoup pour la taille des mini-gâteaux, mais c’est que les framboises sont congelées!) Déposer les moules sur une grille et laisser reposer 10 minutes. Démouler et laisser refroidir.

Thursday, April 30, 2020

Zucchini Quesadillas

I haven’t been very active on here this month because, in addition to homeschooling the Little Prince while keeping the Fox entertained and running the household, I’ve been taking some professional development classes. You see, my professional association decided to offer a limited number of online classes for free to its members during the month of April, since for most of us, our income either decreased or became non-existent in the pandemic. But that means I only had a limited time to complete the courses, so I decided to prioritize that over blogging. I’m done with those now, though I’m taking another course separately – more on that later. My favorite courses were about setting up a family command center, preparing for an emergency or a natural disaster, and which 9 apps (as opposed to 50) are “must haves” to streamline one’s life.

I’m back with a zucchini quesadilla recipe that my kids actually ate – though the Little Prince would like it noted that they were not his favorite. (Still, the fact that he ate them instead of leaving them in his plate as he does with things that he really doesn’t like is a win!)

3 Tbsp olive oil
2 or 3 garlic cloves, thinly sliced
½ tsp. mild pepper flakes (I used Korean pepper, but Aleppo pepper would be good too)
1 ½ lbs zucchini (or other slim summer squash), halved and thinly sliced
kosher salt
1 lime, halved
6 oz. grated extra-sharp cheddar cheese
12 6-inch corn or wheat tortillas
sliced avocado, chopped fresh cilantro, additional lime, lactose-free sour cream (to serve)

Heat a large skillet over medium. Once hot, add oil. Once oil is hot, add garlic and cook, stirring, until just golden at the edges, about 1 minute. Add zucchini, 1 teaspoon kosher salt, and red pepper flakes and increase heat to medium-high. Cook, turning over occasionally, until zucchini becomes soft and starts to break down, about 5 minutes. Reduce heat slightly and cook 7 to 10 minutes more, at which point the zucchini will be jammy and very tender. Taste for seasoning. Add the juice of half your lime and scrape mixture into a wide bowl. Let cool slightly while you prepare any toppings or grate the cheese, if you probably haven’t done so yet.

Add cheese to zucchini mixture and mix. Lay out 6 of your tortillas and divide the filling between them, going all the way to the edges. Place remaining 6 tortillas on top.

Heat a skillet (ideally non-stick, and you could even just wipe clean the large skillet from the first step) over medium heat and add a couple teaspoons of oil. Transfer your assembled quesadillas to the skillet and cook until deeply golden and crisp underneath, letting whatever cheese seeps out cook and crisp in the pan. Flip quesadilla(s) and repeat on second side. Try to take all of the lacy brown cheese with you when you remove your finished quesadillas from the pan. Squeeze the juice of the remaining lime half over them.

Serve halved or in wedges with additional lime wedges, avocado, cilantro, and sour cream.

Muffins à la courge et à la cardamome


Oui, je sais, je fais beaucoup de muffins. Je n’ai rien à dire pour ma défense, sinon que c’est bon, les muffins! J’ai adoré ceux-ci, à la courge et à la cardamome, de Coup de Pouce. Je n’ai pas utilisé les amandes en tranches sur le dessus, donc je mets l’étiquette « sans noix » sur la recette. J’ai aussi utilisé 2 ½ tasses de farine de blé blond au lieu de deux sortes différentes de farine. Assurez-vous également de ne pas choisir une courge trop petite, parce qu’il faut quand même 2 tasses de purée. La recette est censée donner environ 15 muffins; j’en ai obtenu 17.

1 courge butternut, coupée en deux et épépinée (environ 1 ¾ lb/875 g)
1 ½ tasse de farine tout-usage
1 tasse de farine de blé entier
2 c. à thé de poudre à pâte
1 c. à thé de bicarbonate de sodium
½ c. à thé de sel
½ c. à thé de cannelle moulue
½ c. à thé de cardamome moulue
3 œufs
¾ tasse de cassonade
¾ tasse d’huile végétale
¼ tasses d’amandes en tranches (facultatif)

Préchauffer le four à 425 °F.

Sur une plaque de cuisson tapissée de papier d’aluminium, mettre la courge, le côté coupé vers le bas. Cuire au four de 30 à 50 minutes ou jusqu’à ce que la courge soit très tendre lorsqu’on la pique à la fourchette. Laisser refroidir. À l’aide d’une grosse cuillère, racler la chair de la courge. Au mélangeur, réduire la chair en purée de manière à en obtenir 2 tasses (au besoin, congeler le reste de la purée pour un usage ultérieur).

Réduire la température de four à 350 °F.

Dans un petit bol, mélanger les farines, la poudre à pâte, le bicarbonate, le sel, la cannelle et la cardamome.

Dans un grand bol, à l'aide d'un fouet, mélanger les œufs, la cassonade et l'huile jusqu'à ce que la préparation soit lisse.

Incorporer les ingrédients secs à la préparation aux œufs en trois fois, en alternant avec la purée de courge. Répartir la pâte dans des moules à muffins huilés ou tapissés de moules en papier. Parsemer des amandes.

Cuire au four de 20 à 25 minutes ou jusqu'à ce qu'un cure-dents piqué au centre des muffins en ressorte propre. Mettre les moules sur une grille et laisser refroidir 5 minutes. Retirer les muffins des moules et laisser refroidir complètement sur la grille.

Thursday, April 09, 2020

Mini-pâtés à la viande au bacon

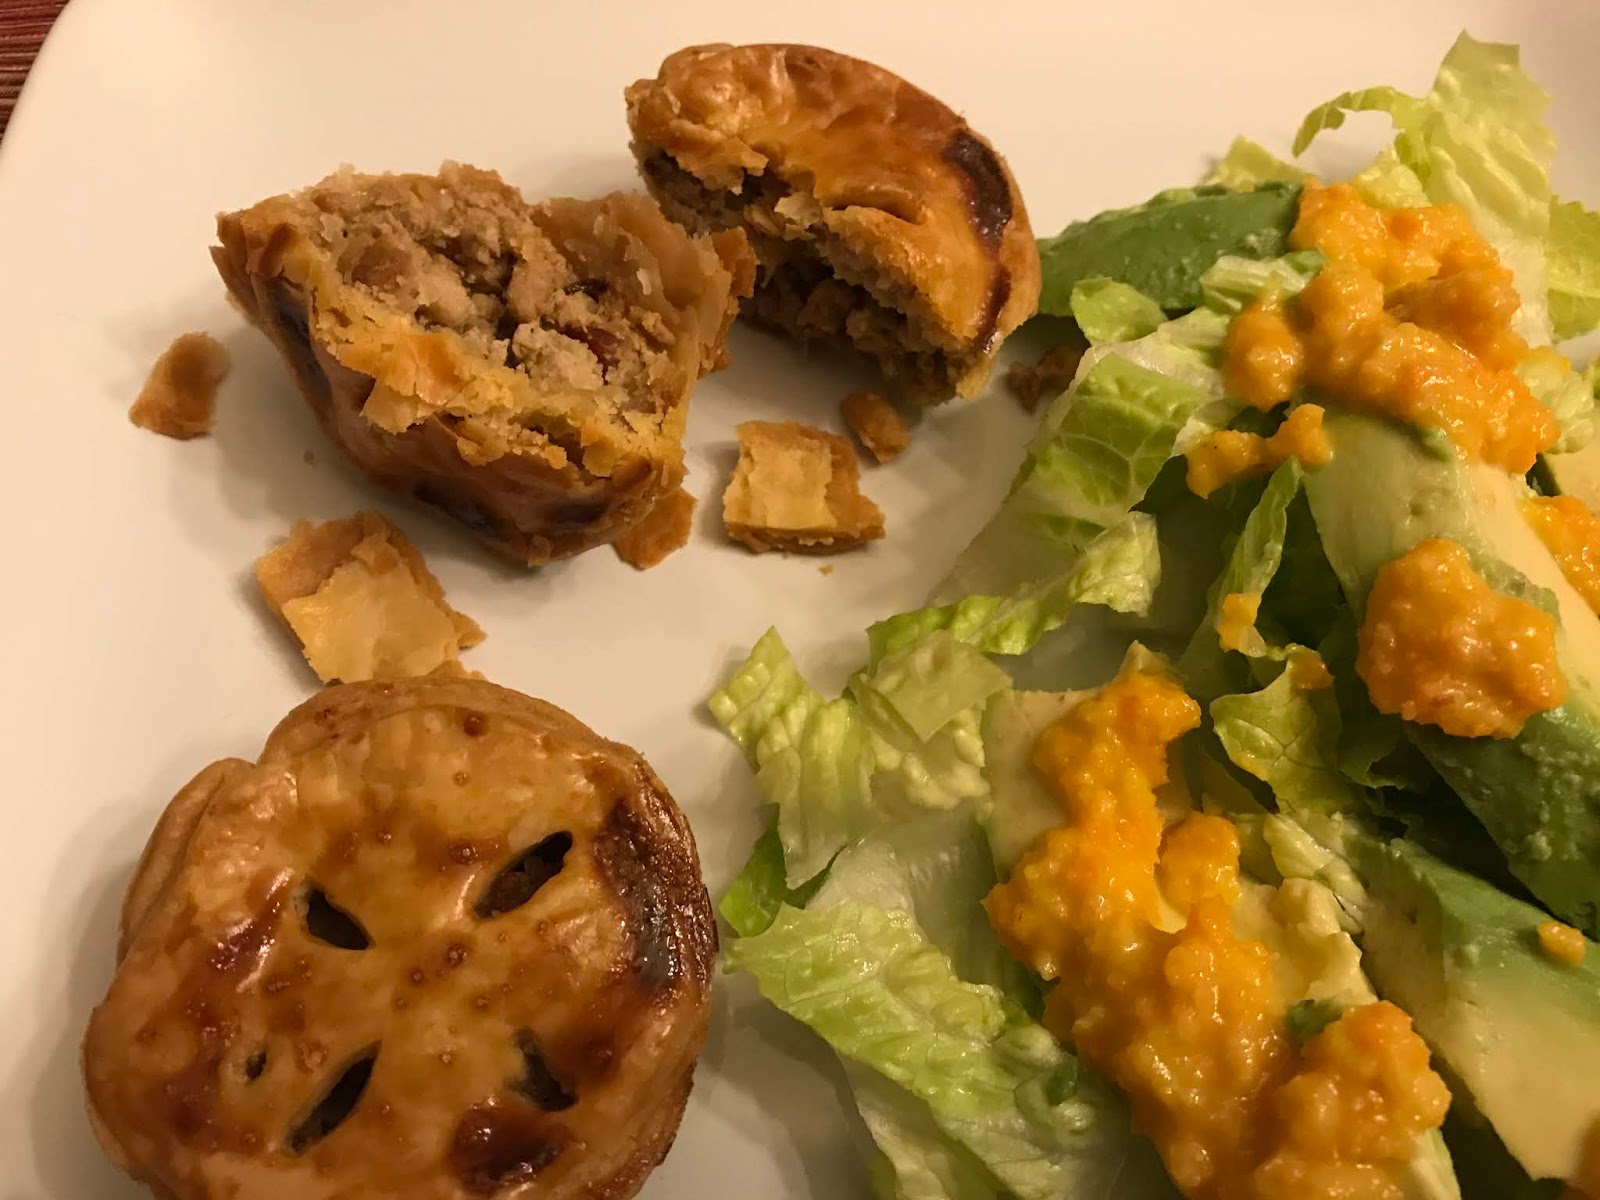
J’ai fait ces mini-pâtés à la viande au bacon parce que pour moi, ça n’est pas exclusif au temps des fêtes. Nous avons absolument adoré; le bacon y est délicieux, et le petit format est génial. J’ai servi ça avec une salade aux avocats avec vinaigrette carotte-gingembre.

J’ai utilisé 3 abaisses de pâte à tarte du commerce, pour un total de 18 petits pâtés. À noter qu’on peut aussi les faire d’avance et les faire congeler, puis les réchauffer au four.

1 double recette de pâte à tarte (pâte brisée), maison ou du commerce, soit environ 1 kg/2 lb (voir note)
750 g ou 1 ½ lb de porc haché maigre
8-9 tranches de bacon
1 oignon, haché très finement au robot
2 c. à soupe d’huile
2 c. à soupe de ketchup
2 c. à soupe de sauce soya
1 c. à soupe de sauce Worcestershire
1 c. à thé de poudre d’ail
¼ à ½ tasse de chapelure (je l’ai oubliée!)
sel et poivre
1 œuf (pour la dorure)
1 c. à soupe de lait (pour la dorure)

Préchauffer le four à 375 °F, puis étendre les tranches de bacon sur une plaque recouverte de papier d’aluminium et cuire jusqu’à ce qu’il soit bien croustillant, soit environ 20 minutes.

Lorsque le bacon est cuit et légèrement refroidi, l’émietter puis le réserver, mais garder le four ouvert à sa température.

Dans une grande poêle, à feu moyen-doux, faire chauffer l’huile puis ajouter l’oignon haché très finement. Faire revenir pendant environ 2 minutes, jusqu’à ce que l’oignon devienne translucide.

Ajouter la viande hachée et mélanger continuellement, pour bien défaire la viande et la cuire. Continuer en mélangeant souvent, à découvert, jusqu’à ce qua viande soit complètement cuite, soit autour de 15 minutes.

Ajouter le ketchup, la sauce soya, la sauce Worcestershire et la poudre d’ail. Bien mélanger.

Ajouter ¼ tasse de chapelure et mélanger, pour absorber le gras (j’ai oublié cette étape, mais mon mélange devait avoir la bonne consistance parce que le résultat final était excellent!). Le mélange de viande ne devrait pas être trop sec, mais il ne doit plus rester de gras dans la casserole. S’il en reste, ajouter encore ¼ tasse de chapelure et mélanger.

Incorporer le bacon émietté. Saler et poivrer, puis goûter et rectifier l’assaisonnement si nécessaire. À noter que la sauce soya et le bacon devraient déjà donner un goût salé, donc y aller avec une main légère sur le sel! Réserver la préparation de viande et sortir 2 moules à muffins.

Abaisser la pâte avec un rouleau à pâte et un peu de farine, si nécessaire. Couper des disques dans la pâte abaissée. Deux formats de disques sont nécessaires : des plus gros pour le dessous du pâté et des plus petits pour le dessus. Pour mes moules à muffins standards, j’ai utilisé un emporte-pièce d’environ 4 ½ po et un autre de 3 po de diamètre.

Déposer un rond de pâte dans chaque cavité du moule à muffins, en pressant légèrement dans le fond et sur les côtés. La pâte devrait peu ou pas dépasser de la cavité.

Répartir le mélange de viande dans les cavités recouvertes de pâte : environ 2 cuillères à soupe de viande rentrait dans les miens. Presser légèrement la viande.

Couvrir chaque cavité d’un 2e rond de pâte, plus petit. Presser légèrement sur le rebord pour sceller la pâte. Avec un petit couteau, faire quelques incisions au milieu pour permettre à la vapeur de s’échapper.

Dans un petit bol, mélanger l’œuf et le lait à la fourchette. Badigeonner le dessus de chaque pâté avec cette dorure, à l’aide d’un petit pinceau. Cuire au four pendant environ 35 minutes, jusqu’à ce que la pâte soit bien dorée. Laisser refroidir un peu avant de démouler.

Wednesday, April 08, 2020

Chocolate Macaroon Cake


Happy Passover! This chocolate cake was created to be kosher for Passover and parve, but it’s good year-round. (For everyone not celebrating Passover, that essentially means it’s gluten-free and dairy-free.) It’s made with roasted almonds, which make it really flavorful! I unfortunately didn’t have enough almonds on hand, so I topped it up with hazelnuts and raw almond flour, but I’ll be the first to say that it would have tasted better with roasted almonds. The cake is meant to be chewy and dense, rather than spongy; that’s because the eggs aren’t separated, and they are only beaten until frothy but still free-flowing, BEFORE the slowly dissolving ribbon forms.

Also, I should say that I may have overbaked the cake (I baked it for 60 minutes instead of 35-45 minutes), because it didn’t seem like it was done when I inserted a toothpick in it. But I think that in this case, the residual heat from the oven would be enough to finish cooking the cake once you remove it from there, and perhaps the texture *should* be a bit fudgy rather than too cakey. (I mean, obviously it should be set, though, not jiggly in the middle.) I think that’s why mine crumbled so much – the edges were VERY fragile. That being said, it was delicious! I didn’t bother making the almond-coconut clusters to top the cake, though.

For the cake
1 cup virgin coconut oil, melted, cooled, plus more for pan
¼ cup unsweetened cocoa powder, plus more for pan
1 cup skin-on almonds
8 oz. semisweet or bittersweet chocolate, chopped
1 tsp. kosher salt
½ cup unsweetened shredded coconut
6 large eggs, at room temperature
½ cup granulated sugar
½ cup (packed) light brown sugar
2 tsp. vanilla extract

Ganache and assembly
4 oz. semisweet chocolate, chopped
1 Tbsp. plus 1 tsp. light agave nectar or pure maple syrup
1 pinch of kosher salt
½ cup unsweetened coconut milk (from a very well shaken 13.5-oz. can)
2 Tbsp. unsweetened coconut flakes
1 Tbsp. sliced almonds
1 tsp. granulated sugar

For the cake
Place a rack in middle of oven and preheat to 350 °F. Lightly brush a 10"-diameter cake pan with oil. Line the bottom with a round of parchment; brush parchment with oil. Dust sides of pan with cocoa powder; tap out excess.

Toast almonds on a rimmed baking sheet until fragrant and slightly darkened, 8–10 minutes. Let cool. Reduce oven temperature to 325 °F.

Meanwhile, heat chocolate and 1 cup oil in a medium heatproof bowl set over a saucepan of barely simmering water (don’t let bowl touch the water), stirring often, until mixture is smooth. Remove from heat.

Pulse almonds, salt, and ¼ cup cocoa in food processor until nuts are finely ground. Add shredded coconut and pulse a couple of times to combine.

Beat eggs on medium speed in the bowl of a stand mixer fitted with the whisk attachment until no longer streaky, about 20 seconds. Add both sugars and vanilla, increase speed to high, and beat until mixture is pale, thick, and starts to hold the marks of the whisk, about 2 minutes (it should fall off the whisk and immediately sink back into itself). Switch to the paddle attachment and with mixer on low speed, gradually add chocolate mixture. Beat to incorporate, then mix in almond mixture. Fold batter several times with a rubber spatula, making sure to scrape the bottom and sides. Scrape batter into prepared pan; smooth top.

Bake cake until firm to the touch and a tester inserted into the center comes out clean but greasy, 35–45 minutes (see note above). Transfer pan to a wire rack and let cake cool 15–20 minutes in pan (cake might fall slightly in the center; that’s okay). Run a paring knife or small offset spatula around edges of cake; invert onto rack. Carefully peel away parchment; let cool completely.

For the ganache and assembly
Preheat oven to 350 °F.

Combine chocolate, 1 Tbsp. agave nectar, and salt in a medium bowl. Bring coconut milk to a simmer in a small saucepan over low; pour over chocolate mixture. Let sit until chocolate is melted, about 5 minutes.

Meanwhile, toss coconut flakes, almonds, sugar, and remaining 1 tsp. agave nectar on a parchment-lined rimmed baking sheet and toast until golden, about 4 minutes. Let almond-coconut mixture cool, then break into smaller clusters.

Using an electric mixer on medium speed, beat chocolate mixture until it has lost its sheen and is thick enough to hold very soft peaks, 6–8 minutes (ganache won’t be quite as thick as frosting but close).

Working quickly before ganache starts to set, scrape on top of cake and spread to edges with a small offset spatula or knife. Top with almond-coconut clusters.