Tuesday, November 25, 2014

GO Veggie! - A quasi-sponsored post

I used a disclaimer on several posts in the past months because I’d made certain recipes using GO Veggie! lactose-free products that had been sent to me for free by the company. It’s high time I elaborated on that! Late last summer, I got an email on behalf of GO Veggie! asking if I was interested in receiving free samples. I had bought their plain and chive & garlic cream cheese substitute before, but that was pretty much it. I read the email over and realized that they had products I’d never tasted, like a strawberry cream cheese substitute, and some that I’d never even seen in stores. So I decided to accept their offer and expected to get some flavored cream cheese and maybe a few other things. I didn’t think about it for a while, and one day when I came back home from the dentist, the Engineer said, “I don’t know what you did, but you got a visit from the cheese fairy while you were out!” Look at everything we got!


That’s a block of cheddar, a block of mozzarella, a container of grated parmesan, three kinds of cream cheese (plain, strawberry, and chive & garlic), four kinds of grated cheese (mozzarella, cheddar, a cheddar and pepper jack mix, and a cheddar and Monterey jack mix), as well as seven – count ’em, seven! – kinds of sliced cheese (smoked provolone, pepper jack, cheddar, mozzarella, cheddar with jalapeño, American, and Swiss). I tasted them and I think this is relevant to the blog, as these are all products that can come in handy for people who are lactose-intolerant. Just to be clear, though, while I got all these products for free, I am not actually getting paid to write this review.

I haven’t seen all these products at my grocery store, so you might have to go to specialty stores or talk to your grocer to try some of them. Keep in mind that while they are lactose-free, they are not all dairy-free or vegan, so they are not suitable for people with dairy allergies, for example. As this page on their website explains, GO Veggie! products have some advantages over dairy and over many dairy substitutes, like fewer calories, less fat (no cholesterol and no trans fats, actually), and more calcium. And, of course, they’re lactose-free.

For those of you who are interested: the cream cheeses are dairy-free (casein-free) and soy-based; they are also vegan and kosher. In addition, the following products I got are dairy-free (casein-free), soy-free, vegan and kosher: shredded mozzarella, as well as sliced American, cheddar, mozzarella and pepper jack. The other products are made with soy and do contain some form of dairy, though not lactose. (This may go without saying, but just to be safe: always check the label before eating something if you have an allergy, because sometimes companies change recipes or suppliers or packing plants, so the information here may be out of date eventually.) GO Veggie! also makes products that I did not taste, so I can’t speak for those, but there are alternatives not mentioned here if your food restrictions prevent you from trying them (such as a dairy-free grated parmesan substitute).

Let’s do this methodically, shall we? For the blocks of cheese (cheddar and mozzarella), I am not fond of eating them straight. To be fair, I don’t think I’ve ever had vegan cheese that I enjoyed eating raw like that, so for me, a lactose-free dairy cheese is a better choice. (Though to be clear, these GO Veggie! blocks of cheese were not vegan because they contained some dairy; they just tasted vegan, if that’s a thing.) That being said, I grated them and used them in a mac and cheese: it was very good! The Engineer, the Little Prince and I all approved.

As for the grated parmesan, it wasn’t as good as real parmesan, but it was definitely on par with parmesan from a green can; it also smelled remarkably similar! I use it to top dishes, like the spinach and ricotta crêpe lasagna I made. This cheese isn’t vegan either, but the website says there is another dairy-free one. However, I only recently realized (or was reminded?) that real parmesan isn’t even vegetarian, as it contains animal rennet; GO Veggie’s grated parmesan is vegetarian, as far as I can tell.

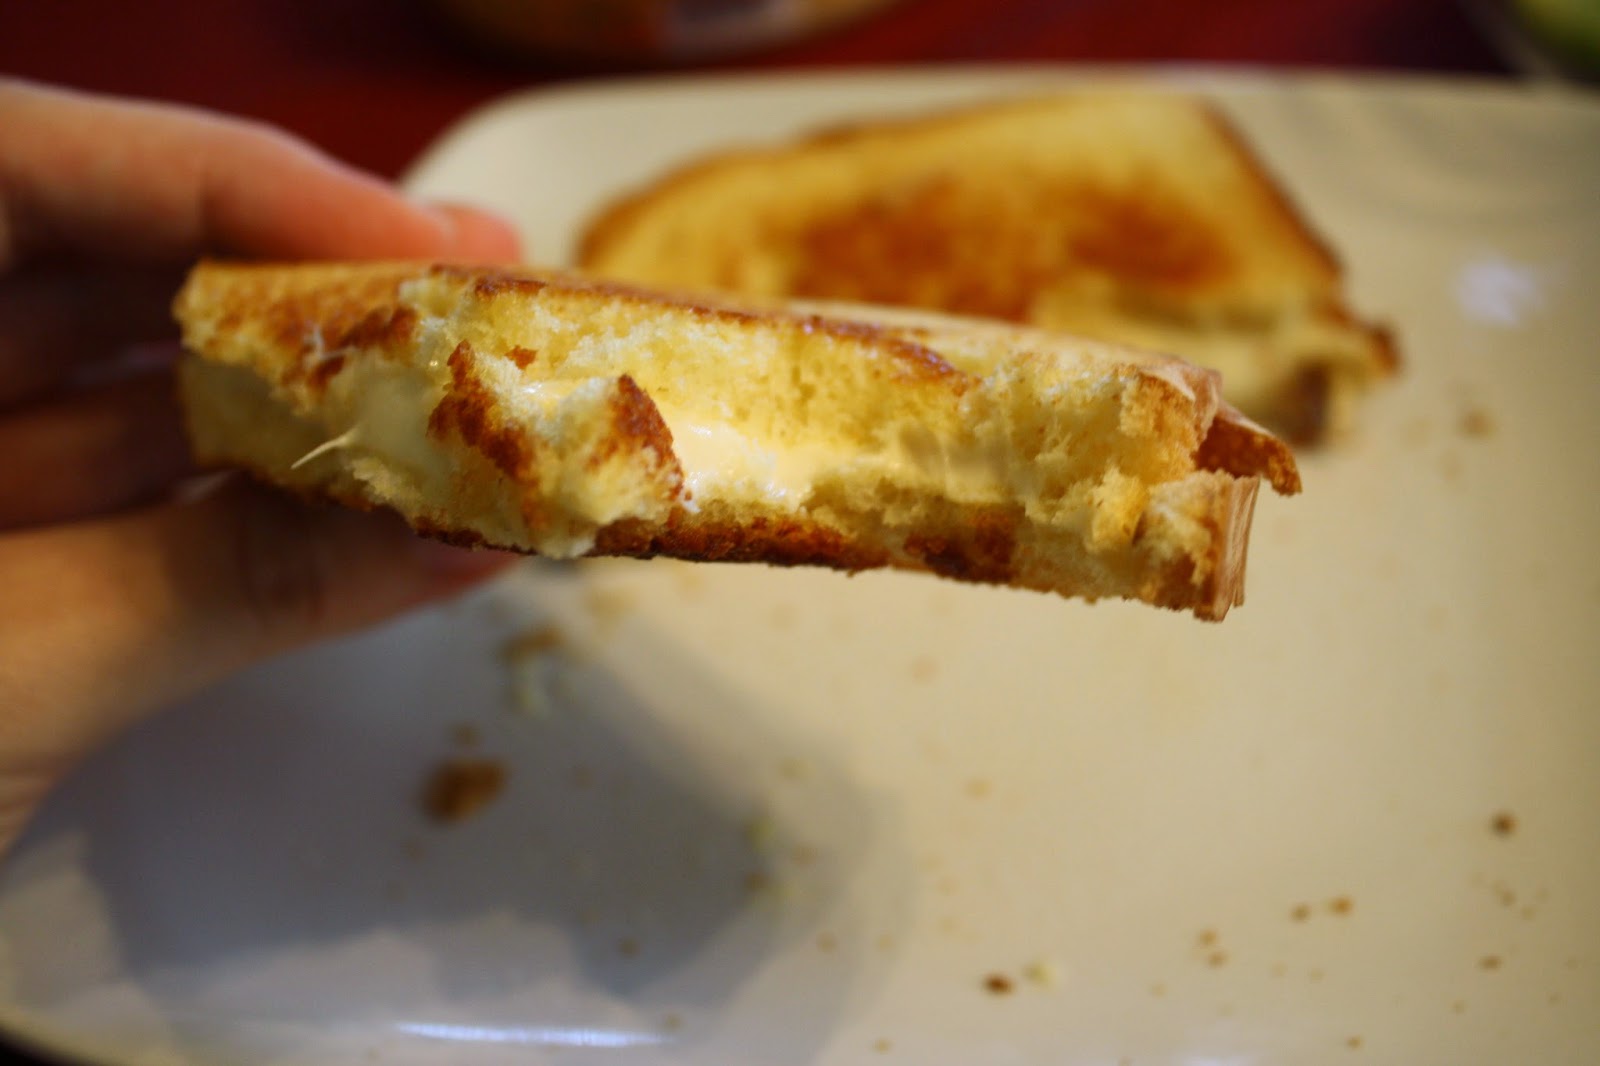
For the sliced cheeses, I had the Engineer test the spicy ones in his sandwiches. Of the pepper jack cheese, he said that it had a weird texture, but it grew on him. Of the cheddar with jalapeño, he says that he likes it and that it adds a nice kick of extra heat to his sandwiches. I tasted the smoked provolone in a grilled cheese sandwich and liked it, as it satisfied cravings. The American cheese was somewhat bland and didn’t get me excited, but I could say the same about the dairy version, too. I tried some sliced Swiss raw in a sandwich and did not like it; it tasted better when grilled, but I still prefer the real thing (as it is lactose-free anyway). I had some of the cheddar in a quesadilla, and it was okay. To be a little different, I tried the sliced mozzarella on a croquet-monsieur; it was alright, though it didn’t melt as well as I would have liked. (In the pictures below, the white cheese is the smoked provolone, and the orange cheese is the American.)

I tried the shredded mozzarella on pizza, and I was really impressed because this cheese mot only melts, it stretches! I thoroughly approve. It was great in tacos, too. The Engineer ate the cheddar and pepper jack mix; he liked it in sandwiches, and it baked up very well in biscuits, too. I used the cheddar and Monterey jack mix in a Mexican lasagna and I couldn’t even tell it wasn’t real cheese! I used shredded cheddar in an omelet, and it was good, though nothing unexpected by that point.


Finally, the cream cheeses: I’m including an image sent by GO Veggie! with ideas for different flavor combinations – I never got around to trying them, mostly because I rarely serve hors-d’œuvres like that, but some of these combinations looked really good to me. I enjoy the chive & garlic one on crackers mostly, or on a bagel for lunch, but it isn’t the kind of thing I like for breakfast. I think it would also be really good in a savory dish like a lasagna that calls for cream cheese. As for the plain cream cheese, I compared it with Daiya’s version, and I preferred GO Veggie! because it wasn’t as sweet. Sweet is fine if you’re making frosting for a cake, for example, but when you just want plain cheese on a bagel, I prefer a more neutral taste. The strawberry cream cheese is made with soy, and when eaten by itself, the soy is really obvious, but it was great on a sesame bagel! It also had the consistency of real cream cheese, so that was good. I used both the plain and strawberry cheeses in frosting for rhubarb cupcakes, and both worked really well.


In conclusion, I really liked discovering all these new products, because it gives me new lactose-free options for my cooking. I hope the same is true for you after reading this post.

Monday, November 17, 2014

Because we can't say no to apple cake

I know, I know. I’ve told you about apple cakes before. There was my ”stout” apple cake, Bubbie Gilda’s apple cake, French apple cake, and apple tart cake. And I’ve got a few more up my sleeve. But somehow I made another one, slightly adapted from Sweet Amandine, and it was good enough that I decided to keep the recipe… The Engineer also approves and says that it has a good, dense crumb, with brown sugar that you can taste without being overwhelmed by it. He also likes the crystallized sugar on top, as do I. I’m changing the cooking time slightly below, as I would have liked to test the cake 5 minutes earlier than I did. I also changed the flour a bit, replaced some of the oil with applesauce, and omitted the nuts, obviously. Enjoy!

1 cup whole wheat flour (see note directly below)
½ cup all-purpose flour (I used 1 ½ cups white whole wheat flour in all)
½ tsp. salt
1 tsp. cinnamon
½ tsp. baking soda
1 cup dark brown sugar
½ cup applesauce
¼ cup vegetable oil (I used safflower oil)
2 large eggs
1 tsp. vanilla
2 cups peeled, cored, and thickly sliced apples (I used a Envy, but your favorite combination is fine)
1 Tbsp. demerara sugar (optional)

Preheat the oven to 350 °F. Grease and flour a 9-inch round cake pan.

In a medium bowl, whisk together the flours, salt, cinnamon, and baking soda. Set aside.

Dump the packed brown sugar into the bowl of a stand mixer and unpack it with a fork. Add the oil, and use the fork to moisten all of the sugar. (If you skip these first steps, the brown sugar will get pressed up against the sides of the bowl instead of mixing with the oil.) Beat the oil and sugar together in a mixer fitted with the paddle attachment. After five minutes, add the eggs and the vanilla, beating after each addition, then continue beating until the mixture is creamy.

Add the dry ingredients into the sugar, egg, and oil mixture and stir by hand until just combined. Fold in the apple slices. It will look like a lot of apple and not enough batter, but it all works out in the end.

Transfer the batter to the prepared pan, sprinkle with demerara sugar if you'd like, and bake for about 40-45 minutes, until a toothpick inserted in the center of the cake comes out clean. Cool in the pan before turning out.

Wednesday, November 12, 2014

5-Minute Vegan Pancakes

For some reason, I was certain I had a vegan pancake recipe here, but I can’t find any. That’s an oversight on my part, I suppose! I had only taken a perfunctory picture, because I really thought I had these on the blog already – I’d have made more of an effort otherwise. Vegan pancakes come in very handy for many reasons, not least of which is allergies. They’re also easy to make! The recipe below is from Food.com, and it’s the one my friend Jen made last SummerFest. I followed the recipe as written, and the only downside to these is that I could taste the baking powder too much, so I might try it with less next time, even if that means a flatter pancake. When we were at the cottage, though, Jen followed the recipe and the pancakes did not taste off at all. I got a yield of 7 pancakes, so I assume a yield of 6 to 8 is reasonable for the recipe as written below.

1 cup flour
1 Tbsp. sugar
2 Tbsp. baking powder
1/8 tsp. salt
1 cup soy milk
2 Tbsp. vegetable oil

Set a stove element with a pan to medium heat.

Combine the flour, sugar, baking powder and salt in a bowl.

Add the soy milk and vegetable oil to your mixture. Mix until smooth.

Now the pan should be ready for your batter, so spoon one pancake’s worth of the mixture into the pan.

Flip when you see bubbles in the middle of the pancake and the edges are looking stiffened. Repeat with the rest of the batter.

Tuesday, November 11, 2014

Pumpkin Ice Cream

You remember last fall’s attempts at pumpkin ice cream, right? I talked about them here and here. I tinkered with spices and custard base, but the problem was the consistency: too hard once in the freezer for more than a few hours. So I upped the fat content, I used coconut milk with guar gum, and I tried adding arrowroot starch after tempering the yolks (arrowroot which, by the way, worked for me before, and that’s how it’s done in The Vegan Scoop for just about every kind of ice cream, including pumpkin). Still, I didn’t get the consistency I wanted. I’m wondering if that’s just the way it’s meant to be – it is, after all, a downfall of many homemade ice creams, even non-vegan ones with sour cream. According to Serious Eats, the only thing left to do would be to replace some (or all) of the sugar with liquid sweetener such as corn syrup. But you know what? I’ve made this a half-dozen times already and I’m tired of tinkering with it, especially since the arrival of a cold front makes me want warm food, not ice cream. So the following is my pumpkin ice cream, inspired by a Herbivoracious recipe. I made it last month and loved the taste. Just remember to take it out of the freezer 10 to 15 minutes before you want to eat it. I might try liquid sweetener if I make it next year, though do report in the comments if you try it! You could also use 1 tsp. pumpkin pie spice instead of the spices below.

1 cup pumpkin purée (canned is fine; I used Farmer’s Market Organic, and it was delicious)
1 14-oz. can of coconut milk with guar gum (such as Thai Kitchen)
1 cup coconut cream (NOT cream of coconut, NOT creamed coconut)
2/3 cup sugar (up to ¾ cup if you want it sweet)
1 pinch of salt
¼ tsp. cinnamon
¼ tsp. nutmeg
¼ tsp. ground ginger
¼ tsp. allspice
6 egg yolks (ideally from pasteurized eggs)

Whisk together the pumpkin purée, coconut milk, coconut cream, sugar, salt and spices in a saucepan. Heat and whisk until the sugar is dissolved.

In a separate bowl, whisk together the yolks. Gradually pour some of the coconut milk mixture over the yolks, whisking constantly as you pour. Scrape the warmed yolks and coconut milk back into the saucepan.

Cook over low heat, stirring constantly and scraping the bottom with a heat-resistant spatula, until the custard thickens enough to coat the spatula.

Strain the custard if needed, then refrigerate to chill thoroughly.

Freeze in your ice cream maker according to the manufacturer’s instructions.

Tuesday, November 04, 2014

Braised Chicken with Saffron Onions, Israeli Couscous and Date Relish


This recipe had been sitting in my inbox for 2 ½ years already. The story behind it is that my mother’s colleague from work at the time heated his lunch in the microwave, and it smelled so good that my mother asked for the recipe, then shared it with me. But it’s one of the longest recipes I’ve seen, and it just seemed so daunting that I didn’t have the heart to make it (and neither did she). But last month, my mother came to visit us for several days, so we made it together. When I wrote it down on that week’s menu, I wrote “Complicated Chicken”. I might as well have called it This-(Damn-Well-)Better-Be-Good Chicken, but in the end, the original title is more descriptive. I’m not exaggerating when I say this: the spice mix is prepared the night before so that the chicken marinates overnight, and then that evening’s preparations took us 2 ½ hours. That’s 150 minutes of non-stop cooking by two fully capable adults (though, to be fair, we did have to entertain the Little Prince at the time as well, and after a little more than 2 hours, we started a Baby Einstein video for him to keep everyone sane).

You know the old adage that the degree to which children like dinner is inversely proportional to the time you spent making it? It turns out it’s absolutely true. The Little Prince hardly touched his dinner the first night. On the second night, however, when all we had to do was reheat it, he had an almost voracious appetite and really liked the dish. As for us, we thought it was very good, but not enough to go through the trouble of making it all again the same way. The recipe below contains a few modifications that we implemented (such as omitting the chile de arbol or not putting plastic wrap in the oven, for God’s sake). Next time, however, we would bake the chicken in a Dutch oven, with half as much broth and fewer vegetables (the fennel, for instance, was surprisingly washed out and could probably be omitted). You could also use a small fresh tomato instead of leaving most of a can of tomatoes unused. My mother would prefer regular couscous, to soak up the sauce better, but I prefer the texture of pearled couscous. It’s not that any of these steps is complicated per se (couscous is easy; the date relish is stupid-easy; the saffron onions take a while, but are not hard), but all together, it’s too much for one cook on a weeknight, especially if kids are involved.

We also argued semantics: is the date condiment really relish? After looking it up, we realized that what defines relish is basically the addition of vinegar. While this condiment isn’t very acidic, the lemon juice might qualify it as relish, so we decided to keep calling it that. In any event, this dish makes about 6 servings, so at least you get leftovers for all the work you put in. And it IS really good.

For the spice rub
1 Tbsp. + 1 tsp. cumin seeds
2 Tbsp. coriander seeds
3 cloves garlic, minced
1 Tbsp. fresh thyme leaves
2 Tbsp. chopped flat-leaf parsley
2 tsp. paprika

For the chicken
6 chicken legs with thighs attaches, bone in and skin on (we used 8 small pieces)
1 sliced onion
1 sliced fennel
2 bay leaves
¼ cup chopped San Marzano canned tomatoes
2 Tbsp. sherry vinegar
½ cup white wine
½ cup sherry
4 cups chicken stock
¼ cup chopped fresh cilantro

For the date relish
½ cup dates, pitted and coarsely chopped
2 Tbsp. quality extra-virgin olive oil
1 Tbsp. lemon juice
2 Tbsp. chopped flat-leaf parsley
1 Tbsp. chopped cilantro
kosher salt and freshly ground black pepper

For the saffron onions
1 tsp. saffron threads
2 Tbsp. unsalted butter or margarine
2 Tbsp. olive oil
5 cups sliced onions (about 1 ¼ lbs.)
1 bay leaf
1 tsp. fresh thyme leaves
kosher salt and freshly ground black pepper

For the couscous
2 ½ cups Israeli couscous
1 Tbsp. unsalted butter or margarine
2 Tbsp. chopped flat-leaf parsley
kosher salt and freshly ground black pepper


For the spice rub
Toast the cumin seeds and coriander seeds in a small pan for a few minutes until the seeds release their aroma and are lightly browned. Grind them in a spice mill or a mortar and pestle. In a small bowl, combine the ground spices with the garlic, thyme, parsley, and paprika.

Place the chicken in a large bowl; sprinkle the spice mixture over it and, using your hands, toss the chicken and spices together, coating well. Cover and refrigerate for at least 4 hours, but preferably overnight.


For the chicken
Remove the chicken from the refrigerator 30 minutes before cooking, to allow it to come to room temperature. After 15 minutes, season the chicken on all sides with salt and pepper. (We may have missed this step.)

Preheat the oven to 325 °F.

Heat a large sauté pan over high heat to 2 minutes. Swirl in the olive oil and wait 1 minute. Place the chicken legs, skin side down, in the pan and cook for 8 to 10 minutes, until golden brown and crispy. Every so often, swirl the oil and rendered fat around in the pan. Turn the legs over, reduce the heat to medium and cook for 2 more minutes on the other side. It may be necessary to do this in 2 batches, adding oil if necessary. (Also, as was noted above, I’d do this in a Dutch oven next time and keep using that for the rest of the recipe.) Set the browned chicken aside.

Pour off some of the fat and return the sauté pan to medium heat. Add the onions, fennel and bay leaves. Cook for 6 to 7 minutes, stirring often, until the vegetables are lightly caramelized. Add the tomatoes and cook another 5 minutes, stirring and scraping with a wooden spoon. Add the sherry vinegar, white wine and sherry. Turn up the heat to high and reduce by half. Add the chicken stock and bring to a boil. Add the cilantro, give it a stir and then spoon the vegetables into the bottom of a large casserole or braising dish. Arrange the chicken in one layer in the dish, skin side up, and then pour the broth over it. The liquid should not quite cover the chicken. (This was fine in a roasting pan. However, using a Dutch oven and keeping the lid on might allow for the use of only half the amount of broth, thereby avoiding waste later in the recipe.) Cover the dish in aluminum foil, place in the oven and braise for 1 ½ to 2 hours. While the chicken is braising, make the sides.

For the date relish
Toss the dates with the olive oil, lemon juice, parsley and cilantro. Season with salt and pepper.

For the saffron onions
Toss the saffron threads in a small pan over medium heat until they are just dry and become brittle. Be very careful not to burn the precious saffron. (We erred on the side of caution here, especially given that saffron is brittle to begin with! As long as it’s fragrant, call it a day.) Pound the saffron to a fine powder with a mortar and pestle.

Heat a large sauté pan over medium heat for 2 minutes. Add the olive oil, butter and saffron. When the butter foams, add the onions, bay leaf, and thyme, along with salt and pepper. Cook 8 to 10 minutes, stirring often, as the onions wilt. Turn the heat down to low and cook for another 20 minutes, stirring every now and then, until the onions are soft and sweet. Taste for seasoning.

For the couscous
Bring a large pot of salted water to a boil over high heat. Add the couscous and cook 6 to 20 minutes, until tender but still slightly al dente. Drain the couscous, return it to the pot and toss with the butter, parsley and a pinch of pepper. Taste for seasoning.

By now, the chicken should be ready. To check the chicken for doneness, remove the foil, being careful of escaping steam, and pierce a piece of chicken with a paring knife. It should yield easily and be tender, but not quite falling off the bone. (We used a thermometer to gauge doneness.)

Turn the oven up to 400 °F. Transfer the chicken to a baking sheet and return it to the oven to brown for about 10 minutes. Pour half the chicken broth and vegetables into a sauté pan and heat over high heat until it has reduced and become thickened. Pour the thickened sauce into the bottom of a serving dish and pile the crisped chicken on top of it.

The second time I plated this for myself, I put the chicken and sauce on top of the couscous, and I liked that better than when it was next to it. The onions are fantastic and would go well with almost any other dish, too, as would the date relish. If you make it this far, sit back, relax, and enjoy a great meal. Worry about the dishes later.

Friday, October 31, 2014

Chocolate Peanut Butter Pillow Cookies


I don’t buy Halloween candy anymore. I used to go trick-or-treating when I was younger, and the Engineer and I bought candy to hand out the first two years we lived in our house, but we’ve turned off the lights for the past two years and intend to do the same tonight. (I’m sure we’ll be making up for it with the Little Prince soon enough.) That being said, I think my favorite candy involves chocolate and peanut butter, Reese’s Peanut Butter Cups being a prime example. And since it’s been well established that I like pillow cookies, these peanut butter chocolate pillows were right up my alley. Consider them a grown-up version of Halloween candy!

Note that it can be hard to gauge the amount of peanut butter mixture and dough to use for each cookie. In my case, I got 36 balls of peanut butter, but only enough dough for 18 cookies, while the recipe should have yielded 24. I admit that I had a bit too much chocolate dough in my cookies, but it wasn’t pliable enough to allow me to use less… In any event, these were great. Shape all your cookies and store any unbaked ones in the fridge until needed. Note also the leftover peanut butter balls can be discretely eaten straight from the fridge.

Oh, and did I mention these are vegan?

For the chocolate dough
1 ½ cups all-purpose flour
1/3 cup unsweetened Dutch-processed cocoa powder
2 Tbsp. black unsweetened cocoa (or more Dutch-processed unsweetened cocoa powder)
½ tsp. baking soda
¼ tsp. salt
1 cup sugar
½ cup canola oil
¼ cup pure maple syrup
3 Tbsp. non-dairy milk (I used soy milk)
½ tsp. vanilla extract

For the peanut butter filling
¾ cup natural salted peanut butter, crunchy or creamy style
2/3 cup confectioners’ sugar
2 to 3 Tbsp. soy creamer or non-dairy milk (I used soy milk)
¼ tsp. vanilla extract

In a medium mixing bowl, sift in flour, cocoa, black cocoa, baking soda and salt. Whisk together and set aside.

In a large mixing bowl combine sugar, oil, maple syrup, soy milk and vanilla extract and mix until smooth. Add the dry ingredients to the wet mixture and mix to form a moist dough.

To make the filling, in another mixing bowl (I used my stand mixer), beat together peanut butter, confectioners’ sugar, 2 Tbsp. of soy milk and vanilla extract to form a moist but firm dough. If peanut butter dough is too dry, stir in remaining tablespoon of non-dairy milk. If dough is too wet, knead in a little extra powdered sugar.

Preheat oven to 350°F. Line baking sheet with parchment paper.

Create the centers of the cookies by rolling the peanut butter dough into 24 balls. Scoop a generous tablespoon of chocolate dough, flatten into a disc and place a peanut butter ball in the center. Fold the sides of the chocolate dough up and around the peanut butter center and roll the chocolate ball into a smooth ball between your palms. Place dough balls about 2 inches apart on the prepared baking sheet. If desired, gently flatten cookies a little, but this is not necessary.

Bake for 10 minutes. Remove sheet from oven and let cookies for 5 minutes before moving to a wire rack to cool completely.

Thursday, October 30, 2014

Pumpkin Bread

So, it’s fall, y’all. It doesn’t really feel like it over here in South Texas, but Halloween is this week, and the days are getting shorter. (It’s also been pleasantly cooler for a few days, by which I mean a high around 85 °F.) I made pumpkin bread to get in the mood, and this one happened to be very good! I halved the recipe from The Kind Diet. The resulting loaf was very moist and had the perfect balance of spice, sweetness and flavor. I would consider increasing the quantity of chocolate chips, but that’s just me.

2 cups spelt flour
1 ½ tsp. baking soda
1 ½ tsp. baking powder
1 ½ tsp. cinnamon
½ tsp. nutmeg
2 ½ cups pumpkin purée
1 cup maple sugar
1 “egg” (i.e. 1 Tbsp. flaxseed mixed with 3 Tbsp. water)
½ cup almond milk or vegan milk of your choice (I used soy)
6 Tbsp. safflower oil
½ tsp. vanilla extract
6 Tbsp. chocolate chips (or ½ cup, if you want; see above)

Preheat the oven to 350 °F. Grease a standard 9”x5” loaf pan.

In a large bowl, combine the flour, baking soda, baking powder, cinnamon and nutmeg. Set aside.

In a small bowl, combine the pumpkin purée, maple sugar, “egg”, almond milk, oil and vanilla in a mixing bowl.

Add the wet ingredients to the dry ingredients and mix until just combined; fold in the chocolate chips. Fill the prepared pan and bake for 45 minutes to 1 hour or until the top springs back when pressed with a finger. Let the loaf cool in the pan for at least 15 minutes, then turn out onto a baking rack to cool completely.

Tuesday, October 28, 2014

Vegan Chocolate Chunk Cookies


As far as I know, I haven’t posted a really good vegan chocolate chip cookie here. I remember making one that was also gluten-free, and it wasn’t great. This Pastry Affair cookie, however, is really good. I feel that it doesn’t beat my best chocolate chip cookies, but it definitely stands its own. Plus, the Engineer said on a few occasions that he really liked them, so that means something! They’re a bit different to put together because they are made with oil (instead of eggs or butter), but you couldn’t tell once they’re baked. This recipe makes about 2 dozen cookies; if you don’t bake them all at once, you should at the very least form each cookie before putting the dough in the fridge – the oil will harden and you won’t be able to shape the dough if it is cold, as it will feel like sand.

2 cups all-purpose flour
½ tsp. baking soda
¾ tsp. salt
½ cup brown sugar, packed
¼ cup granulated sugar
2/3 cup vegetable oil
¼ cup almond or soy milk (lactose-free dairy milk will also work for non-vegans)
2 tsp. pure vanilla extract
3 oz. semisweet chocolate, roughly chopped (use dairy-free chocolate to keep it vegan)

Preheat oven to 350 °F.

In a small bowl, whisk together the flour, baking soda and salt.

In a large mixing bowl, whisk together the brown sugar, granulated sugar, oil, and milk for several minutes until the mixture resembles a smooth caramel sauce. Stir in the vanilla.

Fold in the dry ingredients. If the dough is not stiff enough to hold its shape, add more flour by the tablespoon until it holds together (this was not an issue for me). Mix in the chocolate chunks.

Drop cookies by the tablespoon onto a baking sheet, keeping the cookies at least 2 inches apart. Bake for 8-9 minutes, or until lightly browned on the edges. Cool on the baking sheet for several minutes until transferring to a cooling rack to cool completely.

Sesame Seed Cake

Here’s another recipe from Alice Medrich’s Pure Dessert. I really loved this cake, as I love sesame, especially the deep flavor of toasted sesame imparted by the oil. I toasted the sesame seeds myself in a pan, but to help gauge the doneness, I used a mix if white and black seeds (it’s easy to see a white sesame seed change colors, but a black one, not so much). You could use only white seeds if you want, but the black seeds look so much better in the cake! I assume that this contrast is also the reason why black poppy seeds are so much more widespread than the white ones. (Before baking this cake, it had not even occurred to me that some people are not familiar with black sesame seeds, but apparently that’s the case, so I’m including a picture from my spice rack and throwing in the poppy seeds for good measure.) We all loved this cake, for dessert or breakfast, and it was gone very quickly.


1 1/3 cups (6 oz.) all-purpose flour
½ tsp. baking soda
¼ tsp. baking powder
¼ tsp. salt
2 large eggs, at room temperature
2 ½ tsp. toasted sesame oil
1 tsp. vanilla extract
8 Tbsp. unsalted butter, room temperature (I used cold margarine)
1 cup sugar
½ cup buttermilk (i.e., lactose-free milk with a splash of vinegar or lemon juice)
¼ cup toasted black sesame seeds

Preheat the oven to 350 °F with a rack positioned in the lower third. Grease the bottom and sides of an 8-inch cake pan or a springform pan; line the bottom with parchment paper and grease again. (Make sure the pan has high enough sides, as the cake really rises in the oven!)

Combine the flour, baking soda, baking powder, and salt together in a bowl and set aside.

In a small bowl, whisk the eggs together briefly with the sesame oil and vanilla. Set aside.

Place the butter in the bowl of a stand mixer and beat with the paddle attachment on medium for a few seconds until creamy. Add the sugar and beat for several at medium speed until it is light-colored and fluffy, 2 to 3 minutes. Add in the egg mixture a little at a time while the mixer is still running, taking about 2 minutes to add it all.

Stop the mixer and pour in a third of the flour mixture, and beat on low speed just until combined. Scrape down the sides as necessary. Add half the buttermilk and beat only until the liquid is absorbed. Repeat with half of the remaining flour mixture, the rest of the buttermilk, and finally the rest of the flour mixture with the sesame seeds, scraping the bowl as needed. With each addition, beat it only until it is just incorporated.

Scrape the batter into the prepared pan and bake in the oven for about 35-40 minutes, until the top is golden brown and a toothpick inserted into the center comes out clean. Let the cake cool on the rack for a few minutes before unmolding. If you baked the cake in a regular cake pan, invert it onto the rack, remove the parchment paper and turn it right side up to finish cooling.

This cake will keep in an airtight container for about 4 days, assuming it’s not eaten before then – the flavor gets deeper after a day.

Friday, October 24, 2014

Vegan Roasted Red Pepper Pasta

This pasta recipe from Minimalist Baker really rocks. I loved the creamy sauce that happened to be vegan, so I’ll be making this dish again. I made it with macaroni, because small pasta shapes are easier to feed to the Little Prince! I used a bit too much pepper, but nonetheless, this was a big hit for all family members.

2 red bell peppers
2-3 Tbsp. olive oil
2 shallots, finely chopped
4 cloves garlic, finely chopped
sea salt and ground black pepper
1 ½ cups unsweetened almond milk (or other vegan milk, or lactose-free milk)
2 Tbsp. nutritional yeast
1 ½ Tbsp. cornstarch or arrowroot powder (or other thickener of choice)
pinch red pepper flake (optional, for heat)
16 oz. linguini or spaghetti noodles (or other pasta of choice, including gluten-free)
vegan parmesan cheese (optional, for serving)
fresh parsley or basil (optional, for serving)

Heat oven to 500 °F and roast red peppers on a baking sheet until charred, about 25-30 minutesQuickly put them in a metal bowl and cover it for 10 minutes to steam, then remove (peel away) charred skin, seeds and stems. Set aside. (I did this ahead of time because I was afraid I’d get flustered with the timing of all the steps otherwise. You also don’t want the cooked pasta hanging around too long before mixing it with the sauce, so roasting the pepper ahead of time made sense to me.)

Cook pasta according to package instructions.

While the red peppers are roasting, bring a large skillet over medium heat and sauté shallot and garlic in 2-3 Tbsp. olive oil until golden brown and soft, about 4-5 minutes. Season with a generous pinch of salt and pepper and stir. Remove from heat and set aside.

Transfer sautéed shallot and garlic to blender with roasted peppers, almond milk, red pepper flake, nutritional yeast and cornstarch. Blend until creamy and smooth, taste and adjust seasonings as needed, adding more salt and pepper or nutritional yeast for flavor. You want the flavor to be pretty robust and strong since the noodles don't have much flavor, so be generous with your seasonings (though I went too heavy on the pepper here).

Once blended, place sauce back in the skillet over medium heat to thicken. Once it reaches a simmer, reduce heat to low and continue simmering.

Once sauce is thickened to desired consistency, add the cooked, drained pasta and toss to coat. Serve with vegan parmesan, red pepper flake and fresh chopped parsley or basil.

Wednesday, October 22, 2014

Cherries and Chocolate

In the past few weeks, I made a few dessert recipes using maraschino cherries and cherry preserves, to check a few things off my to-make list while keeping a theme going. I had eschewed maraschino cherries over the past several years, because of all the artificial crap they contain. The Engineer, however, brought home a new-to-me brand, Cherry Man Farm to Market Maraschinos, which do not contain high-fructose corn syrup and only use vegetable juice for color (but they’re still a really bright red). They are widely available, too, though if you don’t mind looking a bit, there are other brands worth seeking out. I liked them and might start using them to make myself Shirley Temples again, for old time’s sake!


The two recipes that I tried with them were white chocolate and cherry shortbread and cherry dark chocolate kisses. In both cases, I used red gel food coloring for the dough. I’m not showing any pictures of the shortbread, because it really looked like salami, but the second kisses turned out pretty enough. However, I felt that neither was good enough to make again.


It was the cherry preserves that really did it for me. I started with Nutella cherry hand pies (with an off-brand chocolate spread, and of course you can make your own lactose-free spread). I used store-bought dough to save time, but your favorite dough recipe would be fine here. Note that I wouldn’t bother with the glaze next time, but if I did, I would make it thicker by using less water.

For the pies
1 package of Pillsbury Pie Crusts (2 crusts)
2-3 Tbsp. Nutella
2-3 Tbsp. cherry preserves
1 egg

For the glaze
½ cup powdered sugar
2 or 3 tsp. hot water (or less, see note)

Preheat oven to 350 °F. Let both pie crusts sit out at room temperature for 15 minutes.

Unroll crusts and cut out circles. (I used a glass that was the size I wanted.) Reroll dough and cut out more circles.

Transfer half of the circles to a greased cookie sheet.

Spread about 1 tsp. of Nutella on the pie crust circles that are on the cookie sheet. Do not spread all the way to the edges.

Top Nutella with 1 tsp. cherry preserves. Feel free to add a little extra filling, but don't go overboard or the pies will burst while cooking.

Make an egg wash by using a fork to mix the egg with 1 tsp. water until combined. Brush inside edges of the circles with the egg wash. Top the filled crusts with the remaining pie crust circles. (You can use a small shape cutter to decorate these.) Use a fork to crimp and seal the edges. Brush the top of each pie with egg wash.

Bake for 10-13 minutes or until golden brown. Allow pies to cool for at least 5 minutes before glazing.

Add the hot water to the powdered sugar 1 tsp. at a time and mix with fork, until desired consistency is reached. Drizzle glaze over hand pies.


The other recipe I made with cherry preserves was these delicious vegan cherry cupcakes. I had assumed that they would be a riff on Black Forest cupcakes, but I was wrong. The cake part is just chocolate, though it is incredibly moist and flavorful; it’s the frosting that is cherry-flavored, thanks to the preserves. I absolutely loved this flavor, and the Engineer agreed. I ended up with too much frosting, though, and it was too good to throw away, so I ended up freezing the leftovers – I’ll let you know if that was a good idea once I use it on something else! To garnish, I used the afore-mentioned maraschino cherries.

For the cupcakes
1 ½ cups cake flour
¾ cup sugar
¼ cup cocoa
1 tsp. baking soda
½ tsp. salt
5 Tbsp. vegetable oil
1 Tbsp. white vinegar
1 tsp. vanilla
1 ¼ cups water

For the frosting
1 cup vegan margarine (at room temperature)
3 cups powdered sugar
½ cup cherry preserves
1 tsp. vanilla extract
½ tsp. almond extract (omit if baking nut-free)
2-3 Tbsp. almond milk (or whichever non-dairy, nut-free milk you prefer)

Preheat oven to 350 °F. Line a standard muffin tin with paper liners.

In a big bowl, whisk together flour, sugar, cocoa, baking soda, and salt.

In another bowl, mix together vegetable oil, vinegar, vanilla, and water.

Whisk the wet ingredients into dry. Whisk until everything is combined. This batter is really runny.

Put the batter into the muffin tin lined (reminder: I like to use an ice cream scoop for this, as it is relatively mess-free). Bake for 20 to 25 minutes, until a toothpick inserted in the center of the cupcakes comes out clean. Let cool completely before frosting.

To make the frosting, cream together the margarine and powdered sugar. Add the cherry preserves, vanilla, and almond extracts. Beat until light and creamy. Add almond milk as needed to get the right consistency.

Frost and garnish with a cherry.

Sunday, October 19, 2014

Pistachio Granola with Fresh Fruit


This pistachio granola recipe is from Real Simple, where it is referred to as muesli. However, the oat flakes are mixed with sweetener and baked, so it’s really granola. That being said, it’s not very sweet, so it definitely benefits from the addition of fresh fruit. I tried it with fresh figs and Envy apples, which was good, but also loved it with nectarines (though not with strawberries). My mother, who enjoys less sugar than I do, liked it plain with milk.

6 cups old-fashioned rolled oats
1 cup shelled roasted pistachios (mine were raw)
½ cup pure maple syrup
¼ cup poppy seeds
¼ cup sesame seeds
2 tsp. pure vanilla extract
1 tsp. ground ginger
½ tsp. fine salt
lactose-free milk, almond milk, or plain yogurt, for serving
sliced apples, for serving (see note)
sliced figs, for serving (see note)
chopped nectarines or peaches, for serving (see note)

Heat oven to 300 °F (the original recipe said 350 °F, but that really seems too high for granola). Combine the oats, pistachios, maple syrup, poppy seeds, sesame seeds, vanilla, ginger, and the salt in a large bowl. Transfer to 2 greased, rimmed baking sheets (or a roasting pan). Bake, stirring and rotating the pans every 10 minutes, until golden brown, 20 to 40 minutes.

Serve the granola with milk, almond milk, or plain yogurt, topped with sliced apple and fig or a chopped nectarine.


Lasagne de crêpes ricotta et épinards


Je voulais vous parler d’une lasagne de crêpes ricotta et épinards, tirée du site Un déjeuner de soleil. C’est un peu élaboré comme recette, dans le sens où il faut préparer ça en trois étapes avant d’assembler le tout, mais ce n’est pas compliqué. Par contre, mes résultats n’ont pas été aussi beaux que sur le site d’origine, on s’en doute : mes crêpes sont toujours un peu plus épaisses que dans les recettes, alors j’ai fini avec neuf crêpes d’environ 6 ou 7 pouces de diamètre, tandis que la recette promettait plutôt 10 crêpes de 9 pouces de diamètre. La lasagne était délicieuse, et excellente, mais cela faisait de petites portions, alors ne comptez pas sur ça pour vous faire des restes! (Malgré que, s’il en reste un peu, les crêpes seront bien moelleuses le lendemain!) Tout le monde ici a adoré, et l’Ingénieur a tout de suite dit que c’était un plat très joli. J’ai adapté les quantités ci-dessous pour l’Amérique du Nord et j’ai remis les ingrédients en ordre pour que ce soit plus facile à suivre.

[À noter que j’ai utilisé du parmesan quasi-végétalien de Go Veggie, que j’avais reçu gratuitement de l’entreprise. Je vous en parlerai davantage dans un futur billet.]

Pour la pâte à crêpes
100 g. de farine tout usage (j’ai pris 50 g de farine tout usage et 50 g de farine de blé blond)
20 g. de farine d'épeautre
2 œufs
1 tasse de lait entier sans lactose
1 c. à soupe d'huile d'olive
1 pincée de sel
1 c. à soupe de parmesan
quelques feuilles de persil ou 1 c. à soupe de pesto (facultatif, je n’ai rien utilisé)

Pour la sauce
1 gousse d'ail, coupée en deux
400 g de sauce tomate en boîte (de bonne qualité)
origan
sel et poivre

Pour la farce
500 g. de pousses d'épinards (j’ai pris 450 g d’épinards surgelés, bien égouttés)
250 g. de ricotta, idéalement sans lactose
1 œuf
80 g de parmesan râpé
1 soupçon de muscade
sel et poivre
3 ou 4 c. à soupe de lait sans lactose

Préparer la pâte à crêpes (même la veille). Mixer la moitié de la farine avec les œufs et le lait, puis ajouter le reste de farine, l'huile, une pincée de sel, le parmesan et les herbes. Couvrir et laisser reposer au moins deux heures (plus si possible).

Cuire les crêpes dans une poêle bien plate et bien chaude. Les superposer, couvrir et garder au chaud.

Préparer la sauce (même à l'avance). Faire revenir l'ail avec 2 c. à soupe d'huile d'olive. Dès qu'il colore à peine, ajouter la sauce tomate, une pincée d'origan, du sel et du poivre. Cuire la sauce pendant un quart d'heure environ, le temps qu'elle devienne plus dense et goûteuse. Éteindre et mettre de côté.

Pendant ce temps, préparer la farce. Faire sauter les pousses d'épinards dans une poêle avec 1 c. à soupe d'eau quelques minutes. (Puisque j’ai utilisé des épinards surgelés, je me suis simplement assuré qu’ils soient bien à la température de la pièce, puis je les ai égouttées en les serrant très fort.) Les hacher au couteau, puis les mélanger à la ricotta. (Pour ma part, je les ai simplement mis dans le robot culinaire avec le reste des ingrédients pour faire la farce, c’est plus simple.) Incorporer l'œuf, ajouter le parmesan, une pincée de muscade, saler et poivrer. (J’ai ajouté un peu de lait sans lactose de façon à ce que la farce ait une texture lui permettant d’être étendue plus facilement.)

Préchauffer le four à 350 °F.

Procéder au montage des lasagnes : beurrer un cercle posé sur une plaque ou un moule rond assez haut (à charnière par exemple). Étendre tout d’abord 1 c. à soupe de sauce tomate, puis par couches une crêpe, un peu de farce et un peu de parmesan... et ainsi de suite. À mi-hauteur, mettre uniquement de la sauce tomate sur une crêpe puis procéder comme avant avec uniquement de la farce. (Moi avec mes neufs crêpes, j’ai mis de la sauce tomate entre la 4e et la 5e, mais la prochaine fois, je ferais plutôt deux étages de sauce, après les 3e et 6e crêpes.) Terminer avec une crêpe et le reste de sauce tomate. Saupoudrer le dessus avec du parmesan et quelques morceaux de beurre. Cuire pendant une vingtaine de minutes. Servir chaud-tiède.

Monday, October 13, 2014

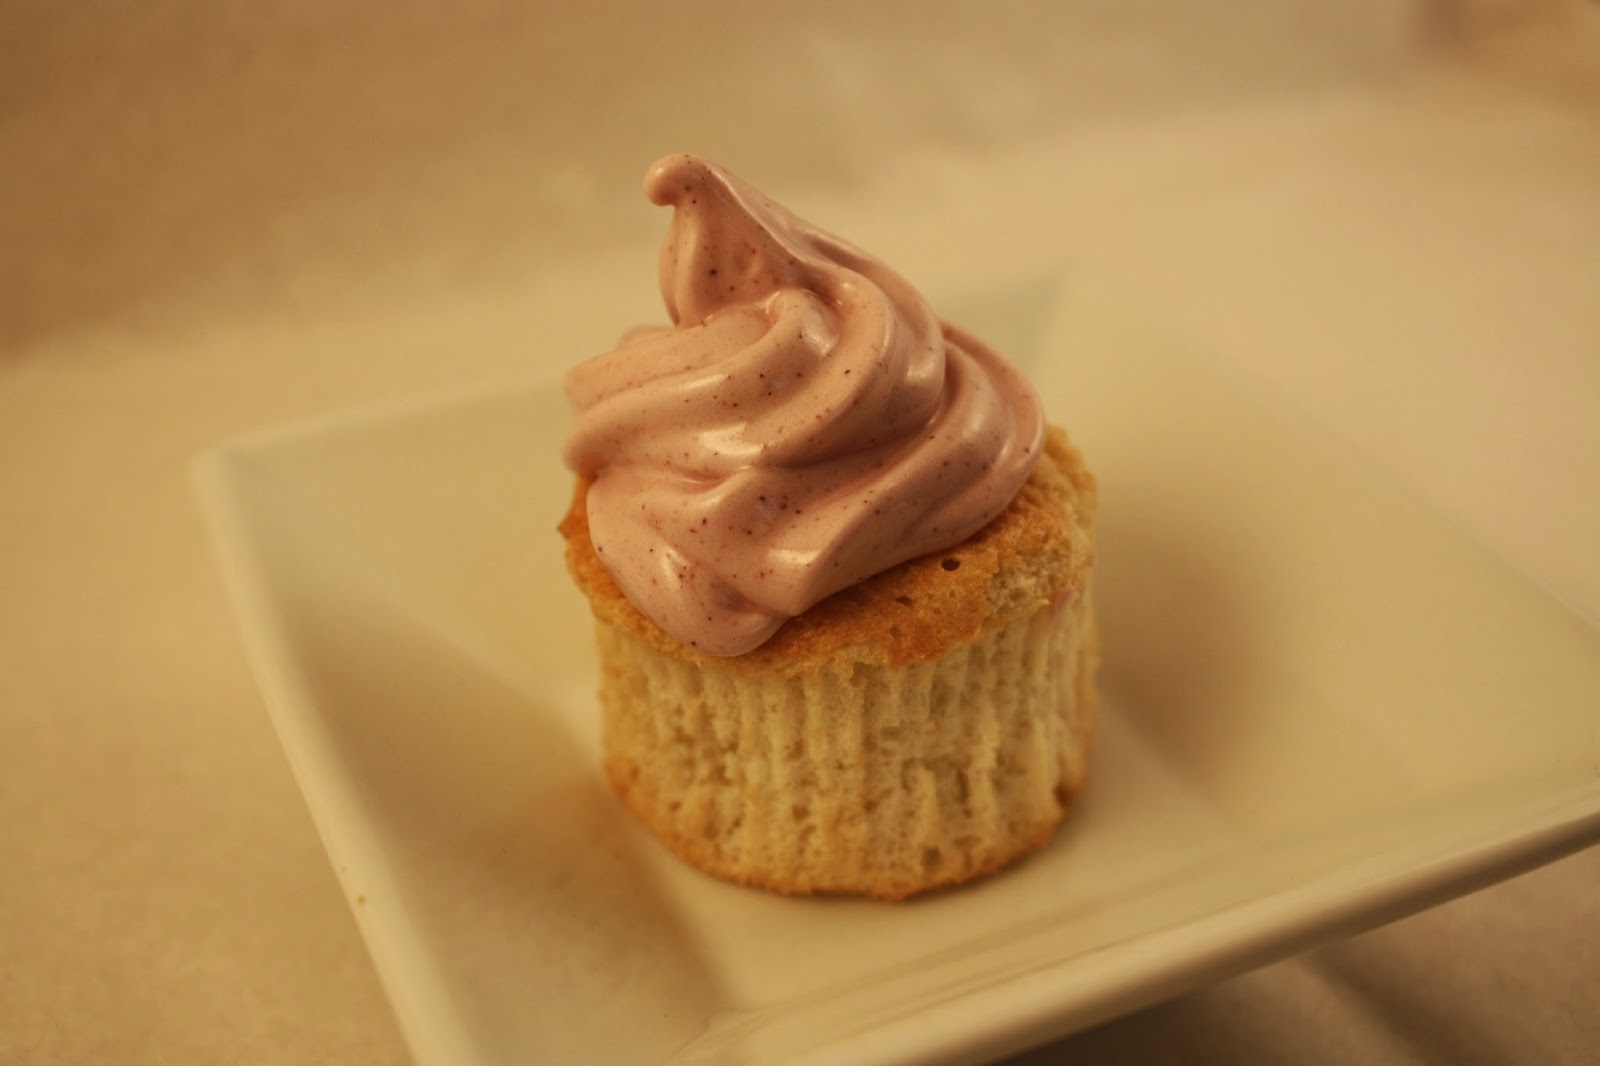
Angel Food Cupcakes with Pink Meringue Frosting


I’d been looking forward to this recipe by Faith Durand for a while now! I even bought the beet powder earlier this year, but never got around to making this recipe… I’m glad I finally found the time, though. I like angel food cake, though I did find this one slightly eggier than my usual version. I loved these cupcakes, especially the taste of the frosting! The twist here is that the frosting is dyed pink naturally, with beet powder! It does give a slightly earthy taste, which I enjoyed mixed with the sugar, though in fairness I should say that the Engineer liked the cupcakes themselves, but not the frosting. You could achieve similar results with something like raspberry powder, if you can get your hands on it (I had to order the beet powder online as it is).

The downside to this recipe, I have to admit, is that meringue frostings generally don’t hold up very well. I had trouble getting mine to the right consistency, though putting in the fridge helped. But even then it separated, and there was a puddle of pink liquid at the bottom of the bowl. These cupcakes should definitely be frosted right before serving. If you make the frosting in advance, keep the bowl in the fridge and mix it again before using it. I don’t recall having had the same problem with seven-minute frosting, though, for what it’s worth. Of course, you could just make a regular lactose-free buttercream frosting and use the beet powder in that! I’ll probably try that next, or add beet powder to waffles or pancakes.

For the cupcakes
½ cup confectioners’ sugar (I calculated this to be 1.8 oz.)
2/3 cup cake flour, sifted (I calculated this to be 2.7 oz.)
¼ tsp. salt
8 egg whites from large egg whites, at room temperature
¼ cup water
1 tsp. vanilla extract
¼ tsp. cream of tartar
½ cup granulated sugar

Heat the oven to 325 °F. Prepare a muffin pan – the recipe should make 12-18 cupcakes. (I do not recommend greasing it, as the original recipe did, because that’s usually a big no-no for angel food cake! I made 12 cupcakes in paper liners, and while they shrank a lot, the paper came off easily. I made the remaining 5 directly in the nonstick cups, and they were flatter than the paper-lined cupcakes, but came out relatively easily with a knife. Next time, I plan on using paper liners for all of them.)

In a medium bowl, whisk together the confectioners’ sugar, cake flour, and salt.

In the bowl of a stand mixer mix the egg whites, water, vanilla extract, and cream of tartar. (You can also do this in a large bowl, using a hand mixer.) Mix on low speed until foamy, then turn the speed to medium and begin to add the granulated sugar in 1-tablespoon increments. Add the sugar very gradually over a period of three to four minutes. When all the sugar has been added, turn the speed to high and beat for an additional three to five minutes, or until the mixture forms medium peaks. (Don't beat until the mixture is extremely glossy and stiff; it should be modestly glossy, but the very tips of the peaks formed when you dip your finger in should flop over just a bit.)

Add the dry ingredients in two installments. Sift the dry ingredients through a fine mesh strainer, tapping them through and into the egg whites. Fold them in carefully, not overmixing. Fold in the second half of the dry ingredients.

Spoon the batter into the prepared baking pan. Bake for 18-20 minutes or until the tops are slightly golden. Remove from the oven and let cool completely before removing and icing.

For the frosting
2 egg whites from large eggs, at room temperature
1 tsp. vanilla
¼ cup water
½ cup sugar
1 pinch salt
1 tsp. beet powder

Place the egg whites with the vanilla in the clean bowl of a stand mixer. Whisk the water and sugar together in a small, high-sided saucepan. Bring to a boil over medium-high heat and cook for four to eight minutes, or until the syrup reaches 234 °F on a candy thermometer.

While the sugar syrup is boiling, whip the egg whites on low speed until they form foamy peaks. When the syrup has reached the correct temperature, slowly drizzle it into the egg whites, turning the speed to medium-high as you do so. Continue to whip until the egg whites form stiff, glossy peaks.

Beat in the salt and beet powder until the mixture is an even, consistent shade of pink.

Fill a piping bag and frost cupcakes. If desired, toast the top of the meringue with a kitchen torch (which I obviously skipped, as I do not own a kitchen torch).