Wednesday, September 07, 2011

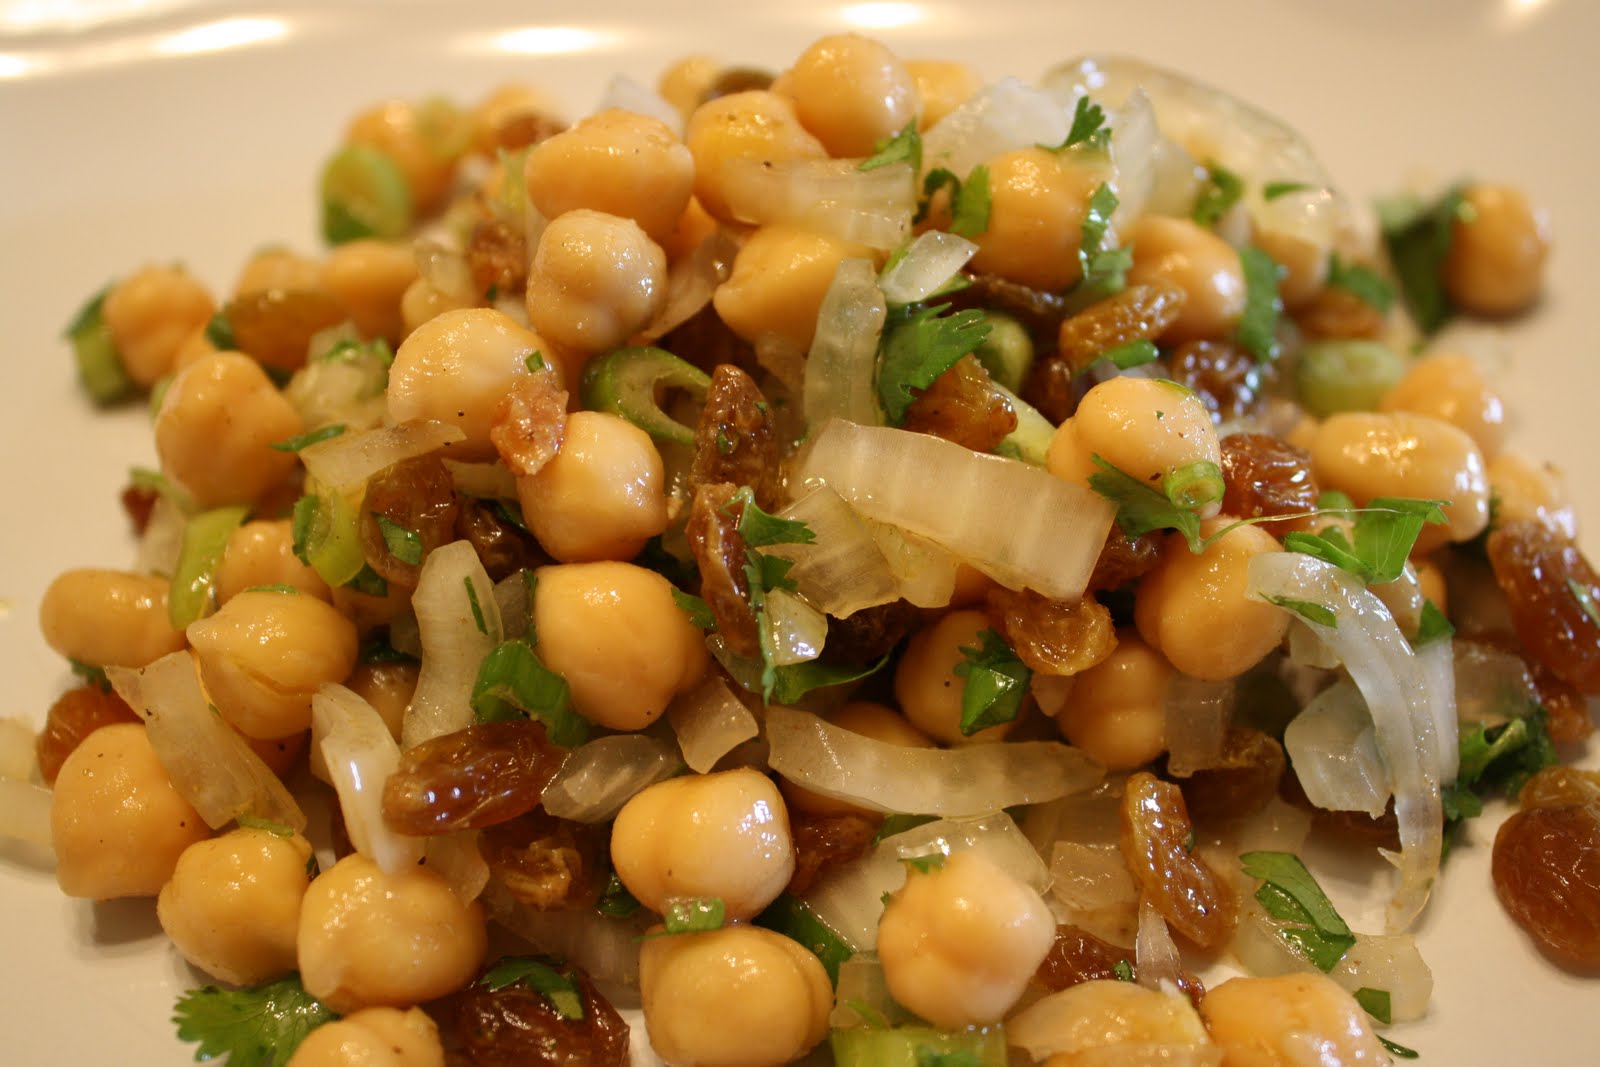
Chickpea and Raisin Salad


I adapted this recipe from one I found in Real Simple. I used 2 cans of chickpeas instead of 3, golden raisin because that’s what I had on hand, and most of a chopped sweet onion left over from a chicken curry, so I used only 2 scallions instead of 4. And it was the best salad ever. I’ll definitely be making it again, and I might even go out of my way to put a sweet onion in it! Try it, you won’t be sorry.

1 cup raisins
¼ cup red wine vinegar
2 tsp brown sugar
2 (15.5-oz) cans chickpeas, rinsed
1 cup fresh cilantro or flat-leaf parsley leaves
2 scallions, thinly sliced
1 sweet onion, sliced, soaked in cold water for a few hours, then chopped
1/3 cup olive oil
½ tsp ground cumin
kosher salt and black pepper

In a small saucepan, combine the raisins, vinegar, and sugar and bring just to a simmer; remove from heat and let cool.

In a large bowl, toss the chickpeas, cilantro, onion, scallions, and raisin mixture with the oil, cumin, ½ tsp salt, and ¼ tsppepper.

Friday, September 02, 2011

Vegan Vanilla Cardamom Ice Cream


I got this recipe from The Vegan Scoop (which contains recipes with amazing flavour combinations that I can’t wait to try). The name of this reminded me of Petit Alep’s 5-spice sherbet, which I love, and it has the added bonus of being made with soy milk and arrowroot starch as a thickener, as opposed to coconut milk. I say this is a bonus because the Engineer doesn’t really like the texture of sorbets made with coconut milk, so I was hoping this would be up his alley.

Texture-wise, I found this ice cream more watery and less rich than the ones I make with coconut milk; the Engineer did like the texture, however, so that’s a win, I thought it was very good, but I would add a bit more cardamom next time. Also, since I’m not really crazy about the taste of soymilk in the first place, I would try rice milk when I make it again, but that’s up to you.

Finally, because I’ve had this question in the past: yes, it is possible to make ice cream without a proper ice cream maker. Read this post on The Kitchn for two different methods. It is, of course, more labour-intensive than with an ice cream maker, and the consistency *may* be a little different (in the same way a sorbet made without an ice cream maker is often more of a granité than a proper sorbet). That being said, it can be useful if you want to try making your own ice cream but aren’t ready or willing to invest in an ice cream maker.

On to the recipe!

1 cup soymilk, divided
2 Tbsp arrowroot powder
2 cups soy creamer
¾ cup sugar
1 Tbsp vanilla extract
1/8 tsp cardamom

In a small bowl, combine ¼ cup soymilk with arrowroot and set aside.

Mix soy creamer, remaining ¾ cup soymilk and sugar in a saucepan and cook over low heat. Once mixture begins to boil, remove from heat and immediately add arrowroot cream. This will cause liquid to thicken noticeably. Add vanilla extract.

Refrigerate mixture until chilled, approximately 2 to 3 hours. Mix in cardamom. Freeze according to your ice cream maker’s instructions.

Yield: 1 quart.


Petits pois avec prosciutto et menthe


J’ai fait cette petite recette simple en accompagnement de poulet avec confiture de Simon Turcotte. J’avais reçu en cadeau un trio de tartinades fines, dont une au citron et au romarin. En consultant The Flavor Bible, j’ai vu que les deux saveurs se marient bien avec le poulet, l’ail et le miel. J’ai laissé tomber le miel, puisque ma confiture était déjà assez sucrée comme ça, mais j’ai gardé l’idée du poulet et de l’ail rôti pour aller avec ma confiture. Et à côté, des pois avec prosciutto et menthe, simple comme tout à préparer (avec le prosciutto qui me restait après cette recette-ci) et très bon.

2 tasses de pois verts, frais ou surgelés
1 c. à soupe d’huile d’olive
¼ c. à thé de poivre noir
¼ c. à thé de sel de mer
6 feuilles de menthe, en chiffonnade
1 oz (environ 2 tranches) de prosciutto, en morceaux de 1 cm

Faire cuire les petit pois (juste un peu s’ils sont frais, juste pour les réchauffer s’ils sont surgelés; aidez-vous d’un bain de glace au besoin).

Dans un bol, mélanger l’huile d’olive, le poivre et le sel. Ajouter les pois et mélanger. Ajouter la menthe et le prosciutto; mélanger. Servir.


Thursday, September 01, 2011

Texas-Style Blueberry Cobbler


I didn’t know this, but according to the August-September 2011 edition of Cook’s Country, Texas cobblers aren’t like the cobblers I know. To me (and, strictly speaking, by definition), a cobbler has a fruit base on which biscuit-like dough is dropped, then baked. This gives it the appearance of cobblestones, hence the name cobbler. But this article says that in Central Texas, cobblers are a pancake-like batter on which fruits are dropped, then the dish is baked – fruits sink to the bottom during baking. And after making this Texas-style blueberry cobbler, I only have this to say: you can call it whatever you want, just as long as I can have another serving! This was a huge hit in our household.

12 Tbsp unsalted butter or margarine, divided (4 Tbsp cut into 4 pieces + 8 Tbsp melted and cooled)
1 ½ cups sugar, divided (¼ cup + 1 ¼ cups)
1 ½ tsp grated lemon zest
15 oz (3 cups) fresh blueberries (if frozen, thaw them first)
1 ½ cups all-purpose flour
2 ½ tsp baking powder
¾ tsp salt
1 ½ cups lactose-free milk

Adjust oven rack to middle position and heat oven to 350 °F. Place 4 Tbsp cut-up butter (I used real butter here) in 13 by 9-inch baking dish (all I had was an 8”x11” and it worked fine) and transfer to oven. Heat until butter is melted, 8 to 10 minutes. Remove baking dish from oven and transfer to wire rack.

Meanwhile, pulse ¼ cup sugar and lemon zest in food processor until combined, about 5 pulses; set aside. (I made a mistake here and used all the sugar; I still loved the result, but rewrote the ingredients in a way that is clearer to avoid this next time.) Using potato masher, mash blueberries and 1 Tbsp lemon sugar together in bowl until berries are coarsely mashed.

Combine flour, remaining 1¼ cups sugar, baking powder, and salt in large bowl. Whisk in milk and 8 Tbsp melted, cooled butter (I used margarine) until smooth. Pour batter into prepared pan.

Dollop mashed blueberry mixture evenly over batter, sprinkle with remaining lemon sugar, and bake until golden brown and edges are crisp, 45 to 50 minutes, rotating pan halfway through baking. Let cobbler cool on wire rack for 30 minutes. Serve warm.


Wednesday, August 31, 2011

Burmese Chicken Curry with Noodles


I’d like to apologize to all of you. First, for taking so long to make this recipe after I had bookmarked it. Then also for not telling you about it immediately after I made it. It was absolutely fabulous! The Engineer said he didn’t expect something quite so amazing, and that it was good enough to be served by a restaurant chef. I also completely loved this dish.

I found the recipe on Tea & Cookies and modified it slightly, using four split chicken breasts instead of 2 lbs of chicken, and 2 Tbsp oyster sauce instead of 3 Tbsp fish sauce. I also reduced the amount of broth called for (down to 2 cups of broth and 1 ½ cans of coconut milk, from 7 cups of broth and 3 cans of coconut milk; it was plenty, but it depends on how much chicken you have and what size pot you use). It’s certainly not hard to make, but be aware that it is labour-intensive, as you have to caramelize an onion, hard-boil eggs and boil noodles on top of making your main chicken. However, the results are well worth it, and you will thank me. We had enough for 6 generous servings.

3 Tbsp fish sauce (I used 2 Tbsp oyster sauce; plus extra for topping, if desired)
3 Tbsp soy sauce
3 cloves garlic, chopped
2-inch piece of fresh ginger, peeled and grated (about 2 Tbsp)
2 tsp ground turmeric
2 lbs boneless chicken thighs or breasts, cut into 1-inch cubes (I used 4 breasts)
¼ cup vegetable oil
2 medium onions, chopped
1 large onion, caramelized
2 tsp ground paprika
3 13.5-oz cans of coconut milk (5 cups, total; I ended up using 1 ½ cans)
7 cups chicken stock (I ended up using 2 cups)
½ cup garbanzo bean flour (you can toast it briefly in a dry pan until fragrant, but I forgot), mixed into ½ cup warm water, to make a smooth, runny paste
2 lbs fresh or 1 lb dried rice noodles
6 hard boiled eggs, peeled and cut crosswise into ¼-inch slices
4 Tbsp ground dried red chilies, pan roasted until dark and fragrant (optional, I omitted them)
1 large sweet onion, halved and cut into slivers, then soaked in water
1 cup cilantro, chopped
3 lemons, quartered

Combine the fish sauce, soy sauce, garlic, ginger, and turmeric in a bowl. Add the chicken and mix well (use gloves if you want to protect your fingernails from being stained yellow by the turmeric, or use a fork). Set aside.

In a large pot, heat the oil until runny and shimmering (1-2 minutes). Stir in the two chopped onions and cook until translucent (3-4 minutes). Add the paprika and mix well.

Add the chicken and mix well. Raise the heat to medium-high and stir to cook thoroughly, about 4-5 minutes. Add the coconut milk and stock and bring to a boil. Stir constantly to prevent curdling. Reduce the heat, cover, and simmer for 20 minutes.

After 20 minutes, stir in the garbanzo bean flour paste and return to a boil. Simmer until the sauce thickens (5-10 minutes). Taste and add more fish sauce or soy sauce, as desired. Reduce heat and keep warm until serving.

Cook the noodles in a large pot of boiling water and drain. Rinse and place in a large bowl, adding a small amount of oil to prevent sticking.

Drain the slivered onion and pat dry.

Divide the noodles among individual bowls and ladle the curry sauce over them (about a cup and a half). Garnish with eggs, chilies, cilantro, onion, caramelized onion, and lemon wedges. Mix it all up, and then eat.


Carrot Salad with Harissa, Feta and Mint


I made this carrot salad a while ago, with harissa that I brought back from Jean Talon Market specifically for this (I couldn’t find any at my local grocery store here and figured I should get some at La Dépense while I was in Montreal). I reduced the amount of harissa to a scant ¼ tsp (down from ¾ tsp), but it was still too spicy for me. The mint and feta do tame it somewhat, but I still didn’t enjoy it – and of course, with feta, it’s not lactose-free. I’ll make a change to the recipe and tell you to use 1 lb of carrots instead of ¾ lb (otherwise, you’re left with two carrots in the bag, and who wants that?); if you enjoy spicy food, this might be right up your alley. As for me, I feel like if I ever made it again, I’d omit the harissa altogether.

1 lb carrots, peeled, trimmed and coarsely grated
4 Tbsp olive oil
1 crushed clove of garlic (I minced mine)
½ tsp caraway seeds or about half as much, ground (I used seeds but ground them first)
¾ tsp cumin seeds or about half as much, ground (I used the seed but ground them first)
½ tsp paprika
¼ tsp to ¾ tsp harissa (this depends on your taste)
½ tsp sugar
3 Tbsp lemon juice
2 Tbsp flat leaf parsley, finely chopped
2 Tbsp fresh mint, finely chopped
100 g feta, crumbled or chopped into bits

In a small sauté pan, cook the garlic, caraway, cumin, paprika, harissa and sugar in the oil until fragrant, about one to two minutes. Remove from heat and add the lemon juice and a pinch of salt. Pour over the carrots and mix. Add the herbs and mix. Leave to infuse for an hour and add the feta before eating.

Just wanted to share

I just wanted to share a page I found with some wonderful quotes by Julia Child – all gathered in the same interview! I love that woman.

Saturday, August 27, 2011

Peach Cupcakes with Brown Sugar Frosting

The peaches here are absolutely delicious right now. They might be the best I’ve ever had. I ended up having a simple Peach Melba salad for breakfast one day, and it didn’t need any intervention by other ingredients to be heavenly.


I also made these peach cupcakes with a brown sugar cream cheese frosting from Smitten Kitchen.


I couldn’t find Tofutti cream cheese at the grocery store that day, so I bought real cream cheese. It therefore wasn’t lactose-free, but since I was giving some away to welcome a new neighbour (and therefore not eating the whole batch), I figured it was worth it. I made a half-recipe, which is still about 14 cupcakes, so that’s how I’ll present it below. I ended up with 12 cupcakes and one ramekin cake, which I ate without frosting – it was great, and would work well as a muffin (perhaps, as Debbie from Smitten Kitchen suggests, reducing the amount of sugar and swapping some of the flour for whole wheat, and throwing in a handful of pecans if you so wish). The cakes were light and airy, with good chunks of peaches every once in a while. The Engineer said they had a great crumb. I found these cupcakes better at room temperature, but given the Texas heat, I had to put them in the fridge to keep the frosting from melting.

For the cupcakes (about 12 to 14)
1 ½ cups cake flour (which I actually had in the house, thanks to the Engineer’s baking odyssey)
¾ tsp baking powder
¾ tsp baking soda
½ tsp salt
good pinch of nutmeg
¾ stick (6 Tbsp or 3 oz) unsalted butter, at room temperature, or cold margarine
6 Tbsp granulated sugar
6 Tbsp dark or light brown sugar, packed
1 large egg, lightly beaten
½ tsp vanilla extract
¾ cup buttermilk, sour cream or full-fat yogurt (I used ½ cup 0% lactose-free Greek yogurt and topped it up with 2% lactose-free milk to get ¾ cup)
1 or 2 large peaches, peeled, cored, and chopped smallish (I went for a 1/3-inch dice)

Preheat the oven to 350 °F. Line 12 muffin cups with paper liners (and grease a ramekin, just in case).

Sift together the flour, baking powder, baking soda, salt and nutmeg and set aside. Cream the butter and sugars together, beating until fluffy. Add the eggs, one at a time, scraping down the sides and bottom of the bowl between each addition, and then the vanilla. Gently mix in the buttermilk, sour cream or yogurt. Stir in the dry ingredients and fold in the peach chunks.

Divide the batter evenly among the prepared cupcake liners. Bake for 18 to 22 minutes, or until a tester inserted into the center of cupcakes comes out clean. Cool the cupcakes for five minutes in the tin, then turn them out onto a wire rack to cool completely.


For the Brown Sugar Cream Cheese Frosting
[Note from the Smitten kitchen: “Cornstarch? Let me explain: Quick buttercreams and cream cheese frostings are generally made by whipping fatty ingredients (butter, cream cheese, yes please) with powdered sugar. Powdered sugar works in a way that granulated sugar does not because it is mixed with cornstarch, which both keeps the sugar from clumping in its packaging and thickens the frosting. Brown sugar is not only more damp than granulated and powdered sugar, it’s missing that cornstarch thickener, so I added some to help the frosting set up. It’s still a bit thinner than traditional cream cheese frosting, but the flavor leaves the stuff you’re used to in the dust. And for me, that’s all that matters.”]


½ cup + 2 Tbsp light brown sugar
2 Tbsp cornstarch
¼ cup powdered sugar
1 8-oz package of cream cheese (or equivalent), at room temperature
¼ cup (2 oz or 4 Tbsp) unsalted butter, at room temperature, or cold margarine
¼ tsp vanilla extract

In a small bowl, whisk together the brown sugar, cornstarch and powdered sugar. In a large bowl, beat the cream cheese and butter until fluffy. Add the sugar-cornstarch mixture and vanilla, beat until frosting is smooth and light. Chill the bowl in the refrigerator until it thickens back up a bit, about 30 minutes, then spread or dollop on cooled cupcakes.


Monday, August 22, 2011

Apricot and Prosciutto Thin Crust Pizza


I’ve mentioned before that I was eagerly awaiting peaches and apricots, as I had a few recipes to try with those as the main ingredient. I started by making a lactose-free roasted apricot ice cream with almond praline ripple. As good as that sounds, the reality was disappointing. My peach and brown sugar ice cream was way better, and even the praline didn’t make nuts in ice cream enjoyable. So I didn’t keep that recipe (nor did I keep the latest olive oil cake I tried). This apricot pizza, however, is a keeper.


I got this recipe from a blog called Love & Olive Oil. Some would consider it more of a flatbread with toppings, since there’s no sauce, but it was really delicious. I did end up making a few changes (omitting the parsley and chives, forgetting the parmesan entirely, making a smaller pizza and baking at 500 °F instead of 550 °F because my oven doesn’t go that high), but this is highly adaptable. In fact, I’ve come to the conclusion that life is better when you have homemade pizza. This made two good servings for us.

½ cup warm water (100 °F to 110 °F)
½ tsp active dry yeast
8 ½ tsp extra virgin olive oil, divided (plus oil for coating the bowl)
½ tsp kosher salt, divided
6 oz bread flour (about 1 ¼ cups)
2 Tbsp yellow cornmeal
1 tsp chopped fresh thyme
¼ tsp freshly ground black pepper
3-4 apricots, pitted and cut into wedges (I found that 2 was plenty)
2 shallots, peeled and thinly sliced
¾ cup (3 oz) crumbled lactose-free goat cheese (I used 4 oz)
1 ½ Tbsp finely chopped fresh flat-leaf parsley
1 Tbsp minced fresh chives
1 cup arugula
1 oz thinly sliced prosciutto (I had about 1.5 oz)
1 oz shaved fresh parmesan cheese

Combine the cup warm water and yeast in the bowl of a stand mixer with dough hook attached; let stand 5 minutes or until bubbly. Add 4 tsp oil and ¼ teaspoon salt to yeast mixture. Weigh or lightly spoon flour into dry measuring cups; level with a knife. Sprinkle flour over yeast mixture; mix 2 minutes or until a soft dough forms. Place dough in a large bowl coated with oil; cover surface of dough with plastic wrap lightly coated with cooking spray. Refrigerate 24 hours.

Remove dough from refrigerator. Let stand, covered, 1 hour or until dough comes to room temperature. Punch dough down. Roll dough out to a thin 12-inch circle on a lightly floured baking sheet, without raised edges, sprinkled with cornmeal. (I now always roll out the dough on a sheet of parchment paper.) Crimp edges to form a ½-inch border. Pierce dough several times with a fork. Cover dough loosely with plastic wrap.

Position an oven rack in the lowest setting. Place a pizza stone on lowest rack. Preheat oven to 500 °F. Preheat the pizza stone for 30 minutes before baking dough.

Combine 1 Tbsp oil, thyme, pepper, apricots, shallots, and remaining ¼ tsp salt; toss gently. Remove plastic wrap from dough; slide dough onto preheated pizza stone, using a spatula as a guide. (I just transfer the parchment paper directly to the baking stone; it keeps things cleaner and easier.) Bake for 4 minutes. Top dough with goat cheese and apricot mixture. Bake an additional 5 minutes or until crust is golden brown. Cut pizza into 10 slices; sprinkle with parsley and chives. Toss arugula with remaining 1 ½ tsp oil; arrange arugula over apricot mixture. Top with prosciutto and parmesan cheese. Cut into 8 wedges (or 4, in my case).


Honey Pepper Vinaigrette


Here’s a really quick and delicious vinaigrette recipe. I served it over a simple salad of arugula, cherry tomatoes and avocados, but really, anything goes. I reduced the amount of oil in the recipe: I know most vinaigrettes have a ratio of about 1 part vinegar to 3 parts oil, but I usually make vinaigrettes with a ratio closer to 1:1 (or 1:2 at the most). Here, I used about ½ cup instead of 1 cup. I also used a bit less salt and pepper than the recipe called for, but I eyeballed those quantities. I loved this dressing! I put all the ingredients in a glass jar and just shook it together before serving; extra portions kept well in the jar, refrigerated.

¼ cup sherry vinegar
2 Tbsp honey, warmed (5 seconds in the microwave will do it)
1 Tbsp freshly ground black pepper
1 tsp salt
1 shallot, minced
1 clove garlic, minced
½ cup to 1 cup of olive oil
¼ cup finely sliced fresh mint leaves

Combine everything in a jar. Cover with a tight fitting lid and shake vigorously until well combined and creamy. Can be refrigerated for about a week.


Thursday, August 18, 2011

Pea and Roasted Red Pepper Pasta Salad


I should let you know right off the bat that this Smitten Kitchen recipe is meant for fresh summer peas. That being said, I omitted the snow peas and I didn’t feel like shelling fresh peas. I did buy a bunch of fat sugar snap peas, but I ended up snacking on them, whole. So I adapted the recipe and used only frozen peas, but you can do as you wish. I do recommend using shell pasta, though, because then the peas get cradled in the shells, and it forces some reluctant pea-eaters (*cough* the Engineer *cough*) to eat their peas. Personally, I love peas, so this was a hit. If you want to serve this as a pasta dish with sauce, reduce the amount of vinegar a bit; otherwise, as the name suggest, it really is a salad. Next time I make it as a warm dish, I’ll double the sauce recipe (but it is the right amount for a salad, certainly.) That being said, it was great served warm immediately after being made, with some parmesan sprinkled on top. You could also add goat cheese, feta or herbs (I’m thinking basil would be really nice). The roasted pepper vinaigrette would also been nice in a white bean salad or a green salad. We both really liked this dish, and the Engineer in particular was impressed by the roasted red pepper dressing.

To peel the roasted bell pepper, I used a trick I picked up watching Curtis Stone on Take Home Chef: as soon as you take the pepper out of the oven, put it in a bowl and cover it with plastic wrap. Since the pepper is still very hot, the bowl will fill with steam, helping to loosen the pepper’s skin. Once it has cooled down, you can peel the skin right off.

For the Roasted Red Pepper Vinaigrette (this makes about 1 cup; consider doubling this recipe)
1 red bell pepper
¼ cup olive oil
1 Tbsp red wine vinegar (and up to 3 Tbsp more if you are leaning more toward a salad than a hot dish)
1 Tbsp chopped shallot (about 1 small)
½ tsp salt
several grinds of black pepper

Preheat the oven to 350 °F. Cut the bell pepper in half, seed it and slow-roast it for 1 hour, giving it a quarter-turn with tongs every 15 min or so. Once it’s done, immediately place it in a bowl and cover with plastic wrap. When cool, peel the skin off the pepper. (You can also get the equivalent from a jar and drain it.)


Purée the red bell pepper in a food processor or blender as much as possible, then add the remaining ingredients and running the machine until the dressing is silky smooth. (I did this in the jar of the immersion blender, and I found it to be the perfect size for this.) Adjust the vinegar level and seasonings to taste.


For the Pasta
1 lb of small pasta (like shells; use gluten-free and/or vegan pasta if you need it)
¼ lb snow pea pods, ends trimmed
½ lb fresh summer peas, which yielded about 1 cup once shelled (or substitute frozen peas)
1 cup Roasted Red Pepper Vinaigrette

Bring a large pot of salted water to a boil and prepare a small ice water bath. Boil the snow pea pods for about two minutes, or until just barely cooked but still crisp. Scoop them out with a large slotted spoon and drop them in the ice water bath. Cook the peas for about 10 minutes (once again, this will be al dente, you can cook them longer if you prefer them softer), scoop them out with a large slotted spoon and plunge them into the ice water bath as well. Drain both peas. Cut the snow peas into thin slivers.

Add the pasta into the boiling water and cook it according to package instructions. Drain and let cool, then toss in a large bowl with peas and Roasted Red Pepper Vinaigrette, seasoning to taste.


Friday, August 12, 2011

Brown-bagging it

This year, the Engineer has resolved to pack lunches to go to work, in an effort both to eat better and to save some money. He says he would be happy with a plain old sandwich every day, but I know that wouldn’t do it for me. So I decided to round up all the links I had saved for packing lunches – a lot of them are from The Kitchn, but I’ve got a few other sites, too. I’ll use this post as a reference for lunch ideas as well as gear like lunch boxes and thermoses. Don’t hesitate to leave your own tips and ideas in the comments!

Food

For starters, here is a link with 10 healthy lunch recipes that happen to be vegan: bean dips and spreads, a chickpea sandwich, noodle salads, lentil salads, couscous, stews and vegetable rolls. The Kitchn also has five complete lunches under 400 calories, for those of you watching your weight, as well as a photo gallery of inspiration for lunches. Lentil salads are particularly convenient, because you can make them ahead of time, freeze them and just let them thaw in your lunchbox – they’ll be just right by lunchtime.

This article is also extremely useful to help you make lunches that don’t need to be refrigerated! Keep in mind that certain herbs, like basil, keep very well at room temperature and can be added to your lunches when you’re ready to eat. There are more ideas here and here, in the comments especially. And if you can’t reheat your lunch, try one of these 15 salads (meat, grain, pasta and bean salads, not lettuce salads, though those work too). If you want to bring dinner leftovers to lunch, remember that they should be easy to reheat or good cold, easy to eat (think chicken pieces instead of a whole chicken breast) and easy to pack. Here are 10 ideas to get you started. There are also various things you can cook ahead of time on the weekend and use in your lunches that week, like rice, beans, quinoa and more.

For snacks, check out these 15 ideas (like granola, yogurt, roasted chickpeas or nuts), if you're bored with fruits and veggies.

If you are looking for healthy lunches that your kids will actually eat, please read this great post on The Kind Life. It’s full of tips and ideas, such as making sure your child is involved in choosing what goes in the lunch, making the food fun (cutting the sandwich in different shapes, for example), giving a variety of tastes and textures, and having an adequate lunch box. There are also ideas for meals and snacks. I have to mention bento boxes as well, though I wouldn’t have the patience to pack those. If you’re making sandwiches for lots of people and want a way to streamline your morning routine, make yourself a prep station!

Lunch bags and accessories

As far as interesting gizmos go, I really like the idea of the Toastabag: it’s a reusable (and dishwasher-safe) bag in which you slip a sandwich, then you put the bag in the toaster and get a grilled sandwich, without a mess! This is great when you don’t have a stovetop at work (or don’t want to go through the trouble of using it). As a bonus, for anyone eating gluten-free, it prevents the bread from coming in contact with crumbs of gluten in a shared toaster. I also like the Fit & Fresh Salad Shaker, which keeps your salad and dressing separate and has a cooling pack right in the lid.

For those of you who want to minimize the amount of trash at each lunch, here are a few resources for reusable straws that aren’t plastic. Obviously, take reusable utensils with you! To replace disposable sandwich bags, take a look at this post on The Kitchn, which has tons of options; there are also reusable bags on Etsy (like these, to name just one) or, if you’re crafty, you can make them yourself (here, for example, but use Google to get dozens more tutorials). There are also 18 resources here. Plus, there’s a neat container designed to keep your sandwich from getting soggy: it separates the contents from the bread until you are ready to eat the sandwich, but still makes it super easy to actually make the sandwich. Be sure to watch the video!

Lunch boxes can be hard to find for adults, but check out the Zojirushi lunch jars, which are both stylish and extremely practical! They come in a variety of sizes and are insulated. OM Goods makes great tiffins out of stainless steel, which is both hygienic and eco-friendly. I also like the Planet Box and especially the Goodbyn, both of which have compartments for your main course, snacks and dessert. Oots has a lunch box with nestling containers that looks sturdy enough for kids, but could be used by adults. And Built has some great lunch totes. The Container Store also has lunch boxes and containers.

Other tips

This is a fun video from two of my favourite stores that has both lunch ideas and resources for specialized carrying containers. Unclutterer also has some tips – and don’t forget to read the comments. I hope this was useful to those of you who have kids starting school soon and to those who were looking for new inspiration.

Monday, August 08, 2011

My summer hit list

I decided to give you a quick list of the restaurants I patronized (i.e., the places I “hit”) during my almost 2 months in Montreal. It’s not really a “best of” list, as I never got around to going to places like Schwartz’s, Fairmount, La Banquise or Le Bilboquet. That being said, I did make it a point to go to Cocoa Locale (reviewed here), Pho Lien, Havre aux Glaces, Pâtisserie Harmonie (mentioned here and reviewed here), Taste of India, Zero8, Asean Garden and the Jean-Talon Market. To tell the truth about Asean Garden, it’s one of the Engineer’s favourite restaurants, but I’ve never reviewed it because I’m not that into it. He likes it because there are dishes from different regions in Asia (so you can order Chinese food, Thai food and sushi in the same meal), and because if you have a big appetite, the all-you-can-eat buffet is a pretty good value. I actually slightly dislike the place for those two reasons: it suffers from the jack of all trades, master of none syndrome (it does so many types of dishes that it doesn’t do any of them particularly well), and with my appetite, it’s cheaper for me to order à la carte than to go for the buffet. To each his own.

I also got to whittle down my list of places to try a bit. I still have about two dozen places I want to try; I was going to say that there was no way I would have had the time to try them all during my stay, but I think that since I wasn’t working much, I could have tried them all if I had set my mind to it – I just couldn’t have afforded it! I did finally go to Café Byblos, Fuchsia – Épicerie Fleur, Au Cinquième Péché, and Dunn’s Famous Deli. The latter was because I’m still looking for the best burger in Montreal, but unfortunately, Dunn’s was nothing to write home about.

During my short stay in Ottawa, I went to see the Caravaggio exhibit at the National Gallery and tried a cupcake at Isobel’s Cupcakes and Cookies. I did also go to The Works not once, but twice! The burger patties are not as moist as I remembered, but that’s because they now only cook them all the way through (it’s safer, albeit drier). I had the Spartacat Special (bacon, gouda and avocado), which had been my favourite since 2004, and the Sk8r Boy – I’d been meaning to try it for years, and the mix of bacon, jack cheese and peanut butter works surprisingly well! The Engineer, faced with a menu this big, has a more methodical approach: alphabetical. He reads through the menu and picks the first, or next, burger that pleases him. He didn’t make it past the B’s yet.

This wraps up the summer Canadian interlude on my blog; back to talking Texas!

Thursday, August 04, 2011

Salade de pois chiches au cumin

L’Ingénieur et moi sommes rentrés au Texas cette semaine. Nous ne sommes pas fâchés d’avoir laissé derrière nous le Détour de l’Île (c’est-à-dire le festival montréalais des cônes orange, version 2011). Et voilà que presque aussitôt arrivés ici, nous avons appris que c’était au tour du tunnel Ville-Marie de s’écrouler. « Au tour » sans sens caché, car je crois de plus en plus que la Ville Montréal a une très mauvaise vision à long terme et que l’effondrement de ses structures majeures, vu leur manque d’entretien, est la seule issue prévisible. Comme l’a dit un journaliste de la Gazette, sans vouloir encourager l’esclavagisme, les pyramides d’Égypte sont en meilleur état que le pont Champlain. Il me semble que ce n’est pas compliqué : quand on construit quelque chose, on prévoit les fonds pour l’entretenir correctement. C’est la seule chose responsable à faire. On peut demander des travaux de « patchage » de temps à autre pour créer des emplois temporaires, mais c’est trop souvent au détriment du bien collectif. On n’attend pas 77 ans avant d’inspecter un pont aucazoù qu’il aurait besoin d’être réparé, on pense à une façon de construire et d’entretenir correctement des rues qui gèlent et dégèlent (d’autres villes dans le même climat que la nôtre réussissent bien!), on n’attend pas que tous les tuyaux d’égout pètent avant de les remplacer. Un propriétaire responsable se doit de prévoir les fonds nécessaires à l’entretien de sa demeure, alors la Ville devrait faire pareil. Mais ça reste une ville superbe.


Bon, revenons-en à nos moutons. Avant de quitter son domicile pour de longues périodes, on essaie toujours de vider le frigo et, si possible, le garde-manger. Cette recette est parfaite pour cela. J’aime les salades de pois chiches, vous le savez, car elles s’adaptent facilement à ce qu’on a sous la main. Celle-ci a aussi l’avantage que le peu de légumes (une boîte de tomates cerises) et d’herbes (un paquet de menthe) que j’ai dû acheter ont été utilisés en entier, donc une fois la salade finie, il n’y avait vraiment aucun reste dans le frigo. Dans la recette d’origine, on recommandait d’utiliser des tomates séchées au soleil, mais j’ai préféré des tomates fraîches. J’ai pu finir mon huile d’olive, mon citron et mon concombre (j’en avais quand même moins qu’il fallait, mais peu importe); j’ai laissé tomber le persil. Je recommande fortement d’utiliser cette recette comme base, c’est excellent et tout à fait adaptable! Cette recette donne environ 6 portions.

3 c. à soupe d’huile d’olive
2 c. à soupe de graines de cumin
¼ c. à thé (ou 1 pincée) de flocons de piment rouge
4 gousses d’ail, émincées
2 boîtes de pois chiches, drainés et rincés
½ tasse de tomates séchées, émincées (ou 1 boîte de tomates cerises, coupées)
¾ tasse persil italien, émincé
1 poignée de menthe, émincée
1 citron (zeste et jus)
¾ lb de concombre anglais (ou ce que vous avez sous la main)
fleur de sel

Faire chauffer l’huile d’olive dans une casserole à feu moyen. Ajouter les graines de cumin et le piment et faire cuire, en mélangeant constamment, pendant environ 1 minute ou jusqu’à ce que les graines soient grillées (elles seront légèrement plus foncées qu’avant et odorantes).

Réduire le feu et ajouter l’ail. Faire cuire, en mélangeant constamment, pendant environ 3 minutes ou jusqu’à ce que l’ail soit doré (ne pas le laisser brûler ou brunir).

Ajouter les pois chiches et les tomates et augmenter le feu à moyen. Faire cuire, en mélangeant fréquemment, jusqu’à ce que les pois chiches soient chauds et bien enrobés d’huile. Retirer du feu.

Ajouter le persil, la menthe ainsi que le zeste et le jus de citron.

Peler le concombre et le couper dans le sens de la longueur. Retirer les graines à l’aide d’une cuillère. Couper le concombre en cubes d’environ 1 cm. Ajouter le concombre aux pois chiches et mélanger. Ajouter du sel, au goût. Servir tiède ou froid (les deux options sont excellentes).

Thursday, July 28, 2011

Tartelettes au fromage de chèvre, avec miel aux herbes


Avant de plier bagage pour rentrer au Texas, j’ai voulu profiter une dernière fois de mon fromage de chèvre sans lactose (Elite, de Damafro). Il s’en fait aux fines herbes, qui est très bon et me rappelle un peu le Boursin, mais en moins tartinable. Il aurait été un bon choix ici, mais j’ai opté pour le chèvre sans lactose nature. J’ai adapté la recette mise en ligne sur Obsessions gourmandes (un excellent blogue, soit dit en passant). L’auteure, Catherine de son petit nom, avait utilisé des retailles de pâte à tarte, mais j’ai opté pour de petites croûtes à mini-tartelettes du commerce; on pourrait aussi utiliser une pâte sans gluten, bien sûr. Je vais écrire dans les ingrédients ci-dessous à la fois les recommandations de Catherine et les miennes; à vous de voir, selon ce que vous avez sous la main. J’ai utilisé 6 croûtes à mini-tartelettes ainsi que tout un paquet (125 g) de fromage de chèvre. J’ai trouvé ça absolument délicieux, et ça m’a fait un souper parfait pour un soir où l’Ingénieur n’y était pas.

des retailles de pâtes à tarte, sucrée ou salée (ou des croûtes à mini-tartelettes du commerce)
1 blanc d’œuf (ou un œuf entier)
4 c. à soupe de fromage de chèvre sans lactose (ou 125 g, c’est tellement bon)
quelques feuilles de roquette miniature
1 tige de fleur d’ail, coupée en petites rondelles (ou un oignon vert, également en rondelles)
fleur de sel
poivre fraîchement moulu
2 c. à soupe de miel
herbes fraîches (j’ai pris de l’origan, je conseille aussi le thym, le romarin, etc.)

Mélanger le miel et quelques herbes fraîches. Laisser macérer le plus longtemps possible (au moins une heure).

Abaisser la pâte dans 4 petits moules à tartelettes (ou 6, ou comme vous voulez). Préchauffer le four à 375 °F.

Mélanger le fromage de chèvre et le blanc d’œuf. Saler et poivrer.

Déposer dans les tartelettes les feuilles de roquette et la fleur d’ail. Couler par dessus le mélange de chèvre.

Enfourner jusqu’à ce que l’intérieur des tartelettes soit solide, mais encore un peu humide (je les ai laissées au four 30 minutes). Laisser refroidir et démouler. Servir parsemées de fleur de sel, avec un filet de miel aromatisé aux herbes.


Tuesday, July 26, 2011

Chipbrowneos


My friend Jen and I invented these Franken-cookies, the turducken of the dessert world. Jen had already made chocolate chip cookies stuffed with an Oreo, but she wanted to take it one step further by adding an extra layer – of brownies. So these are an Oreo inside a brownie inside a cookie. We took our inspirations from recipes for brownies stuffed with Oreos as well as for pillow cookies (i.e., chocolate chip cookies stuffed with brownies). These were actually quite helpful, as it made us realize the order in which we should assemble and bake these treats. We opted for snack-sized Oreos baked in bite-sized brownies (using a mini-muffin pan), which we underbaked by a few minutes; then we put those in chocolate chip cookie dough and baked the whole thing. Jen’s account of the recipe is on her sister’s blog, The Littlest Crafter.


Neologisms we threw around included brownchoceos, orchipnies and brownchipeos, but we decided on chipbrowneos. As in “turducken”, the syllables are in the same order as the food components, from the outside in. While it’s true that there are technically other kinds of chips (like peanut butter, butterscotch or cinnamon), the word “chip” still first brings to mind chocolate chips, usually in cookies, so we felt this name was clear enough to describe the contents accurately, and therefore strike fear in previously hungry dinners. Because, as you can guess, these things are huge (hamburger patty-sized is a good comparison), so you probably couldn’t, and definitely shouldn’t, eat more than one.

For the brownies, we used a recipe published by Bon Appétit and reproduced below; you could also use either one of my go-to recipes if you halve them, or just use your favourite brownie recipe. For the chocolate chip cookies, we used the recipe from Picky Palate, the one that started it all (though, again, feel free to use your favourite chocolate chip cookie recipe). We made this with margarine instead of butter, so they were lactose-free.

For the brownies with Oreos
10 Tbsp unsalted butter or margarine
1 ¼ cups sugar
¾ cup unsweetened cocoa powder
1 tsp vanilla extract
2 tsp water
¼ tsp (generous) salt
2 large eggs, chilled
1/3 cup plus 1 Tbsp all purpose flour
1 box of snack-sized Oreos (you’ll need about 4 packages)

Preheat oven to 325 °F and position rack in bottom third of oven. Grease a mini-muffin pan. (This made 31 mini brownies for us, but we only used 14 in the chipbrowneos; you can always make fewer and bake the rest of the batter longer in a regular muffin tin. Or halve the recipe.)

Melt the butter in a medium saucepan over medium heat. Continue cooking until butter stops foaming and browned bits form at the bottom of pan, stirring often, about 5 minutes. (If using margarine, simply melt it.)

Remove from heat; immediately add the sugar, cocoa, water, vanilla, and salt directly into the saucepan. Stir to blend well. Let cool 5 minutes (mixture will still be hot).

Add eggs to hot mixture, one at a time, beating vigorously to blend after each addition.
When mixture looks thick and shiny, add the flour and stir until blended. Beat vigorously. Transfer the batter to the prepared pan (it’s very thick!). Put an Oreo in each tin and push it down; cover with more batter.

Bake until toothpick inserted into center comes out almost clean, a little moist. (We baked these about 12 minutes; we wanted them slightly underdone, since they go back in the oven later, but you could bake them all the way if you wish.) To unmold, run a knife along the edge of each tin to pry out the brownie. Don’t worry if a few of them crumble; they don’t need to look pretty where they’re going.


For the cookies and assembly
1 cup softened butter or cold margarine
¾ cup brown sugar, packed
1 cup sugar
2 eggs
1 Tbsp vanilla
3 ½ cups flour
1 tsp salt
1 tsp baking soda
10 oz chocolate chips

Preheat oven to 350 °F.

Cream butter and sugars until well combined. Add in eggs and vanilla until well combined.

In a separate bowl mix the flour, salt and baking soda. Slowly add to wet ingredients until just combined. Stir in chocolate chips.

Using a cookie scoop, make balls of cookie dough, then flatten them between your palms. Sandwich a mini-brownie between two cookie dough disks and press the edges closed around the brownie. Place onto a parchment lined baking sheet (6 per sheet) and bake cookies about 15 to 20 minutes with the rack still in the lower third of the oven, until cookies are light golden brown. Let cool for 5 minutes before transferring to cooling rack.

This makes about 14 (very large) chipbrowneos. If you want to turn the dial to 11, you can top them with Oreo Creme, but I certainly won’t blame you if you think they contain enough calories as it is. Enjoy!