Tuesday, January 22, 2019

Last knits of 2018

I had decided to knit for myself a bit more, so I made a quick project: Mira’s Cowl (a free pattern). It calls for a fingering-weight yarn, so I went with Malabrigo Sock Yarn in Ravelry Red (it appears darker on that page than in real life – the color here is more accurate). What I didn’t like is that once you’ve knit your cowl, you have to block it very aggressively, so I’m not sure why I have to use fingering-weight to cast on so few stitches in the first place… I understand that it should create a lighter fabric, but I would have preferred a yarn that naturally knits up closer to the finished gauge, even if that meant casting on more stitches. As it is, I couldn’t stretch it out enough for a proper infinity scarf, but now it’s too big for a good cowl! I’ll consider re-blocking it smaller or washing in hot water, we’ll see, or perhaps using it more as a half-length shawl (though that may be my fantasy self, the sophisticated woman who wears shawls around the house). That being said, it was really easy to knit, because once you’ve memorized the pattern, it’s a bit mindless. This makes it a good pattern if you knit during your morning commute, for example.


I had started a sweater for myself as well, but had to set it aside for unforeseen reasons – more about that eventually.

I also knit a sweater for the Fox. Unfortunately, I can’t find the pattern online – I think it’s by Phildar, it’s called “Le Pull” and was the 10th pattern in that catalog and was on page 31. But all I have is a photocopy, no catalog reference, sorry. In any event, I really like making this sweater, and I have to say that it is more convenient to knit a colorblock pattern than stripes (no balls of yarn getting tangled). Then again, there was a lot of sewing involved, but I decided to pick up stitches for the collar instead of knitting it separately and sewing it on. I also knit some ribbing at the edges to prevent them from rolling in, and I omitted the slits at the bottom. I used yarn that was given to me by my first cousin once-removed: two skeins each of Phildar Intemporel in Raisin, Émail, and Mercure as well as Phildar Cabotine in Outremer. The sweater is still a bit big for the Fox, so hopefully he’ll wear it next winter.


Since I had leftover yarn, I made what I hope can be a gender-neutral cardigan for the baby (due any day now) of the Actor and his Leading Lady; the pattern was the Little Coffee Bean Cardigan and the buttons were from my stash. I can’t express how much I like knitting top-down sweaters with set-in sleeves!


That being said, it didn’t turn out quite as cute as I would have liked, so then I knit up the newborn size of the Tristan cardigan (that pattern is free, and for a fee it comes in sizes up to 12 months here). I used Sublime Baby Cashmere Merino Silk DK in Vanilla, but almost picked Little Linen (I was genuinely paralyzed in front of my screen, trying to pick between white and off-white, and the Engineer picked for me). The buttons are from my stash as well.


While I was at it, I sewed up another bunny because I had just enough fabric left in my stash to make one, and because the Actor loves rabbits. Clutter-busting for me, soft plushie for them – win-win!


For Christmas, I made the Langston Shrug for my niece, using Rowan Wool Cotton 4-Ply, Rich colorway. The pattern comes in sizes 3 months to 10 years! While I love this shrug, I think that it would have been better without cotton in the yarn – the wool-silk blend that is recommended would, in fact, be better to show off the cables. I used a button from my stash and paired it with a purple dress from Tea Collection, because purple is my niece’s favorite color.


I had a skein of that yarn left, and found out that some friends were expecting a little girl in a few months, so I made the Demne cardigan by Knitsofacto – it’s a free pattern in newborn size, and it calls for only 100 grams of yarn, so this was perfect! It’s knit vertically, starting with the left sleeve, but the cuff is knit last because of a special bind-off. The pattern is a bit hard to follow, mostly because it takes a while before you see the shape of a cardigan emerge so you really have to trust the instructions. (To speed things along, I did some of the seams along the way instead of at the very end, because it was getting to be a tangle of scrap yarn and stich holders.) My beef with this is that both side seams are worked in the recommended three-needle bindoff, which actually adds a row, but that row was NOT accounted for in the pattern! So as you can see, the space between the vertical purl rows is wider at the seam than in other places. It’s something that I notice, as a knitter, but I’m not sure to what extent anyone else would notice. That being said, I’d work one row less next time before binding off. The buttons are from my mother’s stash.

Sunday, January 20, 2019

Rainbow Chip Cake

I decided to make the rainbow chip cake from Date Night In, by Ashley Rodriguez, for no other reason than because it was the last recipe I had bookmarked in it and hadn’t tried yet. One version of the recipe is also on her blog. There are a lot of steps, mostly because you have to make your own “chips” with white chocolate and food coloring (this can be done ahead of time, though). I LOVED the resulting cake, but found the accompanying cream cheese frosting to be a nightmare to work with, as it was way too soft, even after being refrigerated.


So I made the cake a second time, using two containers of Miss Jones frosting in confetti pop flavor. And since I had sprinkles built in with the frosting, I figured it wasn’t worth making the chips and I would just put sprinkles both in and on the cake. It turns out I would have needed three Miss Jones containers to frost the whole thing, and the sprinkles fell off the top of the cake once I cut pieces, so it wasn’t very practical. And I must admit that the rainbow chips tasted much better than the sprinkles!


So I’ve decided that the proper way to do this would be to make the cake with chips as instructed, but to use a vanilla buttercream frosting instead of the original cream cheese one. You could use a recipe like this one (with either lactose-free butter or vegan margarine sticks instead of regular butter), or use three containers of commercial vanilla buttercream, assuming you don’t want a naked cake like I did here the second time (in which case two will do). As for the chips, you can either mix them into the frosting or use them to top the cake – the first option is more original, but I find the second option prettier and easier to work with. Note that Ashley Rodriguez puts strawberry jam between the two layers of cake in addition to frosting, but I omitted it in the second version and in the recipe below.

Also, you’ll see in some photos that I used my baking strips and heating cores for this cake. I do think they make a difference, because the cakes seemed flatter and perhaps more even than usual, but I confess I find the heating cores a bit cumbersome… Maybe I should try one or the other for a while and see what happens. On to the recipe!

For the rainbow chips
1 11-oz. bag white chocolate chips
1 Tbsp. neutral vegetable oil
food coloring – red, yellow, blue, and green (I used gel food coloring)

In a microwave-safe bowl, melt the white chocolate with the oil in 20 second intervals. Stir well after each 20-second burst. Continue to heat until all the chips are melted (but be careful, as chocolate burns easily – you could do this in a double boiler instead if you wish).

Divide the melted white chocolate into four small bowls. Add 5-7 drops of color into each bowl. Stir to combine. The white chocolate will seize up a bit but should still be pliable. If not, pop back into the microwave for about 10 seconds.

On a baking sheet covered with parchment paper, empty out each bowl of colored chocolate. Using your hands or an off-set spatula, form it into a rough rectangle about ¼″ thick.

Place in the freezer for about 10 minutes or until set. Once set, chop up each color into little pieces.


For the rainbow chip cake
1 cup lactose-free milk, room temperature, divided
2 tsp. vanilla
5 egg whites
¼ cup cornstarch
2 ¾ cups (370 g.) all-purpose flour
1 Tbsp. + 1 tsp. baking powder
1 tsp. kosher salt
1 ¾ cup sugar
1 ½ sticks (6 oz. or ¾ cup) lactose-free butter or margarine, room temperature
½ cup (70 g.) rainbow chips (from recipe above)

Preheat the oven to 350 °F. Grease two 8″ cake pans, line the bottom with parchment paper, then grease again.

In a small bowl, whisk to combine ¼ cup of the milk with the vanilla and egg whites.

In the bowl of a stand mixer fitted with the paddle attachment, add the cornstarch, flour, baking powder, salt, and sugar and mix on low speed for 60 seconds. Add the butter and the remaining ¾ cup milk. Mix on low until combined and then increase speed to medium and beat for 1 minute.

With a rubber spatula, scrape down the sides of the bowl and mix again just to combine. With the mixer on low, add one third of the egg white mixture and mix until incorporated. Add half of the remaining egg white mixture, beat well, and then add the remaining egg white mixture, beating until everything is combined.

Scrape down the sides of the bowl again and finish mixing on low. Fold in the rainbow chips.

Divide the batter into the cake pans (you should have about 6 ounces or 620 grams of batter per pan). Bake until the cake springs back when gently pressed, 35-40 minutes.

Let the cakes cool on a wire rack for 10 minutes before you remove them from the pans. Cool completely before frosting.


For the rainbow chip frosting
vanilla buttercream frosting (see note above)
¾ cups (105 g.) rainbow chips (or more)

Fold the rainbow chips in the frosting or save them to decorate, as you wish (though I’d make sure to put some between the two layers of cake). Frost the cake and top with additional rainbow chips.

Thursday, January 17, 2019

Banana, Squash, and Carrot Muffins

These muffins were originally called Toddler Muffins, but I find this more descriptive, because “toddler muffins” sounds to me like one of those recipes that you make with leftover baby cereal, and I never liked those. This calls for a jar of baby food, squash purée to be more specific: you could buy a jar and not have any leftovers, or you could water down a bit of homemade squash purée, or go with something similar like sweet potato or pumpkin (same goes for the grated carrot, which you could substitute with either of those, grated as well). For the spices, I used ¼ teaspoon each of cinnamon, nutmeg, ginger, and cloves. I also rewrote the recipe a bit to start with the dry ingredients.

1 cup all-purpose flour
½ cup oat bran
1 tsp. baking soda
1 tsp. pumpkin pie spice (see note above)
½ tsp. salt
½ cup lactose-free butter or margarine, softened
½ cup brown sugar
2 large bananas, mashed
1 (4.5-oz.) jar of squash purée for babies
2 carrots, grated
2 eggs, beaten

Preheat the oven to 375 °F. Grease 12 standard muffin cups.

Whisk together the flour, oat bran, baking soda, pumpkin pie spice, and salt. Set aside.

In a mixing bowl, cream together the butter and brown sugar until smooth. Mix in the mashed bananas, squash, carrots, and eggs. Stir in the dry ingredients. Spoon the batter equally into the prepared muffin cups.

Bake until a toothpick inserted into the center comes out clean, 15 to 20 minutes. Cool in the pans for 10 minutes before removing to cool completely on a wire rack. Store at room temperature for up to two days, or freeze.

Wednesday, January 16, 2019

Lofthouse-Style Pumpkin Cookies


I didn’t post any new pumpkin recipes in the fall because, well, there was only one worth posting about, and I was waiting until I had written up my post about Miss Jones. Now that it’s done, let me catch you up on pumpkin! I tried pumpkin and white chocolate blondies as well as a whole wheat pumpkin bread that were just okay. I enjoyed baked pumpkin and sour cream puddings, but I think that I was the only one who enjoyed them. (Same for these squash and orange flans, which fall in the same category for me.) And then there were Lofthouse-style pumpkin cookies.


Lofthouse cookies are soft and frosted – not what I typically eat, but certainly hard to turn down, so Lofthouse-style pumpkin cookies spoke to me. It’s super easy, too, because I actually used the yellow cake mix called for instead of making my own. And since I didn’t want a cream cheese frosting, I used a can of vanilla frosting from Miss Jones, and it was spot-on! Exactly what I wanted to eat.


Note that I always make my own pumpkin pie spice mix with cinnamon, nutmeg, cloves, ginger, and allspice. I didn’t have sprinkles, so I omitted them. Also, since you only need a very small amount of pumpkin purée for these cookies, so you can make something like the above-mentioned pumpkin puddings with the rest, or even a pumpkin loaf (this one or that one) and pretend you’ve got the full measure. This recipe yielded 26 delicious cookies for me.

1 box yellow cake mix (about 15.25 oz.)
1 Tbsp. pumpkin pie spice, plus more for sprinkling
2 Tbsp. pumpkin purée
1/3 cup canola oil
2 large eggs
1 jar of Miss Jones vanilla frosting (or equivalent)

Place the cake mix and pumpkin pie spice in a large bowl and whisk to combine and break up any lumps. Add the pumpkin purée, oil, and eggs, and mix with a wooden spoon or an electric hand mixer on medium speed until the dry ingredients are just incorporated without overmixing. The dough will be sticky, but firm. Cover the bowl and refrigerate the dough for at least 1 hour.

Arrange 2 racks to divide the oven into thirds and heat to 350 °F. Line 2 baking sheets with parchment paper or a silicone baking mat.

Using a spoon or cookie scoop, measure out 1 ½ tablespoons of dough. Roll into a ball in the palm of your hands and place on the prepared baking sheets, about 2 inches apart.

Bake for 5 minutes. Rotate the baking sheets between racks and from front to back. Bake until the cookies are light golden-brown on the bottom, 4 to 5 minutes more. Let the cookies cool on the baking sheet for 2 to 3 minutes, then use a flat spatula to transfer to them to a wire rack to cool completely.

Generously spread the frosting onto the cooled cookies. Sprinkle with extra pumpkin pie spice or sprinkles to decorate.

Friday, January 11, 2019

Miss Jones

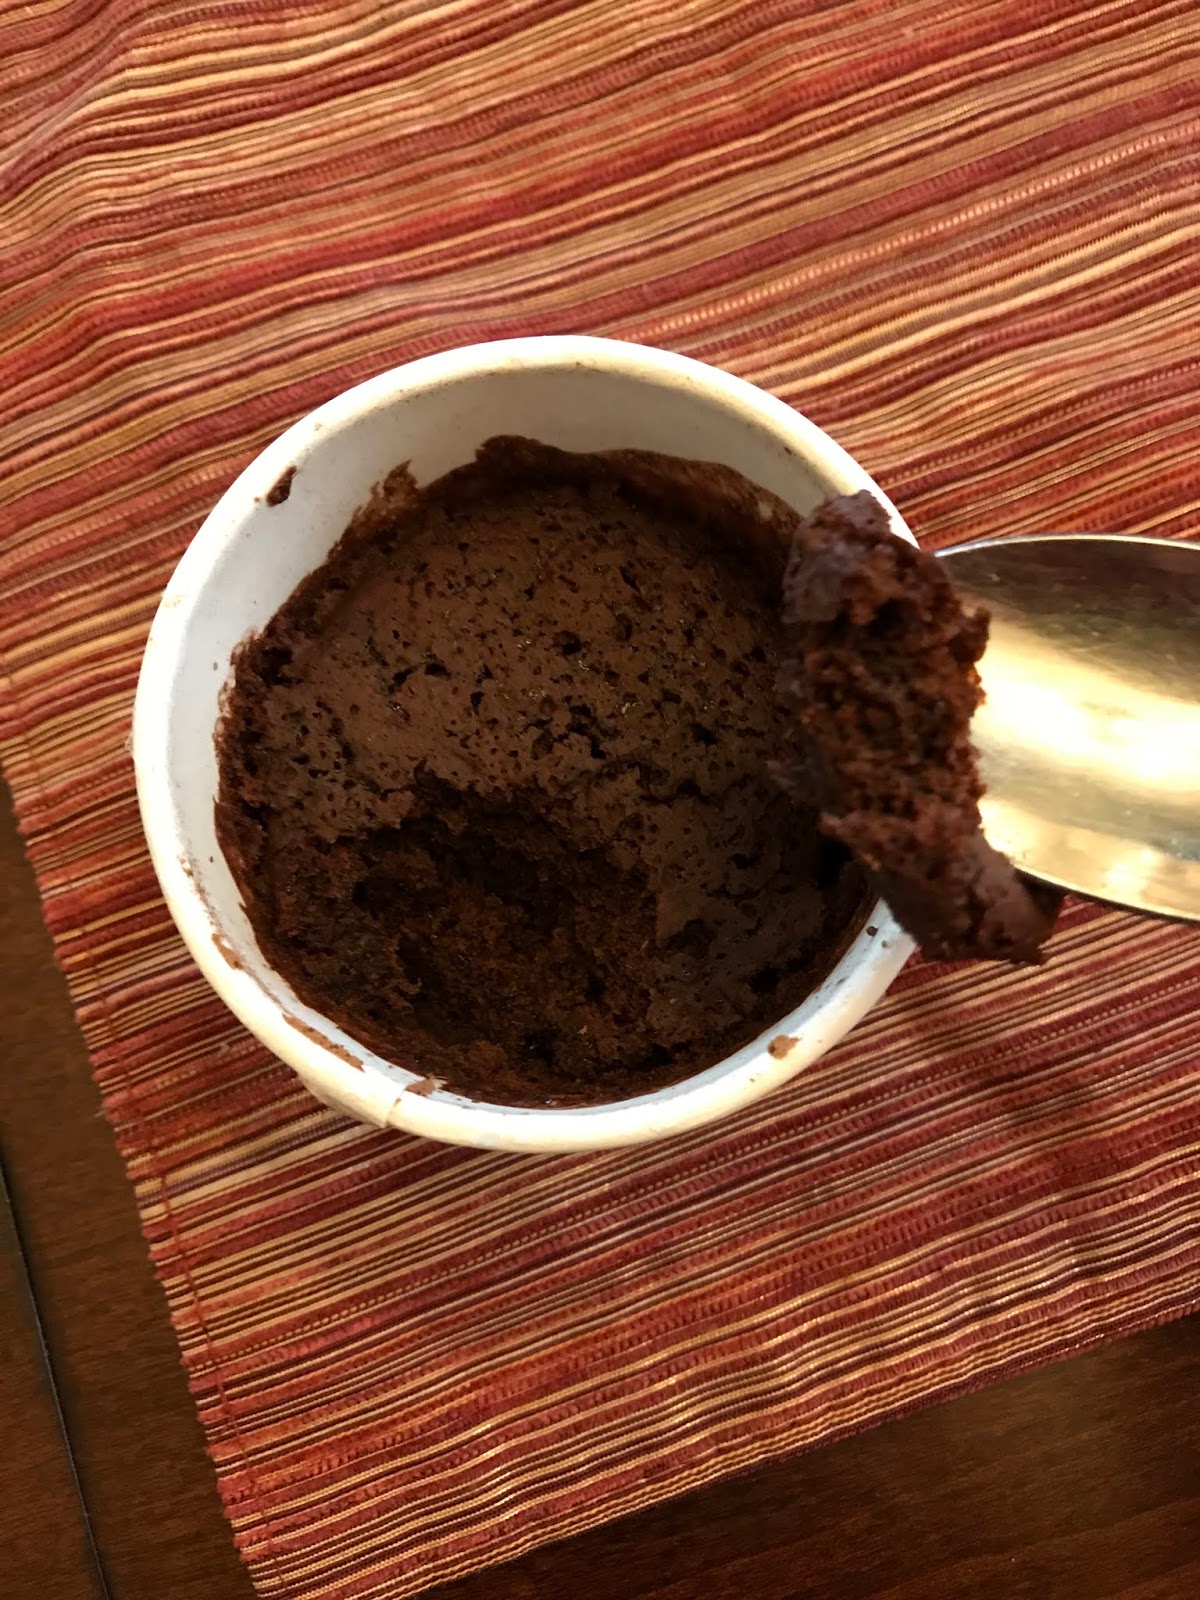
I tried a bunch of Miss Jones Baking Co. products, after hearing about them on my favorite podcast. There was a sale on “cakes in a cup” (microwavable cake mix in individual serving sizes), and I bought a frosting flight box because why not.

I don’t typically like microwaved cake, but it turns out this one is an exception. They manage to have a pleasant, almost fluffy texture that other microwave cakes seem to lack. Plus, they’re not overly sweet, and you won’t feel too guilty eating a single serving. I tried the warm double chocolate chip and the confetti pop and would recommend both.


Now, just to get this out of the way, I also tried the microwavable chocolate chip cookie in a cup, but it was weird and unpleasant and I’m never buying that one again. But it certainly seems to be an exception as far as their offerings go, based on what I’ve tasted.

As for the frostings, I’m so happy I discovered that brand! All the frostings are vegan, therefore suitable for those of us with lactose-intolerance (ingredients are also organic and gluten-free, if you care). For example, the vanilla buttercream contains powdered sugar, sustainably-sourced palm oil, coconut oil, tapioca, sea salt and natural vanilla flavor – there is no warning about any of the major allergens on the packaging. Plus, it’s delicious! You may need to warm it up in the microwave for 5-10 seconds to get the right consistency, but once you know that, it’s a cinch.

The cream cheese flavor tasted more like lemon to me, not actually like cream cheese, but I liked it. I used it on a dozen of these raspberry rosewater cupcakes (half of which I made without raspberries) – they were very good, even though the crumb had some structural integrity issues. And they paired well with a lemon frosting, so it was perfect.


The salted caramel wasn’t my favorite, the chocolate was good, and the vanilla was great (I went out and bought more, actually). The confetti pop flavor is vanilla with a separate container of rainbow sprinkles, and by the looks of it, they are “natural” as the dyes aren’t the bright, vivid ones in typical sprinkles.


I’ve seen Miss Jones products both in my regular HEB and in Whole Foods, so I’m assuming they shouldn’t be too hard to find if you don’t want to order online (though shipping was reasonable, since the products are shelf-stable). I think I’m going to treat myself to some Miss Jones once in a while! I’ll also post a few recipes where I used the frostings.

Thursday, January 10, 2019

Tarte choco-caramel en croûte de chips


J’ai souvent essayé des recettes avec du chocolat et du caramel, et il a fallu que je me rende à l’évidence : je ne fais du bon caramel que si j’ai de la crème et du beurre sans lactose, donc au Québec. Mes substituts végétaliens ne font pas du caramel assez bon à mon goût. Et c’est en faisant cette tarte au chocolat et au caramel salé que j’ai dû l’admettre, effaçant du même coup de mes signets les liens vers cette tarte-ci et ces tartelettes-là, que je n’essaierai pas. Parce que non seulement le caramel n’était pas à mon goût, mais ces desserts sont souvent trop sucrés pour moi. Comme ces brownies triple chocolat et caramel salés, qui n’en valaient vraiment pas la peine non plus, en fin de compte (tsé, quand t’es rendue à jeter des restants de brownies à la poubelle…).


J’ai décidé de donner une dernière chance au concept en achetant une sauce au caramel végétalienne, en l’occurrence celle de la marque Hey Boo, que j’ai beaucoup aimée! Je l’ai utilisée (en partie) pour faire cette tarte choco-caramel en croûte de chips, qui avait un délicieux mélange de sucré-salé… En fin de compte, c’était gagnant! Le seul défaut, c’est que la croûte s’effrite beaucoup et amolli au fil du temps – c’est une excellente idée, la croûte de chips, mais celle-ci est mal exécutée. Je pense qu’une croûte sablée serait un bon substitut, mais je vous donne la recette d’origine au cas où quelqu’un voudrait s’essayer. Par contre, la garniture chocolat-caramel est géniale, enfin!

Pour la croûte
1 paquet de 220 g. de croustilles nature Miss Vickie’s (j’ai pris des chips de type kettle-cooked)
¼ tasse de margarine ou de beurre sans lactose fondu(e)
¼ tasse de farine
¼ tasse de sucre

Pour la ganache
2 tasses de pépites de chocolat noir 50 % (j’ai utilisé 10 oz. de pépites Guittard)
1 tasse de lait de coco (ou de crème sans lactose)
dulce de leche ou caramel sans lactose

Préchauffer le four à 350 °F.

Au robot culinaire, mélanger les croustilles, le beurre, la farine et le sucre jusqu’à l’obtention d’une texture granuleuse (attention de ne pas réduire les croustilles en poudre). Étendre le mélange dans le fond d’un moule à tarte de 20 cm (8 po) de diamètre, en prenant soin de bien presser la croûte dans le fond et sur le côté du moule (j’ai utilisé un moule à tarte de 9 po à fond amovible). Cuire au four de 10 à 15 minutes. Laisser refroidir.

Mettre le chocolat dans un bol résistant à la chaleur. Réserver.

Dans une casserole, porter la crème à ébullition. Verser la crème chaude sur le chocolat et laisser reposer 5 minutes. Mélanger jusqu’à l’obtention d’une texture lisse.

Verser la ganache dans la croûte refroidie. Verser le dulce de leche par cuillerées sur la ganache. Passer la pointe d’un couteau sur le dulce de leche, mais sans toucher la croûte, de manière à créer un effet marbré. Réfrigérer au moins 2 heures avant de servir.