Thursday, July 06, 2017

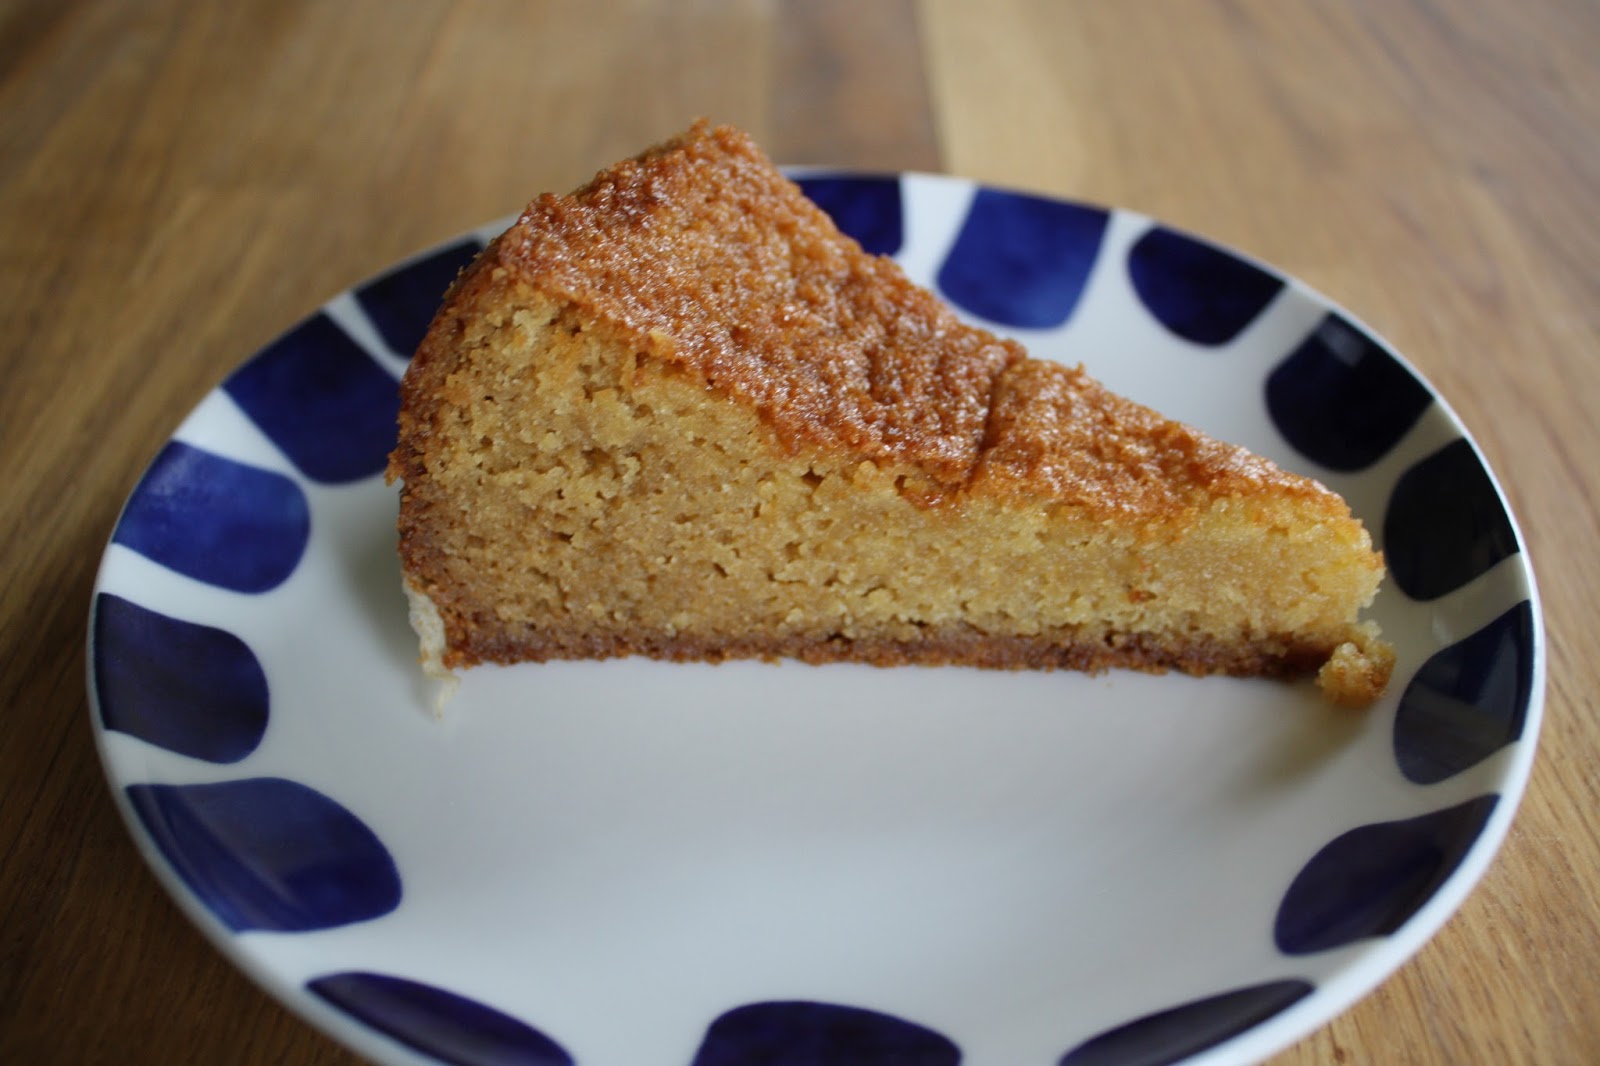
Baniques aux bleuets et à l'érable


Selon Wikipedia, la banique (ou bannique) est une sorte de pain plat dense et calorique, un peu comme un scone. Dans le cas de cette recette, le résultat n’était pas dense et ne donnait pas l’impression d’être très calorique non plus… Mais j’ai bien aimé! C’est le genre de pâtisserie qui se sert bien au déjeuner ou en collation. À vrai dire, maintenant que j’y pense, ces saveurs seraient géniales dans un scone aussi! J’ai obtenu 9 petites baniques, qui se congèlent bien en plus.

1 tasse de farine tout usage
½ tasse de farine de maïs
1 c. à soupe de poudre à pâte
1 pincée de sel
¼ tasse de sucre d’érable
¼ tasse de beurre non salé, froid (j’ai pris de la margarine végétalienne)
¾ tasse de lait sans lactose
½ tasse de bleuets

Dans un grand bol, mélanger tous les ingrédients secs. Incorporer le beurre à la fourchette, puis ajouter le reste des ingrédients et mélanger pour former une boule de pâte.

Sur un plan de travail enfariné, abaisser la pâte à la main à 2 cm (1 po) d’épaisseur (la mienne était un peu plus mince, je crois). À l’aide d’un emporte-pièce de 6 cm (2 ½ po) de diamètre, façonner 10 cercles dans la pâte (j’ai pris un verre en guise d’emporte-pièce et j’ai eu 9 cercles) et les déposer une plaque è biscuits recouverte d’un papier parchemin ou d’un silpat. Les couvrir d’un linge propre pendant 30 minutes.

Pendant ce temps, préchauffer le four à 375 °F. Faire cuire les baniques 30 minutes (il a suffi de 20 minutes pour les miennes).

Wednesday, July 05, 2017

Moelleux aux pois chiches et au chocolat


J’avais fait, pour le congélateur, des brownies de Coup de Pouce. C’est le genre de recette super santé végétalienne sans gluten, sucrée avec des dattes et du sirop d’érable et contenant aussi de la patate douce et de l’avocat. Texture « fudgy » assurée. Bon, honnêtement, la consistance était bonne, mais ils étaient un peu fades. Ils goûtaient trop « santé », mettons. Je me suis rattrapée avec une autre recette des Pâtisseries de Rose Madeleine, soit les moelleux aux pois chiches et au chocolat (c’était aussi au café à l’origine, mais je n’avais pas envie de mocha, alors j’ai modifié un peu; la recette ci-dessous est la mienne). J’avais moins de pois chiches qu’il le fallait, parce qu’aux États-Unis, on a des boîtes de conserve de 15 onces pour les pois chiches, pas 19. Mes biscuits (ou moelleux, en fait) étaient plus plats que ceux d’origine, peut-être pour ça. Mais ils étaient très bons! L’Ingénieur était impressionné et a dit qu’il n’avait jamais rien mangé de tel (mais d’un ton très positif, on s’entend). La recette est censée donner environ 2 douzaines de moelleux – j’en ai eu 18.

1 boîte de 19 oz. de pois chiches non salés, rincés à l’eau courante et égouttés
40 g. (1/3 tasse) de poudre de cacao
80 g. (1/3 tasse) de cassonade
1/3 tasse de sirop d’érable
1 c. à thé de café moulu
300 g. (1 ½ tasse) de pépites de chocolat mi-sucré
2 c. à soupe d’huile de noix de coco

Préchauffer le four à 350 °F. Tapisser une plaque à biscuits de papier parchemin (j’ai pris un silpat).

Au robot culinaire, mélanger les pois chiches, le cacao, la cassonade, le sirop d’érable et le café moulu jusqu’à l’obtention d’une pâte homogène.

À l’aide d’une petite cuillère à crème glacée, prélever des boules de pâte d’environ 2,5 cm (1 po) de diamètre et les déposer sur la plaque préparée. Aplatir légèrement les boules. Cuire au four 20 minutes.

Retirer du four, transférer les biscuits sur une grille et laisser refroidir complètement. Déposer les biscuits dans un récipient hermétique, puis au congélateur de 2 à 4 heures.

Après ce temps, tapisser la même plaque de papier sulfurisé (j’ai utilisé le même silpat, sans le laver). Faire fondre les pépites de chocolat et l’huile de noix de coco au bain-marie. Plonger entièrement les biscuits congelés dans le chocolat fondu, puis les déposer sur la plaque préparée. Laisser le chocolat figer avant de mettre les biscuits dans un récipient hermétique. On peut les conserver à la température de la pièce s’il ne fait pas trop chaud; j’avais mis les miens au réfrigérateur.

Monday, July 03, 2017

Parmesan-Roasted Cauliflower

I was looking for something a bit different for a side dish to serve with turkey meatballs from the freezer. I remembered that I had been meaning to try this dish of roasted cauliflower I saw on Orangette, since this vegetable is more to my liking roasted than steamed. Plus, it was easy enough to pull together! I’d make this again, even though the Little Prince has decided he no longer likes cauliflower.

1 head cauliflower, trimmed
1 medium onion, sliced (not too thinly; about ½”-thick slices)
4 thyme sprigs
4 unpeeled garlic cloves (I chose to peel mine)
3 Tbsp. olive oil
kosher salt
freshly ground black pepper
½ cup parmesan or grana padano, for grating (I eyeballed it)

Preheat the oven to 425 °F, and line a rimmed sheet pan with parchment.

Place the cauliflower on a cutting board, and slice it top-down into roughly 1/3-inch slices. Some of the slices will crumble, which is fine. Scoop all of the cauliflower into a large bowl, and add the onion, thyme, garlic, and olive oil. Toss well. Season to taste with salt and black pepper.

Arrange the mixture in a single layer on the prepared sheet pan. Roast, tossing occasionally, until the cauliflower is mostly tender, golden brown, and caramelized at the edges, 25-30 minutes. Take the pan out of the oven, and grate a generous amount of parmesan over the vegetables. Return the pan to the oven, and continue to roast for another 5 or 10 minutes. You’re basically cooking it to eye: you want the cauliflower to be nicely caramelized, but you don’t want the onions to burn.

Serve hot or at room temperature.

Thursday, June 29, 2017

Lavender-Honey Scones


This recipe was from a promotional magazine I got once and is available online here. I made these and froze them, and pulled some out a few weeks ago. I used coconut milk instead of cream, and instead of using all-white flour, I used 120 g. of white whole wheat flour and 180 g. of all-purpose white flour. They were a bit dry, even for scones, so I’d bake them less next time; that being said, I loved the flavors! I should probably translate that to cupcakes when I have time.

¾ cup lactose-free cream or coconut milk
2 Tbsp. honey
1 Tbsp. dried lavender buds
2 ½ cups all-purpose flour (see note above)
1 Tbsp. baking powder
6 Tbsp. butter or margarine
¼ tsp. salt
1 egg, lightly beaten

In a small saucepan combine cream, honey, and lavender. Warm over medium heat until it begins to steam, about 10 minutes. Chill about 30 minutes or until cooled completely.

Preheat oven to 400 °F.

In a large bowl combine flour, baking powder, and salt. Using a pastry blender, cut in butter until mixture resembles coarse crumbs. Make a well in the center of flour mixture; set aside.

Whisk egg into cooled cream mixture. Add egg mixture all at once to flour mixture. Using a fork, stir just until moistened.

Turn dough out onto a lightly floured surface. Knead dough by folding and gently pressing it for 10 to 12 strokes or until dough is nearly smooth. Pat dough into a 10” x 4” rectangle. Cut in half lengthwise and in sixths crosswise to make 12 rectangles.

Place rectangles 2 inches apart on a parchment-lined baking sheet. Brush rectangles with additional cream. Bake 13 to 15 minutes or until golden brown. Remove scones from baking sheet. Drizzle with additional honey, if desired. Serve warm.

Tuesday, June 27, 2017

Honey-and-Spice-Roasted Carrots with Tahini Yogurt

The meals I made before heading to Canada were a bit lackluster. I finally tried that last recipe from 100 recettes pour toi mon cœur (which I talked about here in English), a sesame chicken with an arugula citrus salad in which I used sugar snap peas instead of asparagus. Good, but nothing to write home about. Same with the beef and pesto manicottis from Coup de Pouce (not online, unfortunately) that I had made for the freezer. There were also chicken enchiladas with tomatoes and avocados that were good, but not photogenic. Luckily, I could count on Molly Wizenberg to make things interesting again.

So I found this roasted carrot recipe on Orangette, though it’s originally by Yotam Ottolenghi. I should probably get his cookbooks, because I usually end up really liking dishes he’s created! This was no exception – very easy to make, very satisfying. I even made it again last week! I ended up serving it with a meat pie from the freezer.

The quantities below yield a generous 4 servings; I halved it when I made it. I roasted the coriander and cumin seeds in a pan, then crushed them with a mortar and pestle. Bonus points if you use yellow and purple carrots as well as orange, it’ll be prettier!

For the yogurt sauce
Scant 3 tablespoons (40 g.) tahini
2/3 cup (130 g.) plain whole-milk yogurt or Greek yogurt
2 Tbsp. lemon juice
1 garlic clove, crushed
1 generous pinch of kosher salt

For the carrots
2 Tbsp. olive oil
scant 3 Tbsp. (60 g.) honey
1 ½ tsp. coriander seeds, toasted and lightly crushed
1 ½ tsp. cumin seeds, toasted and lightly crushed
leaves from 2 sprigs fresh thyme, or a generous pinch of dried thyme
3 lbs. (1.3 kg.) carrots, peeled and cut into index-finger-sized batons
1 ½ Tbsp. cilantro leaves, chopped or not
kosher salt
black pepper

Preheat the oven to 425 °F, and line a large rimmed sheet pan with parchment paper.

Combine the sauce ingredients in a small bowl, and whisk well. Set aside while you roast the carrots.

Combine the olive oil, honey, coriander and cumin seeds, and thyme in a large bowl. Add 1 tsp. kosher salt (if using Diamond Crystal; maybe just ½ tsp. if using Morton) and a few grinds of black pepper. Whisk as well as you can; the honey might make it pretty goopy. Add the carrots, and mix until well coated. (I did this with my hands, since the honey wanted to clump instead of coat the carrots.) Dump the carrots onto the prepared sheet pan, and arrange them evenly in a single layer. Roast, stirring gently once or twice, until they are cooked through and glazed, 30 to 40 minutes.

Serve the carrots warm or at room temperature, with a good spoonful of sauce on top or smeared on the plate underneath them. Scatter with cilantro.

Thursday, June 15, 2017

Petits gâteaux au citron et à la noix de coco

J’ai été déçue par quelques desserts que j’ai cuisinés après la naissance du Renard. De petits pots au chocolat pas recommandables du tout; des chaussons aux pommes peu satisfaisants; de petits gâteaux au chocolat avec glaçage végétalien très bons, mais pas différents de ce que je fais souvent; un strudel aux poires du livre Chefs de famille correct, sans plus. (Ce livre, soit dit en passant, avait l’air excellent, mais j’ai été déçue. La moitié du livre est consacrée aux biographies des contributeurs, et sur les 60 recettes, j’en ai marqué seulement trois pour les essayer. Espérons que les deux autres seront meilleures!) J’ai ensuite décidé de sortir mon « nouveau » livre de desserts végétaliens, Les pâtisseries de Rose Madeleine, et j’ai jeté mon dévolu sur les petits gâteaux au citron et à la noix de coco.

J’ai pris de la farine de blé blond, pour faire plus santé. La crème de citron dont sont fourrés les gâteaux ne m’a pas vraiment impressionnée, surtout parce que je la trouvais un peu fade et bien moins colorée que sur la photo du livre. Par contre, le glaçage à l’huile de noix de coco, c’est magique! Je me demande où ça a été toute ma vie, ça. Le principe est simple, et pourtant, le résultat est vraiment impressionnant. En gros, on mélange de l’huile de noix de coco avec du sucre glace, puis on met au frigo de 30 à 60 minutes; on ressort ça et on fouette à la main. Et voilà, c’est du glaçage! Et ça tient à la température de la pièce pendant des jours! On s’entend, il ne faut pas qu’il fasse trop chaud; l’été, il faudrait une pièce climatisée. Mais la texture est vraiment géniale, et ce n’est pas trop sucré, en plus. À refaire!

Pour le glaçage à la noix de coco
3 tasses d’huile de noix de coco
1 ½ tasse (225 g.) de sucre glace tamisé
1 ½ c. à thé d’extrait de vanille (ou 1 c. à thé d’essence de noix de coco)

Pour les petits gâteaux
¾ tasse de sucre de canne
½ tasse d’huile de noix de coco fondue
1 boîte conserve de 14 oz. (400 mL) de lait de coco
¼ tasse de jus de citron
le zeste de 2 citrons
450 g. (2 ½ tasses) de farine tout usage
20 g. (½ tasse) de noix de coco râpée
2 c. à thé de poudre à pâte
1 c. à thé de bicarbonate de soude

Pour la crème de citron
¾ tasse de sucre de canne
¼ tasse de jus de citron
¾ tasse d’eau
3 c. à soupe de fécule de maïs
3 c. à soupe d’eau

Pour le glaçage à la noix de coco
À l’aide d’un batteur (je l’ai fait au fouet), fouetter l’huile de noix de coco jusqu’à ce qu’elle soit lisse.

Ajouter le sucre glace et la vanille et fouetter jusqu’à ce que le mélange soit homogène.

Réserver au réfrigérateur 30 minutes (ou jusqu’à 60 si, comme moi, vous aviez fait fondre votre huile de noix de coco pour mieux la mesurer et la mélanger), puis fouetter de nouveau.

Pour les petits gâteaux
Préchauffer le four à 350 °F. Huiler 12 moules à muffins ou les chemiser de petits moules en papier.

Dans un grand bol, combiner le sucre de canne, l’huile, le lait de coco, le jus et le zeste de citron.

Dans un autre bol, mélanger la farine, la noix de coco, la levure chimique et le bicarbonate. Incorporer ces ingrédients secs aux ingrédients liquides en trois fois, en remuant après chaque addition.

Répartir la pâte dans les moules. Cuire au four de 20 à 25 minutes, ou jusqu’à ce qu’un cure-dent inséré au centre d’un gâteau en ressorte propre. Retirer les gâteaux du four et des moules. Suivre les instructions du montage ci-dessous.

Pour la crème de citron
Dans une casserole, chauffer le sucre, le jus de citron et l’eau à feu moyen, jusqu’à ce que le sucre soit dissous.

Dans un petit bol, mélanger la fécule de maïs et l’eau, puis verser ce mélange dans la casserole. Porter à ébullition en fouettant sans arrêt, jusqu’à épaississement.

Verser la préparation dans un bol, couvrir d’une pellicule de plastique et laisser refroidir complètement à température ambiante.

Pour le montage
Faire un trou au centre de chaque petit gâteau à l’aide d’une petite cuillère (je le fais avec un vide-pomme) et le remplir de crème de citron. Couvrir de glaçage à la noix de coco.

Friday, May 26, 2017

Batch of links

- Ramadan etiquette guide: 10 tips for people who aren’t Muslim (pretty self-explanatory).

- A map of popular brunch foods in every state, though “the roundup isn't top brunch foods by volume, but what people in each state like proportionally more than those in other states.” Apparently, people in Texas like stuffed avocado.

- Ten food items that need to rethink their packaging. YES!

- One more reason to consider switching to full-fat dairy. I’m looking at you, Dad.

- It turns out that salty foods don’t actually make you thirsty. My whole life is a lie!

- Protein 101, as well as 10 ways to eat your daily protein (it’s less than you’d think) and 10 vegetarian ways to eat your daily protein.

- Bon Appétit had an article about the history of Maldon salt that was very interesting!

- Remember my batch of links about meal kits? The Kitchn did an actual dollar-to-dollar comparison with groceries for three different services.

- Have you ever seen Jacques Pépin debone a chicken? It is a thing of beauty.

- (Not food-related.) Reclaiming “Jew”: an article about the fact that using “Jew” as a noun is often seen as a slur, even though it is correct, while the adjective “Jewish” is seen as polite.

- (Also not food-related.) Math problems for English majors and math problems for parents, because they’re too funny!

Wednesday, May 24, 2017

Pistachio-Citrus Pound Cake

Here’s something that I made and managed not to taste right away, instead stashing it in the freezer for after the baby was born. It’s a pistachio-citrus pound cake that I found on Orangette, though it’s originally from Bon Appétit. I unfortunately neglected to get a picture of the whole loaf when it was made; instead, I cut it in half and froze everything, and I only tasted it recently. It was delicious! Not too sweet, this pound cake might be more of a snack than a dessert. As for the citrus, you could make it as is (with lemon, orange and lime), but if it’s citrus season, consider using Meyer lemon or tangerines, for example. Note that I put fewer pistachios in the batter than called for, because that’s usually not my favorite place for nuts, but I like them on top of the cake!

2 cups (260 g.) all-purpose flour
1 ½ tsp. kosher salt
1 tsp. baking powder
2 sticks (1 cup) unsalted butter or margarine, at room temperature
2 cups sugar
5 large eggs
2 Tbsp. fresh lemon juice
2 tsp. finely grated orange zest
2 Tbsp. fresh orange juice
1 tsp. finely grated lime zest
1 cup (125 g.) shelled, unsalted pistachios, coarsely chopped; divided

Position a rack in the middle of the oven, and preheat the oven to 325 °F. Lightly grease a 9”x5” loaf pan. Cut a rectangle of parchment paper to line the bottom and the two long sides of the pan, leaving a little overhang. Press the parchment paper into the pan, and grease it lightly, too.

In a medium bowl, whisk together the flour, salt, and baking powder. Set aside.

Using an electric mixer, beat the butter on medium speed until light and fluffy, about 2 minutes. Add the sugar, and beat until well incorporated, 1 to 2 minutes more. Add the eggs one at a time, beating to blend between additions. Add the juices and the zests, and beat until well combined. (Don’t worry if the batter looks curdled.) Add the flour mixture, reduce the speed to low, and beat until just incorporated. Add ¾ cup of the pistachios, and fold in gently. Pour the batter into the prepared pan, smoothing the top. Sprinkle the remaining ¼ cup pistachios over the top.

Bake the cake, rotating it halfway through, until a tester inserted into the center comes out clean, about 1 ½ hours. Transfer it to a wire rack, and let it cool completely in the pan. Run a sharp knife along the short ends of the pan to loosen the cake; then pull up on the parchment paper to lift the cake out of the pan. (The flavor of this cake is best the day after it’s made. I can tell you that it freezes well, too.)

Wednesday, May 17, 2017

Granola au gingembre et à l'érable

J’ai fait ce granola et je l’ai congelé avant la naissance du Renard. Je l’ai ressorti récemment pour déjeuner – ça me manquait, le granola! Il s’agit d’une recette du magazine À bon verre, bonne table. J’ai fait une demi-recette, parce que je n’avais pas l’intention de nourrir une armée, quand même; les quantités ci-dessous sont les miennes. (Je ne connais personne qui veut un rendement de 15 tasses pour sa famille!) Pour cette recette, j’ai utilisé des amandes ainsi que des canneberges et des abricots séchés. Selon mon humeur et le contenu de mon frigo, j’aime manger le granola avec du lait sans lactose (végétal ou pas) ou encore du yogourt. Mon yogourt préféré ces temps-ci est le Noosa à la vanille, qui est riche et crémeux et dont les grains de vanille croquent sous la dent. (Noosa, c’est du yogourt australien fait au Colorado, avec des saveurs comme fraise-rhubarbe, miel, cerise et même mangue et chili ou poire et cardamome!)


4 tasses de gros flocons d’avoine
¾ tasse d’amandes ou de vos noix préférées ou encore de noix mélangées, hachées grossièrement
½ tasse de son ou de germe de blé
½ tasse de graines de citrouille
¼ tasse de graines de lin moulues
¼ tasse de noix de coco non sucrée, préférablement râpée
1 c. à thé de cannelle
1 c. à thé de gingembre moulu
¾ c. à thé de sel
1 orange
¼ tasse d’huile végétale
¾ tasse de sirop d’érable
2 c. à thé de vanille
1 tasse de fruits séchés (cerises, canneberges, raisins secs, abricots émincés, pruneaux hachés, etc.), préférablement un mélange
2 c. à soupe de gingembre confit coupé en dés fins

Préchauffer le four à 300 °F.

Huiler légèrement 2 grandes plaques à pâtisserie à gros rebords (ou une rôtissoire).

Remuer dans un grand bol : flocons d’avoine, noix, son de blé, graines de citrouille, graines de lin, noix de coco, épices et sel.

Râper finement la peau de l’orange dans une casserole moyenne. Presser l’orange et verser 3 c. à soupe du jus, l’huile et le sirop d’érable dans la casserole. Chauffer jusqu’à ce que le liquide soit bien chaud. Incorporer la vanille. Verser ce liquide sur le mélange d’avoine et remuer pour bien humecter les ingrédients.

Étaler le granola sur les plaques à pâtisserie. Cuire au four préchauffé en prenant soin de remuer de temps à autre et de faire la rotation des plaques, jusqu’à ce que le granola soit bien doré (40 à 45 minutes). Y incorporer les fruits séchés et le gingembre. Laisser refroidir complètement. (Conserver le granola à la température ambiante, dans des récipients hermétiques, pendant 2 semaines. On peut aussi le congeler. Servir le granola avec du lait ou une grosse cuillerée de yogourt, agrémenté de baies fraîches et d’un filet de sirop d’érable pour en faire un dessert.)

Dark Chocolate and Squash Muffins


These muffins were really something. They contain squash purée, which makes them moist and makes one feel like they’re at least somewhat healthful, and they are delicious. As it turns out, they’re gluten-free, but no one here guessed it. They were especially good warm (I called them “perfect” in my notes), but were great at room temperature after a few days as well.

The original recipe calls for kabocha squash, but I used half a small butternut squash that I had left over from this recipe. I’m pretty sure that any winter squash would do, maybe even sweet potato. Note that the original recipe also recommends homemade squash purée, not canned, as the texture is better. (An easy way to do this is to halve a squash, rub the cut sides with oil and bake the whole thing at 425 °F for 30 to 45 minutes or until tender. The flesh can then be scooped out and puréed.)

1 ¼ cups fine brown rice flour
2/3 cup coconut sugar (I used cane sugar for a bit more sweetness)
½ cup almond flour
5 Tbsp. cocoa powder
1 tsp. baking powder
1 tsp. baking soda
½ tsp. fine sea salt
½ cup unsweetened almond milk
½ cup coconut oil, melted
½ cup kabocha squash purée (see note above)
2 large eggs
1 ½ tsp. pure vanilla extract
2/3 cup chopped dark chocolate (I used 4 oz.)
cacao nibs, for topping (optional)

Preheat oven to 350 °F and line a 12-cavity muffin tin with liners (I actually ended up with 15 muffins).

In a large mixing bowl, whisk together all of the dry ingredients.

In another large mixing bowl, whisk together the wet ingredients until mixed. Add the dry ingredients to the wet a little at a time until combined (I used a wooden spoon), then fold in the chocolate.

Evenly distribute the batter into the muffin tin, filling each cavity ¾ of the way. Top with a sprinkle of cacao nibs, if desired.

Bake in the center of your oven until a cake tester comes out clean, about 28-34 minutes. Cool on a rack for 15 minutes, then remove muffins and let them cool completely before eating.

Monday, May 15, 2017

Green & Black's

For some reason, I haven’t been able to find my regular Godiva dark chocolate with sea salt in stores in a while, I’m not sure why. I bought Lindt’s version again, but didn’t like it as much. So I started looking for a substitute and bought a Green & Black’s pure dark chocolate bar with sea salt, which I really liked. Then, as I was renewing stock in our emergency kit, I found two bars of Godiva, so I decided to do a side-by-side comparison.


The first thing I should point out is that Godiva appears to have changed its ingredients since I first wrote about it. It has less iron than it used to (now 15% of the daily value, when it used to be 30%), and it had also become less expensive (before it disappeared). Green & Black’s is about $5.00 a bar, and bars are ever so slightly smaller than Lindt or Godiva (90 g., versus 100 g. for both others). That being said, it is ethically sourced cocoa, so I’m guessing that’s where most of the money goes. Serving sizes are similar (4 squares, with 2.5 servings per bar), so I don’t notice the difference in size. Green & Black’s is technically vegan, though processed on equipment that also comes in contact with milk and tree nuts. It has more calories, and those seem to come mostly from fat – but it’s cocoa butter, which is a vegetable fat and in my mind is similar to coconut oil or avocado, so it’s a good fat and I’m not worried (if I’m wrong, please don’t shatter my illusion). The cocoa butter gives it a smooth mouthfeel and enhances the flavor. It’s also got significantly less sugar than the other brands, about half as much, but is still very good – I normally prefer lower percentages of cocoa, but I really like this. And it’s got 25% of the daily value of iron, which is nice.

So if I see my Godiva again, I’d certainly stock up, but for now, Green & Black is my go-to evening treat.

On a side note, I also tried Alter Eco’s Dark Salted Brown Butter Organic Chocolate bar and loved it. It may not be strictly lactose-free (it contains butterfat), but I stuck to 2 squares per serving and didn’t have any symptoms. The chocolate is smooth and tastes more like caramel than browned butter, but is very enjoyable!

Thursday, May 11, 2017

Beef Curry

I got this Japanese curry recipe from Bon Appétit and made it right before having the Fox. The original recipe claims to serve 6, but we had more than 8 servings (without guests, I would have frozen the leftovers). Note that I reduced the amount of curry from 3 to 2 tablespoons and, as always, I prefer mild curry. I served it with rice the first night and with couscous the second – so technically, you do need to make a side for this to be a complete meal, but it’s an easy side, and at least the meat and vegetables are taken care of here. This was really good!

For the raita
2 Japanese or Persian cucumbers (I used baby cucumbers)
kosher salt
1 garlic clove
½ cup plain lactose-free whole-milk yogurt
½ cup plain lactose-free whole-milk Greek yogurt

For the curry
1 Tbsp. all-purpose flour
1 Tbsp. potato starch or cornstarch
2 Tbsp. water
3 Tbsp. vegetable oil
2 lbs. beef chuck, cut into ½–1-inch pieces
kosher salt, freshly ground pepper
3 medium onions, chopped
1 apple, peeled, grated
3 Tbsp. mirin
1 Tbsp. finely chopped peeled ginger
2 garlic cloves, finely chopped
2 Tbsp. curry powder
2 Tbsp. kuro sato (Japanese black sugar) or 1 Tbsp. granulated sugar + ½ tsp. robust-flavored (dark) molasses
1 Tbsp. garam masala
1 Tbsp. soy sauce
4 cups low-sodium chicken broth
½ kabocha squash, peeled, seeded, cut into ½-inch pieces (I used half a butternut squash)
1 large Yukon Gold potato, scrubbed, cut into ½-inch pieces
2 large carrots, peeled, cut into ½-inch pieces

For the raita
Slice cucumbers in half lengthwise. If using Japanese cucumbers, scrape out seeds with a small spoon. Slice cucumbers into very thin half-moons. Toss in a small bowl with a few pinches of salt. Let sit until salt begins to draw out water from cucumbers, about 5 minutes. Massage cucumbers to release liquid, gently at first to keep them from breaking, then more vigorously as they start to expel water. Rinse in several changes of water, squeeze out excess liquid, and place in a clean small bowl.

Mash garlic and a pinch of salt on a cutting board with the side of a chef’s knife to a paste. Mix into cucumbers along with both yogurts; season with salt. Set aside in the refrigerator.

For the curry
Mix flour, potato starch, and water in a bowl. Set slurry aside.

Heat oil in a large heavy pot over medium-high. Season beef with salt and pepper. Working in 2 batches, cook beef, turning occasionally and reducing heat if needed, until browned on all sides, 6–8 minutes per batch. Add onions and apple and cook, stirring occasionally, until onions are soft, 12–15 minutes. Add mirin, ginger, and garlic and cook, stirring occasionally, until very fragrant, about 5 minutes. Add curry powder, kuro sato, garam masala, soy sauce, and broth. Bring to a boil; reduce heat and simmer until beef is almost tender, 30–40 minutes.

Add squash, potato, and carrots, cover, and cook, adding water by ¼-cupfuls if needed to keep vegetables submerged, until tender, 20–30 minutes.

Submerge a small sieve into curry and whisk reserved slurry into liquid in sieve to combine. Return curry to a boil; reduce heat and simmer until thickened, 8–10 minutes. Serve over rice topped with raita.

Wednesday, May 10, 2017

Chai-Spiced Medjool Date and Almond Tart


Now here is the perfect dessert if you want something simple and not too sweet! (I mean, I had tried an easy spiced applesauce cake, but it was a bit too one-dimensional for my taste; this tart is different.) It’s a bit more cakey than most tarts and is particularly good served warm, though it was great at room temperature as well. You could use chai tea instead of the spice blend if you want (just grind it well beforehand). The original recipe specified that it could be made in 8 individual tart pans of 3 ¼ inches each, rerolling the dough a few times, but I haven’t tried it. We all enjoyed it (including my parents, who were in town at that point).

For the pastry
½ cup (1 stick) unsalted butter or margarine, at room temperature
⅓ cup sugar
1 egg
1¼ cups cake flour
1 tsp. baking powder

For the date filling
1½ cups chopped Medjool dates (about 15)
½ cup water
1 tsp. ground cardamom
½ tsp. ground cinnamon
½ tsp. ground nutmeg
½ tsp. ground ginger

For the almond filling
¼ cup (½ stick) unsalted butter or margarine, at room temperature
¼ cup sugar
1 egg, at room temperature
¼ tsp. almond extract
½ cup ground almonds
1½ tsp. all-purpose flour

For the pastry
Place the butter and sugar in the bowl of an electric mixer fitted with the paddle attachment. Beat on medium speed until combined. Add the egg and continue beating until combined.

In a small bowl, whisk together the cake flour and baking powder, then add to the butter mixture. Beat just until combined. The dough will be very soft. Wrap in plastic wrap and form into a flat disc. Chill at least 2 hours. The dough can be prepared a day ahead.

For the date filling
Combine all the ingredients in a small saucepan and place over low-medium heat. While the dates are cooking, mash them with a rubber spatula and continue cooking, about 5 minutes, until the liquid is absorbed and the mixture is very thick and almost smooth. Transfer the date mixture to a small bowl to cool completely. The dates can be cooked 2 days in advance and refrigerated. Bring to room temperature before proceeding.

Line a sheet pan with parchment paper and set aside. Roll the dough about ⅛ inch (3 mm) thick, and line a 9-inch (23 cm) tart pan with it. Place on the parchment-lined tray. Chill while preparing the almond filling.

Place the oven rack in the middle position and preheat the oven to 350 °F.

For the almond filling
Place the butter and sugar in the bowl of an electric mixer fitted with the paddle attachment and cream together on medium speed until light and fluffy. Add the egg and almond extract and beat to combine.

Combine the ground almonds and flour together and add to the butter mixture. Beat until smooth.

Spread the date mixture evenly over the chilled dough. Repeat with the almond filling, spreading it over the date mixture to cover.

Bake until the top is golden brown, about 30 to 35 minutes. Remove from oven and serve warm or at room temperature. (The tart can be baked 1 day ahead and stored, well wrapped, at room temperature.)

Tuesday, May 09, 2017

Mini-tourtières feuilletées


J’ai fait quelques soupers simples, comme un sauté au bœuf asiatique et une quiche aux tomates, qui étaient bons mais sans plus. (La quiche était en fait meilleure que je pensais, puisque la plupart des tomates étaient cuites pour les dégorger d’eau et qu’il y avait aussi des tomates séchées pour un peu d’umami. Mais le Petit Prince a décidé qu’il n’aime plus les quiches, et ça finit par gâcher mon plaisir un peu…) Je suis ensuite tombée sur une recette de Coup de Pouce pour ces mini-tourtières feuilletées. C’était vraiment délicieux! J’ai fait la garniture le matin, puis j’ai assemblé le tout pour l’enfourner avant le souper. Tout le monde a aimé! J’ai servi ça avec une salade verte, simplement.

J’ai utilisé 3 carrés de pâte feuilletée, soit 1 ½ paquet, pour un rendement de 18 mini-tourtières, alors c’est ce que j’écris ci-dessous. Aussi, j’ai utilisé du porc haché comme viande (j’ai trouvé ça plus simple que d’aller demander de petites quantités de ci et de ça au boucher). À noter que sur le site de Coup de Pouce, il y a deux variantes qui ont l’air délicieuses : bacon et poireaux ainsi que canard et pomme.

1 lb de viande hachée (mélange de porc, veau et bœuf)
1 oignon, haché finement
1 gousse d'ail
1 c. à thé de sel
½ c. à thé de poivre
½ c. à thé de sarriette
¼ c. à thé de cannelle
¼ c. à thé de clou de girofle moulu
2 c. à soupe de beurre non salé ou de margarine
1 c. à soupe de farine
1 tasse de fond de veau (j’ai pris du bouillon de bœuf)
2 c. à soupe de chapelure
1 c. à soupe de pâte de tomates
1 ½ paquet de pâte feuilletée (environ 725 g en tout), dégelée
1 jaune d'œuf
2 c. à thé de lait sans lactose

Mélanger la viande, l'oignon, l'ail, le sel, le poivre, la sarriette, la cannelle et le clou dans un grand poêlon et cuire à feu moyen-vif, en brassant de temps à autre, pendant 8 minutes jusqu'à ce que la viande ait perdu sa teinte rosée et que l'oignon soit cuit. Retirer le poêlon du feu et réserver.

Dans une petite casserole, faire fondre le beurre à feu moyen-doux, en brassant de temps à autre. À l'aide d'un fouet, incorporer petit à petit la farine en brassant jusqu'à ce que la préparation soit lisse. Ajouter le fond de veau, porter à ébullition et laisser mijoter, en brassant souvent, pendant 10 minutes ou jusqu'à ce que la sauce ait épaissi.

Verser la sauce dans la préparation de viande réservée. Ajouter la chapelure et la pâte de tomates. Mélanger et laisser refroidir. (On peut préparer la garniture à l'avance. Elle se conservera jusqu'au lendemain au réfrigérateur.)

Préchauffer le four à 425 °F. Huiler un moule à muffins (ou, dans mon cas, 18 cavités de deux moules à muffins).

Sur une surface légèrement farinée, abaisser le premier carré de pâte feuilletée en un rectangle, puis couper l’abaisse en six rectangles d’environ 4 po x 3 po. Presser chaque morceau de pâte dans une cavité de moule à muffins huilée; répéter avec les deux autres carrés. Répartir la garniture réservée (environ 2 c. à soupe) au centre de chaque carré de pâte en pressant. Ramener les pointes vers le centre, par-dessus la garniture et les presser ensemble pour sceller les feuilletés.

Fouetter le jaune d'œuf avec le lait. Badigeonner les feuilletés du mélange d'œuf. Cuire au four préchauffé de 18 à 20 minutes. Laisser reposer 5 minutes avant de servir.

Monday, May 08, 2017

Almond Cake

I had my eye on this recipe from Orangette for a long time. I’m not sure why I kept stalling – maybe because it calls for sour cream, which I don’t keep on hand and I have to go to a specific grocery store to get the lactose-free kind. But anyway, this was really good! The first time I made it, it came out darker and denser than I was expecting. So I made it again, this time making sure to use white flour instead of white whole wheat flour and baking it at a lower temperature while tenting it with foil. The latter precautions might have been too much, but the result was indeed better the second time around (albeit not as beautiful as Molly Wizenberg’s pale golden creation on her original post). The texture is a bit dense, with no crumbs when you cut into it; the cake will cave in the middle, and that’s a feature, not a bug. We really liked this one, though, and I’ll have to make it again!

1 cup lactose-free sour cream, at room temperature
1 tsp. baking soda
2 cups all-purpose (white) flour
½ tsp. salt
2 sticks (8 oz.) unsalted butter or margarine, at room temperature
1 ½ cups sugar
1 (7-oz.) tube almond paste, cut into small pieces
4 egg yolks, at room temperature
1 tsp. pure almond extract

Preheat the oven to 350 °F (see note below). Grease the sides and bottom of a 9-inch springform pan, then line the sides and bottom with parchment paper and grease the paper.

In a small bowl, mix together sour cream and baking soda.

In another bowl, whisk together the flour and salt.

In the bowl of an electric mixer fitted with the paddle attachment, beat the butter and sugar until fluffy. Add the almond paste a few pieces at a time, and beat on medium speed for 8 minutes. (Molly Wizenberg admits that this seems like a long time, but do it. The mixture will get gorgeously fluffy.) Beat in the egg yolks one at a time, and mix until incorporated. Beat in the almond extract and the sour cream mixture. Reduce mixer speed to low, and gradually add the flour mixture, beating just until combined. Using a rubber spatula, fold the batter a couple of times to make sure there’s no unincorporated flour lurking around.

Scrape the batter into the prepared pan, and spread it evenly with the rubber spatula. Bake for about 1 hour: the cake is done when you press the top and it returns to its shape, and also when it shrinks from the sides of the pan. In my case, 55 minutes was too much; I’d try 45 minutes next time. (When I tried it again at 325 °F, I left the cake in there 45 minutes covered with foil, then removed the foil and baked it until it was done, 25 minutes longer. You could just try it at 325 °F without any foil.) Transfer to a cooling rack, and cool the cake in its pan.

Thursday, May 04, 2017

Batch of links - FPIES and other food restrictions

- Today is National FPIES Awareness Day. FPIES stands for Food protein-induced enterocolitis syndrome and is basically a form of food allergy that affects the gastro-intestinal tract. Certain foods (not just top allergens, but potentially anything, like peas, blueberries, lamb, rice, sweet potatoes, etc.) are rejected by the body, with symptoms like vomiting, diarrhea (occasionally with blood or mucus), low blood pressure, paleness, and lethargy, sometimes leading to shock (short-term) and malnutrition (long-term) and often requiring hospitalization. (Note that these are not the same symptoms as those of an IgE-mediated food allergy, the latter of which are immediate and life-threatening.) Roughly 90 children are diagnosed with FPIES in the U.S. each year, and most (but not all) outgrow it by age 5. In the meantime, though, there are kids who won’t be able to find a single safe solid food to eat! You can find out more here, here or here.

- There are kids and teenagers (with FPIES or other restrictions) who still haven’t passed any solid food trials. What happens when insurance companies stop covering their formula?

- Here’s an interesting article on which food allergies are more likely to be outgrown.

- Can you get a food allergy from a blood transfusion? (Spoiler: it’s rare, but it can happen and, thankfully, it’s usually temporary.)

- With new technology, we could actually commercialize hypoallergenic peanuts someday.

- Had you heard about Indie Candy, an allergen-free candy maker in Alabama? They were featured on The Kitchn a while back, but their social media accounts haven’t been active in a while, though Google claims they’re still in business…

- Enjoy Life is still very much in business, though, providing allergen-free ingredients for the home cook.

- The 25 best allergy-friendly packaged foods, according to Parents magazine.

- A neat cartoon titled Gluten: The Facts and the Fad.

- Did you know that the celiac vaccine successfully completed the first phase of clinical trials? It’s based on immunotherapy, which is also used to treat some allergies.

- I’ll follow that up with 10 restaurants where you can safely eat in Montreal if you are gluten-intolerant.

- It turns out that non-celiac gluten sensitivity may actually have nothing to do with gluten. It’s probably due to another family of proteins, amylase-trypsin inhibitors (ATIs), which are found in wheat and other grains alongside gluten. I wonder if cases like these have contributed to the increased prevalence of celiac disease, just through misdiagnosing (in addition to correctly diagnosing more patients who would not have been counted before).

- On a related note: patients with celiac disease who react to gluten-free oats may actually be reacting to another protein called avenin.

- For a laugh: the Gluten-Free Museum, where works of art are reimagined to be gluten-free.

- Did you know you can test for food sensitivities at home? There’s a test kit called EverlyWell that tests for sensitivity to 96 different foods.

Wednesday, May 03, 2017

Muffins au gruau


J’ai fait quelques sortes de muffins qui se ressemblaient récemment. Il y a eu les muffins santé à la banane et aux pépites de chocolat, qui étaient corrects, sans plus. J’ai aussi essayé les muffins aux flocons d’avoine de Miss Diane, qui ont la particularité d’être sans gluten… Honnêtement, je pense que je les aurais plus aimés s’ils avaient contenu de la farine de blé. Cependant, j’ai aimé la flexibilité de la recette : il faut 1 tasse de purée de fruit, et on peut choisir de la banane, de la pomme, de la citrouille, etc.; il faut aussi ½ tasse d’ajouts comme des noix ou des pépites de chocolat, en plus de l’édulcorant liquide au choix : miel, sirop d’érable, nectar d’agave… Bon, des possibilités infinies! Il y a même des versions végétaliennes. Je garde quand même l’idée, mais je travaillerais la recette un peu.

Enfin, je me suis rappelée la recette sur le site d’Orangette, les muffins au gruau. Pour être claire : il ne s’agit pas de muffins aux flocons d’avoine, simplement, mais bien de muffins au gruau! On peut utiliser du gruau fait avec de l’avoine épointée (idéalement) ou des flocons d’avoine (ça fera l’affaire), et ça peut être du gruau fait exprès tout comme un restant de gruau. Dans ce cas-ci, j’ai fait du gruau exprès pour la recette et j’ai testé une version nature, sans ajouts, à part de la vanille. (Peut-être que ça vaudrait la peine d’essayer du gruau qui a déjà une saveur, comme celui-ci, mais je serais plus du genre à essayer le gruau à l’avoine épointée de Megan Gordon, avec du lait de coco et de la pâte de vanille!) Les muffins étaient bons, mais un peu fades; je les ai trouvés meilleurs avec des fruits ou un peu de confiture. La prochaine fois, je teste les ajouts!

1 ½ tasse (210 g.) de farine tout-usage
¼ tasse (50 g.) de sucre
4 c. à thé de poudre à pâte
½ c. à thé de sel de mer fin
½ tasse d’ajouts (noix, morceaux de chocolat, noix de coco râpée, fruits secs, etc.)
1 gros œuf
1 tasse (185 g.) de gruau (voir note plus haut)
½ tasse de lait entier sans lactose
2 c. à soupe de beurre ou de margarine, fondu et refroidi (ou de l’huile)
1 c. à thé de vanille (mon ajout)

Préchauffer le four à 400 °F et graisser les 12 cavités d’un moule à muffins.

Dans un grand bol, mélanger avec un fouet la farine, le sucre, la poudre à pâte, le sel et les ajouts.

Dans un autre bol, battre l’œuf légèrement. Ajouter le gruau et écraser à la fourchette pour défaire les grumeaux. Ajouter le lait et le beurre (et la vanille, si vous l’utilisez) et bien mélanger (à la fourchette ou au fouet).

Verser les ingrédients humides sur les ingrédients secs et mélanger seulement jusqu’à homogénéité. Diviser la pâte entre les cavités du moule à muffins préparé. Cuire au four de 15 à 20 minutes, ou jusqu’à ce qu’un cure-dents inséré au milieu d’un muffin en ressorte propre. (Les muffins seront encore pâles.) Servir tièdes, idéalement (voir note plus haut).

Thursday, April 27, 2017

Chocolate Haupia Pie Squares


Have you heard of haupia? It’s essentially a Hawaiian dessert made with coconut milk that has been thickened to a gelatinous consistency. It’s the kind of thing that, at a buffet, I would avoid just because I don’t know whether it’s dairy or not. This recipe, though, is dairy-free – heck, it’s vegan and paleo, so enjoy! Just remember to make it a day ahead to give it enough time to solidify. The crust came out a bit too dry and crumbly for me, so I’d use more dates next time, or less cocoa, and refrigerate it until the filling is ready. I think this would also work with another type of chocolate crust if you wanted to make something without nuts and with flour, for example. In any event, everyone here liked it!

For the chocolate crust
⅔ cup raw almonds
⅔ cup raw pecans
10 large medjool dates, pitted (or more, see note above)
6 Tbsp. raw cacao powder

For the haupia
½ cup arrowroot powder/starch
¾ cup water
1 can full fat coconut milk
4 Tbsp. raw honey or maple syrup
½ tsp. vanilla extract
¼ cup dark chocolate, chopped and melted

For the chocolate crust
Pulse the nuts in the food processor, leaving a few small chunks. Add the dates and process until creamy. Add the cocoa and process one last time until well combined. Spread evenly on the bottom of an 8”-square pan lined with parchment paper. Set aside in the refrigerator.

For the haupia
Combine the arrowroot powder and water in a saucepan and mix until all the arrowroot has dissolved.

Add the coconut milk and honey; slowly cook over medium-low heat, stirring constantly, until mixture thickens.

Remove from heat and mix in the vanilla extract. Slowly pour mixture over the crust and refrigerate overnight or until the coconut layer is firm.

Cut into squares and drizzle with melted dark chocolate. (I decided to drizzle the chocolate on top before cutting the bars, as it’s less messy.)

Carrot Orzotto

Here’s the last of the saved promo recipes that had been cross-pollinated in Better Homes and Gardens as well as Coup de Pouce. I don’t know if you remember the carrot risotto I once made, adapted from Dirt Candy? I really only made it once, because it was so labor-intensive. But this recipe is like its fast, easy cousin, and I’m sure I’ll actually make it again. Plus, I love orzo! I used store-bought julienned carrots; shredded would work, too. It came out really great, and the lemon juice really brightened it up. I served it without feta, though I’m sure it would be great with it if you can digest it. I served it with turkey breasts stuffed with kale and bacon that I had in the freezer.

2 cups carrot juice
1 ¾ cups chicken broth
2 Tbsp. butter or margarine
1 Tbsp. olive oil
10 oz. (1 ½ cups) dried orzo pasta
1 cup matchstick carrots (see note above)
½ cup water
¼ tsp. salt
½ lemon, zested and juiced (roughly 1 tsp. zest and 1 ½ Tbsp. juice)
½ cup crumbled feta cheese (optional, as this isn’t lactose-free)
freshly ground black pepper

In a medium saucepan, heat carrot juice and chicken broth over medium-low heat; cover to keep warm.

Meanwhile, in a large skillet, heat butter and oil over medium heat until melted. Add orzo; cook and stir 3 to 5 minutes or until orzo is golden brown. Stir in carrots. Add about 1 cup of the hot broth mixture to the orzo. Stir until absorbed. Continue adding broth mixture, 1 cup at a time, stirring until just absorbed. Cook until orzo is tender. Remove from heat. Slowly stir in up to 1/2 cup water until creamy. Stir in salt, lemon zest, and lemon juice. Top with feta (if using) and freshly ground pepper. Serve immediately.