Sunday, March 05, 2017

Blueberry Poppy Seed Snacking Cake

I adapted this recipe slightly from Cook Republic, which itself had adapted from Tara O’Brady’s recipe (published in her cookbook). It is a really great cake for snacking, as it isn’t too sweet, but we ate it for dessert. Note that I used white whole wheat flour with a bit of corn starch instead of cake flour, and I used turbinado sugar because I happened to have a bag of it on hand and needed to use it up. It was really good!

255 g. unbleached cake flour
2 Tbsp. poppy seeds
1 pinch of crushed sea salt flakes
1 tsp. baking powder
1 cup (2 sticks) salted butter or margarine, softened
250 g. turbinado sugar (cane sugar will do, but use a bit less)
4 eggs
2 tsp. vanilla bean paste
2 Tbsp. crème fraîche (or lactose-free sour cream or Greek yogurt)
zest of 1 small orange or lemon, finely chopped
juice of half a small orange
1 cup fresh or frozen blueberries (I used frozen)

Preheat oven to 300 °F. Grease and line a 9-inch springform pan with parchment paper; grease the paper again.

Whisk flour, poppy seeds, salt, and baking powder in a medium bowl. Set aside.

In a separate bowl, cream the butter and sugar for 5 minutes with an electric beater until pale and fluffy. Add vanilla, eggs, crème fraiche, orange juice and zest. Beat until smooth.

Fold the flour mixture and blueberries in the wet batter gently until thoroughly combined.

Scrape into the prepared pan and bake for approximately 55-60 min until golden, cooked through the middle when tested with a skewer, and coming away from the edges.

Citrus Avocado Salad

I know it’s the tail end of citrus season, but this salad is absolutely, positively worth your time. I adapted it a bit and only used three kinds of citrus, and it was delicious. I also adapted the dressing recipe, since the quantities weren’t very conducive to being scaled down for my purposes – the variation below is mine. This was so simple, and yet mind-blowingly good!

And hey, if you have blood oranges left, try this blood orange chia pudding; you can thank me later.


For the salad
3-4 cups mixed greens (my favorite is arugula, but this time I used spinach)
2 navel oranges
2 cara cara oranges
2 tangerines
3 mandarin oranges
1 blood orange
3-4 Persian cucumbers, thinly sliced (I used baby cucumbers)
2 avocados, cut into wedges
kosher salt and pepper, to taste

For the dressing
1 cup tightly packed basil leaves, stems removed (about 2 oz.)
2 Tbsp. white wine vinegar
1 generous pinch garlic powder
4 Tbsp. olive oil
kosher salt, to taste

For the salad
Arrange the lettuce on a large platter or bowl (I did this directly in the plates).

Carefully slice the peel off the citrus. Cut the citrus into slices and carefully pop out any seeds (you can cut them into pretty circular slices or more convenient segments, it’s up to you).

Arrange the citrus, cucumbers, and avocados in and around the lettuce and season with salt and pepper.

For the dressing
Combine all the ingredients in a high powered blender (I used an immersion blender) and blend for 60 seconds, until very smooth. Drizzle on top of the salad. (Leftover dressing keeps well in the fridge for a few days.)

Saturday, March 04, 2017

My new go-to pancakes


Remember when I went looking for a good go-to pancake recipe? You can read Part 1 and Part 2 to refresh your memory. Despite my love of Clayton Miller’s pancakes, the recipe that had the best taste/effort ratio was basically the lofty buttermilk pancakes that call for separating eggs but not whipping the whites, and I’ve since found an interesting article on the topic that basically confirms that they are indeed loftier than if the eggs had not been separated OR if the whites had been whipped, surprisingly enough! But there were still recipes that I wanted to try, so I did.

There were Amy Halloran’s pancakes (she of the 10 pancakes commandments), but I didn’t like them. I only got 3 smallish ones out of the recipe (which was supposed to yield 4 to 6 servings!), so I had to make a second batch to serve for breakfast; I found the batter too thick, and the resulting pancakes were also too thick and bready, and sometimes they weren’t cooked all the way through. I wasn’t at all impressed. Then there was a brief interlude with cream cheese pancakes, but those were a flop as well.

Enter this recipe I had seen for Scottish pancakes. I had made them once, but while they were delicious, I was not satisfied with their height. Which isn’t to say that they weren’t fluffy, it’s just that if you take a look at the original blog post, you’ll see that they are ridiculously tall! The author used a biscuit cutter to shape them in the pan. Since I didn’t have a biscuit cutter, I decided to get round silicone egg molds and try again. This admittedly took a while before I got around to it, and in the end, I don’t think the molds are worth it, because the pancakes just won’t puff up like in the original post (though it looks like she used all the batter to make 3 pancakes, so obviously her molds are much taller than mine!). The pancakes are delicious either way (though I omitted the cinnamon the second time and prefer them like that, so that’s what I’m writing below). I got 12 little pancakes, and would consider just doubling the recipe next time. I think these are my favorite easy pancakes to make! I haven’t tried combining this recipe with The Kitchn’s tip for tender diner-style pancakes, but let me know if you do!

200g all-purpose flour
1 Tbsp. baking powder
1 pinch of salt
1 Tbsp. sugar
2 eggs
1 ¼ cups lactose-free milk

In a mixing bowl, whisk together flour, baking powder, salt, and sugar.

In another bowl, combine eggs and milk and whisk vigorously until eggs are foamy.

Whisk the dry ingredients into the wet ingredients until just combined. Set aside for 15 minutes.

Put a teaspoon of butter, margarine or oil in a pan and melt over medium heat. Drop a ladle-full of batter into the pan and cook until it starts to rise up and bubble; flip over and continue to cook until golden brown. Remove from the pan and keep warm while repeating with the rest of the batter, greasing the skillet again as needed.

Serve warm with syrup and fresh berries, if desired.

Persian Chicken Stew with Prunes and Dried Apricots

This chicken stew was pretty easy to make, and it was a big hit – we all loved it! The Little Prince even had third helpings of chicken (though he showed no interest in the dried fruit). The original recipe says the vegetarians can use legumes instead of chicken, and you can obviously spice it up to your liking. I served it on rice and it was a complete meal.

3 Tbsp. neutral oil (such as grapeseed or canola)
1 medium-size onion, sliced thin
3 garlic cloves, minced
8 bone-in skinless chicken thighs and legs (I used boneless chicken thighs and cut them into pieces)
½ tsp. turmeric
1 tsp. cumin powder
1 tsp. sea salt (or to taste)
½ tsp. chili pepper flakes or powder (optional, I didn’t use it)
1 ½ cups crushed tomato sauce
2 ½ to 3 cups lukewarm water (2 cups were enough for me)
1 Tbsp. saffron threads, crushed into powder in a pestle and mortar, dissolved in 2 Tbsp. of hot water
1 stick cinnamon
1 tsp. freshly grated ginger
1 cup pitted prunes
½ cup dried apricots
juice of two limes
herbs of your choice, for garnish

Place a wide, heavy-bottomed pan with a lid on the stove on medium heat and add oil. Add onions and sauté for 10 minutes, until they turn slightly golden but not brown.

Turn heat to medium-high and add garlic, chicken and turmeric, and sauté until the chicken has lost its raw pink color, about five minutes. Add cumin powder, salt, chili pepper and tomatoes. Sauté for five minutes, until the spices are fragrant and the tomato sauce has reduced and looks like a thick jam. (If you find the sauce is sticking to the pan, reduce heat and add 2 tablespoons of water.)

Add lukewarm water, saffron water, cinnamon stick, grated ginger, prunes, dried apricots and lime juice, and gently stir. Reduce heat and cover with a lid to simmer for 40 minutes.

Before serving, taste and adjust for salt. Serve with your favorite fresh herbs strewn on top, alongside rice or bread.

Bacon Cheesecake


This recipe is from Trader Joe’s. It was originally for a dairy-free cheesecake, but I used lactose-free cream cheese instead of a vegan cream cheese. I tweaked a few things in the recipe (including doubling the sweeteners); the version below is mine. You could of course use graham crackers or another cereal for the crust. We enjoyed this cake, and the Little Prince was particularly tickled to see bacon in a dessert!

4 cups multigrain Puffins cereal
4 strips bacon, cooked and divided
½ cup margarine, melted (I think this would work with coconut oil, too)
2 8-oz. containers lactose-free cream cheese (vegan or not), at room temperature
2 large eggs
½ cup brown sugar
¼ cup maple syrup

Preheat oven to 350 °F.

In a food processor, combine cereal and two strips of bacon. Pulse to create crumbs. Mix crumbs with buttery spread. Press into a 9-inch pie plate (I used a springform pan). Bake for 10 minutes and set aside to cool.

In a mixing bowl, combine cream cheese, eggs, sugar and maple syrup. Using a hand mixer on medium speed, blend the ingredients until smooth and creamy. Pour into cooled crust. Bake for 30-35 minutes. Let cool.

Crumble two remaining strips of bacon and save for garnish. Refrigerate for at least one hour before serving.

Wednesday, March 01, 2017

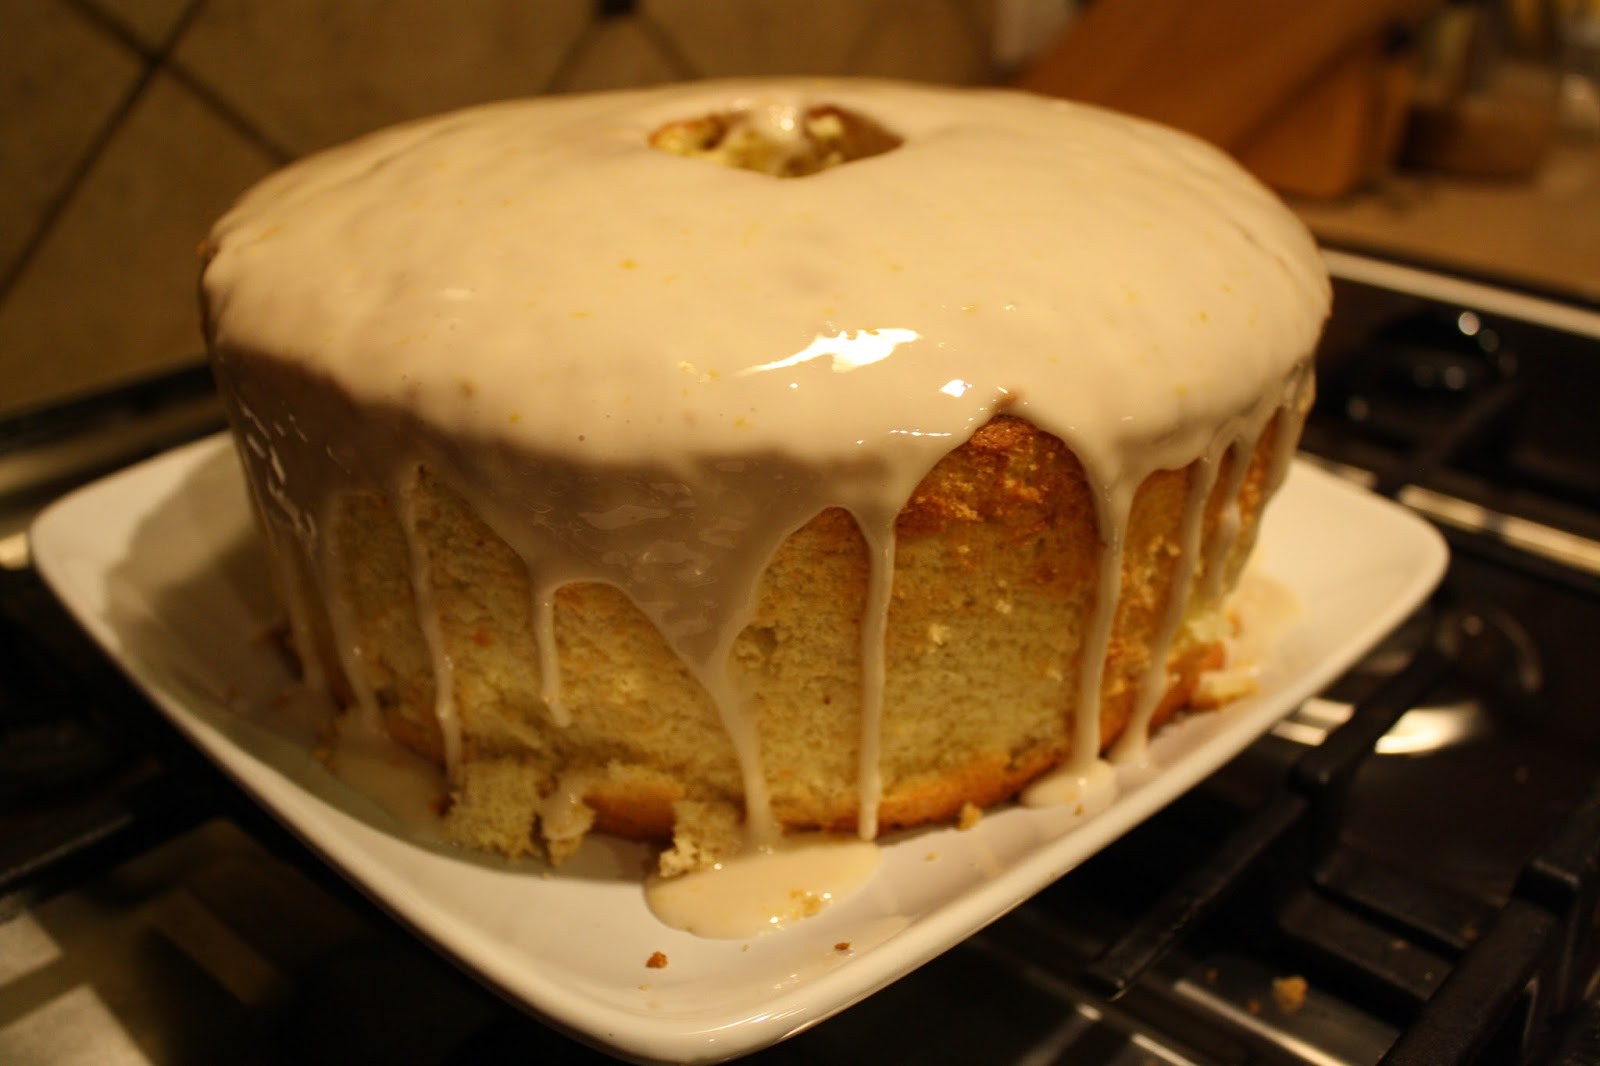
Meyer Lemon-Olive Oil Chiffon Cake


This cake was delicious, and probably the best use of Meyer lemons this year. I love chiffon cakes, as the crumb is so fluffy and moist. The recipe is from The Kitchn. Note that I only needed 5 Meyer lemons to yield ¾ cup of juice (whereas the recipe below calls for the juice of 6 Meyer lemons, topped up with water to yield ¾ cup). Keep this in mind of you have large lemons! Otherwise, you could potentially make this with regular Eureka lemons, but you might have to increase the sugar a bit.

For the cake
2 ¼ cups (279 g.) cake flour
1 Tbsp. baking powder
½ tsp. salt
6 Meyer lemons (1 lb.)
¼ cup water or enough water needed to add to the lemon juice to get to ¾ cup total
1 ½ cups granulated sugar
7 large egg yolks
½ cup extra-virgin olive oil
2 tsp. vanilla bean paste
10 large egg whites
1 tsp. cream of tartar

For the lemon glaze
2 cups (250 g.) confectioners' sugar
4 Tbsp. lactose-free milk, as needed to get the desired consistency
zest of 1 Meyer lemon

For the cake
Preheat the oven to 325 °F and position an oven rack in the center of the oven.

Whisk the flour, baking powder, and salt into a medium bowl. Set aside.

Zest the Meyer lemons. Squeeze the juice and strain into a glass measuring cup. You should have about ½ cup (see note above). Add enough water to make ¾ cup and mix the zest into the juice. Set aside.

Pour the sugar into the food processor and process for about 30 seconds until it is light and fine. Scoop about ½ cup of the processed sugar into a small container and set aside.

In the bowl of a stand mixer fitted with a whisk attachment (or if you are using a handheld mixer, in a mixing bowl), combine the remaining 1 cup sugar and the egg yolks and mix at medium speed for about 3 minutes, until the mixture is thick, light in color and texture, and creates ribbons in the bowl when the whisk is lifted. Add the oil and vanilla bean paste and mix until well combined.

Add 1/3 of the flour mixture and half the juice mixture, and mix to combine. Add another 1/3 of the flour mixture and the juice mixture and mix to combine, and then the remaining flour, mixing to combine. Pour the mixture into a large mixing bowl, scraping the bottom, and set aside. Clean the stand mixer bowl and whisk (or detach the handheld mixer blades and clean them and the bowl) with hot soap and water and dry very well, making sure there's not even a speck of grease on anything.

Return the bowl and whisk attachment to the stand mixer (or reassemble the handheld mixer and set up the mixing bowl), add the egg whites, and mix at medium speed until they are foamy. Add the cream of tartar, and mix at medium speed until the mixture forms soft peaks. Add the remaining sugar, a little at a time, and beat the whites until they hold stiff and glossy peaks.

Stir 1/3 of the whites gently into the batter to lighten it. Fold in half of the remaining whites until there are a few streaks remaining. Fold in the last of the egg whites just until mixed.

Carefully spoon the batter into an ungreased 10- by 4-inch tube, with feet and an ungreased removable bottom. The batter should come about ¾ of the way up the sides. (My pan doesn’t have feet, so I put it upside down on a wine bottle to let it cool – works like a charm.)

Bake for 50 to 55 minutes, or until a tester or toothpick inserted into the center comes out clean.
With oven mitts, invert the pan immediately onto a cooling rack. Let the cake cool completely in the pan.

When ready to serve, turn the cake upright on the rack, and run a thin flexible knife or offset spatula around the outer and inner edges of the pan. Turn the cake out of the pan: Place a serving plate on top of the pan and, pressing the plate firmly with one hand, invert the whole thing with the other, allowing the cake to release onto the plate.

For the glaze
In a small bowl, whisk the sugar, milk, and lemon zest until blended. Drizzle liberally over the cake, letting it drip.

Caliente Hot Glass

I was saving this for the next batch of outings, but now I realize it’s probably not going to happen anytime soon, so I’ll turn it into a post now. In November, we spent a day in Gruene once again. It was busier than we thought, because in addition to it being Thanksgiving weekend, the town is now holding a Christmas market for 3 weeks straight! Thankfully, there is more parking than I remembered last time. We even made it to lunch at the Gristmill!


Our December outing was awesome: we went to a free demonstration at Caliente Hot Glass, a local glass-blowing studio and gallery. (As of this writing, the free demos are on the second Sunday of the month, but check the website to be sure.) Glass blowing is the type of hobby I never think of when I wonder if I want to take up anything (like ceramics or yoga, sure, but glass blowing?), and yet it is so cool to watch! Well, hot, really, because the furnaces are really going. We learned about what temperatures are needed for various colors of glass, how to make a bowl or vase (sometimes that depends more on circumstances than intentions and you have to go with it), etc. I would have stayed longer, but the Little Prince was getting restless. The studio happens to be adjacent to active train tracks, and that held his interest for much longer than glass blowing. But I had a really great time!


I was hoping to go see an exhibition about French moderns at the McNay, but I don’t think that’s going to happen before Baby Number 2 is born, and then we’ll be optimistic and say we’ll start our outings again during or after the summer…

Tuesday, February 28, 2017

Fruity Chicken Salad

I think I’ve established that I like salads with fruit in them. I made one from Coup de Pouce with leftover turkey, pearl couscous, carrots and raisins with an orange dressing (granted, raisins aren’t much in the way of fruit, but this was great to polish off leftover turkey from the holidays). I also tried a farro salad with roasted squash, pomegranate, and persimmons, after reading this guide to persimmons. It’s too bad I only caught the tail end of the season, because I really liked them! And of course there was my lemon chicken salad with oranges and pomegranates. All this to say that it should come as no surprise that I’m overjoyed with this so-called rainbow chicken salad with almond honey mustard dressing! Both the Engineer and I loved this salad; the Little Prince liked the grapes, chicken and dressing on day 1 (and asked for more of each), and on day 2, he decided that maybe the blueberries were pretty good too. Note that to make this nut-free, in addition to eliminating the chopped almonds, I’d recommend using sun butter or tahini instead of almond butter in the dressing.

For the salad
2 tsp. vegetable oil
8 oz. boneless, skinless chicken breasts or cutlets
½ tsp. salt
½ tsp. pepper
1 tsp. chili powder (or a pinch of Korean pepper)
2 cups red grapes, halved
1 cup fresh blueberries
3 cups curly lettuce, chopped
½ cup feta cheese (I omitted that)
½ cup almonds, chopped or crushed (mine were roasted and salted; see note above)

For the dressing
3 Tbsp. almond butter (see note above)
1 Tbsp. olive oil
2 Tbsp. freshly squeezed orange juice
3 Tbsp. water
1 Tbsp. stoneground mustard
½ Tbsp. honey
¼ tsp. salt, more to taste
½ tsp. garlic (I used some garlic powder instead)

Heat the oil in a large skillet over medium high heat. Sprinkle the chicken with the salt, pepper, and chili powder. Sauté in the oil for a few minutes, flipping the chicken now and then to cook through and get a nice golden color on both sides. When the chicken is cooked, remove from heat and set aside.

Cut and prep all the vegetables and fruits. When the chicken is cool enough to handle, cut into bite sized pieces. Place the salad ingredients in a large bowl - you can either arrange the bowl by ingredient, as in a salade composée, or toss everything together. Refrigerate to chill.

For the dressing, purée all the dressing ingredients in a food processor until smooth (I did this with my immersion blender). Taste and adjust to your preferences. Pour dressing over salad and serve.

Raspberry Yogurt Cake with Meyer Lemon Frosting

This cake was a good way to use Meyer lemons. They go well with raspberries, and in this case the frosting was a wonderful vehicle for their taste. You could even add some Meyer lemon zest in the cake, if you wanted. I’ve changed the frosting recipe a bit, though, because it originally called for “the juice of 2 Meyer lemons”. I hope you realize how arbitrary that is! The amount of juice in one Meyer lemon could be anything between 1 tablespoon and 4 tablespoons, and the amount of liquid in frosting is particularly important! Therefore, I recommend starting with 2 tablespoons and going from there.

For the cake
8 Tbsp. unsalted butter or margarine, room temperature
1 cup sugar
3 eggs, separated
2 cups flour
1 Tbsp. baking powder
1 tsp. salt
½ tsp. baking soda
1 cup plain lactose-free Greek yogurt
1 cup raspberries, fresh or frozen

For the frosting
8 oz. lactose-free cream cheese, room temperature
8 Tbsp. unsalted butter or margarine, room temperature
zest and juice of 2 Meyer lemons (see note above)
1 pinch of salt
4 cups powdered sugar, sifted

Preheat the oven to 320 °F. Grease and line four 6" round cake pans or two 8" or 9" round cake pans with parchment paper and set aside (I used two 9” pans).

In a large bowl, cream the butter and sugar until light and fluffy. Add the egg yolks one at a time, mixing after each addition.

In a medium bowl, whisk together the flour, baking powder, salt and baking soda. Add to the wet ingredients and mix until mostly combined. Add the yogurt and mix until combined.

In a separate bowl, beat the egg whites to medium peaks, then fold them into the cake batter. Fold the raspberries into it as well.

Divide the batter evenly between the pans and bake 25-30 minutes (this worked well for 9” cakes, but it would be less for 6" cakes), or until a toothpick comes out clean. Let the cakes cool in the pan for about 10 minutes before turning them out onto a wire rack to cool completely.

To make the icing, mix the cream cheese and butter together until smooth. Add the lemon zest and 2 tablespoons of the lemon juice and mix until combined. Slowly add powdered sugar and mix until combined. You can adjust the consistency as you wish (more lemon juice to make it runnier, more powdered sugar to make it stiffer). Frost the cake and store it in the fridge.

Saturday, February 25, 2017

Muffins à la noix de coco et à la confiture

Cette recette, tirée des Carnets de Miss Diane, s’appelait à l’origine « moelleux » à la noix de coco et à la confiture. Personnellement, je n’ai pas trouvé ces petits gâteaux si moelleux que ça – peut-être qu’il faudrait les faire cuire un peu moins? En tout cas, ça fait de délicieux petits muffins! J’en ai obtenu 8 et je les ai fait cuire dans des moules en silicone, pour un démoulage facile (puisqu’ils ne contiennent pas de gluten). Pour la confiture, j’ai utilisé un reste de confiture de framboise (achetée pour les rugelachs), mais c’est facile à adapter à ce que vous avez sous la main!

½ tasse de yogourt nature sans lactose
¼ de tasse de sucre granulé
½ tasse de farine de riz
¼ c. à thé de poudre à pâte
2 c. à soupe d'huile végétale
2 œufs
¾ de tasse de noix de coco râpée
confiture de fraises (ou de votre choix), maison ou du commerce

Préchauffer le four à 350 °F.

Mélanger les ingrédients, sauf la confiture de fraises, dans l'ordre en brassant bien à chaque addition. Verser la pâte dans des moules à muffins en les remplissant aux ¾ et ajouter environ 1 c. à thé de confiture sur chaque muffin. Enfourner et cuire de 15 à 20 minutes. Laisser tiédir avant de démouler.

Friday, February 24, 2017

Batch of links

- The Oscars are this weekend! Take a peek at the after-party menu.

- There’s a drive-thru that sells salads at fast-food prices! It figures this would not at all be on our way to Quebec from Texas…

- Here’s why and when to bloom cocoa powder, i.e. steep it in warm liquid to develop its flavor.

- Have you seen white stripes on some chicken breasts? Here’s why some people avoid them.

- Would you look at these weird paper towels?

- Produce stickers might be replaced with lasering logos instead, but am I the only one who might occasionally want produce that hasn’t been literally branded?

- GQ had this great interview with Tom Hiddleston recently, and then Bon Appétit set out to recreate his Bolognese recipe.

- Parents had an article about families dealing with food allergies, which made me think I haven’t mentioned the “new” guidelines according to which the best way to prevent food allergies in children is to introduce allergens early, not delay their introduction. I used quotation marks on “new” because technically, those guidelines already existed when I was pregnant with the Little Prince, and those are the ones I followed with him. That being said, it’s true that the information hadn’t made its way into the general population; even my doctor wasn’t aware. I remember having this discussion with my then-neighbor: she had a shellfish allergy and was adamant about delaying the introduction of nuts into her children’s diet. I told her the evidence showed it was actually the opposite that was beneficial, but didn’t press the point so as to avoid an argument, because how one raises one’s children is a very touchy subject. For what it’s worth, both her kids now have food allergies, though there’s obviously no proof of causation here, this is entirely anecdotal. So anyway, there you go, hopefully now everyone is aware of the evidence.

- Related: Mylan, which makes the EpiPen, now makes a generic version. CVS also makes an even cheaper alternative, and Auvi-Q is back on the market. More tips here. There’s also hope for eventual treatment with immunotherapy.

- I thought this article titled To Obama with love, hate, and desperation, about the letters sent to President Obama, was both interesting and moving – his staff selected ten for him to read each day.

- I really enjoyed this article on Leonard Cohen’s Montreal. (Here’s another on the same topic.)

- The Globe and Mail recently conducted an investigation into why so many sexual assault claims are dismissed as unfounded by the police. It’s a long read, but very informative – it turns out that “unfounded” doesn’t actually mean “no evidence it happened”. As a result, some places, like the province of Quebec, are reviewing their policies.

- American Girl released its first boy doll last wekk. Some people are not happy about this, but I’m thrilled! It’s about time boys had a doll – hopefully there will be more eventually. They also have dolls with various disabilities and medical conditions.

- Also, while on the topic of gender equality for children: I love Free to Be Kids, a clothing company that makes “clothing with positive messages, designs that flip the script on gender clichés, and stylish, on-trend design”. I recently ordered a t-shirt for the Little Prince from them. In the same vein, I also like Jessy & Jack.

- Finally, it’s Black History Month. I think the U.S. have (overall) done a good job of integrating topics like slavery and the Civil Rights Movement to school curriculums, and I look forward to the day when we just call it “history” without specifying race. That being said, the whole point of this month is to raise awareness, and we still have a long way to go. Did you know that there used to be Black slaves in Quebec, for example? And here’s an African-American woman with whom I’m not nearly familiar enough, given how much I like rock and roll: Sister Rosetta Tharpe. She influenced musicians like Elvis Presley, Chuck Berry, Johnny Cash, Jerry Lee Lewis, and Little Richard. I think this is the first performance I saw of hers. I need to get myself one of her compilation albums!

Tuesday, February 21, 2017

Eggnog Tart

This recipe was originally titled Holiday Nog Pie with Coconut and Gingersnap Crust, and it was vegan. I couldn’t find vegan eggnog, though, so I used Lactaid’s lactose-free pasteurized eggnog. I made a non-alcoholic version, naturally, so that’s what I’m writing below. You can also make this nut-free by using something other than almond milk. For the coconut milk, make sure to use something without stabilizers, otherwise it won’t congeal properly in the fridge.

In the original recipe, one had to reduce 1 cup of eggnog down to ¼ cup and then proceed with making the filling. However, that made a very small amount of filling, more like a little puddle in the crust – it didn’t even reach all the sides! So I went ahead and doubled the amounts, below. I think that the original amounts would be alright for a 6- or 7-inch tart pan, but certainly not the standard 9-inch pan that was recommended! You might have filling left over, in that case, but I’d prefer that to not having enough. I don’t think that simply reducing the eggnog to a lesser extent would be a good idea, from a consistency standpoint.

With the rest of my eggnog, I made bread pudding, which was only so-so – I think French toast would have been better! I also drank a small glass of it, but this isn’t the kind of beverage I would consume in large quantities, even during the holidays.

For the crust
1 bag (10 oz.) gingersnap cookies
¼ cup (30g) coconut flour
1 pinch ground ginger, optional
1 pinch of fine sea salt
¼ cup coconut oil, melted (but not hot)
2 Tbsp. unsweetened almond milk (see note above)

For the filling
2 cups lactose-free eggnog
2 (13.5-oz) cans full fat coconut milk, refrigerated overnight (see note above)
½ cup turbinado sugar
½ cup coconut oil
1 pinch of freshly grated nutmeg

For topping
freshly grated nutmeg
coconut whipped cream
gingersnap cookies, crushed

Preheat oven to 325 ˚F. Line the bottom of a 9″ tart pan with parchment paper and spray with oil; set aside.

In a food processor, mix the gingersnap cookies, coconut flour, ground ginger (if using), and sea salt into a fine meal. While the processor is still running, drizzle in the coconut oil and continue processing until the crumbs have completely absorbed the oil (no more than 30 seconds), then drizzle in the almond milk and pulse just until combined. Press the mixture between your fingers to make sure it sticks together. If so, you’re good to go; if not, add almond milk, 1 tablespoon at a time, until the mixture sticks together when pressed between your fingers.

Press the crumbs into the bottom of the tart pan and up the sides. Transfer to the freezer to chill for 10 minutes. Once chilled, put on a baking sheet and place in oven. Bake for 11-12 minutes. Once baked, remove from oven and cool on a wire rack.

Put the eggnog in a small saucepan set over medium heat and cook until reduced to a scant ½ cup, about 25-30 minutes (make sure to keep an eye on this, especially if there’s real dairy in your eggnog, as milk can boil over). Once the mixture has been reduced, open the cans of coconut milk and scrape the thick, white cream off the top (you should have at least 400 g. of cream) and add it to the saucepan. (I freeze the coconut water that remains, with the intention of using it for smoothies.) Add the sugar, coconut oil, and nutmeg, and simmer on medium heat for about five minutes, whisking every minute or so. Remove the pan from the heat and set it aside to allow the mixture to cool for about 15 minutes.

Slowly pour the mixture into the crust. Refrigerate for at least 12 hours, then transfer to the freezer to firm up completely (two more hours).

When you’re ready to serve, remove from freezer, top with freshly grated nutmeg or topping of your choice, and let sit at room temperature for about 15 minutes before slicing.

Monday, February 20, 2017

Black Cherry and Marzipan Bread Pudding


I really like bread pudding. Or at least, I do in theory, even though some recipes fall flat (like orange maple French toast casserole, a somewhat bland dish that called for twice as much syrup as it should have and in which the orange segments completely disintegrated). Luckily, the LCBO’s Food & Drink came through with this recipe for black cherry and marzipan bread pudding, published over the holidays. It was fantastic! A bit nerve-racking, though, because there’s really a lot of bread cubes and liquid to fit into a loaf pan, but it all worked out for the best. And the result was a moist bread pudding sturdy enough that it can be unmolded and sliced – it was delicious as part of an indulgent breakfast, but it could work for dessert as well. I just love the combination of almond and cherry, especially when the almond is in the form of marzipan!

Note that I’m giving you the amounts that worked for me below (including lactose-free substitutions). Also, I recommend putting the marzipan in the freezer for 30 minutes before starting on the recipe, it’ll be easier to grate that way. I used a big loaf of challah (though brioche would work too) and sliced it into roughly 1”-cubes.

¼ cup butter or margarine, melted
9 cups cubed day-old brioche or challah
½ cup good-quality black cherry jam (I used St-Dalfour)
3½ oz. (105 g) marzipan
1 can coconut milk, topped up to 2 ½ cups with lactose-free milk
2 eggs
2 egg yolks
½ tsp vanilla extract or paste
2 Tbsp. sugar
¼ tsp salt
½ tsp cinnamon
1 Tbsp. coarse decorative white sugar (optional)

Preheat oven to 350 °F.

Generously grease a 9½ x 4½-inch (24 x 11 cm) loaf pan. Line with a strip of parchment trimmed to the length of the pan (the ends don’t need to be covered), leaving ample overhang along sides to later become handles and aid in the removal of the loaf.

Arrange 3 cups of the bread cubes evenly over bottom of pan; using only half of the jam, spoon randomly in dollops over bread. Grate roughly one-third of the marzipan overtop. Arrange another 3 cups of the bread over, and once again top with half the jam and one-third of the marzipan. Finish with the final third of bread, then the final third of the marzipan. (I pressed everything down gently to make it fit into the pan.) Drizzle melted butter over the top.

In a large bowl, whisk together the milk mixture, eggs and egg yolks; stir in vanilla, sugar, salt and cinnamon. Gently pour over bread (really take your time here) and let stand for 20 minutes to allow bread to absorb custard mixture. Sprinkle decorative sugar overtop and bake for 40 minutes or until puffed and golden. Let stand at room temperature for at least 1 hour (hot bread pudding will be too delicate to turn out) before removing from pan and slicing into pieces.

Sunday, February 19, 2017

Vegan mac & cheese from a box

I tried three kinds of boxed vegan mac & cheese. First up, Earth Balance’s cheddar flavor. It was delicious, though not quite as orange as I would have expected – perhaps more annatto coloring would do it? I also have a bit of a quibble about serving sizes (this seems to be consistent across all brands, though): the box says that it contains 2.5 servings, which is a weird number to begin with, but I end up eating all of it for lunch! What’s up with that? In any event, this was a really good mac & cheese, I’d recommend it.

As a side note, there’s been a recall on Earth Balance mac & cheese due to possible cross-contamination with dairy allergens… Come to think of it, I haven’t seen it in stores lately.


I also tried So Delicious’ mac & cheese (the pizza flavor, because that’s the only one that was on the shelf). I hated it. The sauce was neither creamy nor cheesy and it didn’t look or taste good. I love other products from that brand, just not their pasta, I guess.


Finally, I tried Daiya’s cheddar-style mac & cheese. This one was a bit different because the sauce comes premade in a pouch, instead of being a powder. It was almost too cheesy (read too thick), though it was delicious. Plus, they nailed the orange color! I really enjoyed this one. Bonus: I had leftovers – there’s actually more in this package than in the other brands. Did I mention it’s allergen-free?


Since I liked it so much, I also tried their Alfredo style macaroni, and I really liked that, too! It should be said that the Little Prince seems to love Daiya’s pastas as much as I do – we always polish off the box for lunch between the two of us.

Friday, February 17, 2017

Vegan Chocolate Cake with Mousse Frosting


I had this recipe bookmarked for a while and finally got around to making it recently. The cake itself was good, but what really makes it special is the mousse frosting, made with silken tofu (such as Mori-Nu, which is shelf-stable). It is luscious without being overly sweet, and it would actually make a good chocolate pudding by itself, which I’ll have to keep in mind! Plus, this dish is super easy to make.

For the cake
1 ½ cups white whole-wheat flour
1 tsp. baking soda
4 Tbsp. cocoa powder
½ tsp. salt
2/3 cup sugar
1 ½ tsp. vanilla extract
1/3 cup coconut oil
2 tsp. white vinegar
¾ cup cold water

Preheat the oven to 375 °F. Grease a 9-inch springform pan or 8-inch square pan; line with parchment paper and grease again.

Sift together the flour, cocoa, soda, salt, and sugar directly in a medium bowl. In a 2-cup measuring cup or a small bowl, measure and mix together the oil, cold water or coffee, and vanilla.

Pour the liquid ingredients into the dry ingredients and mix with a fork or a small whisk. When the batter is smooth, add the vinegar and stir quickly. There will be pale swirls in the batter as the baking soda and vinegar react. Stir just until the vinegar is evenly distributed throughout the batter and put it in the oven right away. Bake for 20 to 30 minutes and set aside to cool.

For the chocolate mousse
1 package firm silken tofu
1 tsp. cocoa powder
1 tsp. pure vanilla extract
2 Tbsp. almond or soy milk
1 pinch salt
melted dark chocolate to drizzle on top
8 to 10 oz. chocolate chips (a little over 1 1/3 cup), white or dark

Purée tofu in a food processor, scraping down the sides as needed, until completely smooth.

Add the cocoa powder, vanilla, milk, and salt to the mixture, and process until smooth.

Melt the chocolate chips in 30-second intervals in the microwave on 50% power.

Add chocolate mixture to tofu in food processor. Pulse mixture until smooth and completely combined, scraping down the sides as needed.

Spread mousse mixture on top of the cooled cake.

Drizzle melted dark chocolate on top of the mousse and sprinkle it with chocolate chips.

Carrot Tahini Muffins


These muffins from Smitten Kitchen were fabulous! Not only were they beautifully domed, but they are absolutely delicious – almost addictive. Even the Little Prince liked them. Come to think of it, I should make another batch of these! Note that I recommend the glaze, because it was great, but it is optional.

For the muffins
2 cups (260 g.) flour (I used white whole wheat, but all-purpose is fine)
2 tsp. baking powder
½ tsp. baking soda
¼ tsp. fine sea salt
½ cup (80 g.) light brown sugar
¼ cup olive oil
¼ cup (30 g.) well-stirred tahini
2 large eggs
¾ cup buttermilk substitute (or almond milk or apple cider, even)
1 tsp. vanilla
2 cups (packed) coarsely grated carrots (from about 9 oz. or 5 slim carrots)

For the glaze (optional, but recommended)
½ cup (60 g.) powdered sugar, sifted
3 Tbsp. (25 g.) tahini
2 Tbsp. (30 ml) water
toasted sesame seeds, for garnish

Heat oven to 425 °F. (I confess that I forgot this and accidently baked the muffins at 350 °F – I just left them in the oven a few minutes longer and they came out perfect anyway.) Grease a 12-cup standard muffin pan.

Whisk flour, baking powder, baking soda and salt together in a small bowl. Set aside.

Whisk brown sugar, olive oil, and tahini together in the bottom of a large bowl. Whisk in eggs, then buttermilk and vanilla. Then, using a spoon or flexible spatula, mix in the dry ingredients and the carrots until just combined.

Put the batter into the prepared muffin pan, filling each cup ¾ full (you may have enough batter for a few more muffins, but I didn’t). Bake muffins for 14 to 16 minutes, or until a tester inserted into the center of each comes out batter-free. Muffins should be domed and lightly golden on top. Let them cool in pan for 5 minutes on a rack before transferring them to the cooling rack to cool completely.

Whisk powdered sugar, tahini and water together in a medium dish. (I recommend adding the water 1 Tbsp. at a time, and leaving the glaze a bit thicker than you think you need, so that it doesn’t get absorbed by the muffin and actually forms a cap on it as it dries.) Either drizzle this over the cooled muffins or dunk them into the puddle. Sprinkle with sesame seeds, if desired.

Wednesday, February 15, 2017

Thai Coconut Soup with Udon Noodles and Tofu

This soup was an unexpected hit! I made it for lunch on a cold day, and I thought it was delicious; what was unexpected is that the Little Prince asked for seconds, and then thirds! For him, I put mostly solids in his bowl (including cut-up noodles), with only a little broth. I’d definitely make this again! Just make sure to store leftovers separately (i.e. tofu, noodles, and broth in individual containers) and only assemble and garnish prior to serving.

For the tofu
1 14-oz. package of firm tofu (this needs to be drained, so note the extra time in the directions)
1 Tbsp. honey
3 Tbsp. soy sauce
2 Tbsp. sesame oil
vegetable oil

For the sofrito
2 stalks of lemongrass (peel off the outside layer and quickly chop the tender centers of the stalks)
2 Fresno red chilies, seeded and deveined (I omitted those)
2-3 inches of fresh ginger, peeled and quickly chopped
4 garlic cloves
1 large shallot, quickly chopped
¼ cup water
1-2 Tbsp. fish sauce

For the soup
1 ½ Tbsp. vegetable oil
1 14.5-oz. can coconut milk
2 Tbsp. creamy peanut butter
1 quart chicken broth
1 Tbsp. soy sauce
1 Tbsp. brown sugar
1/3 cup lime juice (about 1 ½ limes)
10 oz. udon noodles

For garnish
1 large shallot, thinly sliced
cilantro, trimmed
sesame oil

To drain the tofu, wrap it in paper towels and set it on a plate. Place another plate on top to help press out the water. Let the tofu drain for about an hour. Mix together your honey, soy sauce, and sesame oil to make a marinade for the tofu. After draining for one hour, cut the tofu into 1″ cubes, place in a bowl or dish and pour in the marinade. Gently toss and allow it to sit while you prep all the other ingredients for the soup.

Put all the sofrito ingredients in a food processor (lemongrass, chilies, ginger, garlic, water, fish sauce, and shallot) and purée them together. Set aside.

In a bowl, gently whisk together all of the soup base ingredients except for the oil (coconut milk, peanut butter, chicken broth, soy sauce, brown sugar, and lime juice). Set aside.

Heat the vegetable oil in a large pot over medium heat. Put in the sofrito and cook, stirring constantly for a few minutes. Once it smells really fragrant and sweet, add in the coconut milk/broth mixture. Bring to a low simmer and cook the soup for 15-20 minutes.

In the meantime, bring another large pot of water to a boil. Cook the udon noodles until they are al dente, then drain them.

While you’re doing that, heat a large non-stick pan over high heat. Add a bit of vegetable oil to the pan and allow it to heat up. Carefully add your tofu cubes to the pan using a pair of tongs. Sauté the tofu until it’s nice and golden brown on all sides. Transfer the tofu to a plate and set aside.

Stir the soup well; ladle it into bowls and add in some noodles. Top with tofu, cilantro, and the thinly sliced shallot. Drizzle with a tiny bit of sesame oil and serve immediately.

Tuesday, February 14, 2017

Saffron Yogurt Cake


This saffron cake was delicious! I replaced some of the oil with applesauce and reordered the ingredients for you below, and I added precisions about the pan I used. Instead of caster sugar, you can put regular sugar in the food processor, or just use regular sugar directly. In order to make it a bit more Persian, I used rosewater in the glaze – you’re welcome. You could also top this with crushed pistachios, though we didn’t find it necessary. The saffron really dominates the tastes, as it should. Enjoy!

For the cake
2 cups plain flour
2 tsp. baking powder
1 pinch salt
1 cup caster sugar (see note above)
4 eggs
½ cup unsweetened applesauce
½ cup vegetable oil
¾ cup lactose-free Greek yogurt
4 tsp. dissolved saffron (I used a generous pinch of saffron, ground it, and added 1 Tbsp. water)

For the glaze
½ cup icing sugar, sifted
1-3 Tbsp. rosewater
chopped pistachios, to garnish

Preheat the oven to 325 °F. Grease a 9” springform pan; line the bottom with paper and grease again.

Whisk together the flour, baking powder and salt. Set aside.

Beat caster sugar and eggs for 5 minutes or until the mixture has thickened and forms a ribbon when the beater is lifted. Add applesauce, oil, yogurt and saffron; beat for a few seconds to mix.

Add the dry ingredients to the wet mixture and slowly fold in with a spatula. Scrape into the prepared pan and bake for 45 min. or until it springs back to the touch. Let cool completely.

For the glaze, mix icing sugar with 1 Tbsp. rosewater at a time, until the mixture is the right consistency (i.e., thick and not too runny – I should have used a bit less rosewater, perhaps 1 ½ Tbsp. would have been perfect).

Sprinkle with chopped pistachios and serve.