Monday, January 24, 2011

Chocolate Babkas


The Engineer is usually the one who deals with active yeast, kneading dough and letting it rise. Those steps have always intimidated me because on the rare occasion I had tried them (before even meeting the Engineer), I had failed miserably. But I decided I didn’t want that to perpetually be a hurdle, so I waded in the world of active yeast with this chocolate babka recipe. It makes two loaves, so you can always freeze one if you wish.

This recipe is from Epicurious, but I originally found it via Bread Basket Case. It’s a good thing I did, too, because that pointed out a flaw in the recipe: you’re supposed to check whether the babka is ready by unmolding it and tapping the bottom to see if it sounds hollow. The problem is that if you unmold your babka too early, it will collapse! So a better way to check doneness is to verify that the internal temperature has reached about 180 °F, at which point it’s ready. I also agree with the author of Bread Basket Case that the chocolate should be grated, rather than chopped. I made this recipe with margarine (because butter often has too much lactose for me) and white whole wheat flour (which I use almost exclusively over white flour). However, in this case, I recommend that you use real butter and white flour; the babka will be so much better that way. Also, don’t forget the egg wash in the final step like I did; I was so mad at myself for that!


For the dough
¾ cup warm lactose-free milk (105–115°F)
½ cup plus 2 tsp sugar
3 tsp active dry yeast
3 ¼ cups all-purpose white flour, plus additional for dusting
2 whole large eggs
1 large egg yolk
1 tsp pure vanilla extract
¾ tsp salt
1 ¼ sticks (10 Tbsp) unsalted butter, cut into pieces and softened (do not substitute margarine here)

For the egg wash
1 large egg yolk
1 Tbsp whole lactose-free milk

For the chocolate filling
5 Tbsp unsalted butter, well softened
8 oz fine-quality bittersweet chocolate (no more than 60% cacao), finely chopped or grated
¼ cup sugar

Making the dough
Stir together warm milk and 2 tsp sugar in bowl of mixer. Sprinkle yeast over mixture and let stand until foamy, about 5 minutes. (If yeast doesn't foam, discard and start over with new yeast.)

Add ½ cup flour to yeast mixture and beat at medium speed until combined. Add whole eggs, yolk, vanilla, salt, and remaining ½ cup sugar and beat until combined. Reduce speed to low, then mix in remaining 2 ¾ cups flour, about ½ cup at a time. Increase speed to medium, then beat in butter, a few pieces at a time, and continue to beat until dough is shiny and forms strands from paddle to bowl, about 4 minutes. (Dough will be very soft and sticky.)

Scrape dough into a lightly oiled bowl and cover bowl with plastic wrap. Let dough rise in a draft-free place at warm room temperature until doubled in bulk, 1 ½ to 2 hours. (I put the dough in the microwave oven, left with the door slightly ajar so that the light is on.)


Assembling with the filling
Line two loaf pans with 2 pieces of parchment paper (1 lengthwise and 1 crosswise).

Punch down dough with a lightly oiled rubber spatula, then halve dough. Roll out 1 piece of dough on a well-floured surface with a lightly floured rolling pin into an 18- by 10-inch rectangle and arrange with a long side nearest you.

Beat together yolk and cream. Spread 2 ½ Tbsp softened butter on dough, leaving a ½-inch border all around. Brush some of egg wash on long border nearest you.

Sprinkle half of chocolate evenly over buttered dough, then sprinkle with half of sugar (2 Tbsp). Starting with long side farthest from you, roll dough into a snug log, pinching firmly along egg-washed seam to seal. Bring ends of log together to form a ring, pinching to seal. Twist entire ring twice to form a double figure 8 and fit into one of lined loaf pans.

Make another babka with remaining dough, some of egg wash, and remaining butter and chocolate in same manner. Chill remaining egg wash, covered, to use later. Loosely cover pans with buttered plastic wrap (buttered side down) and let babkas rise in a draft-free place at warm room temperature until dough reaches top of pans, 1 to 2 hours. (Alternatively, let dough rise in pans in refrigerator 8 to 12 hours; bring to room temperature, 3 to 4 hours, before baking.)

Put oven rack in middle position and preheat oven to 350 °F.

Brush tops of dough with remaining egg wash. Bake until tops are deep golden brown and internal temperature is about 180 °F, about 40 minutes (bottoms of loaves will sound hollow when tapped once removed from the pans). Transfer loaves to a rack and cool to room temperature.


Avocado Wasabi Salad


Here’s a recipe for a salad that I really liked. I assembled most of the salad using the recipe as more of a guideline and eyeballed quantities, using what I had in the fridge. The wasabi powder really wasn’t as spicy as I feared, so this was quite good. The first time I ate it, I threw in some chopped avocado as well, but I think that was too rich with the avocado dressing. The dressing itself was thicker than I thought, with a consistency like that of mayonnaise, so it really worked only once it was mixed into the salad (as opposed to dolloped onto it). The second time, I didn’t use chopped avocado, only the dressing, and it was much better. I think I’ll reuse the chickpeas in other salads, they were quite good. I used arugula and baby spinach for this, but you can use whatever you have on hand. This makes 4 big servings as a main dish, but would be a great side dish too.

For the salad
greens of your choice for 4 people
1 carrot, shredded
2 tsp vegetable oil, divided
½ to ¾ cup broccoli florets, chopped small
½ cup toasted slivered almonds
1 recipe Wasabi Chickpeas, below
1 recipe Avocado Wasabi Dressing, below
freshly cracked black pepper

For the Wasabi-Tamari Chickpeas
1 tsp vegetable oil
1 can chickpeas
1 tsp wasabi powder
½ tsp sugar
1 Tbsp low sodium tamari/soy sauce

For the Avocado Wasabi Dressing
1 ripe avocado, diced
2 tsp white wine vinegar (I used apple cider vinegar)
3 Tbsp hummus, plain or garlic (I used some tahini)
1 tsp stone-ground mustard
½ tsp salt
2 tsp wasabi powder
¼ to 1/3 cup finishing-quality olive oil

Begin by whisking the dressing ingredients together, except for the oil. Whisk until smooth. (I did this in the food processor.) Slowly add oil until emulsified and the dressing is smooth; refrigerate until ready to use.

Toast your almonds in a dry pan over medium heat if they are not already toasted. Set aside.

In the same pan, add 1 tsp of oil and add broccoli. Sautee over high heat until the broccoli is beginning to color in spots and is bright green, but still tender-crisp. Sprinkle lightly with salt and set aside. (I completely skipped this step, as I prefer raw broccoli.)

Add the second teaspoon of oil to the same pan and add the chickpeas. Reduce heat to medium-high. Cook the chickpeas until they are golden on all sides, using a spatula to loosen them as necessary, but don’t worry if they stick a little. Add the wasabi powder, sugar, and tamari and stir well. Remove from pan and set aside.

In a large bowl, add your salad greens. Add the broccoli, ¾ of the chickpeas, ¾ of the almonds and ¾ of the carrots. Toss with enough dressing to coat. Plate the salad, and garnish the top with the remaining chickpeas, almonds and carrots. Crack fresh black pepper over the top. Serve immediately. (If you are serving the salad later, do not add the dressing until the last minute.)


Chicken Thighs Braised in Pomegranate Molasses


This recipe is from Gluten-Free Girl, by Shauna James Ahern. Even though I’m not gluten-intolerant, I really liked this book for the way it treats food and for the variety of recipes, many with grains that aren’t usually mentioned in cookbooks. This particular recipe intrigued me for the use of pomegranate molasses, an ingredient that fascinated me. While the result was very good, I found that the sauce was much more liquid than I had anticipated, and the molasses were not as present as I had hoped (even though I used more than ½ cup). I ended up using a cornstarch slurry to thicken the sauce a bit, but next time I’ll just reduce the amount of chicken stock called for (though I’ll reproduce the recipe here with its original measurements). Note that while the roasted nuts are a good garnish, you could easily omit them if you suffer from allergies. This was very good chicken, though, and I’ll be making this recipe again. These quantities make about four servings, and I made rice with gomashio as a side.


8 Tbsp high-quality olive oil
4 Tbsp unsalted butter or margarine
8 chicken thighs, bone in and skin on
1 large white onion, chopped
8 cloves garlic, peeled and chopped
3 cups chicken stock (or less, as I said; if you’re using store-bought stock, make sure it’s gluten-free)
8 Tbsp pomegranate molasses
juice of 1 lemon
2 Tbsp sugar
1 tsp kosher salt
1 tsp cracked black pepper
½ cup cashews, raw and unsalted (optional)
½ cup pistachios, raw and unsalted (optional)
zest of 1 lemon

Preheat the oven to 425 °F.

Heat 3 Tbsp of the olive oil, along with the butter or margarine, in a heavy saucepan or skillet over medium-high heat. When the mixture has become a hot liquid, add the chicken thighs. Brown them quickly, just 1 or 2 minutes on each side. Put them in a roasting pan and set aside.

Add the remaining oil and the chopped onion to the saucepan and cook until it is soft, about 2 minutes. Then add the garlic and sauté for another 2 minutes.

When the onion and garlic are soft and golden, add the chicken stock, pomegranate molasses and lemon juice. Bring to a boil. Add the sugar. Cook for 1 minute. Add the salt and pepper.

Pour the stock and molasses mixture over the chicken thighs. Cover the pan with aluminum foil and put it into the oven. Bake for 45 minutes, or until the chicken is tender and internal temperature reads 165 °F on your meat thermometer.

Ten minutes before the chicken has finished baking, put the nuts in a skillet and place it into the oven alongside the chicken. Toss the nuts a few times while toasting to make sure they do not burn. (I did this in a pan on the stovetop. Of course, you can omit this step if you have a nut allergy; the chicken will still be delicious.)

Remove the chicken and the nuts from the oven. Place the chicken thighs on a platter. Pour the molasses sauce into a saucepan and bring it to a boil over medium-high heat. Let it simmer for about 10 minutes, or until the sauce begins to thicken. Whisk in 1 Tbsp of butter and the lemon zest. Remove from the heat. Pour the sauce over the chicken thighs. Sprinkle on the toasted nuts, if using, and serve.


Saturday, January 22, 2011

Vosges chocolate


I haven’t mentioned Vosges chocolate before. I bought one of their chocolate bars almost a year ago and showed you a glimpse of it in the very first post where I talked about San Antonio. It was the dark chocolate bacon bar. The reason I didn’t mention it is actually because it was the second such bar I had tried, but it wasn’t nearly as good as the first (which I got in Montreal). As I once commented on Pork, Knife & Spoon, I actually felt that the Vosges bar didn’t taste enough like bacon. I just wish I could remember what brand I had the first time...

Anyway, I tried two more bar flavours, and I am SOLD. These two are awesome. There’s the Black Pearl Bar, a dark chocolate bar (55% cocoa) with wasabi, ginger and black sesame seeds. The wasabi is hardly noticeable, so this isn’t a spicy bar, but it goes very well with the ginger and the dark chocolate. The other bar I like is the Naga Bar, which is deep milk chocolate (45% cocoa) with sweet Indian curry powder and coconut flakes. Again, these are flavours that are somewhat unexpected, but absolutely perfect together. They’re the perfect grown-up treat. I usually grab a bar or two when we’re at Whole Foods.

The Black Pearl Bar is vegan, and both are gluten-free, but they do contain traces of nuts and peanuts.

Red Lentil Soup with Lemon


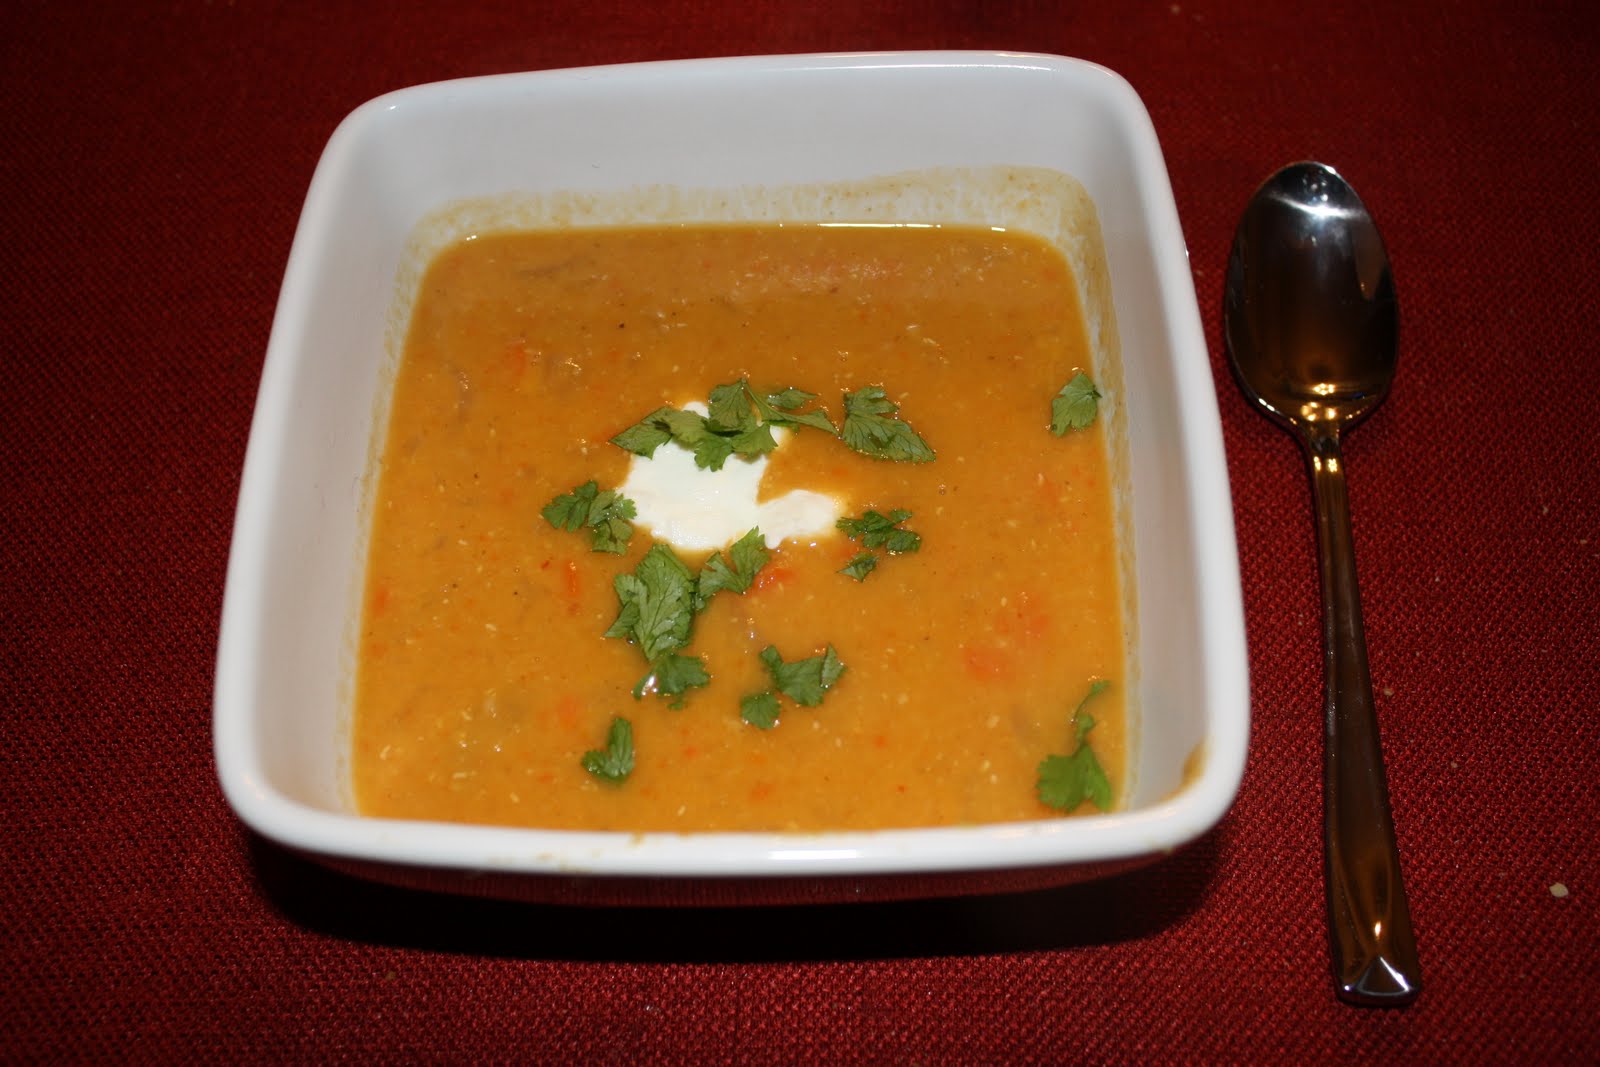
A long time ago (almost two years... yikes!), I bookmarked a red lentil soup recipe published on Tea & Cookies, because it looked like something I’d really like. I finally got around to trying it right before the holidays, after finding red lentils hiding in the bulk section of Whole Foods (and not in bags with the other lentils and beans next to the rice). I ended up adding more broth to the soup, and two carrots instead of one in order to empty the crisper drawer. I really loved it, but decided not to write about it then, partly because I took time off for the holidays and partly because I wanted to compare to another red lentil soup recipe I had bookmarked last fall. So a few weeks ago, I get around to trying that second one, published on Orangette, and do a double take when I look at the ingredients. It’s the same list as the first soup, with only a few quantities changed. It turns out that both recipes are actually based on one published by Melissa Clark in The New York Times. And you know what? It was so good the first time that I made it again.

In the end, I kept a version of it closer to Molly Wizenberg’s (Orangette), which has an extra carrot but also more broth than the original (though I stick to one onion, not two, and more other quantities remain as they are in the original recipe). This is all adjustable according to your taste, of course. I do recommend using 2 Tbsp of lemon juice, like on Tea and Cookies, which makes for a soup with a hint of lemon: enough to be a noticeable taste, but not so much that it’s lemon soup. I also use Korean pepper almost exclusively now whenever a recipe calls for cayenne pepper, chili pepper or anything along those lines. The garnishes I list here are optional, but I recommend the plain yogurt, as it complements the dish quite well. Note that I use the cilantro as a garnish rather than stirring it in the soup, as that’s what both bloggers appear to have done and I had their photos in mind rather than the textual recipe. I love this soup, as it is quick to make, healthy and savoury. This makes about 4 small main course servings, so consider doubling the recipe.

3 Tbsp olive oil, plus additional good oil for drizzling
1 large yellow onion, chopped
2 garlic cloves, minced or pressed
1 Tbsp tomato paste
1 tsp ground cumin
½ tsp kosher salt, or more to taste
¼ tsp freshly ground black pepper
pinch of Korean pepper, or more to taste
4-6 cups chicken or vegetable broth, for desired consistency
1 cup red lentils, picked through for stones and debris
2 large carrots, peeled and diced
juice of 1 lemon, or more to taste (about 2Tbsp)
1/3 cup chopped fresh cilantro
plain yogurt, good olive oil or Korean pepper, for garnish (optional)

In a large pot, warm the oil over medium-high heat until hot and shimmering. Add the onion and garlic and cook until golden, about 4 minutes. Stir in the tomato paste, cumin, salt, pepper and Korean pepper, and cook for 2 minutes longer. Add the broth, the lentils and the carrots. Bring to a simmer, then partially cover the pot and reduce the heat to maintain a gentle simmer. Continue to cook until the lentils are soft, about 30 minutes. Taste, and add more salt if necessary. Using an immersion or regular blender, purée about half of the soup. It should still be somewhat chunky, not completely smooth. Reheat if necessary, then stir in the lemon juice. Top the soup with plain yogurt and cilantro, or top with cilantro and serve the soup drizzled with good olive oil and dusted very lightly with Korean pepper, if desired.

The following pictures were taken the first time I made the soup, but I now use more broth, so it isn’t as thick.


Friday, January 21, 2011

Third time's the charm, or what to do with Buddha's hand citrus

I decided to post this recipe quickly, because Buddha’s hand citrus is only available for a short while (if you are in San Antonio, go to Central Market; if you are in Montreal, I’m guessing that Jean Talon Market or Atwater Market would be your best bet, though some specialized grocery stores might carry it too). I got this recipe on Dessert First (adapted from a Dorie Greenspan recipe), and when I saw Buddha’s hand citrus at Central Market last Monday, I seized the moment and bought one.


Buddha’s hand citrus, if you’ve never seen it before, looks like an alien fruit (something they would have as a prop at Quark’s bar on Deep Space Nine, for example). It smells fantastic and almost unreal, like freesia or perhaps...Tic-Tacs? It almost smells like candy. Once grated, it has a sharper lemon-like smell. Unfortunately, the Engineer is suffering from newly-discovered cedar allergies, and was only able to detect the lemon smell. The Buddha’s hand has no pulp to speak of, so the zest is really what’s used here. One fruit has enough zest for three of these cakes – and I know because I made three.

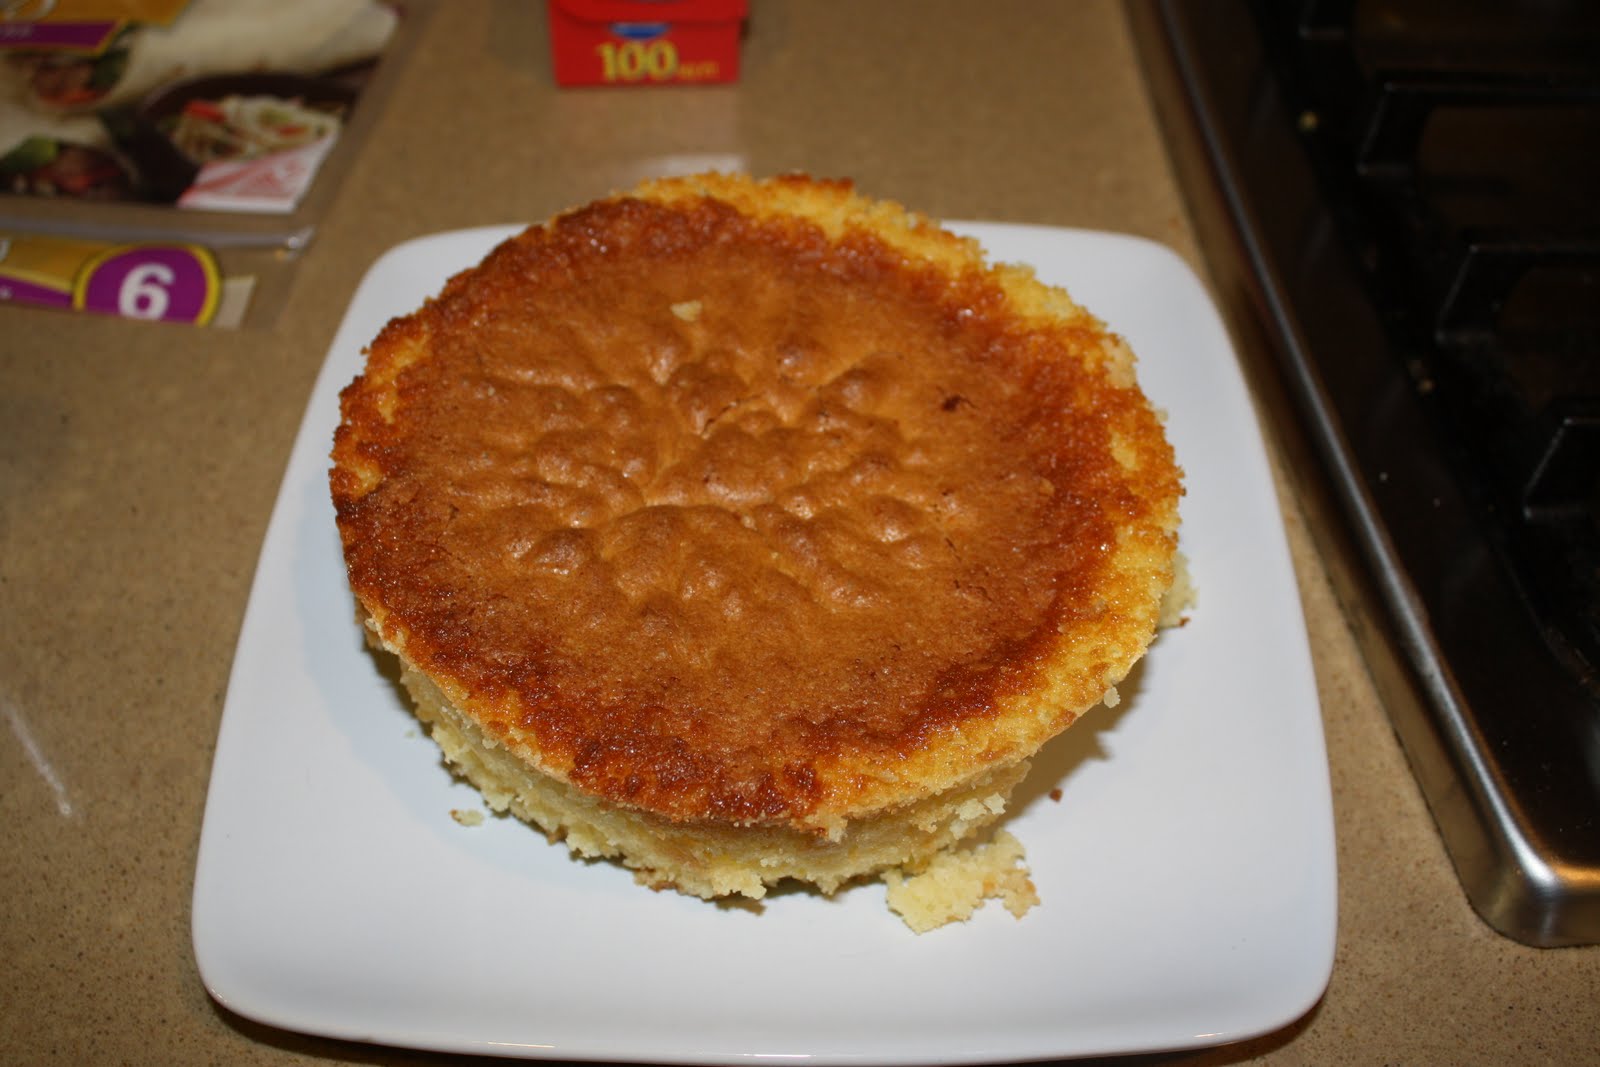
You see, I don’t have a small loaf pan like the recipe calls for, so I used this site to determine that the recipe made 4 cups of batter. I therefore used a round 6”x2” cake pan, but ended up needing two ramekins on top of that. My oven was a disaster, even though I had taken precautions with tin foil, because the batter came out of those pans. (This may have something to do with my substitution for cream – more on that in a moment.) However, the cake was so good that I just had to perfect the recipe. So I made it again, with less baking powder, in an 8”x2” round cake pan with wax paper: it worked, but was extremely hard to unmold. I tried again in a 9” round springform pan with wax paper: bingo. No spillage, easy to unmold. That’s the pan size and baking time I’ll be using here. The first two cakes were eaten quite rapidly; the third one was frozen for another time. It may be possible to freeze just the Buddha’s hand zest, which would take up less space. But since it’s a relatively rare fruit, with a price tag to match, I strongly recommend using up all the zest and not letting anything go to waste.


Instead of using 1/3 cup of heavy cream, I used ¼ cup of plain Greek yogurt (a kind I know I can digest) and added lactose-free milk until I reached the 1/3 cup mark in the measuring cup, then mixed well. I hope you get the chance to make this cake, because it is absolutely delicious. It would be good with lemon zest, too, but definitely less special.


1 ½ cups all-purpose flour
1 tsp baking powder
pinch of salt
1 ¾ cups sugar
1 Tbsp Buddha's hand zest
3 large eggs, room temperature
¾ tsp vanilla extract
1 Tbsp fresh lemon juice
¼ cup plain Greek yogurt, + enough lactose-free milk to make 1/3 cup total
8 Tbsp unsalted butter or margarine, melted and cooled
2 Tbsp candied/crystallized ginger, cut into small pieces


Preheat oven to 350 ° F, with the racks in the lowest position (I used the rack in the second-to-last bottom position, out of five). Grease a 9-inch springform pan; cover the bottom with wax paper, grease again, and flour.

Sift flour, baking powder, and salt together in a small bowl.

Combine sugar and zest in a medium bowl. Add eggs and whisk to combine. Add vanilla, lemon juice, and cream, and whisk to combine.

Using a wooden spoon, stir in dry mixture in 3 additions until smooth and combined.

Add melted butter and fold into mixture until combined. Stir in the pieces of candied ginger.

Pour mixture into prepared pan and bake for 55 to 60 minutes, until top is golden brown and a tester inserted in the center comes out clean.

Let cool on wire rack before unmolding and serving.


Spaghetti and Meatballs


My go-to spaghetti sauce, based on my grandmother’s recipe, contains ground beef. Therefore, I was never really drawn to recipes for spaghetti with meatballs, because I felt my sauce already had all you could want. Also, the Engineer doesn’t really like spaghetti, so I don’t often look for new spaghetti recipes. However, those who read this blog also know that I just love Molly Wizenberg and her recipes. So when she published a spaghetti and meatball recipe in Bon Appétit, I paid attention, especially because she said this was her perfect meatball. The Engineer and I feel that her turkey meatballs are the best thing ever, so if she says these beef-and-pork meatballs are better, she’s got our full attention. She cooks them in her tomato sauce with onion and butter, which is very simple, so I decided to try the recipe.

When the Engineer tasted it, he said, “I wish I had a time machine to give this to myself as a child; if all spaghetti were like this, I’d love it.” That’s high praise indeed! I’ll now have to alternate between this recipe and grandma’s recipe for spaghetti.

I made a double batch of meatballs and froze half for later use. The original recipe says it takes a total of 2 hours and 45 minutes to make, including cooking time. But for the first time in my life, I was done way before then, at about 2 hours. But the Engineer wasn’t home yet, so the sauce simmered a little longer than it should have. It turned out almost like a cream sauce – not what I had expected, but definitely very good. If there’s any chance you can digest butter (sometimes it’s too much lactose for me, but that depends on the person), I recommend you use it here; the taste is well worth it, and margarine wouldn’t turn out as well. Also, Molly Wizenberg says the following: “For the best texture, don’t overwork the meat mixture and use Parmesan that’s ground to a fine powder (use the processor or the rasp side of a box grater). For more heat, add ½ to ¾ tsp dried crushed red pepper to the sauce.” This makes 4 to 6 servings.

For the sauce
2 28-oz cans whole peeled tomatoes in juice, drained, juice reserved, tomatoes finely chopped
½ cup unsalted butter (or margarine if you really can’t digest butter)
2 medium onions, peeled, halved through root end
½ tsp (or more) salt

For the meatballs
1 cup fresh breadcrumbs made from crustless French or country-style bread (I used canned)
1/3 cup whole lactose-free milk
8 oz ground beef (15% fat)
8 oz ground pork
1 cup finely ground (not grated) Parmesan cheese
1/3 cup finely chopped Italian parsley
1 tsp salt
¼ tsp freshly ground black pepper
2 large eggs
2 large garlic cloves, pressed (I minced)
1 lb spaghetti
freshly grated Parmesan cheese (for serving)

For the sauce
Combine tomatoes with juice, butter, onions, and salt in large wide pot. Bring to simmer over medium heat. Reduce heat; simmer uncovered 45 minutes, stirring occasionally. Discard onions. Using immersion blender, process sauce briefly to break up any large pieces of tomato (texture should be even but not completely smooth). Season sauce with more salt and freshly ground black pepper. Remove from heat.

For the meatballs
Combine breadcrumbs and milk in small bowl; stir until breadcrumbs are evenly moistened. Let stand 10 minutes.

Place beef and pork in large bowl and break up into small chunks. Add the ground Parmesan, parsley, salt, and pepper.

Whisk eggs to blend in small bowl; whisk in garlic. Add to meat mixture.
Using hands, squeeze milk from breadcrumbs, reserving milk. Add breadcrumbs to meat mixture. Using hands, quickly and gently mix meat mixture just until all ingredients are evenly combined (do not overmix). Chill mixture at least 15 minutes and up to 1 hour.

Moisten hands with some of reserved milk from breadcrumbs, then roll meat mixture between palms into golf-ball-size balls, occasionally moistening hands with milk as needed and arranging meatballs in single layer in sauce in pot. Bring to simmer. Reduce heat to medium-low, cover, and simmer until meatballs are cooked through, 15 to 20 minutes


Cook spaghetti in large pot of boiling salted water until just tender but still firm to bite, stirring occasionally. Drain.

Using slotted spoon, transfer meatballs to platter. Add pasta to sauce in pot and toss to coat. Divide pasta among 6 plates. Top each serving with meatballs. Sprinkle meatballs with freshly grated Parmesan cheese and serve.