Saturday, May 12, 2012

BabyCakes

I’m finally getting around to reviewing the first BabyCakes cookbook, which came out three years ago (for those who don’t know, BabyCakes is a vegan bakery in New York that’s gotten rave reviews; they’ve since opened bakeries in Los Angeles and Orlando as well). I was a little angry when the first printing came out, because the tagline on the cover page of the first edition said “Vegan, Gluten-Free and (Mostly) Sugar-Free from New York's Most Talked-About Bakery”. The problem? While all recipes in the book are wheat-free, a lot of them contain spelt – which is NOT gluten-free. The editor who wrote the tagline basically hadn’t taken the time to find out what he was talking about. (The author of the book does discuss ingredients and substitutions here, and she’s well aware that spelt contains gluten.) In the second printing, it has been corrected to “Vegan, (Mostly) Gluten-Free, and (Mostly) Sugar-Free Recipes from New York's Most Talked-About Bakery”. I still have an issue with the word “sugar”, because it is used here as a synonym for “refined white sugar”, but there are tons of different sweeteners that still qualify as sugar without being the white refined stuff. A second cookbook has been published since then.


I was drawn to the idea of a vegan baking book because of my lactose-intolerance for the most part, and I also loved the idea of reducing sugar in my desserts. Because both the book and the shop were getting such rave reviews, including from non-vegans and from people who do eat wheat and, alright, because of the awesome trailer too (it’s too good not to share), I put the book on my wish list and got it for the holidays. I’ve made four recipes from it and I think I can talk about it in more general terms, now.

I started with the vanilla cupcakes, which happen to be gluten-free to boot. The recipe for both cupcake and frosting is on Epicurious. I made a half recipe, because I never want more than a dozen cupcakes in the house! My expectations were high, because this cupcake was once crowned the best cupcake of New York City (the best of ALL cupcakes, including non-vegan ones and wheat-based ones). However, my experience was quite different. I didn’t make cupcakes, I made little bricks! And the frosting never firmed up (which, according to BabyCakes' troubleshooting page online, tends to happen). They were so bad that I threw some away. ME, of all people, I threw away cupcakes – that speaks volumes. I’m not sure what happened. Perhaps I made a mistake when halving the recipe; perhaps the fact that the ingredients are written out in volumes instead of weight was a factor, as this is even more crucial when baking gluten-free; perhaps some of my ingredients weren’t fresh enough (this does happen with some gluten-free flours in my pantry). As for the frosting, I do know that it’s not the recipe used in the actual bakery; the one in the book was written to be more accessible to the home cook. So I’d love to try this recipe one more time if I ever get measurements in weight, but until then, I’m not touching it again.


After that, I made the red velvet cupcakes. I halved this recipe as well, but it turned out better. Then again, it calls for spelt flour, which gave them a consistency more like what I’m used to. They were a little dry, so I’d bake them a little less if I made them again. They were good, but not sweet at all, so they definitely need the frosting. I didn’t use the BabyCakes frosting this time, but one of my own (for a vegan frosting to pair with red velvet cake, you can try this fluffy buttercream one or that cream cheese one). The recipe for the cupcakes can be found here. As I said, they’re pretty good, but they’re certainly not dethroning my go-to utterly ridiculous red velvet cake.


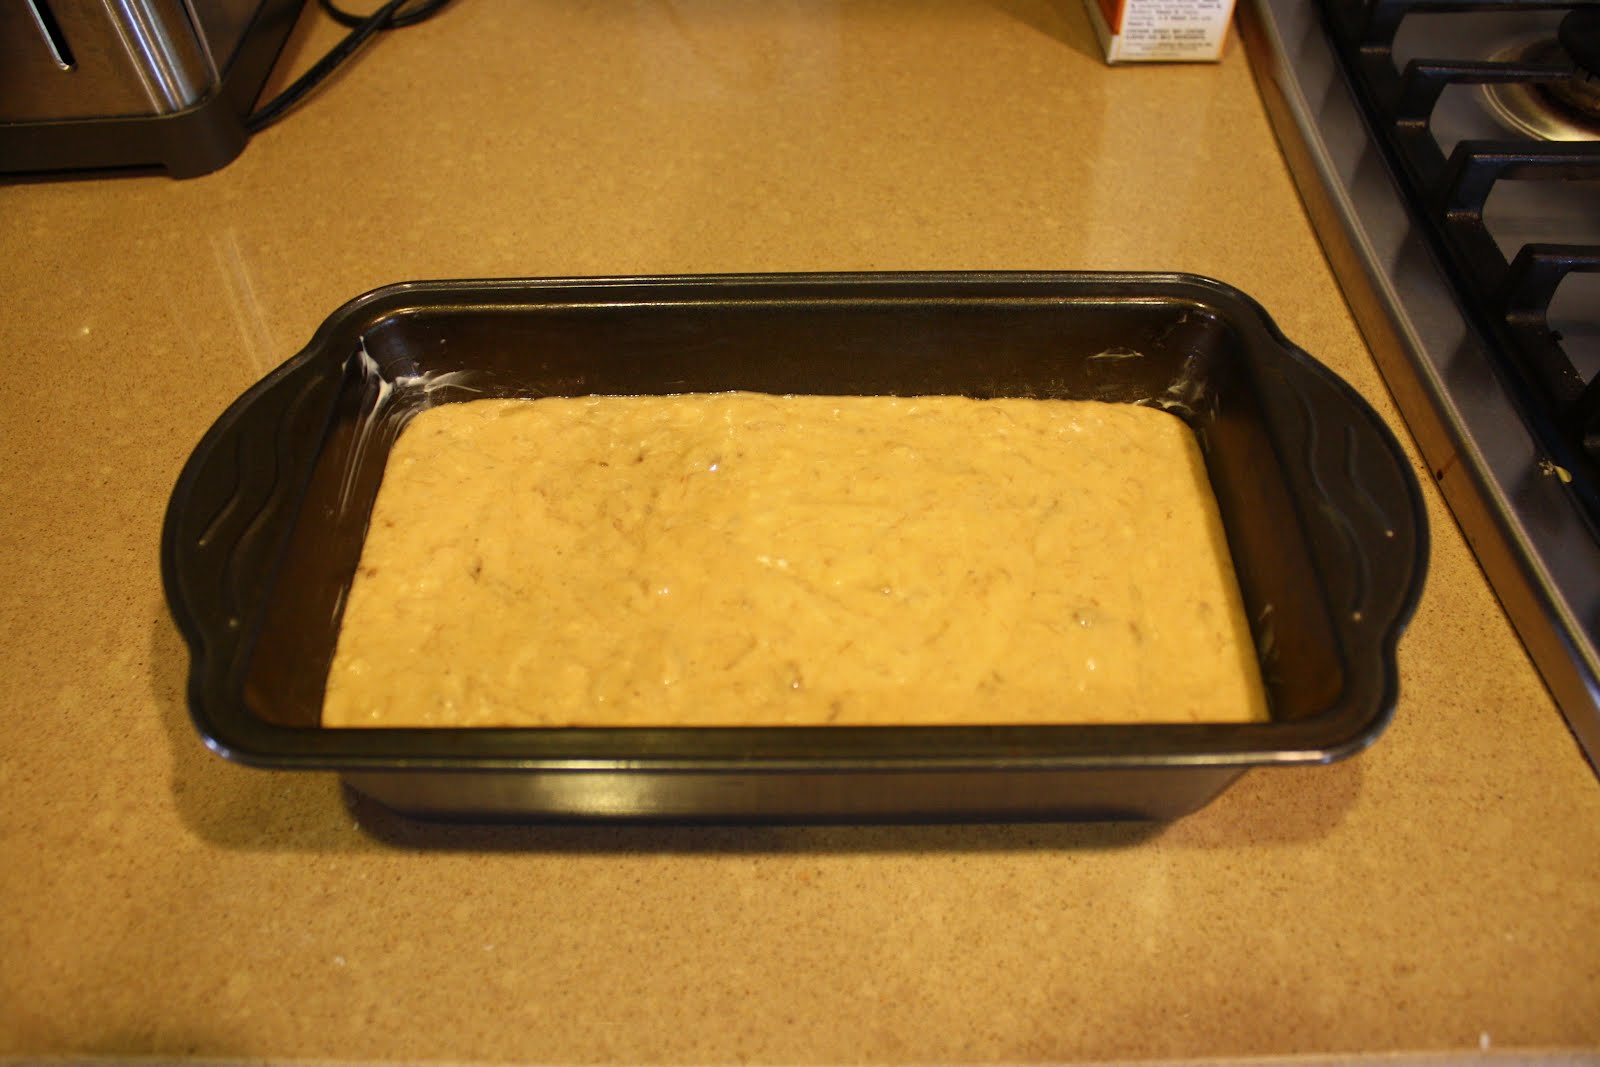
The third recipe I tried was the banana bread, because it did look really good. I adapted the recipe a bit because I did not like that it called for a smaller-than-standard loaf pan AND had quantities planned in such a way that you DEFINITELY had batter left over. I put the whole thing in a regular loaf pan and baked it 10 minutes longer, and it turned out great. It could have gone wrong, because it can be hard to bake gluten-free goods in big pans, but seriously, it was nicely baked all the way through. At first, I wasn’t too sure about using Bob’s Red Mill all-purpose gluten-free flour, as the recipe calls for, because it contains chickpea flour and fava bean flour, neither one of which is the best choice for desserts, in my opinion. However, this isn’t really a dessert, more like a snack or breakfast item, and it worked well. That being said, Bob’s Red Mill all-purpose gluten-free flour is cross-contaminated by nuts; if you want to make this banana bread nut-free, try making your own all-purpose flour using a recipe such as this one or that one.

When I first tasted this banana bread, I thought it wasn’t sweet enough and decided I would definitely add chocolate chips next time. But when I had it again in the morning, it was perfect as it was! I like to cut myself a thick slice, toast it and spread a little margarine on it. This bread, despite being gluten-free, held together just fine in the toaster. It’s moist, delicious, and if I hadn’t made it myself, I’d have never known it was vegan or gluten-free. It’s also healthier than most banana bread recipes, so I really recommend it! It disappeared in two days. I’ve written down the recipe below, with my modifications (a version of the recipe is available on the BabyCakes website here, though it’s not quite the one printed in my cookbook; interestingly, there’s less batter total, but a higher ratio of sweetener and six times the vanilla).


Finally, I decided to make a half batch of the chocolate chips cookies, which is still about 2 dozen. The recipe said to use a melon baller to portion out the dough; that seemed very small to me, so I used my cookies scoop, which is bigger than a melon baller but smaller than an ice cream scoop. I realize now that I got 25 cookies by halving a recipe that the book claims makes 36 cookies in all, so clearly the author’s melon baller is even bigger than my cookie scoop! This recipe also calls for Bob’s Red Mill all-purpose gluten-free flour, and as it turns out, BabyCakes’ chocolate chip cookie recipe is the one printed on the package of flour! These cookies spread more than I thought they would and were perhaps over-baked by a minute or two, but they were still very good. And again, I certainly don't miss the gluten. They also gave me the opportunity to try a new-to-me product, Ricemellow Creme, which is essentially the vegan equivalent of marshmallow crème. It contains only four ingredients, but mostly brown rice syrup, so it’s much less processed than marshmallow crème and doesn’t contain refined sugar – though it is super sweet. It’s not pure white, more of a pale café-au-lait, because of its contents. I used it to make a version of this suggested by BabyCakes: cookie sandwiches, which I popped in the freezer for a while before eating. It felt very decadent! I wrote the recipe below; it is also available on Oprah.com.


So overall, there are things that I don’t like about this book, like imprecisions in quantities or amounts that are wrong for the size of pan specified (that being said, those things have been amended on the website, so I wonder if a third printing of the book would have the corrections as well). I feel like I shouldn’t have to tinker with a printed recipe to get it to work; I can tinker with it to suit personal preferences, but that’s another matter. Still, I think that this cookbook has a lot of potential. I might try a scone recipe next.


BabyCakes’ Banana Bread
2 cups Bob's Red Mill All Purpose Gluten Free Flour (I know it’s a volume, but it worked for me)
2 tsp baking soda
2 tsp baking powder
1 tsp xanthan gum
1 tsp salt
1 tsp cinnamon
½ cup coconut oil, plus more for pan
2/3 cup agave nectar
2/3 cup rice milk
1 tsp pure vanilla extract
1 ½ cups mashed bananas (I used 3 bananas)
1 cup vegan chocolate chips (optional)

Preheat oven to 325 °F. Brush your loaf pan with oil (or use vegan margarine) and set aside.

In a medium bowl, whisk together flour, baking powder, baking soda, xanthan gum, salt, and cinnamon. Add oil, agave nectar, rice milk and vanilla and then mix again. Fold in bananas (and chocolate chips, if using) until nicely distributed.

Pour batter into loaf pan and set in the oven. After 20 minutes, rotate the pan 180 degrees. Continue baking for about 25 minutes longer, or until a toothpick inserted in the center comes out clean.

Let banana bread stand in the pan for 20 minutes. Gently run a knife around the edge of the cake, cover the top of the pan with a cutting board and invert the loaf onto the board. Carefully lift the pan away and re-invert the bread. Covered with plastic wrap, it will keep at room temperature for 3 days.


BabyCakes’ Chocolate Chip Cookies
(Note that I halved this)
1 cup coconut oil
6 Tbsp homemade applesauce or store-bought unsweetened applesauce
1 tsp salt
2 Tbsp pure vanilla extract
1 ¼ cups evaporated cane juice (i.e., unrefined sugar, so I used my regular evaporated cane sugar)
2 cups Bob's Red Mill gluten-free all-purpose baking flour
¼ cup flax meal
1 tsp baking soda
1 ½ tsp xanthan gum
1 cup vegan chocolate chips

Preheat the oven to 325 °F. Line 2 baking sheets with parchment paper (I used silpats).

In a medium bowl, mix together the oil, applesauce, salt, vanilla and evaporated cane juice. In another medium bowl, whisk together the flour, flax meal, baking soda and xanthan gum. Using a rubber spatula, carefully add the dry ingredients to the wet mixture and stir until a grainy dough is formed. Gently fold in the chocolate chips just until they are evenly distributed throughout the dough.

Using a melon baller (or small cookie scoop; see above), scoop the dough onto the prepared baking sheets, spacing the portions 1 inch apart. Gently press each with the heel of your hand to help them spread (this was definitely not necessary in my kitchen). Bake the cookies on the center rack for 15 minutes (I would say a bit less), rotating the sheets 180 degrees after 9 minutes. The finished cookies will be crisp on the edges and soft in the center.

Let the cookies stand on the sheets for 10 minutes, then transfer them to a wire rack and cool completely before covering. Store the cookies in an airtight container at room temperature for up to 3 days.

Optional: Slather on an extremely generous dollop of your favorite frosting (or a marshmallow crème equivalent; see above) between two cookies; eat as is or freeze them first.

And on a happy note

I don’t share too much personal information online, but I figured some people might be interested in this tidbit, since it does pertain to the way I eat (which is 90% of this blog) and my health. Six months ago, my cholesterol was a bit high; it had gone up for no obvious reason that I can pinpoint since my checkup previous to that. I’m blaming the Engineer’s cakes until further notice, but maybe someone looking at the recipes from last fall could give me fresh perspective. Then I announced that I would try to be a vegetarian 50% of the time (of which half would ideally be vegan). And after 4 months of this, my cholesterol has dropped by 38 points! The only other change in my diet is that I try to have “better” desserts after lunch (like a yogurt instead of a cookie) and using safflower oil instead of olive oil for cooking. Plus, my LDL went down and my HDL went up even though I had stopped taking omega-3 supplements (I can’t swallow pills and couldn’t find anything I liked better than this, which tastes horrible). So I can say, with medical proof, that a more vegetarian diet is healthier for me than what I was having before. My doctor said that whatever I was doing, I should keep it up.

Beyond that, the only tip I could give those of you who want to lower your cholesterol is to try to eat more whole grains, like oatmeal. My breakfasts haven’t changed much, but I do try to incorporate fruit and whole grains. I’m not saying I do it perfectly every day, but I try. I like granola (which I make with whole grain oats), muffins and banana bread made with whole grain flour, and the occasional pancake or waffle. I’ve even tried kasha, below, on cold days (I like it with brown sugar or maple syrup). I also bake almost exclusively with white whole wheat flour instead of regular white flour, which gives me extra fiber.

Friday, May 11, 2012

Batch of product reviews

There are a few products I want to talk about, so I figured I’d do so in one post.

First, I tried the new Yoplait lactose-free yogurt. It comes in two formats: individual servings (6 oz containers) and packages of 4 (not clearly stated, but according to my calculations, almost 4 oz per container). My favorite flavor is the black cherry, which is hard to come by in lactose-free varieties! It uses beet juice concentrate to get its color, too, instead of artificial dyes. What I like best about these yogurts is the added calcium: a 6-oz container has 50% of the recommended daily value (30% for each container in the 4-pack). This is great because calcium is often a concern for the lactose-intolerant. However, the second ingredient is sugar, and the 6-oz container has 170 calories (110 for the smaller size). So yes, it tastes great, but it isn’t necessarily that healthy… If I compare it to a 6-oz container of my other favorite brand of lactose-free yogurt, Green Valley Organics, in blueberry flavor, that one has 140 calories, but only 25% of the recommended daily value of calcium. When I read the fine print of the ingredients, though, I realize that sugar technically is the second ingredient, though in this case it’s organic evaporated cane juice, plus the product is kosher, gluten-free, and certified humane. So I guess I’ll alternate between buying both, depending on how I feel in the refrigerated section of the grocery store that day (ethical or calcium-deprived).


I also tried chive and garlic Veggie Cream Cheese, by Galaxy Nutritional Foods. It’s a cream cheese alternative that I found in the produce section, where it was obviously meant to be used as a dip. The consistency is perhaps a little too solid for a dip, though I found it quite tasty, more so than Tofutti cream cheese (that being said, I’ve only tried plain Tofutti, because that’s all I’ve seen in stores here). I definitely see myself buying this again, either as a cream cheese substitute or if I need to bring a dip to a party so I don’t feel left out.


You’ll be happy to know that I tried a kind of vegetarian bacon that I actually liked! It was Morning Star Veggie Bacon Strips, which are vegetarian (but not vegan or gluten-free). They do contain milk ingredients, but not enough that I’d react to them. I pan-fried several strips until they were crisp, which also improved their appearance a bit (though the smell is remarkably smoky), and once I bit into one, I was happy to realize that it satisfies a lot of the cravings created by regular bacon! It doesn’t quite taste the same, of course, but it’s smoky and crispy and could totally hit the spot if I’ve decided not to have meat (or real bacon) that day.


As a drink, I bought Reed’s raspberry ginger brew a while back and really liked it. It contains almost 20% real raspberry juice and is sweetened with fruit juice and fructose, on top of the natural ginger root it’s made from. It was neither too sweet nor too dry, and I liked the packaging. I’ll be buying this again, though it’s a special treat because my regular grocery store doesn’t carry it.

I forgot to talk about it before, but I tried Udi’s gluten-free cinnamon rolls. The most noticeable thing, actually, is that there are no instructions to prepare them, so you have to either wing it or look it up online (if you google “udi cinnamon rolls”, you’ll see that the first suggestions and links pertain to that issue!). Udi says it’s because the rolls are stored differently from one store to the next (the rolls last 7 days at room temperature, 21 days in the fridge and 6 months in the freezer). I found that they were best taken out from the fridge, sprinkled with water and popped in the microwave for 20 seconds; I warmed up the icing for 5 seconds before pouring it on. The crumb seemd a little dry to me, but it was very good, and this product should satisfy those who follow a gluten=free diet and don’t have time to make their own rolls.


And finally, I found my favorite coconut syrup at World Market! I had tasted it in Hawaii and had brought some back from a trip there in 2007, but I hadn’t seen any since then – I figured it was an island thing. But World Market is surprisingly well-stocked! I bought a package of it had have been enjoying it, sparingly, on pancakes every once in a while.


Batch of links

- Why do recipe writers lie and lie and lie about how long it takes to caramelize onions? I’ve often wondered that myself, so I thoroughly enjoyed reading this article by Tom Socca.

- A few months ago, the New York Times launched a contest to find the most rational, ethical defense FOR eating meat. The winning entry is an interesting read! Basically, the author makes a good point by summing it up as follows: “What are these ‘right’ and ‘wrong’ ways of producing both meat and plant foods? For me, they are most succinctly summed up in Aldo Leopold’s land ethic: ‘A thing is right when it tends to preserve the integrity, stability and beauty of the biotic community. It is wrong when it tends otherwise.’” This applies to a vegetarian diet, too.

- Recently, Obama officially supported gay marriage. It was about damn time! This was in response to North Carolina amending their constitution to expressly forbid marriage between two people of the same sex. When I heard about that, I said that was stupid (I said other things too, but I did use that exact word). And the Engineer pointed out that I may have put my finger on the issue: look at this map comparing the number of people in each county who have a bachelor’s degree or higher to the way the county voted to amend the law. So yes, education really does expand minds!

- The cover of this week’s Time magazine is already causing quite a stir all over the internet (see here, for example). Frankly, I’m surprised it’s making this many waves. I mean, if you haven’t heard about attachment parenting, get out from under your rock and read up on it (like in Time); and if you have heard about it and don’t agree with it, then get over your darn self and let mothers whose family benefits from it do things their way.

- An interesting read on why it’s so hard to make a good vegan cheese. Daiya is mentioned, and I’m looking forward to trying the new one from Galaxy Foods.

- Nancy Silverton’s secret to making whipped cream hours ahead: use a scoop of crème fraîche (or sour cream) along with the cream, and the extra fat content will help the whipped cream hold in the fridge. This probably won’t come in handy for me now (I’m either in Canada with lactose-free cream or in the States with lactose-free sour cream), but it’s a really good thing to know in theory! I might make my own crème fraîche this summer, though, you never know.

- 15 money-saving tips for frugal cooking and shopping. And if you like those, try these 25 tips, too.

- Why you shouldn’t put something in the oven as soon as it’s done preheating.

- Five great tips for baking gluten-free, by Shauna James Ahern.

- I love infographics, so I just had to share this one, the satiety index. It turns out that when you measure the satiety index and the glycemic index (how full you feel and how bad the sugar crash is), as opposed to the nutritional value, a banana really is as bad as a cookie. Sadly, though, this did not make me crave oranges (a good choice), but croissants (not so good).

- On my old website, I talked about California Pizza Kitchen, which I really enjoy (especially for their Thai chicken and roasted garlic chicken pizzas). Well, they have a new pizza on the menu, and I’ve fallen completely in love with it! It’s the habanero carnitas, which has slow-roasted pulled pork, red onions and cilantro pesto; it’s served with spicy habanero sauce on the side, but I don’t use it. I just love that pizza!

Thursday, May 10, 2012

Trilogie de courgettes - Gâteau


Pour clore ma trilogie de courgettes, quoi de mieux qu’un dessert? J’ai bien des recettes de pain aux courgettes, dont une avec tout plein de bonnes choses comme des canneberges et des noix, mais je trouve que ça se rapproche trop d’un pain aux bananes pour dessert. Je préfère un gâteau au chocolat! Je rappelle quand même que l’idée de mettre des légumes dans un dessert n’est pas innovatrice en soi; après tout, nous avons bien des gâteaux aux carottes ou aux betteraves, sur ce site ou ailleurs! Ce gâteau au chocolat et aux courgettes, donc, est servi avec une crème anglaise; elle est facultative, mais fortement recommandée! Si on compte 8 grosses tranches de gâteau, on a environ la moitié d’une portion de légumes dans chacune, mais je crois que les courgettes seraient trop apparentes si on en augmentait la quantité. En tout cas, j’aime ce gâteau comme il est! Je ne sais plus où j’ai pris la recette à l’origine, mais elle se trouve sur Group Recipes.

Pour le gâteau
1 ¾ tasse de sucre
½ tasse d’huile végétale
¼ tasse de beurre (à température ambiante) ou de margarine
2 œufs
½ tasse de lait sans lactose ou de babeurre (lait sans lactose additionné de jus de citron)
1 c. à thé de vanille
2 ½ tasses de farine tout usage
¼ tasse cacao
1 c. à thé de bicarbonate de sodium
½ c. à thé de poudre à pâte
½ c. à thé de cannelle
1 pincée de clous de girofle en poudre
2 tasses de courgettes finement râpées
½ tasse de pépites de chocolat mi-sucré

Pour la crème anglaise
½ tasse de sucre
2 c. à soupe de farine
2 c. à soupe de fécule de maïs
3 tasses de lait sans lactose
3 jaunes d’œuf
3 c. à soupe de beurre ou de margarine
1 soupçon d’extrait d’amande (artificiel si vous évitez les noix, ou omettez-le simplement)

Préchauffer le four à 325 °F. Huiler un moule à cheminée de 10 pouces et le saupoudrer de cacao.

Dans un grand bol, battre le sucre, l’huile et la margarine. Ajouter les œufs, le lait et la vanille; bien mélanger.

Dans un bol de taille moyenne, mélanger la farine, le cacao, le bicarbonate de sodium, la poudre à pâte, la cannelle et les clous de girofle. Ajouter les ingrédients secs aux ingrédients humides et mélanger jusqu’à homogénéité. Ajouter les courgettes et les pépites de chocolat. Verser la pâte dans le moule préparé et faire cuire pendant environ 55 à 60 minutes ou jusqu’à ce qu’un cure-dents en ressorte propre. Laisser refroidir 10 minutes; démouler et laisser refroidir complètement sur une grille.

Pour la crème anglaise, mélanger le sucre, la farine et la fécule de maïs dans une casserole à fond épais. Ajouter le lait. Amener à ébullition; faire cuire en mélangeant jusqu’à ce que la sauce ait épaissi, environ 2 minutes. Retirer du feu. Mélanger une petite quantité de la sauce aux jaunes d’œufs, puis verser les jaunes d’œufs au mélange tout en remuant. Ramener à ébullition à feu doux; réduire le feu et faire cuire pendant 2 minutes. Retirer du feu; ajouter la margarine et l’extrait d’amande et bien mélanger. Servir tiède.


Trilogie de courgettes - Galettes


Pour la deuxième recette de ma trilogie, je vous présente une recette qui, je crois, est tirée de Coup de Pouce (mais introuvable sur leur site). Il s’agit de galettes de courgettes, un peu comme des latkes pâteux et étonnement savoureux! Je les aime comme plat principal, avec une salade en accompagnement (une salade de courgettes ou une salade verte). La recette d’origine recommande les galettes comme accompagnement pour de la viande ou de la volaille. On peut aussi en faire beaucoup et les mettre au congélateur pour une autre fois, elles se conservent bien.

1 ½ lb de courgettes râpées grossièrement (4 ou 5 moyennes)
¾ c. à thé de sel
4 œufs
1 gousse d’ail, hachée finement
¾ tasse de farine
½ tasse de parmesan râpé
1 c. à soupe d’oignon, haché finement
½ c. à thé de poivre noir du moulin

Mélanger les courgettes et le sel et les mettre dans une passoire. Placer une assiette sur les courgettes, puis y déposer quelques boîtes de conserve en guise de poids. Laisser égoutter les courgettes pendant 15 minutes (jeter le liquide).

Dans un bol, à l’aide d’un fouet, battre les œufs et l’ail. Ajouter la farine, le parmesan, l’oignon et le poivre et mélanger à l’aide d’une cuillère de bois jusqu’à ce que la préparation soit humide, sans plus. Ajouter les courgettes égouttées et mélanger.

Badigeonner un poêlon d’un peu d’huile et chauffer à feu moyen. Pour chaque galette, mettre environ 1 ½ c. à soupe de la préparation dans le poêlon (cuire 4 ou 5 galettes à la fois) et l’étendre en une cercle d’environ 3 pouces de diamètre. Cuire de 2 à 3 minutes de chaque côté ou jusqu’à ce que les galettes soient bien dorées. Réserver au chaud. Répéter l’opération avec le reste de la préparation.


Trilogie de courgettes - Salade


En règle générale, je n’aime pas les courgettes. Ou plutôt, il se trouve que je n’aime pas les courgettes cuites, mais en fait, j’ai quelques recettes pour les apprêter que j’aimerais partager. C’est qu’elles peuvent être bonnes, les courgettes! Et puisque la saison est commencée ici, j’en ai profité un peu. Tout d’abord, voici la recette de salade de courgettes de ma mère, où les courgettes sont crues et, par le fait même, tout à fait acceptables. Je la fais sans les câpres, que je n’aime pas, et j’ai oublié la roquette (que j’avais pourtant achetée!); les goûts dominants sont surtout le citron, l’ail et le parmesan. C’est délicieux! La recette donne environ 4 portions. J’ai servi cette salade en accompagnement de galettes de courgettes et je l’ai également mangée pour dîner, sans rien d’autre.

3 grosses courgettes, jaunes ou vertes (j’aime mieux les deux)
4 c. à soupe d’huile d’olive
1 gousse d’ail, écrasée (j’ai râpé la mienne)
le zeste et le jus d’un citron
2 c. à soupe de câpres, égouttées et rincées (facultatif)
50 g de parmesan, râpé
1 poignée de roquette

Trancher les courgettes en tranches très minces, avec une mandoline ou un couteau économe. Mélanger les courgettes avec l’huile, l’ail, le zeste et le jus de citron. Laisser reposer 30 minutes (ou pendant la nuit, au réfrigérateur). Pour servir, ajouter les câpres, le parmesan et la roquette.


Tuesday, May 08, 2012

Salted Chocolate Cookies


I think it’s been a little while since I posted a recipe from Orangette, so here we go. I made these cookies recently, and they were so good! The chocolate taste is rich and deep; the cookies are slightly crispy on the outside, but still chewy on the inside. I made cookies that were about 2 inches in diameter, and I’d say you’ll get between 24 and 30 if you make them that way; you can also freeze them and bake them as needed. I used turbinado sugar to finish the edges and vanilla fleur de sel as a topping – I totally recommend that, but Maldon salt is also very good. Be sure to use a chocolate you really like (I used Ghiradelli 60%, though Valrhona “Guanaja” 70% is recommended in the original recipe). Note that I weighed ingredients most of the time for this recipe, but volume measurements are also provided.

225 grams (8 oz) bittersweet chocolate, coarsely chopped
155 grams (1 ¼ cups) all-purpose flour
50 grams (½ cup plus 2 Tbsp) unsweetened cocoa powder
2 tsp baking powder
115 grams (8 Tbsp) unsalted butter, at room temperature (I used cold margarine)
225 grams (1 cup plus 2 Tbsp) sugar, plus more for rolling the logs
2 large eggs
¼ tsp table salt
1 tsp. vanilla extract
75 ml (1/3 cup) lactose-free whole milk
Maldon salt (or vanilla fleur de sel or your favorite salt), for finishing

Pour water into a saucepan to a depth of about 2 inches. Bring to a simmer. Put the chocolate in a heatproof bowl that will rest securely on the rim of the saucepan, and place it over – not touching – the simmering water. Heat, stirring occasionally, just until the chocolate melts and is smooth. Remove from the heat and set aside to cool.

In a medium bowl, whisk together the flour, cocoa, and baking powder. Using a stand mixer fitted with the paddle attachment, beat the butter on medium-high speed until creamy. Slowly add the sugar, and continue to beat until the mixture is completely smooth and soft, stopping to scrape down the sides of the bowl with a rubber spatula as needed. Add the eggs one at a time, mixing well after each addition. Beat in the salt and the vanilla, and then add the melted chocolate, beating to incorporate. Add the milk, and beat until combined. Finally, add the flour mixture and beat on low speed until just incorporated. The dough will be quite thick and stiff.

Depending on what size cookie you’d like to wind up with (I made 2-inch cookies, but you can make them smaller if you wish), divide the dough into 2 or 4 portions (I chose 2). Put each portion on a large piece of plastic wrap, and shape into a log, using the wrap to help you smoosh, roll, and smooth it. Twist the ends to seal. Chill overnight. (If you’re into advance planning, the dough can probably be kept in the fridge for at least a week, or frozen for longer keeping, though I’d finish preparing and slicing the cookies first so that I can just pop them into the oven later.)

When you’re ready to bake the cookies, preheat the oven to 350 °F, and line a baking sheet with parchment paper or a silpat.

Put another sheet of parchment paper on your work surface. Take a spoonful or two of sugar, and pour it onto the parchment, making a ridge of sugar of approximately the same length as your dough logs. Remove a log from the fridge, unwrap it, and roll in the sugar to evenly coat. Using a thin, sharp knife, slice the dough into ¼- to 1/3-inch slices. (If you’re making small cookies, the 1/3-inch thickness is best.) Lay the slices on the baking sheet, leaving about 2 inches between each cookie. Sprinkle each cookie with a few flakes of Maldon salt.

Bake for 10 minutes, or until the top of the cookies looks set but still feels a little soft to the touch. Transfer to a wire rack, and leave the cookies on the pan to cool. Repeat with remaining dough.

These cookies will keep at room temperature for several days.

Sweet Potato Sformatos


A sformato is originally a rice-based dish. I’m not sure how authentic these are, since they use rice flour instead of whole rice. (I put some sweet rice in the spice grinder and made the flour myself.) They’re somewhat like a soufflé, though you don’t have to whip eggs whites and worry about them rising or falling. On the plus side, they are gluten-free (unlike my soufflé recipes so far), and they’re very easy to make. I’d say they work best as a light lunch (with a salad), or maybe an appetizer for dinner. I made a half recipe, but I still had enough to fill six small ramekins (though since the sformatos are so light, it came out to 2 full meals). The original recipe says that you can use an 8x8 baking dish instead of ramekins and just increase the cooking time by about 10 minutes. You can also add a spoonful of cooked sausage or mushrooms to each ramekin, to make it a more substantial meal. I used parmesan instead of asiago, which is what I’ll write below, and when I halved the recipe, I used 2 egg yolks I had leftover from another recipe instead of a whole egg and half a yolk. I really enjoyed these!

1 ½ cup grated parmesan cheese, loosely packed, divided
1.5 lbs (2 average-sized) sweet potatoes
3 cups lactose-free whole or 2% milk
4 Tbsp unsalted butter or margarine, plus extra for greasing the ramekins
¼ cup sweet rice flour (or regular all-purpose flour if you want)
1 tsp salt
1 Tbsp minced thyme (or rosemary)
¼ tsp freshly grated nutmeg
½ tsp black pepper
2 large eggs
1 large yolk

Heat the oven to 400 °F. Rub the insides of six 8-oz ramekins with butter and sprinkle with ¼ cup of the parmesan cheese. Cheese should stick to the bottom and sides of the ramekin in a single layer.

Prick the sweet potatoes all over with a fork and place them on a microwave-safe plate lined with a paper towel. Microwave on high in 3-minute intervals, turning the potatoes between each interval and testing them for doneness. It should take 9-12 minutes total for the sweet potatoes to completely soften. Allow the potatoes to cool enough to handle. (Alternatively, you can wrap the potatoes in foil and roast them in a 400 °F oven until soft. As for me, I used sweet potato purée I had in the freezer.)

Meanwhile begin making the béchamel. Warm the milk in a small saucepan until it just barely starts to steam (or microwave to warm). Remove from heat. In another pan, melt the butter over medium heat. Add the flour and stir until a thick paste is formed, 3-5 minutes. Add the milk a little at a time while whisking the butter-flour mixture. Wait to add more milk until the mixture becomes smooth and creamy again. Once all the milk is added, simmer and stir the béchamel until it starts to thicken. Remove from heat and set aside to cool to room temperature.

Peel the sweet potatoes and mash the insides in a large mixing bowl. Add one cup of the cheese (reserving the last ¼ cup for topping), the thyme, the nutmeg, and the black pepper. Stir in the cooled béchamel sauce a little at a time to achieve a smooth pudding-like consistency. Before adding the eggs, taste the mixture and add more salt or pepper if desired. Whisk the eggs and yolks together and stir them into the sweet potato mixture.

Place all the ramekins on a baking sheet (a silpat can help keep them from slipping around). Fill the ramekins to within ½ inch of the top. Bake for 35-40 minutes, until the tops are puffed and beginning to brown in spots. Five minutes before the end of cooking, sprinkle each sformato with a little of the reserved cheese.

Allow the sformatos to cool for about 10 minutes before serving. Leftovers can be kept refrigerated for up to a week and do well reheated for a few minutes in the microwave or a toaster oven.


Tuesday, May 01, 2012

Pear Muffins


I found this muffin recipe on Tea and Cookies, where it was adapted from Sophie Dahl’s pear muffins. I decided to make them the easy way, without any decorative pear slices on top (though I admit they would look better with the pear slices). I didn’t use any nuts or raisins, because I feel like they don’t have a place here, but I did keep the crystalized ginger. For a sweetener, I used a few tablespoons of agave syrup and topped it up with coconut nectar; note that the agave syrup is much more fluid than coconut nectar or honey, but the former and latter are both suggested in this recipe, so you do have some leeway. I also used applesauce instead of pear purée, since that’s what I had on hand. I liked all the whole grains in this and the fact that the resulting muffins are dense, but not too heavy – and they certainly don’t “taste like fiber”. The recipe makes 12 muffins, and since they freeze well, I froze half of them for future breakfasts.

2 tsp baking powder
1 tsp baking soda
1 tsp ground ginger
1 tsp ground cinnamon
¼ tsp freshly grated nutmeg
½ tsp salt
1 ¼ cup spelt four
1 ½ cup rolled oats
4 egg whites
1 cup pear purée (you can mash up a pear, use baby food or commercial purée, or use applesauce)
½ cup plain lactose-free yogurt (I used Greek yogurt)
¾ cup agave or honey
1 firm pear, peeled, cored, and cut into a small dice
¼ cup crystalized ginger or more, to taste, chopped (optional)
extra pear for decoration on the top of the muffins (optional)

Preheat oven to 375 °F.

In a medium sized mixing bowl, add all the dry ingredients (baking powder, baking soda, ginger, cinnamon, nutmeg, salt, spelt flour and oats). Stir to blend and make a well in the middle.

Lightly beat the egg whites until they are foamy and hold a bit of their shape.

In a small bowl, mix the yogurt, pear purée, and honey/agave; add to the bowl with the flour mixture and stir to combine. Add the egg whites and gently fold into the batter. Add the diced pear and crystalized ginger, if using. Mix briefly to incorporate.

Spoon the batter into muffin tins lined with cupcake liners, or use parchment paper cut into squares. If you prefer to bake strait into the muffin tins, grease them with a bit of oil before. Fill each muffin tin ¾ of the way up. Bake for 25-30 minutes. The tops of the muffins will brown slightly, but the insides will remain moist.


Hummus-Crusted Chicken


I made this chicken recipe from O Magazine, the same issue in which I found the carroty mac and cheese. I made hummus with my mother’s recipe (below), though you could buy hummus if making it isn’t your thing (although hummus is so simple that you might as well make it!). The gist of the recipe is that you cover the chicken with hummus, sprinkle the whole thing with lemon juice, rosemary and balsamic vinegar, then bake it until it’s done. And it’s fantastic! The Engineer regarded it with a bit of suspicion, then bit into it and simply said, “Wow!” The hummus keeps the chicken moist, on top of adding wonderful flavor. I’ll definitely be making more.

This time, I served it with rösti, though a green vegetable would be more appropriate. The Engineer didn’t know what rösti was, so I summarized it by saying that it’s a pan-sized latke. But when he saw that there was bacon in it, he said, “This is so treife!” We both like rösti, though, with or without bacon.

For the hummus
¼ cup tahini (or almond butter or ground almonds)
¼ tsp cumin
½ tsp salt
2 cloves of garlic, finely chopped
2 Tbsp lemon juice
3 Tbsp (or more) boiling water
1 can (15 oz or 19 oz) chickpeas, drained and rinsed
chopped parsley (optional)

In a small bowl, mix the tahini, cumin, salt and garlic; slowly add the lemon juice and boiling water.

Put the chickpeas in the food processor and process; add the tahini mixture and process again. Add water if needed (especially if using ground almonds). Taste and add cumin or other seasonings as needed. Garnish with parsley if using.

For the chicken
about 1 cup hummus (see above)
4 boneless, skinless chicken breasts
lemon juice
balsamic vinegar
chopped fresh rosemary
lemon slices (optional)

Preheat the oven to 450 °F. Line a baking dish with tin foil and put the chicken breasts in it. Smother the chicken breasts with the hummus, then top with a squeeze of lemon juice, a sprinkle of balsamic vinegar, chopped fresh rosemary, and lemon slices (optional). Bake until hummus is golden brown and meat is cooked through, 30 to 35 minutes. Season with salt and black pepper to taste and serve immediately.


Cardamom-Vanilla Shortbread Cookies with White Chocolate and Rose Petals


For my 800th post, I wanted something that was somewhat impressive. But then again, it really doesn’t feel like I’ve been blogging that long, and this 800th post doesn’t feel like that much of an accomplishment. It kinda snuck up on me, actually. So I figured this recipe was perfect, because it looks impressive, yet is one of the easiest recipes you’ll ever make. It literally took me 5 minutes to mix the cookie dough and put it in the fridge! The rest is just slice, bake, melt, dip, tap, enjoy. And the result is so pretty!

I made the cookie dough itself vegan by using margarine instead of butter, and it worked well. The white chocolate is trickier: while there are companies making vegan white chocolate with soy milk instead of cow’s milk, vegan white chocolate is hard to come by. You may need to go to a specialty store or order it online. That being said, regular white chocolate milk, in small doses, isn’t a problem for me. I also don’t have organic roses, because the fertilizer that we bought for our rosebush isn’t organic (I wasn’t thinking that far ahead when we moved in, and now I want to finish this container of fertilizer before buying a new one). I do know, however, that it’s been at least two years since there have been any pesticides used on our roses, so that was good enough for me. This rose variety is Radrazz, though any will do (as will other edible flowers, and the cookies are still very pretty without any petals). Keep in mind that flowers wilt quickly, so if you are keeping the cookies until the next day and they’ve already been dipped and decorated, put them in the fridge. This recipe makes between 18 and 24 cookies.

½ cup (1 stick) margarine (or unsalted butter, at room temperature)
2/3 cup confectioners' sugar
1 tsp vanilla extract (or vanilla bean paste, for extra oomph)
1 cup all-purpose flour
1 ½ tsp ground cardamom
pinch kosher salt
4 oz premium white chocolate (vegan if you wish), melted
24 organic, unsprayed rose petals

Combine butter and sugar in a mixing bowl and beat on medium-high speed until light and fluffy. Add the vanilla extract and combine.

Whisk together flour, cardamom, and salt. Gradually add the flour mixture and beat until just combined.
Form dough into a long log, about 1 ½ inches in diameter, wrap in wax paper and refrigerate for at least 1 hour.

Preheat oven to 325 °F and line two baking sheets with parchment paper or silpats. Set aside. Slice chilled dough into ½-inch-thick rounds and place on sheets. Bake until pale golden, about 12-15 minutes.

When cookies are completely cooled, dip halfway in melted chocolate, place on greased parchment paper or silpat, and top with a rose petal. (The chocolate was a little thicker than I expected when I was dipping the cookies, but it worked out anyway; I could have warmed it up a little to thin it out if I had wanted to.) Allow chocolate to set completely before serving.