I got this recipe from the Martha Stewart website, where it was simply called “maple granola”. However, the Engineer and I agreed that this is so good that it needed a better name – hence the “fantastic”. I used #1 medium maple syrup and was a bit heavy-handed, using 2/3 cup instead of ½ cup. Since I couldn’t find coconut chips even in stores here, I ordered it from Amazon. I also decided to use white sesame seeds, since I figured they would look better than black in granola.
3 cups rolled oats (gluten-free if necessary)
1 cup dried unsweetened coconut chips
1 cup pecans or walnuts, quartered
½ cup to 2/3 cup pure maple syrup
½ cup finishing quality extra-virgin olive oil
½ cup packed light-brown sugar
¼ cup sesame seeds
1 tsp coarse salt
¾ tsp freshly grated nutmeg
½ cup golden raisins
Preheat oven to 300 °F. Mix together oats, coconut, nuts, syrup, oil, sugar, sesame seeds, salt, and nutmeg. Spread granola in an even layer on a rimmed baking sheet lined with parchment paper. Bake, stirring every 10 minutes, for 40 minutes. Add raisins, and bake until granola is toasted, about 10 minutes more. Let cool completely.
Once again, I’ve got a huge backlog of recipes to post, but I plan to take some time off for the holidays. I’ll try to do a blitz in the next few days, so bear with me! I decided to start with this delicious frozen yogurt recipe. I got it on Orangette, but it’s originally a recipe by David Lebovitz. (On a side note: next month, I will be taking a cooking class with David Lebovitz, who will be passing through Texas; and once he saw how excited I was at the prospect, the Engineer decided to make it my birthday gift!)
I used Greek yogurt for this recipe, because I prefer the consistency in frozen yogurt (otherwise, I prefer to strain the yogurt overnight), and because I found some that I can digest without a problem. It’s not whole milk, but it worked just as well. The blackberries were from Mexico, so they weren’t exactly local, but almost! The Engineer isn’t too fond of berries, but I absolutely loved the fresh taste of this frozen yogurt, and so did my parents (who were in town last week to visit us).
1 lb fresh blackberries, rinsed
¾ cup sugar
2 tsp vodka
1 cup plain whole-milk yogurt (Greek or strained overnight)
1 ½ tsp fresh lemon juice
In a medium bowl, toss the blackberries with the sugar and vodka, stirring until the sugar begins to dissolve. Cover, and let stand at room temperature for 1 hour.
In a blender, process the blackberries and their liquid with the yogurt and lemon juice until smooth. Place a mesh sieve over a medium bowl, and pour the mixture through the sieve to remove the seeds. Taste. It should be a little too sweet at this point, but that’s good; it will taste less sweet when frozen.
Refrigerate the mixture for one hour. Then freeze in your ice cream maker according to the manufacturer’s instructions.
In the past year, but especially after reading The Kind Diet, I’ve become more concerned about sugar. You may have guessed that by my last post. I’m reconsidering my intake of refined white sugar (sucrose/saccharose) in particular.
It seems like it would be a major hassle to rework all my recipes to substitute something else for the refined white sugar. (I won’t get into the differences between beet sugar and cane sugar, because once refined, it acts pretty much the same on the body, despite some mild differences in baking results.) But even if I did that, which sweetener should I use? People have long been recommending agave nectar as a sweetener. I thought it looked great. After all, it sounded like sap extracted from the agave plant and concentrated, a bit like maple syrup. But it turns out that’s bullsh*t, according to Food Renegade. Agave nectar is not actually nectar, nor is it natural. It has more fructose in it than high-fructose corn syrup and it is highly refined. So that would put it in the “bad sugars” category.
I’m going to get a little scientific right now. Sucrose (again, like refined white sugar) is made up of fructose and glucose, in refined form. Now, let me quote from that Food Renegade article I just mentioned. “Refined fructose is processed in the body through the liver, rather than digested in the intestine. Levulose [the sugar naturally occurring in fruits and containing enzymes, vitamins, minerals, fiber, and fruit pectin] is digested in the intestine.” The problem is that “fructose inhibits leptin levels — the hormone your body uses to tell you that you’re full. In other words, fructose makes you want to eat more. Besides contributing to weight gain, it also makes you gain the most dangerous kind of fat.” One can gain weight with glucose, fructose or any other sweetener, of course, but the weight gained with fructose is mostly visceral fat – it worsens “blood glucose control and insulin sensitivity.” It increases “small, dense LDL particles and oxidized LDL, both factors that associate strongly with the risk of heart attack and may in fact contribute to it.” It changes one’s metabolism. Again, that would put it in the “bad sugars” category.
So, let’s talk about high-fructose corn syrup. Sure, it’s made from corn, and in small quantities, it’s probably no more harmful than refined white sugar – or so we think. I found an article on The Kitchn that refers to the Princeton study that proved, once and for all, that high-fructose corn syrup really is bad. In a nutshell: the rat subjects eating high-fructose corn syrup gained MORE weight than those eating regular table sugar, even though the total caloric intake was the same. Over the long term, the fat was also distributed differently in the body: there were more visceral fat deposits in subjects eating high-fructose corn syrup than in those eating a regular diet, and their metabolism had changed (they gained 48% more weight, which is enormous). One of the graduate students who worked on the Princeton study says that “in humans, these same characteristics are known risk factors for high blood pressure, coronary artery disease, cancer and diabetes." This is worrisome particularly because of how prevalent high-fructose corn syrup is in prepared foods – the rats in the study only had half the concentration of high-fructose corn syrup that is found in sodas! (I should point out, though, that regular corn syrup on the market is not high-fructose corn syrup, which nowadays tends to be used in processed foods rather than sold in stores as an ingredient.) As a marketing strategy, high-fructose corn syrup will now be called corn sugar; the fact remains that many processed foods contain too much sugar, period. To help those of you reading labels, here’s a list of synonyms for “sugar”.
Allow me scientific jargon for one more paragraph. In Canada, aspartame can be used as a food additive since 1981, and sucralose (Splenda) has been approved more recently. In the United States, saccharin is still approved as a food additive, while in Canada, saccharin and other cyclamates cannot be used as such (though they can be sold as table sweeteners). The problem is that saccharin and cyclamates are suspected to have caused bladder cancer when ingested in high doses by some lab animals… Not that aspartame has been proven to be completely safe, though, and as is the case with other artificial sweeteners, it should be avoided during pregnancy. In 2007, Health Canada also authorized neotame, a new artificial sweetener that is apparently between 7,000 and 13,000 times sweeter than sugar. Along with acesulfame potassium, this rounds up the four artificial sweetener approved as food additives in Canada, but of course each country has different rules and regulations. This link, in French, gives more information about artificial sweeteners in general. But all this is to say that I don’t trust artificial sweeteners, and I’m really trying to cut them out of my diet. (I still have the occasional “bad” soda, but even then most of those I buy now have natural sweeteners.)
So if I want to eliminate, or at least reduce, my intake of refined table sugar, corn sugar, non-natural brown sugar (because it is also sucrose), artificial sweeteners and natural-sounding sugars like agave nectar, what’s left? I had high hopes for stevia, which looked like a silver bullet, but since learning that it is banned in Europe, I can’t help but think it’s not all it’s cracked up to be. I’m wondering the same thing about xylitol. Most scientists currently agree that natural sweeteners like honey, maple syrup and brown rice syrup are safe. I personally am now using vegan/organic raw cane sugar to bake; the crystals are bigger than those of refined white sugar, and it tastes a little less sweet, but everything I’ve baked with it so far has been great. It’s better for me than refined white sugar, as are natural brown sugars like demerara, turbinado and muscovado. But how much is too much?
I’m not sure how much success I would have cutting out sugar completely, as it is so addictive (Gwyneth Paltrow recently wrote Goop’s newsletter on the subject). The truth is that I have a major sweet tooth. To put it in perspective: this is my 400th post; of those, 272 are recipes, and at the very least 125 contain sugar in some form or other. I’ve started looking into macrobiotic desserts, particularly Éric Lechasseur’s book Love, Eric. Macrobiotics is centered on whole foods (as opposed to anything processed), legumes and vegetables, as well as eating what is in season, balancing the different kinds of food we eat and not overeating. Éric Lechasseur is a chef who happens to be French Canadian, like me. I haven’t made anything from the book yet, but only because I haven’t gotten around to it. I’m actually very much looking forward to trying out some of these recipes and plan to do so right after the holidays, if I can’t find the time before.
Back in Montreal, I read this very informative article titled “How to make grenadine and why you should bother”. It basically said that most commercial grenadine – get this – doesn’t even contain pomegranate (sort of like how most candied fruit in North America is actually candied and coloured rutabaga). So I rushed over from the computer to the bottle of Château Thierry grenadine syrup in the fridge and looked at the ingredients, then cursed. By this point, the Engineer wanted to know what was going on, so I explained. You see, most commercial grenadine is actually high-fructose corn syrup. Our wasn’t much better: “liquid sugar, glucose, water, citric acid, artificial flavour, sodium benzoate, colour; contains traces of sulphites”. Where’s my pomegranate, people? I had decided to make my own grenadine once we had settled in, but I’m pernickety and I didn’t have the right bottle in which to put it. I’ve now decided to buy some good one online.
As long as we’re on the subject, I’d also like to share a link to natural Maraschino cherries, which I’d love to have in my pantry (as opposed to the bright red artificial ones, which I haven’t liked since I hit puberty).
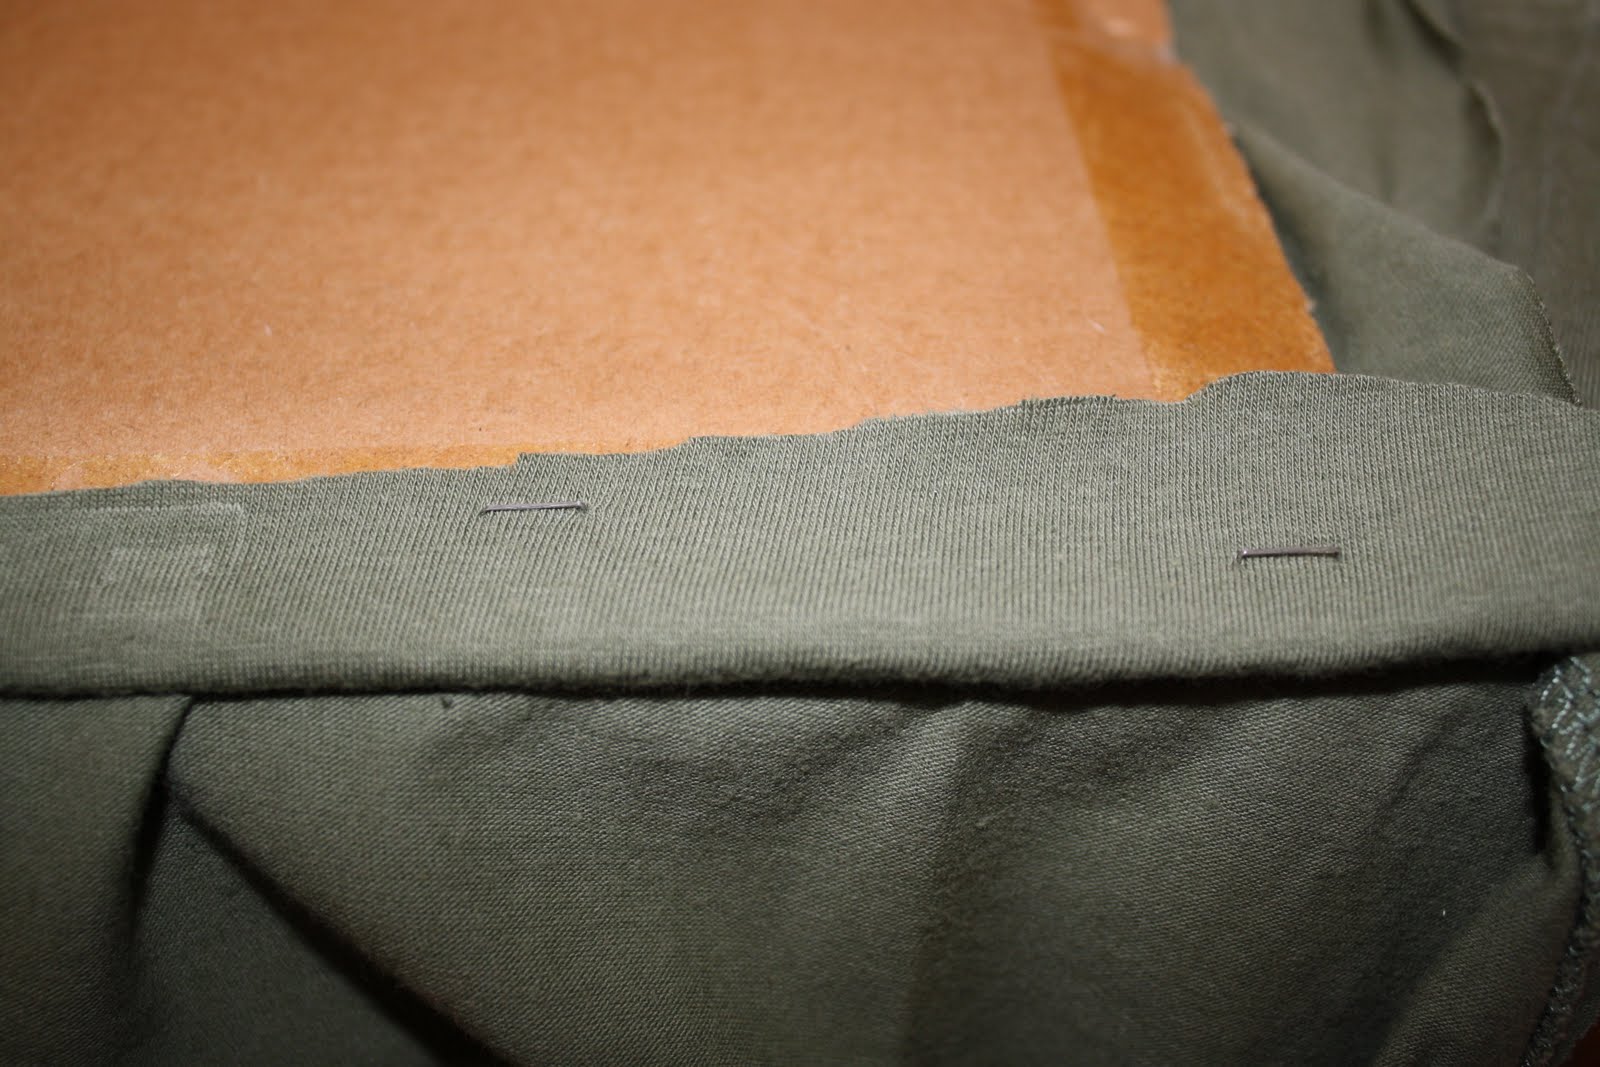
Dans mon dernier billet, je vous ai parlé de recyclage/transformation de vêtements, et notamment d’encadrement de t-shirt. Voici quelques exemples concrets. D’abord, j’avais un t-shirt dont j’aimais beaucoup la couleur et le pictogramme, mais il était devenu trop petit. Je ne pouvais donc plus le porter, mais je n’arrivais pas à m’en défaire. J’ai décidé de l’encadrer. Cependant, dans ce cas-ci, ce n’était pas simple, car la forme du pictogramme ainsi que son emplacement (près du col) faisaient en sorte qu’il me fallait un cadre d’environ 7"x7", ce que je ne trouvais pas en magasin. J’ai fini par trouver un cadre de 8"x8" pour quelques dollars à l’Armée du Salut, et il était de la même couleur dorée que le dessin sur mon t-shirt. Je l’ai donc acheté, puis démonté. J’ai remplacé l’image par mon t-shirt, découpé de la bonne dimension (l’image est quand même décalée vers le haut du cadre, puisque celui est un peu trop grand). C’était un peu compliqué, car j’ai dû agrafer le tissu sur un morceau de carton de la bonne taille, mais j’aime beaucoup le résultat final.
Pour la plupart des t-shirt, un cadre 8"x10" trouvé dans tout bon magasin suffit. C’est également plus simple à assembler, car il suffit de ciseaux pour découper l’avant du t-shirt de la bonne taille, et le tour est joué. Il s’agit ici d’un t-shirt que m’avait offert mon amie la Maman des Zigotos. Encore une fois, il était devenu trop petit, et très usé à force d’être porté. J’ai donc choisi un cadre blanc et j’ai encadré le dessin, qui fera sûrement très bien dans une chambre de bébé un jour.
Voici aussi le résultat final de deux autres projets, ainsi que mes premiers cadres du genre.
Les cadres du commerce qui sont composés de deux vitres dans un cadre de bois, ainsi que les boîtes-cadres, sont également parfaits pour encadrer un petit vêtement entier, comme un vêtement de bébé, sans avoir à le découper.
Je vous avais promis un billet sur l’organisation vestimentaire – ou plutôt, quoi faire quand on trouve qu’on a trop de vêtements. Je vais vous donner ici des trucs qui ont fonctionné pour moi par le passé, de même que certains trucs que j’essaie pour la première fois maintenant. C’est un peu long comme billet, vous êtes avertis!
D’abord, trop, c’est combien? Selon moi, ça se mesure selon l’espace dont on dispose. On peut donc avoir plus de vêtements que la moyenne, mais si on a assez d’espace pour tout entreposer de façon à ce que ça reste joli et pratique, ce n’est pas trop. Et vice-versa. J’introduis la notion de « joli » ici, car bien qu’on ne soit pas habitué à penser en ces termes pour le rangement, c’est important. Surtout pour les vêtements, car c’est quelque chose qu’on voit tous les jours, le matin en plus, alors ça démarre notre journée en quelque sorte. Si c’est le bordel dans notre commode, ou qu’on ne trouve rien dans le garde-robe, ça sape le moral. Au contraire, si c’est beau et bien rangé, ça aide beaucoup – non seulement à être de bonne humeur, mais aussi à choisir de beaux vêtements qui nous garderont de bonne humeur toute la journée.
Je suis bien consciente que les gens qui travaillent à l’extérieur de chez eux à temps plein, qui doivent entretenir une maison, qui ont des enfants, etc., n’ont pas le temps de consacrer toute une journée à réorganiser leurs vêtements et ceux de leurs enfants (qui doivent souvent coopérer). C’est normal. Mais il suffit d’une dizaine de minutes chaque soir pour faire un tiroir de commode ou une tablette de garde-robe. On en fait un peu chaque jour, en se fixant comme objectif de terminer en une semaine, par exemple
La première étape de tout rangement : l’élagage. On se débarrasse du surplus, sans pitié. Je conseille de toujours TOUT enlever du tiroir, de la tablette ou de la pole du garde-robe dès le départ. Sinon, on se contentera de piger un ou deux morceaux qui ne font plus notre affaire et on abandonnera, sans vrais résultats. Au contraire, quand l’espace à travailler est vide, ça permet de faire quatre choses : 1) tout bien nettoyer (linge humide, aspirateur, comme on veut, et tant qu’à y être, garnir d’un petit sachet de lavande ou d’un bloc de cèdre avant de continuer); 2) bien voir l’espace dont on dispose (l’aménager au besoin, mais surtout, garder en tête de quoi il peut avoir l’air s’il n’est pas surchargé); 3) être obligé de peser le pour et le contre de CHAQUE vêtement et décider s’il vaut la peine d’être conservé; 4) bien replier/remettre sur un cintre ce qu’on conserve, et repenser notre manière de le ranger au besoin. Soit dit en passant, bannissez les cintres de métal : non seulement ils sont laids, mais en plus, ils endommagent les vêtements qui y sont suspendus. Je recommande les cintres en bois (qui sont de moins en moins chers chez Ikea) ou en plastique (mais alors, allez-y avec un look uniforme, je vous prie). Pensez aussi à choisir les cintres appropriés selon le vêtement (veston, jupe, pantalon, camisole, chemise en soie, etc.). C’est le moment d’acheter de quoi bien ranger ses souliers, ceintures, cravates, etc., et même de penser à ajouter une tablette ou une deuxième pole pour les pantalons, par exemple.
Allons-y avec un exemple que j’ai déjà vécu à Montréal : organiser mon tiroir à t-shirts et camisoles. J’ai vidé le tiroir au complet en jetant tout sur mon lit, j’ai nettoyé le tiroir comme il faut et je me suis attaquée aux vêtements. J’ai décidé de faire trois sections dans le tiroir : t-shirts « tout-aller », t-shirts « habillés/chic » et camisoles. D’abord, une pile pour chaque sorte de t-shirts, et chaque t-shirt plié correctement (comme en magasin, ce qui fait que les plis sont moins visibles que si c’est plié autrement et ce qui élimine donc souvent le besoin de repasser son linge avant de le porter). Pour les camisoles : je les ai toutes roulées, classées par couleur puis disposées à la verticale dans le tiroir. Comme cela, je vois d’un coup d’œil toutes les camisoles et je peux en prendre une rapidement pour la mettre sous un t-shirt qui en a besoin, sans fouiller dans le tiroir parce que je ne sais plus où est la turquoise que je veux mettre pour finir par me rendre compte qu’elle est au lavage. Cela permet aussi de faire de l’élagage si on se rend compte qu’on a six camisoles blanches et qu’on met toujours les trois mêmes.
Dans le garde-robe, j’ai aussi classé mes vêtements par type (chandail, blouse à manches courtes, blouse à manches longues, etc.) et par couleur, ce qui fait que je trouve tout très facilement. Cela permet d’y voir clair dans ce qu’on possède. Exemple vécu : je me suis rendu compte que j’avais quatre blouses blanches à manches longues, et pourtant, aucune que j’aimais mettre. Il y en avait une trop petite, une avec une coupe trop masculine à mon goût, une trop usée et une trop mince. Conclusion : j’ai pris en note d’aller magasiner pour trouver UNE blouse blanche d’une belle coupe et pas trop mince, qui me fasse bien. La blouse trop usée a fini à la poubelle (ce n’était pas le bon tissu pour des guenilles). La coupe que je n’aimais pas et la petite ont été données. La mince a dès lors été utilisée exclusivement comme première pelure sous un chandail. Et je me suis acheté une blouse blanche à mon goût. En bout de ligne, non seulement j’avais deux fois moins de blouses, mais je les mettais bien plus souvent qu’avant. Ça aide aussi les personnes qui n’ont jamais organisé leurs vêtements et qui ne savent donc pas ce qu’elles possèdent. J’ai lu le témoignage d’une dame qui s’est rendu compte, en faisant l’exercice, qu’elle avait seize (!) cardigans noirs : c’était toujours ce qu’elle achetait, car ça va avec tout et ça ne se démode pas, mais elle les perdait dans le fond du garde-robe par la suite! Avec un peu d’organisation, elle a donc arrêté de dépenser son argent pour acheter des choses trop semblables à ce qu’elle avait déjà. Savoir exactement ce qu’on a permet aussi de dresser une liste précise de ce qu’on n’a pas. Il s’agit souvent de morceaux classiques : une paire de talons chics, un costume, un manteau long, etc. On peut alors magasiner avec un but précis.
Maintenant, pour se débarrasser des vêtements superflus : dans le doute, on essaie le vêtement. Parfois, c’est suffisant pour prendre une décision, mais sinon, je suggère de faire une pile « sursis ». Dans mon cas s’y retrouvent les vêtements que j’aime encore, mais que je ne sais plus si je veux mettre. Ensuite, de temps à autre, je pige un morceau dans la pile et je le porte pour la journée. Souvent, de deux choses l’une : soit il me va bien et je décide de le mettre plus souvent; soit il me va mal, je me sens mal dans ma peau toute la journée et je n’ai plus aucune envie de le mettre par la suite. Je sais alors que je peux m’en débarrasser sans remords. À la limite, certains morceaux peuvent être rétrogradés dans la catégorie « pyjamas » ou « linge porté quand on lave avec de l’eau de Javel ou qu’on fait de la peinture ».
On peut décider aussi de ne garder que ce qu’on met dans une période de 12 mois; si on ne l’a pas mis depuis un an, il y a des bonnes chances qu’on ne le remette plus. Il y a certaines exceptions, comme une robe chic ou un costume dont on peut avoir besoin trois fois une année puis jamais l’année suivante. Mais en général, on met 20 % de nos vêtements 80 % du temps, c’est donc dire qu’on en a plus qu’il le faut. Vous pouvez tenter l’expérience : pour vos vêtements qui sont sur des cintres, accrochez-les à l’envers – c’est-à-dire avec le bout courbé du cintre qui pointe vers vous plutôt que vers le fond du garde-robe. Quand vous mettez un morceau, remettez ensuite le cintre à l’endroit. Au bout d’un an, voyez combien de cintres sont encore retournés!
Chez certaines, il peut y avoir une pile « je le porterais bien, mais... ». Là-dedans entrent les pantalons dont il faut ajuster le bord, les chemises auxquelles il manque un bouton, les vêtements déchirés ou tachés, etc. La question : si ce vêtement est si important, pourquoi n’a-t-il pas déjà été arrangé? Il est raisonnable de se donner un délai d’une semaine ou deux après ce grand ménage pour tout arranger, mais si ce n’est pas fait au bout du délai, il vaut sans doute mieux se débarrasser du vêtement. Si vous avez des vêtements dont la taille ne vous sied plus (trop grands ou trop petits), ils se retrouvent également dans cette pile. Je pense qu’il faut habiller son corps tel qu’il est maintenant, alors ça ne vaut pas la peine de garder toute une panoplie de vêtements trop petits, au cas où on perdrait du poids. Un ou deux morceaux comme incitatif, soit, mais donnez le reste. (Exception : vêtements de maternité si on prévoit une autre grossesse, et vêtements pré-maternité si on est enceinte, bien sûr.) On peut aussi se demander pourquoi on ne le porte pas. Par exemple, si on n’aime pas la texture du vêtement, mais qu’on aime la couleur, on prend note de cela et on cherche un nouveau morceau de la même couleur, mais d’une texture et d’une coupe qu’on aime. C’est plus facile de se débarrasser de quelque chose si on sait qu’on a autre chose qu’on aime davantage.
Pour se débarrasser de ses vêtements, on pense d’abord à une vente de garage ou à un site comme eBay, surtout pour les vêtements d’enfants, qui deviennent souvent trop petits avant d’être usés. Si on n’a pas l’énergie ou le temps pour cela, le mieux est de donner ses vêtements à un organisme caritatif, spécialisé au besoin (comme ceux qui récoltent les robes de bal pour les offrir à des jeunes filles qui n’ont pas les moyens de s’en acheter une neuve, ou encore ceux qui offrent des costumes aux femmes dans le besoin qui retournent dans le monde du travail). Tout vêtement donné doit bien sûr être propre et en bon état; l’exception est les serviettes tachées ou usées, qui feront toujours plaisir aux abris pour les animaux. On peut aussi recycler son linge (j’y reviens). En dernier recours, on en fait des guenilles ou on les jette.
Comme je le disais dans mon billet précédent, mon problème, c’est que je forme souvent un attachement émotionnel à mes vêtements, ce qui fait que même quand j’admets que je ne les mettrai sans doute plus, je peux avoir du mal à m’en défaire. Parfois, ce qui aide, c’est prendre une photo du vêtement et la garder à la place du vêtement lui-même (surtout une photo numérique, qui ne prend aucune place). Ce que je fais aussi parfois, au lieu de jeter un t-shirt que j’aime mais que je ne mets plus, c’est de l’encadrer et d’accrocher le cadre à un endroit où il me fera sourire. Je vais faire un billet séparé avec quelques exemples. C’est ce que j’appelle du recyclage (ou de la transformation) de vêtements, que j’ai mentionné plus haut. J’ai aussi un nouveau truc : je veux apprendre à coudre. Je pense donc garder certains vêtements et les utiliser pour faire des projets simples, comme transformer un chandail en coussin ou des jeans en sac à bandoulière. J’en parlerai ici quand je me lancerai. Si l’idée vous tente, mais que vous ne savez pas où donner de la tête, je vous recommande d’aller faire un tour sur KaHo pour voir ce qui s’y fait; c’est vraiment superbe!
Enfin, quand on remet tout en place dans son garde-robe propre, bien rangé et pas trop plein, on veut que l’effet dure. Je vous laisse donc avec un dernier conseil : chaque fois que vous achetez un nouveau morceau, débarrassez-vous d’un vieux morceau. Cela évite d’avoir à tout recommencer, mais en plus, cela permet d’être plus exigeant envers les vêtements qu’on achète. On sait qu’il faudra se débarrasser de quelque chose qu’on possède, alors on aura plus tendance à réfléchir à l’achat, à laisser tomber les vêtements qui ressemblent trop à ce qu’on a déjà et à éviter les coups de tête (notre portefeuille ne s’en portera que mieux). On peut alors garder une boîte ou un sac, sous son lit, où on met les vêtements dont on se débarrasse, et quand on en a assez, on les donne.
Here we are, the post with our Thanksgiving dinner! This year, the Engineer and I decided to do things the American way. I’ll tell you about our meal; the recipes are at the end of the post. I had always wanted to try a turducken, but since there were only three of us and turduckens often weigh over 20 lbs, we decided to go with a more reasonable turducken roast. All the turducken roasts we saw had the stuffing already inside, though, so I couldn’t try any stuffing recipes I wanted to make, but then again dinner was easier. Our roast had a wild rice stuffing. We still ended up with way more meat than we thought, because a turducken is entirely deboned, so a 5-lb roast is 5 lbs of meat, straight, without anything to cast aside! It was ready exactly when we thought it would be, at 6pm, so there was no delay for dinner. We were a little disappointed, though, because we couldn’t tell the three birds apart. (Also, when you see the final picture of my plate of food, rest assured that I didn’t eat all the poultry, it was just too much.)
I usually make my orange-ginger cranberry sauce, which I absolutely love, but I was also dying to try Molly Wizenberg’s famous cranberry chutney, so that’s what I went with this year. It calls for dried cherries: in Montreal, it would have taken me several trip to various grocery stores to find them. Here, though, our local grocery store has two kinds (tart cherries and Bing cherries). I mean, not only does my local store have dried cherries, but I can choose what kind of dried cherries I want! Isn’t life wonderful? Anyway, as the chutney was cooking, it was like the vinegar picked up the cloves and their smell travelled through the entire house, so I was a little worried about the final taste – would it be sweet enough? It was, thankfully, and I really enjoyed it. The recipe made a lot, though, so we froze some, along with leftover turducken. I think next year, I might try adding dried cherries to my standard sauce and see how that goes.
I also wanted to make candied yams. Of course, in North America, what is marketed as a “yam” is actually a sweet potato. I happened to have cans of sweet potato purée (because when they went on sale, I couldn’t decide whether I wanted sweet potato pie or pumpkin pie, so I bought both; I decided on pumpkin pie in the end, but I wanted to use up the cans of sweet potato purée nonetheless). I used two of those (15 oz each), but really only because I had them on hand. In hindsight, you really do want to use pieces of sweet potato, not purée. That being said, I really liked this dish. Good thing it’s only once a year, though, because it’s like dessert as a side dish. I used this recipe from Cooks.com, but without the actual cinnamon candy (there are limits to what I’ll eat as a side dish).
Then, I needed something green, but I didn’t feel like doing the whole green bean casserole thing, so I made lima beans with a cumin mint dressing. We don’t drink much alcohol, so we had pomegranate soda. And pumpkin pie for dessert. It was a delicious meal!
Molly Wizenberg’s Cranberry Chutney
24 oz apricot preserves (not sugar-free)
¾ cup raspberry vinegar (or ¾ cup white distilled vinegar plus 1 ½ tsp raspberry preserves)
a pinch of salt
¼ tsp ground cloves
¼ cup Grand Marnier
24 oz (2 bags) fresh cranberries, nasty ones discarded
½ cup finely chopped crystallized ginger
1 ¼ cups dried tart cherries
In a large, heavy-bottomed saucepan, combine the apricot preserves, raspberry vinegar (or vinegar and raspberry preserves), salt, cloves, and Grand Marnier. Stir to mix, and place over medium-high heat. Bring the mixture to a boil, and continue to cook – it will bubble aggressively, and you should stir regularly to keep it from scorching – for about 10-15 minutes, or until it has thickened slightly. It may seem like it’s still too thin, but keep in mind that it will thicken considerably as it cools. Reduce the heat to medium, add the cranberries, and cook until they are soft but not all are popped. (I know that they’re ready when I hear one or two of them pop; that’s a good indicator that most of them must be getting pretty soft.) Add the ginger and cherries, stir well, and remove from the heat. Cool completely before serving. The chutney will thicken considerably as it cools.
Candied Yams
1 large can (about 30 oz) sweet potatoes (or 2 small cans)
2 tsp butter
¼ cup brown sugar
1 tsp cinnamon
1 cup marshmallows (I used 18, sliced in half crosswise)
Preheat oven at 325 °F. Drain half of the juice from the can of sweet potatoes. Place in a casserole dish. Dot with butter (I must admit I totally forgot this step). Mix brown sugar and cinnamon together and sprinkle on top. Add cover top with marshmallows. Cover loosely with foil (again, I forgot) and bake for 20-25 minutes.
Enfin, on arrive à mes recettes de l’Action de grâces américaine! Cette année, j’avais décidé de m’intégrer à mon nouveau pays en faisant les plats typiquement américains dont j’entendais parler mais auxquels je n’avais pas encore goûté. Pour le souper, on avait un rôti de turducken, un chutney aux canneberges et des patates douces confites (recettes à venir). Et bon, j’avais déjà fait de la tarte à la citrouille, mais j’ai essayé une nouvelle recette, que j’ai faite le jeudi matin. Les tartes à la citrouille sont très simples, mais ce qui est parfois plus compliqué, c’est d’en trouver une recette sans lactose (car la majorité des recettes font appel à du lait condensé sucré). De plus, c’est préférable d’avoir une recette qui utilise une boîte de conserve de purée de citrouille – ni plus, ni moins – pour éviter les restes. Celle-ci vient des Banlieusardises, et j’ai utilisé ma recette de pâte brisée additionnée de sucre et d’épices au lieu de la pâte feuilletée, mais vous faites comme vous voulez. Pour la faire sans gluten, je recommande cette recette-ci.
¼ tasse de cassonade
2 c. à thé de fécule de maïs
¼ c. à thé de cannelle moulue
¼ c. à thé de muscade moulue
¼ tasse de mélasse
3 œufs battus
1 c. à thé de gingembre frais râpé
425 ml (1 petite boîte de conserve) de purée de citrouille
¼ tasse de beurre ramolli (ou de margarine)
1 croûte à tarte feuilletée (ou 1 abaisse de pâte brisée)
Préchauffez le four à 350 °F.
Dans un grand bol, mélangez la cassonade, la fécule de maïs, la cannelle et la muscade.
Ajoutez la mélasse, les œufs battus, le gingembre, la purée de citrouille et le beurre. Battez énergiquement pour obtenir un mélange homogène. Versez dans la croûte à tarte.
Faites cuire au four 35-40 minutes, ou jusqu’à ce que le dessus soit doré et que la préparation ait figé jusqu’au centre.
About a month ago, I made a roasted pumpkin hummus, using a recipe I found on Gluten-Free Girl. I used the seeds from our lopsided, scarred Halloween pumpkin, which we affectionately named Mr. Garibaldi. I dutifully followed the recipe, and while the result was indeed delicious, something just wasn’t right. The hulls of the seeds were just too hard, and no matter how much I processed them, there were too many pieces left in the spread for it to be enjoyable.
So I decided to buy hulled pumpkin seeds in the bulk aisle and try again (without boiling them to salt them, though). And it was much better! I still feel like the finished product is too thick, so I added water. Then again, the seeds were delicious once seasoned and roasted, so next time I might just make those and not bother with the spread! Let me know if you think of any improvements to this recipe.
For the roasted pumpkin seeds
1 cup raw hulled pumpkin seeds
1Tbsp olive oil
½ tsp smoked paprika
½ tsp dried ginger powder
1 tsp salt
½ tsp cracked black pepper
Preheat the oven to 400 °F. Put a piece of parchment paper on a baking sheet. Pour the olive oil on the parchment paper and spread it out with your hands. Put the seeds on the oiled parchment. Sprinkle them with the smoked paprika, ginger, salt and pepper. Slide them into the oven and cook until the seeds have browned to your liking, about 10 to 15 minutes. (I roasted them for 8 minutes, actually, because they were popping.)
Take them out of the oven, let them cool, and eat – or make the spread.
For the spread
1 cup roasted pumpkin seeds
about ¼ cup olive oil
juice of 1 large lemon
3 cloves garlic, peeled
15 oz chickpeas
at least ¼ cup warm water
1 tsp smoked paprika
Put the pumpkin seeds into the bowl of a food processor. Turn on the processor and start to break up the pumpkin seeds. As the processor is running, pour in the olive oil, slowly, until you have a thick paste. (The seeds will still be a bit noticeable, rather than entirely smooth. That's okay.) Turn off the food processor.
After you have formed the paste, squeeze in the lemon juice. Throw in the garlic and the chickpeas. Turn on the processor and whirl it all up until you have the thick consistency of hummus. You might need to add the water and more olive oil, as the processor is running, depending on the texture you like.
When you have the consistency you want, sprinkle in the smoked paprika and run the processor until the paprika is fully incorporated. Take the spread out of the food processor and let it sit in the refrigerator for 2 hours to allow the flavors to develop fully.
Eat with crackers or vegetables or whatever you want.