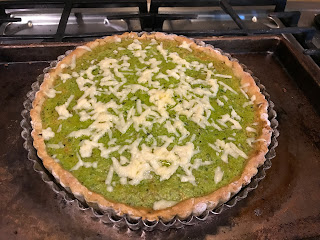
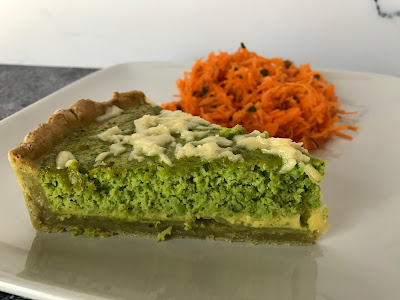
Thursday, March 31, 2022

Tarte au jus de pomme


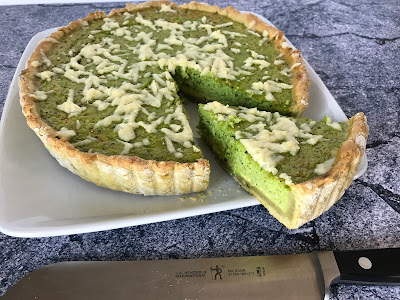
Il s’agit bien d’une tarte au jus de pomme, pas d’une tarte aux pommes (la recette vient de Ricardo). J’étais intriguée par l’idée d’une tarte sans sucre raffiné et aussi par la texture promise, celle d’une tarte au sucre, justement. Et c’était sucré, bien sûr, mais il y avait également une délicieuse pointe d’acidité avec ce bon goût de pomme. 

J’aurais quelques changements à faire, comme celui d’utiliser une assiette à tarte peu profonde (parce que je trouve que me croûte avait l’air ridiculement haute à côté de la garniture), et j’ai annoté les temps de cuisson ci-dessous. J’ai aussi ajouté une bonne pincée de sel du Saint-Laurent, que j’écris dans les ingrédients. 

Pour la garniture 
7 tasses de jus de pomme frais à l’ancienne (j’en avais 6 ½ tasses) 
¼ tasse de sirop d’érable 
2 c. à soupe de farine tout usage non blanchie 
2 c. à soupe de fécule de maïs 
1 bonne pincée de sel (voir plus haut) 
1 œuf 
½ tasse de crème sans lactose ou de substitut de crème 

Pour la croûte 
1 ¼ tasse (190 g) de farine tout usage non blanchie 
½ c. à thé de poudre à pâte 
¼ c. à thé de sel 
½ tasse de beurre sans lactose, froid et coupé en dés 
3 c. à soupe d’eau glacée 


Pour la garniture 
Dans une grande casserole à feu moyen, réduire le jus de pomme jusqu’à l’obtention de 1 ¼ tasse de jus, soit environ 50 minutes (il m’a fallu 1 h 40 min). Écumer au besoin. Retirer du feu. Ajouter le sirop d’érable et laisser tiédir. 

Pour la croûte 
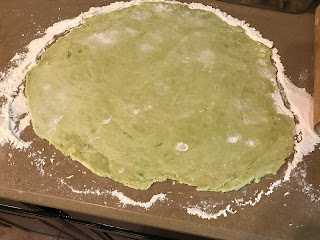
Entre-temps, au robot culinaire, mélanger la farine, la poudre à pâte et le sel. Ajouter le beurre et mélanger quelques secondes à la fois jusqu’à ce qu’il ait la grosseur de petits pois. Ajouter l’eau et mélanger de nouveau jusqu’à ce que la pâte commence tout juste à se former. Ajouter de l’eau au besoin. Retirer la pâte du robot et former un disque. Envelopper de pellicule plastique et réfrigérer 20 minutes. 

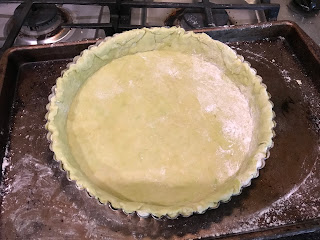
Sur un plan de travail légèrement fariné, abaisser la pâte à une épaisseur d’environ 3 mm (1/8 po). Foncer une assiette à tarte de 23 cm (9 po) de diamètre. Couper l’excédent de pâte à 1 cm (½ po) à l’extérieur du moule. Rabattre le pourtour de la pâte sur elle-même pour former une double épaisseur. Festonner la bordure (avec les doigts, former une suite de courbes pour la décorer). 

Placer la grille au centre du four. Préchauffer le four à 375 °F. 

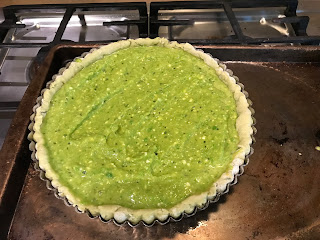
Dans un bol, mélanger au fouet la farine, la fécule de maïs et le sel. Ajouter l’œuf et bien mélanger. Incorporer la crème et le mélange de jus de pomme réduit en remuant jusqu’à ce que la préparation soit homogène. Verser dans l’abaisse. 

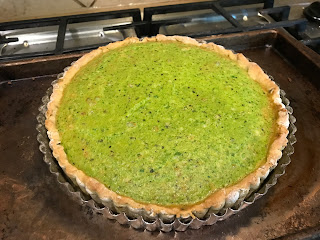
Cuire au four 35 minutes ou jusqu’à ce que la garniture soit figée et légèrement dorée (dans mon cas, après 35 minutes, j’ai recouvert la croûte d’un anneau de silicone et j’ai laissé cuire la tarte 10 minutes de plus). Laisser tiédir sur une grille avant de servir. On peut la servir à la température de la pièce ou froide.


Wednesday, March 30, 2022

Pain doré croustillant au bacon


Ce pain doré croustillant au bacon n’est pas santé du tout. Il y a des lipides, il y a des glucides, c’est clair. Mais j’avais décidé que je voulais faire certaines recettes qui traînaient sur mon ordinateur depuis quelques années, alors voilà, je me suis gâtée. (Quand même, j’ai réduit les quantités pour faire 2 tranches de pain seulement.) Ça valait la peine parce que c’était vraiment délicieux! 

Pour le croustillant au bacon 
340 g (¾ lb) de tranches de bacon, émincées 
1 pain carré blanc non tranché 
1 c. à soupe de cassonade 

Pour le pain doré 
3 œufs 
1 tasse de crème sans lactose 
½ tasse de lait sans lactose 
1/3 tasse de sirop d’érable 
1 c. à thé d’extrait de vanille 
3 c. à soupe de beurre sans lactose 

Pour la garniture 
2 poires, épépinées et tranchées finement (j’ai pris 1 pomme) 
85 g (3 oz.) de copeaux de fromage cheddar fort 
50 g (2 tasses) de roquette sirop d’érable, au goût (je n’en ai pas mis) 


Pour le croustillant au bacon 
Dans une grande poêle à feu moyen-élevé, cuire le bacon jusqu’à ce qu’il soit bien doré en remuant fréquemment. Égoutter sur une assiette tapissée de papier absorbant. Jeter le gras de bacon. Nettoyer la poêle. 

Sur un plan de travail, couper 6 tranches de pain de 2,5 cm (1 po) d’épaisseur chacune et les réserver pour le pain doré. Couper ensuite 105 g (1 ½ tasse) de cubes de pain. Conserver le reste du pain pour un autre usage. 

Au robot culinaire, réduire le bacon, les cubes de pain et la cassonade en chapelure fine. Réserver. 

Pour le pain doré 
Dans un bol, fouetter les œufs avec la crème, le lait, le sirop d’érable et la vanille. 

Répartir les tranches de pain dans un plat rectangulaire de 33 x 23 cm (13 x 9 po). Arroser du mélange de crème. Laisser imbiber 5 minutes, retourner les tranches de pain et imbiber de nouveau 5 minutes. 

Les retirer du plat et les placer sur une plaque de cuisson. Laisser reposer 1 minute pour permettre au liquide d’être bien absorbé. 

Répartir la moitié de la chapelure de bacon sur les tranches de pain et presser pour faire adhérer. Retourner les tranches et répéter avec le reste de la chapelure sur le deuxième côté. 

Placer la grille au centre du four. Préchauffer le four à 350 °F. Tapisser une plaque de cuisson d’un tapis de silicone ou de papier parchemin. 

Dans une grande poêle à feu moyen, dorer la moitié des tranches à la fois dans la moitié du beurre. Déposer sur la plaque. Cuire au four 5 minutes ou jusqu’à ce que les tranches gonflent légèrement. 

Servir le pain doré dans des assiettes. Répartir les poires, le fromage et la roquette. Ajouter du sirop d’érable, au goût.


Monday, March 28, 2022

Chopped Salad with Date Tahini Vinaigrette

I don’t think I’ve talked about Amy Zitelman’s The Tahini Table on here before, but it’s a cookbook I’ve been enjoying lately. I made this chopped salad from it: it’s based on a traditional Israeli salad of tomato, cucumber, and onion (I’ve also seen versions with bell pepper), but this one takes it to the sweet side with the addition of apples and dates. This was delicious! The quantities below make 2 or 3 servings. (You can find date syrup on Soom, which also sells the cookbook.) 

1 tsp. sea salt 
1 garlic clove, minced 
¼ cup freshly squeezed lemon juice 
6 pitted Medjool dates, finely chopped 
3 Persian or Kirby cucumbers, finely chopped 
2 celery ribs, finely chopped 
1 medium tomato, finely chopped 
1 apple, cored and finely chopped 
½ small red onion, finely chopped 
1 Tbsp. tahini paste 
2 tsp. silan date syrup 
1 tsp. extra-virgin olive oil 
½ tsp. freshly ground black pepper 
½ cup chopped flat-leaf parsley 

Mix the salt, garlic, and lemon juice in a small bowl (I used a lidded jar) until combined and let it sit for 10 minutes or so. 

Toss the dates, cucumbers, celery, tomato, apple, and onion in a salad bowl to combine. 

Whisk the tahini, date syrup, olive oil, and pepper into the garlic mixture until smooth. Add the vinaigrette to the salad mixture and toss. Taste and season with salt and pepper as needed. 

Cover and refrigerate for at least 20 minutes or up to 24 hours. Stir in the parsley just before serving.


Asian Chicken Lettuce Wraps

Here’s an Asian chicken lettuce wrap recipe that I made recently. I really liked this dish, and while I don’t think the kids loved it, they also didn’t have any problem with it. For some reason, I think grated carrots would have been a nice addition here and I would use them next time. 

For the lettuce leaves, we had a Boston lettuce, but in hindsight I think we should have used something sturdier (though not romaine because the leaves tend to be too long). One head of lettuce was about enough for 4 servings. Since I had doubled the recipe, we resorted to tortillas the next night, and the kids liked that better! 

3 Tbsp. hoisin sauce
2 Tbsp. low-sodium soy sauce 
2 Tbsp. rice wine vinegar 
1 Tbsp. sriracha (optional; I used a dash of hot sauce) 
1 tsp. sesame oil 
1 Tbsp. extra-virgin olive oil 
1 medium onion, diced 
2 cloves garlic, minced 
1 Tbsp. freshly grated ginger 
1 lb. ground chicken 
½ cup canned water chestnuts, drained and sliced 
2 green onions, thinly sliced 
kosher salt 
freshly ground black pepper 
large leafy lettuce (leaves separated), for serving 

In a small bowl, whisk together hoisin sauce, soy sauce, rice wine vinegar, sriracha, and sesame oil. 

In a large skillet over medium-high heat, heat olive oil. Add onions and cook until soft, 5 minutes, then stir in garlic and ginger and cook until fragrant, 1 minute more. Add ground chicken and cook until opaque and mostly cooked through, breaking up meat with a wooden spoon. 

Pour in sauce and cook 1 to 2 minutes more, until sauce reduces slightly and chicken is cooked through completely. Turn off heat and stir in chestnuts and green onions. Season with salt and pepper. 

Scoop about ¼ cup of chicken mixture into center of each lettuce leaf. Serve immediately.


Thursday, March 24, 2022

Pâté chinois moitié-moitié

Une dernière recette du livre Presque végé de Geneviève O’Gleman! J’avais essayé ses boulettes à la dinde et aux champignons, qui étaient correctes, sans plus (mais servies à côté de courge rôtie avec tahini à l’orange qui vaut le détour!). Son bœuf braisé avec champignons et polenta au parmesan est passable. Mais j’ai aussi essayé son pâté chinois moitié-moitié, où la moitié du bœuf a été remplacé par des lentilles. Et je vous jure qu’on n’y voit que du feu! C’était absolument délicieux, même les enfants ont aimé! En plus, l’utilisation du maïs surgelé (au lieu de mon mélange classique en grains et en crème) permet à mes enfants parfois capricieux de mettre de côté le maïs beaucoup plus facilement (j’en ai un qui mange la viande et les patates, l’autre qui a mangé juste la viande – aucun des deux ne s’est rendu compte qu’il y avait des lentilles). Vraiment excellent, je vais le refaire! (Et puis, on va se le dire, ce n’est pas très esthétique, du pâté chinois, mais il fallait absolument que je vous montre la texture!) 

2 lb. de pommes de terre 
3 tasses de maïs en grains surgelé 
1 oignon, haché 
1 boîte de 540 ml de lentilles, rincées et égouttées 
1 c. à soupe d’huile d’olive 
1 lb. de bœuf haché 
2 c. à soupe de sauce Worcestershire 
sel et poivre 
¼ tasse de lait sans lactose 
¼ tasse de beurre sans lactose 
1 pincée de paprika fumé 

Peler les pommes de terre et les couper en cubes. Déposer dans une grande casserole et couvrir d’eau. Porter à ébullition à feu vif. Réduire à feu moyen, couvrir et cuire 15 minutes ou jusqu’à ce que les pommes de terre soient tendres. 

Dans un bol moyen allant au micro-ondes, chauffer le maïs 2 minutes. Égoutter et réserver. 

Préchauffer le four à 350 °F et placer la grille au centre du four. 

Dans un grand poêlon antiadhésif, chauffer l’huile à feu moyen-vif. Cuire l’oignon et le bœuf de 5 à 7 minutes ou jusqu’à ce que le bœuf commence à dorer. Ajouter les lentilles et la sauce Worcestershire. Poivrer généreusement et ajouter une pincée de sel. 

À l’aide d’une fourchette (j’ai pris mon pilon à patates, que j’ai rincé ensuite), écraser grossièrement environ la moitié des lentilles. Poursuivre la cuisson 5 minutes ou jusqu’à ce que la viande soit bien cuite. Retirer du feu et réserver. 

Égoutter les pommes de terre et remettre dans la casserole. Réduire en purée à l’aide d’un pilon à patates. Incorporer le lait et le beurre. Poivrer généreusement et ajouter une bonne pincée de sel. 

Dans un plat de cuisson carré de 8" de côté (j’ai plutôt pris un grand plat ovale), déposer dans l’ordre (évidemment) le mélange de bœuf et de lentilles, le maïs, puis la purée de pommes de terre. Saupoudrer de paprika et cuire au four 20 minutes. Terminer la cuisson sous le gril 2 minutes.


Wednesday, March 23, 2022

Sheet Pan BBQ Tofu


I really don’t know why I waited so long to try this sheet pan BBQ tofu recipe. It’s very easy to make and very flavorful, and the cooking method makes for a pleasantly crisp texture. The kids did not care for this, but the Engineer and I absolutely loved it. This recipe makes about 2 servings (I served broccoli slaw on the side). 

14 to 16 oz. extra-firm tofu, drained and patted dry 
1 ½ tsp. paprika 
1 tsp. ground cumin 
1 tsp. chili powder (I used 1 large pinch of Korean pepper) 
1 tsp. garlic powder 
½ tsp. kosher salt 
¼ tsp. smoked paprika (I used a drop of liquid smoke instead) 
¼ tsp. freshly ground black pepper 
1 ½ Tbsp. olive oil, plus more for the baking sheet 
¼ cup barbecue sauce 

Wrap the block of tofu in a few layers of paper towels, then set on a dinner plate or cutting board. Weigh it down with a heavy object like a skillet, pot, or large can while the oven preheats. Tear the tofu into bite-sized pieces (I find that this not only makes for a more pleasant texture, but it also allows the tofu to get more flavorful). 

Arrange a rack in the middle of the oven and heat to 425 °F. Lightly coat a rimmed baking sheet with olive oil. 

Meanwhile, place the sweet paprika, cumin, chili powder, garlic powder, salt, pepper, and smoked paprika in a medium bowl and stir to combine. Pour in the oil and stir to combine. Add the tofu and gently stir to evenly coat. Place the tofu in a single layer on the prepared baking sheet. 

Roast, stirring every 10 minutes so it cooks evenly, until the tofu is crisp all over, 30 to 35 minutes total. Drizzle the tofu with the barbecue sauce and toss to combine, then serve.


Friday, March 18, 2022

Pancakes au fromage cottage

Un déjeuner-santé qui en vaut la peine! Meilleur que cette tartinade chocolatée avec dattes et graines de citrouille, bien mieux reçu que ces galettes-matin canneberges et chocolat


Il s’agit de ces pancakes au fromage cottage bien protéinées. Bon, vous allez me dire que c’est grumeleux, le fromage cottage, et que vous n’en voulez pas dans vos pancakes. Mais attendez! Celles-ci sont passées au mélangeur pour une texture lisse, et la pâte peut être préparée le soir d’avant! C’est super pratique, et super bon en plus. La seule chose que je changerais, c’est peut-être de les faire un peu plus petites la prochaine fois, en versant la pâte avec une cuillère à crème glacée plutôt qu’une louche. 

1 ½ tasse de fromage cottage sans lactose 
4 œufs 
1 c. à thé de vanille 
2 c. à soupe de sucre 
1 tasse de farine tout-usage 
1 c. à soupe de poudre à pâte 

Dans un mélangeur, mettre le fromage cottage, les œufs, la vanille, le sucre, la farine et la poudre à pâte. Bien mélanger. (La pâte se conserve au réfrigérateur jusqu’au lendemain au besoin.) 

Faire chauffer une poêle à feu moyen et ajouter un peu d’huile de canola. Faire cuire les pancakes jusqu’à ce qu’elles soient dorées de chaque côté, en rajoutant de l’huile fréquemment pour éviter qu’elles collent à la poêle. 

Servir avec des fruits ou du sirop d’érable.


Thursday, March 17, 2022

Pea Quiche with Avocado Crust


This green tart by Jamie Oliver is perfect for spring! And given that it’s so green, it’s perfect for Saint Patrick’s Day as well. 

The basic idea of this pastry dough is that puréed avocado is used in place of butter. It worked remarkably well! The only problem I encountered is that since I don’t have a baking dish that was the right size, I used a standard 9” tart pan, but I had way too much dough. I think I should have used a baking sheet or something, to make a much thinner tart. So I recommend halving the dough recipe to fit a 9” pan, and that’s what I wrote below – if you want the larger version, click through the link above to the original post. I also recommend incorporating all the cheese into the filling instead of keeping some to top the quiche. Finally, I didn’t serve the green salad with this, because I already had leftover French grated carrot salad that was delicious! I really liked this tart when I made it for lunch for myself, but it’s too bad everyone else refused to taste it. 

Note that while the dough is green when raw, it bakes to a golden-brown and the green mostly disappears. That being said, if you have leftover dough, the avocado in it will oxidize and the raw dough will turn brown – still edible, of course, just unappetizing. I’m not sure how quickly that happens if you freeze the dough, but I wouldn’t take any chances. 

1 ripe avocado 
200 g all-purpose flour, plus extra for dusting 
2 Tbsp. cold water, plus more if needed 
6 large free-range eggs 
300 g frozen peas 
90 g Cheddar cheese 
½ a bunch of basil (15g)
extra-virgin olive oil 
100 g bag of mixed salad, for serving 
1 lemon, for serving extra-virgin olive oil, for serving 

Halve, destone, and peel the avocado. Weigh the flesh – you want 100 g to get your ratios right (if you don’t have enough, simply top up to 100 g with extra virgin olive oil). In a large bowl, smash up the avocado, then gradually rub in the flour, a pinch of sea salt and 2 tablespoons of cold water until you have a dough (you can add more water as needed – I used a total of 5 ½ tablespoons for the double batch, which works out to an extra ¾ Tbsp. beyond the original 2 Tbsp. as written here). Knead until smooth, then wrap and rest for 15 minutes. 

For the filling, crack the eggs into a blender, then add the frozen peas and the cheddar. Rip in the top leafy half of the basil, add a pinch of salt and black pepper, and blitz until smooth. 

Preheat the oven to 400 °F. Roll out the avocado pastry on a flour-dusted surface to just under ½ cm thick. Loosely roll it up around the rolling pin, then unroll it over an oiled 9” tart pan, easing it into the sides and pricking the base. Roughly tear off any big bits of overhang, then bake for 10 minutes, or until lightly golden. Evenly pour in the filling and bake for another 30-35 minutes, or until set. (The original recipe called for 15 minutes, but that was for the filling spread out much more thinly in a larger pan; I baked mine for 35 minutes.) 


Dress the salad leaves with extra virgin olive oil and lemon juice, season, then sprinkle over the quiche to serve (or serve on the side).


Wednesday, March 16, 2022

Vegan Chocolate Avocado Cookies


So, despite the claims of the original blog post where I saw this recipe, I’m not sure I can say that this recipe is healthy. I mean, yes, it’s got avocado purée replacing some of the butter, BUT there’s also an equivalent amount of coconut oil replacing that butter, and sadly, it turns out that coconut oil is not a healthy fat. However, the cookies were really good, and no one would have guessed the special ingredient (I didn’t say anything). 

The original recipe yielded 2 dozen cookies, but I made mine bigger and had 13 in all – I baked them for the same amount of time called for and they were perfectly chewy. 

I had leftover mashed avocado and ended up freezing it – I’m pretty sure it could be thawed and used for this recipe again. 

1 ¼ cups all-purpose flour 
1 tsp. baking powder 
½ tsp. sea salt 
2/3 cup Dutch processed cocoa 
½ cup brown sugar 
¼ cup granulated sugar 
¼ cup coconut oil 
¼ cup mashed avocado 
1 tsp. vanilla extract 
1/3 cup almond milk (or nut-free plant milk) 
½ cup vegan chocolate chips 

Preheat the oven to 350 °F. Line a large baking sheet with a silpat baking mat or parchment paper and set aside. 

In a medium bowl, whisk together the flour, baking powder, salt, and cocoa. Set aside. 

In the bowl of a stand mixer, beat the brown sugar, granulated sugar, coconut oil, and avocado together until creamy and smooth, about 2-3 minutes. Add in the vanilla extract. 

With the mixer on low, add half of the flour mixture. Add the milk and then add the remaining dry ingredients. Mix until the flour disappears. Stir in the chocolate chips. 

Form cookie dough into tablespoon balls (I had about 2 heaping tablespoons per cookie) and place on prepared baking sheet, about 2 inches apart. Slightly flatten the cookies with the palm of your hand or a spatula. Bake cookies for 10 minutes, or until set around the edges, but still soft in the center. Let the cookies cool on the baking sheet for two minutes. Transfer to a wire cooling rack and cool completely.


[Update, April 1st 2022: I just made these again with the frozen avocado purée and I used my 3-oz cookie scoop. Worked like a charm!]


Salade orange et avocat

Est-ce que ça se fait, publier une recette sans photo? J’espère que oui, parce que ça m’arrangerait vraiment. J’ai peur que si cette salade ne se retrouve pas sur mon blogue, je vais l’oublier, et ce serait vraiment dommage! Je l’ai prise dans le Coup de Pouce de décembre 2021, mais je ne la retrouve pas en ligne. C’est un plat d’accompagnement vraiment délicieux! 

Pour la salade 
2 ou 3 orange navel (ce serait aussi bon avec des oranges sanguines) 
10 tasses de feuilles de laitue mélangées 
2 gros avocats, coupés en tranches fines 
½ tasse d’arilles de grenade 
½ tasse de pistaches non salées grillées 
½ tasse de fromage feta sans lactose émietté 
flocons de sel (de type Maldon) 
poivre noir 

Pour la vinaigrette 
3 c. à soupe de jus d’orange (pris des oranges navel, voir ci-dessous) 
2 c. à soupe de vinaigre de vin blanc 
1 c. à soupe de sirop d’érable 
1 c. à soupe de moutarde de Dijon 
1 c. à thé de zeste d’orange râpé finement (pris des oranges navel, voir ci-dessous) 
¼ tasse d’huile d’olive 

Prélever le zeste d’orange pour la vinaigrette et mettre de côté. Peler les oranges à vif. En travaillant au-dessus d’un bol pour récupérer le jus, à l’aide d’un couteau d’office, dégager les quartiers d’orange en passant la lame de part et d’autre de chaque membrane. Réserver les suprêmes d’orange et garder le jus pour préparer la vinaigrette. 

Dans un petit pot (ou dans un bol, avec un fouet), mélanger les ingrédients de la vinaigrette. Réserver. 

Au centre d’une grande assiette de service (ou d’un saladier, c’est joli quand même!), déposer un petit bol et y verser la vinaigrette. Disposer les feuilles de laitue dans le plat, autour du bol, de manière à former une couronne. Couvrir la laitue des suprêmes d’orange réservés en alternant avec les tranches d’avocat. Garnir la salade des arilles de grenade et des pistaches. Parsemer du fromage de manière à donner l’effet d’une fine neige. Saler et poivrer.

Pasta e Piselli

As you know, I now tend to use Banza pasta instead of the regular wheat kind, to limit carbs. I really like it, but I now realize that perhaps it’s not meant to be substituted in every recipe. For example, when I made this pasta with mushrooms and cashew cream, I think that the pasta water, despite being starchy, was not up to making a sauce as the recipe intended. However, Banza did work very well with this easy pasta e piselli dish, which is meant to be more of a soup than a saucy pasta. I made a meatless version that I really liked! But the Engineer found it bland, so perhaps I should have added salt or more cheese to compensate for the pancetta. Too bad I had doubled the recipe… 

I used Banza’s orzo pasta, but to be honest, had I found regular ditalini, I would have used those instead. For substitutions, just use the same weight of another shape of small pasta. And don’t use parmesan instead of the pecorino romano here, it would not be the same! 

2 Tbsp. olive oil, plus extra for drizzling 
1 onion, finely chopped 
2 ounces pancetta, finely chopped (I omitted it) 
½ tsp. table salt 
½ tsp. black pepper 
2 ½ cups chicken broth (or vegetable broth; I used 2 cups) 
2 ½ cups water (I used 2 cups) 
7 ½ oz (1 ½ cups) ditalini 
1 ½ cups frozen petite peas (I had closer to 1 cup) 
1/3 cup minced fresh parsley 
¼ cup grated pecorino romano cheese, plus extra for serving 
2 Tbsp. minced fresh mint 

Heat oil in a large saucepan over medium heat until shimmering. Add onion, pancetta, salt, and pepper and cook, stirring frequently, until onion is softened, 7 to 10 minutes. 

Add broth and water and bring to a boil over high heat. Stir in pasta and cook, stirring frequently, until liquid returns to a boil. Reduce heat to maintain a simmer; cover, and cook until pasta is al dente, 8 to 10 minutes. 

Stir in the peas and remove the saucepan from the heat. Stir in parsley, pecorino romano, and mint. Season with salt and pepper to taste. Serve, drizzling with extra oil (if desired – I omitted it) and passing pecorino romano separately.


Tuesday, March 15, 2022

Dinner Crêpes

I’m always game for branching out and trying new crêpes and pancake recipes. I had made a ”flourless” blueberry pancake for myself – it wasn’t really flourless, it just had oat flour instead of wheat flour – but it was a disaster and fell apart. I also tried so-called ”healthy” pancakes (with yogurt for protein), and they were fine. Then came Candlemas and the welcome obligation to make crêpes. They had to be different from the super spinach crêpes that we’d just had. I knew my kids wouldn’t go for a spinach and feta option, so I decided to make a basic crêpe batter recipe and use up the leftover turkey bacon we had, adding fried eggs and some gruyere for those who wanted it. I don’t know the metrics on this, but screw them – it was a hit!

I ended up adding an extra ½ cup of water to the crêpe batter because it seemed a bit thick to me, but even then it didn’t make particularly thin crêpes – there wasn’t any way in heck I could fold over the edges like in the original post, but I did roll them up like wraps for the kids (and kids-at-heart). This made about 8 crêpes. You could add herbs to the batter for savory crêpes, or a bit of sugar and vanilla for sweet ones, but this plain recipe will work for either. 

2 large eggs
1 ¼ cups lactose-free whole milk 
1 cup (5 oz/140 g) all-purpose flour 
1 Tbsp. melted lactose-free butter or vegetable oil, plus more for cooking 
1 pinch kosher salt 

Combine eggs, milk, flour, melted butter or oil, and salt in a blender. Start blender on low speed and increase to high. Blend until smooth, about 10 seconds. (Alternatively, you can combine the ingredients in a mixing bowl and whisk vigorously until smooth.) 

Heat a 10-inch nonstick or well-seasoned cast iron or carbon steel skillet over medium heat for 2 minutes. Lightly grease with oil or butter, using a paper towel to wipe out the excess. 

Hold the pan's handle in one hand and pour in 3 to 4 tablespoons of batter (I had more), swirling and tilting pan immediately to spread batter in a thin, even layer over bottom of pan. 

Let cook until top looks dry, about 20 seconds. Using a thin metal or nylon spatula, lift one edge of crêpe. Grab that edge with the fingers of both hands and flip crêpe. Cook on second side for 10 seconds, then transfer to a plate. Repeat with remaining batter. 

Fill crêpes as desired (such as with butter, sugar, and lemon juice; with butter and jam; with ham, cheese, and eggs; or with filling of your choice) and serve. Crêpes can also be made ahead and stored, unfilled and wrapped in plastic, in the refrigerator for up to 3 days. Reheat in a nonstick pan to serve.


Sunday, March 13, 2022

Vegan Chocolate Beet Cupcakes


I didn’t know if I could start making desserts with beets and chocolate again. The Engineer did ask me to lay off for a while, but that was what, at least three years ago? So I took a chance and made these chocolate beet cupcakes from Minimalist Baker. Not only were they delicious, but I will tell you straight up I couldn’t tell they contained beets, and neither could anyone else – I don’t think the Engineer even realized this had happened until he read this blog post. We give them 4 thumbs up! 

I made the beet purée a day ahead; I did have more than needed for the recipe, so I froze the leftovers. 

1 medium beet (you’ll need ½ cup puréed) 
1 cup (120 g.) whole-wheat pastry flour or unbleached all-purpose flour 
½ cup (50 g.) unsweetened cocoa powder (plus more for topping) 
1 tsp. baking soda 
½ tsp. baking powder 
1 pinch salt 
1 cup unsweetened vanilla almond milk (or other plant milk; at room temperature if using coconut oil) 
1 tsp. white or apple cider vinegar 
¾ cup raw turbinado OR granulated sugar (I used ½ cup turbinado + ¼ cup monkfruit sugar) 
¼ cup avocado or melted coconut oil 
2 tsp. pure vanilla extract 

Preheat oven to 425 °F. 

Remove the stem and most of the root from your beet(s), and scrub and wash them underwater until clean. Wrap beet(s) in foil, drizzle on a bit of olive or avocado oil, wrap tightly, and roast for one hour or until a knife inserted falls out without resistance. They should be tender. Set in the fridge (in a bowl to catch juice) to cool to room temperature. 

Once they have cooled, purée the beets in a small blender or food processor (you can add a bit of water to encourage mixing). Measure out ½ cup and set aside; reserve the rest for another use.

Lower the oven temperature to 375 °F. Line a muffin pan with paper liners.

In a small bowl, whisk together the flour, cocoa, baking soda, baking powder, and salt. Set aside. 

In a large bowl, whisk together the almond milk and vinegar and set aside for a few minutes to curdle. Add the sugar, oil, vanilla extract, and ½ cup beet purée and beat until foamy. 

Add the dry ingredients into the wet ingredients while mixing with a hand-held mixer or a wooden spoon. Beat until no large lumps remain. 

Pour batter into liners, filling ¾ of the way full. Bake 22 to 25 minutes, or until a toothpick inserted into the center comes out clean. Transfer to a cooling rack and let cool completely. Do not try and unwrap them at this point or they'll stick to the wrapper. 

Once cooled, dust with cocoa powder and/or icing sugar and store in an airtight container to keep fresh.


Saturday, March 12, 2022

Plaque de tofu et de poulet à l'asiatique

Pendant nos vacances de Noël, j’ai feuilleté le livre de recettes Presque Végé de Geneviève O’Gleman et j’ai pris en note certains plats que je voulais essayer. Celui-ci, la premier que j’ai fait, était excellent! Je pense que c’est la première fois que je vois dans un tel livre du tofu comptabilisé comme en Asie, c’est-à-dire simplement en tant que « protéine » plutôt que strictement « substitut de protéine animale ». Le Petit Prince et l’Ingénieur ont quand même préféré le poulet, mais le tout était délicieux! Et en plus, il y a un arc-en-ciel de légumes. Que vouloir de plus? 

2 gousses d’ail, hachées finement 
2 c. à soupe de gingembre râpé 
¼ tasse de sauce soya réduite en sodium 
¼ tasse de vinaigre de riz 
1 c. à soupe de fécule de maïs 
1 c. à soupe d’huile d’olive 
2 c. à soupe de miel 
½ c. à soupe d’huile de sésame grillé 
1 oignon rouge 
1 lb. (450 g.) de hauts de cuisse de poulet désossés et sans la peau 
1 bloc (de 350 à 450 g.) de tofu extra-ferme 
2 poivrons rouges ou jaunes 
1 brocoli 

Préchauffer le four à 450 °F. Placer la grille au centre du four. Tapisser une plaque de cuisson de papier aluminium ou parchemin. (J’ai pris 2 plaques pour être sûre d’avoir assez de place.) 

Dans un petit bol, mélanger la sauce soya, le vinaigre, la fécule de maïs, l’huile d’olive, le miel, l’huile de sésame, l’ail et le gingembre. Réserver. 

Hacher grossièrement l’oignon et couper le poulet en cubes. Avec les mains, défaire le tofu en bouchées. 

Répartir le poulet d’un côté de la plaque de cuisson et le tofu de l’autre. Déposer l’oignon au centre. Verser la moitié de la marinade sur les morceaux de poulet et de tofu (réserver le reste de la marinade). Remuer pour bien les enrober. Cuire au four 20 minutes. 

Pendant ce temps, couper les poivrons en cubes et le brocoli en fleurons. Peler le pied du brocoli et le couper en bâtonnets. 

Retirer la plaque du four. Retourner les morceaux de tofu et de poulet et les déplacer aux extrémités de la plaque. Disposer les légumes en rangées au centre de la plaque. Verser le reste de la marinade sur les légumes et poursuivre la cuisson 20 minutes. 

Si désiré, accompagner de riz ou de vermicelles pour servir.


Tuesday, March 08, 2022

Chocolate (Raaka and others)

 Is it just me of has it been a while since I talked about chocolate brands? (Not counting my homemade chocolate, of course). 

I had tried a new-to-me brand of chocolate in Montreal over the holidays: a bar of Kétolat Sea Salt, because I was looking for something low-carb. Well, it wasn’t very good at all, and I won’t be buying that brand again. Luckily for me, I also bought a bar of my favorite Rochef Sea Salt (they changed the packaging since last time), and not only was it really delicious, it turns out it really doesn’t have that many carbs either! I’m sticking to Rochef in Quebec from now on. 


Then, since I already liked Raaka Pink Sea Salt, I decided to try other flavors. Raaka doesn’t roast their cacao beans, so their (vegan, ethical) chocolate actually tastes a bit fruitier than other brands – in a pleasant way. Many of their flavors are low-carb and/or free of refined sugar (like this bundle). They sold a bar of Tahini Swirl that, unfortunately, seems to have been a limited-time thing because I can no longer find it on their website. It was beautiful, though, as well as smooth and perfectly balanced. I loved it! They currently have a matcha swirl that is in the same style, though I haven’t tasted it. 


I also enjoyed their Oat Milk bar and Coconut Milk bar, but not the Pure Cacao & Strawberry & Coconut, which was much too bitter for my taste. The Maple Nib was a bit disappointing, because I couldn’t taste the maple much and I decided I don’t really like nibs in my chocolate. But then the Pink Magic was really fun: vegan white chocolate mixed with red-fleshed pitaya (dragon fruit). It was a little soft and melted very easily, but was also very good, so totally worth it. 


I also tried the Green Tea Crunch – again, I couldn’t really taste the green tea, but the crunch part was puffed quinoa which was small enough that I appreciated it. The one I’m currently eating is Rose Cardamom, which is really lovely! I’m detecting a pattern in that I can’t taste the rose, but the cardamom is present in just the right amount. All in all, I really like this brand!

Friday, March 04, 2022

Banana Miso Bread

While it does often feel like my kids are whining about not having anything special to eat for breakfast (because… I don’t make pancakes and waffles every day?), they are usually happy with some kind of loaf bread. I really didn’t like this low-carb pumpkin bread made with almond flour because it completely fell apart and wasn’t even much good. The pumpkin and pear bread from Weelicious was good, but nothing to write home about. 

Then when I saw the recipe for miso banana bread, well… I was like a moth to a flame. Of course I had to make it! But I had to do it my way: I don’t like having a banana sliced lengthwise on top of baked goods, because while it looks great when it comes out of the oven, it won’t look appetizing at all when you’re finishing it up a few days later. Also, the baking time seemed outrageous even for a loaf bread (90 minutes!), so I brought it down to a more reasonable 60 minutes – and if your oven runs hot, I’d even check before then. And I used a standard-size loaf pan. This was really good! The miso is very subtle, and no one would guess there’s anything unusual about the ingredients. 


4 medium overripe bananas (I cleared out my freezer for this, hence their ragtag appearance) 
1 ¾ cup all-purpose flour (I used white whole wheat flour) 
1 tsp. baking soda 
½ tsp. baking powder 
¼ tsp. kosher salt 
1 stick lactose-free butter, softened 
1 cup sugar 
¼ cup white miso 
½ cup lactose-free buttermilk substitute 
2 large eggs 

Preheat the oven to 350 F°. Butter and flour a 9-by-5-inch metal loaf pan. I

n a bowl, using a fork, mash the bananas until chunky. In another bowl, whisk the flour, baking soda, baking powder and salt. 

Using a stand mixer fitted with the paddle, cream the butter, sugar and miso at medium speed until fluffy, about 5 minutes. At low speed, slowly add the buttermilk, then beat in the eggs 1 at a time until incorporated. Beat in the mashed bananas; the batter will look curdled. Add the dry ingredients and mix until just blended. Scrape into the prepared pan. 

Bake for 60 minutes (see note above), or until a toothpick inserted in the center comes out clean. Let the bread cool on a rack for 30 minutes before turning out to cool completely.


Wednesday, March 02, 2022

Petits pots de crème au chocolat


Quand j’ai vu la photo de cette recette sur Instagram, je n’ai pas pu m’empêcher de la faire! J’ai utilisé du lait d’amandes au chocolat au lieu du lait d’avoine au chocolat; je n’ai pas mis de crème de noisette; et j’ai réduit le sucre de moitié, mais j’aurais pu réduire encore davantage. Les quantités ci-dessous sont les miennes. La recette donne environ 6 portions (que j’ai étirées en 8 petites portions). J’ai mis des clémentines comme garniture, et j’aurais moi aussi ajouté des arilles de grenade si j’en avais eu des belles! Ce serait également bon avec des fruits des champs. 

¼ tasse de sucre de canne (voir plus haut) 
¼ de tasse de fécule de maïs 
1 pincée de sel 
2 tasses de boisson d'avoine au chocolat (voir plus haut) 
100g (j’ai arrondi à 4 oz) de chocolat noir en morceaux (50% pour moi) 
1 c. à soupe d'extrait de vanille 
1 c. à soupe de crème de noisette (je n’en ai pas mis) 

Dans une casserole, mélanger le sucre, la fécule de maïs et le sel. 

Verser la boisson d'avoine au chocolat et porter à ébullition en mélangeant constamment le temps que le mélange épaississe. 

Ajouter les morceaux de chocolat noir, l'extrait de vanille et la crème de noisette et remuer jusqu'à ce qu'ils soient fondus. Retirer du feu. 

Verser dans un bol ou dans de petits ramequins individuels et réfrigérer au moins 4 heures.