Thursday, August 31, 2023

Roundup of summer's end

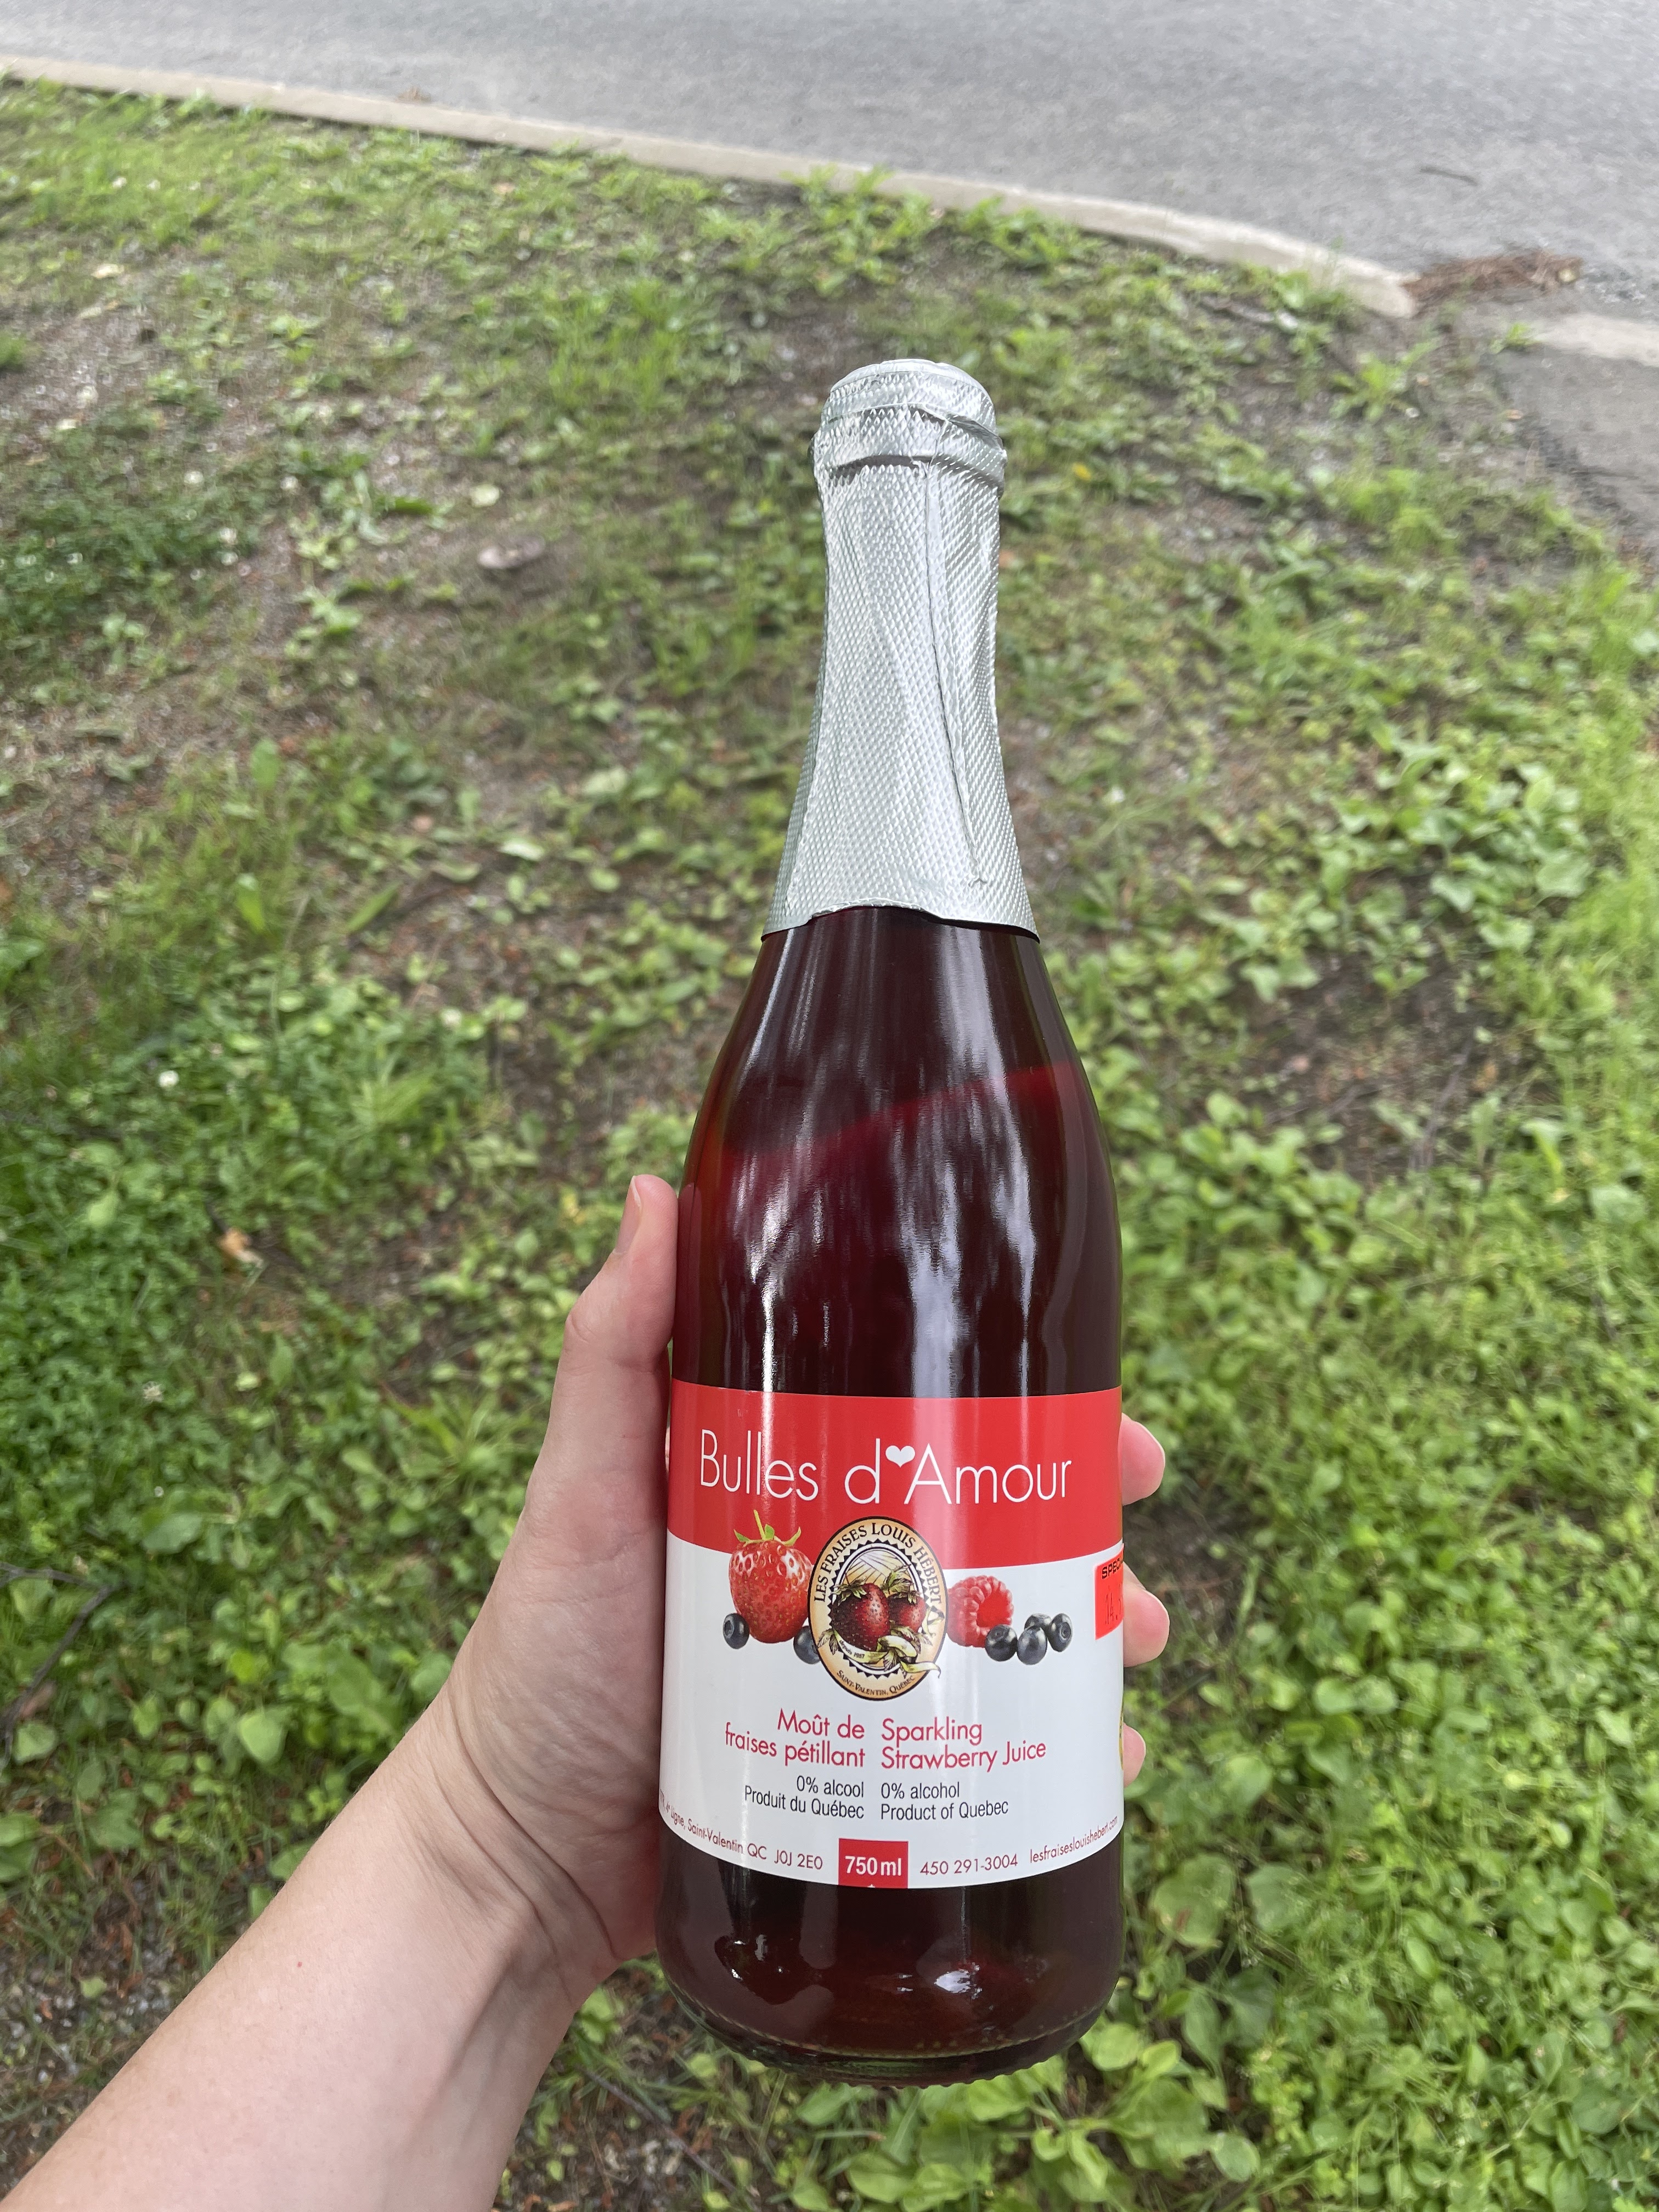
I didn’t try many new Canadian products over the summer. The two that stood out are Theobroma’s Zero Sugar Chocolate (in dark and coconut) as well as Bulles d’Amour, a sparkling strawberry juice. (I bought it at Les Pères Nature, a new-to-me grocery store that reminded me of Whole Foods and Exofruits, and I just loved shopping there!) While the chocolate was disappointing, unsatisfying, and not nearly as good as regular Theobroma, I really like the sparkling strawberry juice! But given that it’s hard to find and expensive, I doubt I’ll be making it a regular purchase. 


On the way back, we finally got to stop at Sister Pie in Detroit – during opening hours! We got two pie slices to go; one was salted maple pie, and the other was a creamy peach custard pie. The Engineer and I really liked both of them, and we agree that their pie dough is great! (While our kids were with us, neither one of them likes pie, but I’ve decided not to disown them.) For lunch, we went right across the street to Frenchie’s, where we had some really great sandwiches. The retro décor was lovely! 


We also stopped for the first time at a Naf Naf location. Basically, picture a fast-food restaurant, but it serves Middle Eastern fare. I had a nice salad with chicken shawarma and a warm pita, we got falafel for the table, and it was just great. We’ll definitely pull over for a Naf Naf from now on! 

Finally, we tried Naaman’s in Texarkana, and are now lamenting the fact that we’d have to drive all the way to Texarkana to eat there again. It was fantastic, with outstanding service by our waiter (nicknamed Mr. Bowtie), wonderful food, and an all-around awesome experience. I had a house salad with smoked chicken, and was so pleasantly surprised by both the appearance and taste of my dish! The barbecue sauce, which our waiter brought to the table for us to taste, was superb. We shared desserts, too, and now think we might have to make this a standard stop in our road trips. The restaurant might open another location in Oklahoma, but I hope they come further south too!


Mini Toad in the Hole


My kids just love when their dad makes toad in the hole, and I’m always looking for new things to put in their lunchboxes, so this recipe was perfect! I found it in one of Annabel Karmel’s cookbooks, but it is also on her website. These are super easy to make, and while the kids would prefer them warm from the oven rather than in a lunchbox, I recommend these. I ended up making a double batch and freezing the excess, just to use up the extra sausage in the package. (I seriously considering eating all of them warm, though, they were so good!) 

12 cocktail sausages 
100 g (¾ cup + 1 Tbsp.) all-purpose flour 
2 eggs 
¾ cup lactose-free whole milk 
sunflower oil, for greasing 

Preheat the oven to 400 °F. 

Put the sausages onto a baking sheet. Roast in the oven for 10 to 15 minutes until nearly cooked and very lightly golden. 

Mix the flour, eggs, and milk together in a large bowl until smooth using an electric whisk. 

Brush a 12-hole muffin tin with oil. Put in the oven for 10 minutes to get very hot. 

Immediately put the batter mixture halfway up the holes in the tin. Put a sausage in the middle of each batter-filled hole. Put in the oven for 15 minutes, until well risen and golden brown.


Saturday, August 05, 2023

Tarte aux trois chocolats


Une magnifique tarte aux trois chocolats, ça vous dit? J’ai trouvé cette recette dans Coup de Pouce. 

C’est vrai qu’il peut être difficile de trouver un chocolat blanc sans lactose, mais avec cette petite quantité, je n’ai pas de problème. J’avoue que ça peut être embêtant, une recette qui demande moins d’un sachet de gélatine, mais puisque c’était la deuxième recette du genre que je faisais en un cours laps de temps (la première étant celle-ci), ça m’a en fait aidé à finir mon sachet! Enfin, si vous utilisez une crème végétalienne, il ne faut pas la faire chauffer – j’ai donc modifié les instructions ci-dessous selon ce que j’ai fait, puisque je n’ai pas de crème laitière sans lactose aux États-Unis. 

Pour la ganache montée au chocolat blanc 
3 oz. de chocolat blanc à cuisson, haché 
¾ tasse de crème à fouetter sans lactose 

Pour la croûte sablée au cacao 
1 ¼ tasse de farine 
1/3 tasse de poudre de cacao tamisée 
2 c. à soupe de sucre en poudre 
½ tasse de beurre sans lactose froid, coupé en cubes 
1 jaune d’œuf 
1 c. à soupe d’eau froide 

Pour la garniture au chocolat noir
1 ½ c. à thé de gélatine sans saveur 
2 c. à soupe d’eau 
6 oz. de chocolat noir haché 
1/3 tasse de sucre granulé 
1 ½ tasse de crème à fouetter sans lactose, froide, divisée 
2 c. à soupe de copeaux de chocolat 


Pour la ganache montée au chocolat blanc 
Faire fondre le chocolat dans un bain-marie à feu doux, puis ajouter la crème et mélanger délicatement jusqu’à homogénéité. Couvrir directement la surface de la ganache d’une pellicule plastique. Laisser refroidir à la température ambiante, puis réfrigérer 6 heures ou jusqu’au lendemain. 

Pour la croûte sablée au cacao 
Entre-temps, au robot culinaire, mélanger la farine, le cacao et le sucre glace. En actionnant et en arrêtant l’appareil, incorporer le beurre jusqu’à ce que le mélange ait la texture d’une chapelure grossière. Dans un petit bol, mélanger le jaune d’œuf et l’eau. Verser sur la préparation de farine et mélanger en actionnant et en arrêtant l’appareil jusqu’à ce que la pâte commence à se tenir. Presser uniformément la pâte dans le fond et sur la paroi d’une assiette à tarte à fond amovible de 9 po (23 cm) de diamètre. (Je vous dirais même de graisser l’assiette au préalable pour vous faciliter la vie.) Réfrigérer 30 minutes. (La pâte se conservera jusqu’au lendemain, au réfrigérateur.) 
 
À l’aide d’une fourchette, piquer le fond et le pourtour de la croûte. Cuire au centre du four préchauffé à 350 °F pendant 20 minutes. Laisser refroidir sur une grille. 

Pour la garniture au chocolat noir 
Entre-temps, dans un petit bol, saupoudrer la gélatine sur l’eau. Réserver. Dans un bol en métal placé sur une casserole d’eau chaude, mais non bouillante, faire fondre le chocolat, en brassant jusqu’à ce qu’il soit lisse. Réserver. Dans une petite casserole, mélanger le sucre et ¾ tasse de la crème. Chauffer la préparation à feu moyen jusqu’à ce que le sucre soit dissous. Retirer la casserole du feu, ajouter la préparation de gélatine en fouettant jusqu’à ce qu’elle soit dissoute. Incorporer cette préparation au chocolat fondu réservé. Laisser tiédir 15 minutes. 

Dans un autre bol, à l’aide d’un batteur électrique, fouetter le reste de la crème bien froide jusqu’à ce qu’elle forme des pics fermes. À l’aide d’une spatule, incorporer le tiers de la crème fouettée à la préparation de chocolat en soulevant délicatement la masse. Incorporer le reste de la crème fouettée de la même manière, en deux fois. Verser la garniture sur la croûte au cacao refroidie. Lisser le dessus à l’aide d’une spatule, couvrir le moule de pellicule plastique et réfrigérer 4 heures ou jusqu’à ce que la garniture ait pris. (La tarte se conservera jusqu’au lendemain, au réfrigérateur.) 

À l’aide du batteur électrique (utiliser des fouets propres), fouetter la ganache au chocolat blanc à vitesse moyenne jusqu’à ce qu’elle forme des pics mous. [Il est important de ne pas fouetter la ganache trop longtemps ou trop rapidement, au risque d’obtenir un résultat granuleux. Si jamais c’est le cas, on peut faire fondre le mélange et le réfrigérer jusqu’à ce qu’il soit bien froid avant de le fouetter de nouveau (et avec délicatesse!).] À l’aide d’une cuillère, étendre la ganache montée au centre de la garniture au chocolat. Au moment de servir, parsemer des copeaux de chocolat.




Shredded Teriyaki Chicken Salad


This teriyaki chicken salad is a great summer dish – as a matter of fact, I think I’ll make it again once I get home in a few weeks. The original recipe said it made 4 servings, but I got way more mileage out of this! 

For the teriyaki sauce 
⅔ cup (85 g) brown sugar 
1 cup soy sauce 
¼ cup lemon juice 
1 Tbsp. sesame seeds 
1 tsp. fresh ginger, grated 
1 Tbsp. garlic, grated 

For the salad 
1 ½ lb. (685 g) boneless, skinless chicken breast 
½ cup olive oil (I’d use less next time) 
1 head green leaf lettuce, roughly chopped 
1 mango, pitted and cubed 
1 red bell pepper, seeded and thinly sliced 
1 orange bell pepper, seeded and thinly sliced 
10 green beans, thinly sliced on the bias 
1 avocado, sliced 
1 scallion, greens only, finely chopped 


For the teriyaki sauce 
 In a liquid measuring cup or medium bowl, combine the brown sugar, soy sauce, lemon juice, sesame seeds, ginger, and garlic. Whisk to combine and dissolve the sugar. 

For the salad 
Butterfly the chicken breasts, then place in a high-walled baking dish. Pour the teriyaki sauce over the chicken, reserving ½ cup of the sauce. Cover the dish with plastic wrap and marinate the chicken in the refrigerator for 20 minutes. 

Preheat the oven to 375 ˚F. Line a baking sheet with foil. 

To make the dressing, slowly drizzle the olive oil in the reserved teriyaki sauce while whisking. 

Transfer the marinated chicken breasts to the prepared baking sheet. Bake for 25-30 minutes, or until the internal temperature reaches 160˚F. Let cool for 10 minutes. 

In a medium bowl, use 2 forks to shred the chicken. Pour ¼ cup dressing over the chicken and toss to coat. 

Put the lettuce in a large bowl. Top with the mango, bell peppers, green beans, avocado, and shredded chicken. Add the remaining dressing and toss well. 

Divide between serving bowls and top with the scallions.


Friday, August 04, 2023

Raspberry Rose Angel Food Cake


I had to empty out the freezer, and since I still had a lot of egg whites left, I made another angel food cake, this time, flavored with raspberries and rosewater. This one was really good, and it looked great! 

I love rosewater, and I used the amount recommended, but I felt like I could barely taste it in the cake. This was disappointing to me, so I’d definitely use more next time. I also changed the frosting recipe: the original blog post said to cook (and cool) 2 cups of raspberries, then fold that into the frosting, but I went with 4 tablespoons of freeze-dried raspberry powder instead, and that just seems so much easier to me that it’s what I’m writing below. 

For the cake 
1 cup (120 g) cake flour, sifted 
1 ¼ cups (250 g) granulated sugar, divided 
¼ tsp. table salt 
12 egg whites, at room temperature (I used 16 oz.) 
1 ¼ tsp. cream of tartar 
2 tsp. vanilla extract 
zest of one lemon (optional) 
2 tsp. rose water (see note above) 

For the topping 
2 cups lactose-free cream 
4 Tbsp. freeze-dried raspberry powder 
¼ cup (50 g) packed light brown sugar 
1 ½ tsp. pure vanilla extract 
a handful of fresh raspberries, for garnish 


For the cake 
Preheat the oven to 350 °F. 

Sift the flour, half the sugar and salt, set aside. 

Whip the egg whites until foamy. Add 1 tablespoon water, the cream of tartar and vanilla, whip until it begins to form soft peaks. Add the remaining sugar, 1 tablespoon at a time until incorporated. Add the lemon zest and rose water and continue whipping until it is medium stiff peaks. 

Sift 1/3 of the flour over the whites and gently fold it in using a rubber spatula. Continue with another 1/3 and then the final flour. Transfer the batter into a 10-cup tube pan. Run a knife around the batter to get out any large air pockets, then smooth the top. Bake for about 30-40 minutes or just until a tester comes out with moist crumbs. 

Turn the pan upside down to cool. If your pan has feet, then you're all set, if not, you'll need to set it over a bottle of wine or balance it on soda cans. Once the cake is completely cool, run a paring knife around the outer edge and the middle. Invert the cake onto the serving plate. 

For the topping 
Whip the cream, raspberry powder, and brown sugar on medium speed until it just starts to thicken, add the vanilla and continue to whip until medium/soft peaks. 

Top the cake as desired (I put the frosting on top, but you could also slice the cake in half and put some in the middle as well as on top, or put some on the sides too.) Decorate with fresh raspberries as desired.


Thursday, August 03, 2023

Berry Quinoa Breakfast Bowl


I made these berry quinoa bowls for breakfast (and actually had to eat them for breakfast, hence the low-light photo conditions!). The quinoa (healthy carbs) is cooked in milk (extra protein) and served with Greek yogurt (again, extra protein), fruit, and almond butter. This was delicious, and helped keep me pretty full until lunch. I’d probably add more fruit than in the pictures next time. 

½ cup uncooked quinoa, rinsed 
1 cup lactose-free milk 
1 pinch of salt 
4 tsp. maple syrup, divided 
¼ tsp. vanilla extract or almond extract (I used vanilla bean powder) 
¼ tsp. cinnamon 
½ cup lactose-free plain Greek yogurt 
1 cup strawberries 
2 Tbsp. slivered almonds, toasted (optional) 
almond butter for drizzling on top (optional) 

In a medium sized saucepan, heat the milk over medium heat. When the milk is simmering, add in the quinoa and a pinch of salt and stir to combine. Bring the quinoa to a gentle boil then cover with a lid and reduce the heat to low. 

Simmer for 10 minutes, then stir in a tablespoon of the maple syrup and the cinnamon. Cover with the lid and cook for another 5-10 minutes or until the quinoa has absorbed most of the milk and is tender. (Check the quinoa occasionally and stir. If it starts to get too dry, add in additional milk.) 

Stir together the Greek yogurt, a teaspoon of maple syrup, and a splash of vanilla extract. 

Divide the cooked quinoa into 2 bowls. Top each with half of the Greek yogurt, berries, and almonds; drizzle with almond butter.

Tahini Chocolate Chip Cookie Dough Bites


Here’s a recipe that’s perfect if you want cookie dough bites, but are looking for a healthier version; this one is made with tahini, which is full of nutrients; it also has no refined sugar and is vegan (assuming you use maple syrup) and gluten-free. The recipe is from Soom. 

1 cup almond flour 
1/3 cup tahini 
¼ cup honey or maple syrup 
½ tsp. vanilla extract 
¼ tsp. sea salt 
1/3 cup mini chocolate chips 

Combine almond flour, tahini, honey, vanilla, and salt in a large bowl; mix well to combine. Fold in chocolate chips. 

Use a small cookie scoop to form mixture into 14 cookie dough bites (I got more). Sprinkle with flaky sea salt, if desired. Store in an airtight container, refrigerated, for up to 1 week.


Sunday, July 30, 2023

Hazelnut Butter Cup Tart


This tart is a bit like a giant peanut butter cup! I used powdered monk fruit sugar to make it, but in hindsight, I just don’t like that (the cooling sensation puts me off), so I’d recommend using the real stuff, and perhaps using only 1 cup of it instead of 1 ¼ cups. I used bittersweet chocolate instead of milk chocolate, and like it so much that I’m writing that below. I’m wondering whether I could use matzo crackers instead of ice cream cones to make it kosher for Passover… In any event, this was a great tart! The recipe is from Bon Appétit. 

2 ½ cups (350 g) hazelnuts, preferably blanched 
7 oz. quality bittersweet chocolate (about 60 %), chopped (about 1 cup) 
7 oz. quality semisweet chocolate, chopped (about 1 cup) 
2 ¼ tsp. Diamond Crystal or 1 ½ tsp. Morton kosher salt, divided 
4 sugar or waffle ice cream cones 
4 Tbsp. lactose-free butter, at room temperature 
1 Tbsp. vanilla bean paste or vanilla extract (I recommend the paste!) 
1 Tbsp. vegetable oil, plus more for pan 
1 ¼ cups (138 g) powdered sugar (see note above) 
flaky sea salt 

Place a rack in middle of oven and preheat to 350 °F. Toast hazelnuts on a rimmed baking sheet until golden brown in the center, 10–12 minutes. Let cool. If nuts are unblanched, rub together in a clean kitchen towel to remove skins; discard skins. 

Using a paper towel, lightly grease bottom and sides of tart pan with vegetable oil. If you’d like to eventually remove tart from bottom of pan, line with a parchment paper round. Melt bittersweet chocolate, semisweet chocolate, and ¼ tsp. Diamond Crystal or Morton kosher salt in a heatproof bowl set over a saucepan filled with 1" of barely simmering water, stirring with a heatproof rubber spatula, until just melted and smooth, about 5 minutes. Pour about half of chocolate into prepared pan (eyeballing is fine!); set remaining chocolate aside. Using a small spoon, spread chocolate across bottom and up sides of pan, working it all the way to edges of pan. Place on a rimmed baking sheet or large plate and chill in freezer until chocolate is set, at least 10 minutes and up to 30 minutes. 

Crush ice cream cones in a medium bowl until pieces are about peanut-size. (I did this in the food processor, so it makes more sense to put it at this point in the recipe.) Set aside. 

Meanwhile, pulse hazelnuts and remaining 2 tsp. Diamond Crystal or 1¼ tsp. Morton kosher salt in a food processor until a paste forms, about 4 minutes. Add butter, vanilla, and 1 Tbsp. vegetable oil; process until the texture of smooth peanut butter, about 4 minutes. Add powdered sugar; pulse until combined (mixture will be thick). 

Scrape hazelnut butter in the medium-sized bowl containing the crushed ice cream cones. Mix until well combined (using your hands might be most efficient, but I used a rubber spatula). Scrape hazelnut butter filling into chocolate shell and gently press down into shell to compact into an even layer; smooth surface with an offset spatula. 

Scrape remaining melted chocolate over nut butter (reheat slightly if needed), spreading all the way to the edges. Smooth surface with offset spatula or spoon. Sprinkle generously with flaky sea salt, then chill tart in freezer until chocolate is set and sides of tart are pulling away from pan, at least 30 minutes and up to 4 hours. 

Gently pop tart out of pan. (If pan is lined with parchment paper, remove bottom and peel away parchment; discard.) Transfer tart to a large plate and thaw in fridge 30 minutes. 

Let tart sit at room temperature 15–20 minutes before cutting into thin wedges. A knife dipped in hot water and wiped clean will make the neatest slices, but you don’t have to go through the trouble if you don’t want to.


Monday, July 24, 2023

Pouding aux fruits et aux légumes


J’ai trouvé cette recette dans un article de La Presse. C’était à servir avec un genre de quesadilla aux quatre garnitures, mais pour moi, c’était plutôt un déjeuner original.

J’ai pris environ 2/3 tasse de betteraves en conserve, 1 sachet de purée de pitaya, 1 ¼ tasse de framboises, 2 tasses de yogourt grec nature (donc davantage de fruits et de légumes par rapport au yogourt pour moi), et 4 c. à soupe de sirop d’érable puisque je n’avais pas de yogourt à la vanille sucré. Il n’y avait pas assez de protéines pour me satisfaire jusqu’à midi, mais j’ai beaucoup aimé ce pouding! 

1 tasse (150 g) de fruits surgelés au choix (je recommande les fruits des champs) 
1 tasse (180 g) de betteraves, cuites et hachées grossièrement (ou un reste de carottes cuites) 
3 tasses de yogourt grec à la vanille (voir note plus haut) 
2 c. à soupe de sirop d’érable (voir note plus haut) 
4 c. à soupe (25 g) de graines de lin moulues 

Au mélangeur, mixer tous les ingrédients jusqu’à l’obtention d’une consistance lisse et crémeuse.

Casserole de boulettes de bœuf aux épinards

Voici une recette tirée de Coup de Pouce : une casserole de boulettes de bœuf aux épinards, dans une sauce aux tomates et aux poivrons. Je précise, ci-dessous, de hacher les épinards et de bien saler et poivrer les boulettes. J’en ai fait la moitié sans féta, pour les enfants. Nous avons vraiment aimé ce plat! 

La recette d’origine dit d’accompagner ce plat de quartiers de pomme de terre, de riz, de pain pita ou d’une salade verte; je l’ai servi du couscous perlé et du pain pita version texane (c’est plus un plain plat qu’une pochette de pain). 


Pour les boulettes de bœuf 
1 paquet (500 g) d’épinards surgelés, décongelés, bien essorés, et hachés 
1 lb (500 g) de bœuf haché maigre 
1 tasse de parmesan râpé 
1 oignon, haché finement 
1 gousse d’ail, hachée finement 
1 œuf battu légèrement 
3 c. à soupe de chapelure 
sel et poivre 

Pour la sauce aux poivrons rôtis 
2 tasses de sauce marinara 
1 tasse de poivrons rôtis en pot, égouttés et hachés grossièrement 
1 contenant (200 g) de fromage féta sans lactose, égoutté et émietté 
feuilles d’origan frais (facultatif) 
sel et poivre 


Pour les boulettes 
Préchauffer le four à 400 °F. 

Dans un grand bol, mélanger l’ensemble des ingrédients jusqu’à ce que la préparation soit homogène. Saler et poivrer. Avec les mains, façonner la préparation en boulettes, 2 c. à soupe à la fois, et les déposer sur une plaque de cuisson tapissé de papier parchemin. Cuire au four 15 minutes ou jusqu’à ce que les boulettes aient perdu leur teinte rosée à l’intérieur. 

Pour la sauce 
Entre-temps, dans une casserole à feu moyen, cuire la sauce marinara et les poivrons rôtis 10 minutes en brassant de temps en temps. Au mélangeur ou au pied mélangeur, réduire la préparation en purée lisse. Saler et poivrer. 

Mettre les boulettes dans un plat de cuisson. Verser la sauce aux poivrons sur les boulettes et parsemer du féta. Cuire au four à 400 °F pendant 10 minutes ou jusqu’à ce que le fromage soit légèrement doré. Garnir de feuilles d’origan, si désiré.


Sunday, July 23, 2023

Gluten-Free Angel Food Cake


I had a lot of egg whites in the freezer (some of it from making recipes like this almond pie), so I decided to make angel food cake. Serious Eats argues that a gluten-free version is even better than the original because the gluten-free flours below create “a more delicate balance of starch and protein” than all-purpose wheat flour. (See here for more information about the choice of flours.)


I’ll confess immediately to using cornstarch instead of white rice flour (in a 1:1 ratio by weight), because as I was making the cake, I realized that I did not have white rice flour on hand (only brown rice flour and sweet rice flour, neither of which is a good substitute). Cornstarch is a relatively good substitute for white rice flour, though of course it’s best to use the blends specified below, and be aware that gluten-free flours are not interchangeable. I could have baked my cake a little longer, but it was really, really good! Seriously, no one would have guessed it was gluten-free – the crumb was perfect! It turns out that this works so well in large part because the protein in the egg whites gives the cake enough lift and structure that wheat flour isn’t strictly necessary. 

2 oz. (56 g) tapioca flour or arrowroot starch (about ½ cup) 
1 ½ oz. (42 g) white rice flour (about 1/3 cup) 
1 ½ oz. (42 g) cornstarch (about 1/3 cup) 
1 oz. coconut flour (about ¼ cup; 28g) 
1 tsp. (4 g) baking powder 
15 oz. (425 g) cold egg whites (about 2 cups), from 12 large eggs 
15 oz. (425 g) granulated sugar (about 2 cups) 
1 Tbsp. vanilla extract 
1 oz. (2 Tbsp.) freshly squeezed lemon juice, from 1 small lemon 
¼ tsp. (1 g) Diamond Crystal kosher salt; for table salt, use half as much by volume or use the same weight 

Adjust oven rack to the middle position and preheat to 350 °F. 

Sift tapioca flour or arrowroot starch, white rice flour, cornstarch, coconut flour, and baking powder into a large bowl. Whisk together until homogeneous, then sift mixture one more time to ensure total uniformity prior to mixing. 

Combine egg whites, sugar, and vanilla extract in the bowl of a stand mixer fitted with the whisk attachment. Mix on low to loosen, about 1 minute, then increase to medium-low (4 on a KitchenAid) and whip 3 minutes; the whites will be dense and dark. 

With the mixer still running, add lemon juice and salt. Immediately increase to medium (6 on a KitchenAid) and whip 3 minutes more; the meringue will be thin but foamy. Increase to medium-high (8 on a KitchenAid) and continue whipping until the meringue is glossy white and thick enough that you can see the pattern left by the wire whisk. This can take between 2 and 4 minutes, depending on the freshness of the whites and the horsepower of your mixer. When the meringue is ready, it should be soft enough to run off the wires when the whisk attachment is removed, but thick enough to mound up on itself like soft-serve in the bowl. 

Sprinkle flour blend on top and stir with a flexible spatula to roughly combine. Switch to a folding motion, scraping from the bottom up and folding through the center, until no pockets of flour remain. Scrape batter into a 10-inch aluminum tube pan (do not butter or grease pan); if you notice any small pockets of unincorporated flour, simply pause to mix them in. Bake until the cake is puffed, golden blond, and firm to the touch, about 45 minutes, or to an internal temperature of 206°F. (I did not measure the internal temperature of my cake, but should have baked it a tad longer.) 

Invert pan onto its stilts, over the neck of a wine bottle, or onto three soda cans (I balanced my pan on a single can because I’m a rebel) and cool upside down until absolutely no trace of warmth remains, at least 2 hours. Slide an offset spatula around the sides of cake to loosen, remove the insert, and slide spatula under the bottom as well. Flip onto a serving plate, pulling gently on the sides of cake to release it from the center tube. To serve, cut with a chef's knife, using a gentle sawing motion and only the slightest downward pressure. In an airtight container, leftovers will keep up to a week at room temperature.


Saturday, July 22, 2023

Almond Pie


Here’s a dessert from Bon Appétit, an almond pie from Spain. I didn’t like the dough recipe – it made too much, and the crust ended up being too thick for my taste; I would just use my regular recipe for a single-crust pie next time. The filling, however, is heavenly! The Engineer said he could eat this all day. 

For the crust 
1 cup (2 sticks) chilled lactose-free butter, cut into small pieces, plus more for the pan 
2 ½ cups (313 g) all-purpose flour, plus more for the pan and countertop 
1 tsp. Diamond Crystal or ½ tsp. Morton kosher salt 
1 tsp. sugar 
4 tsp. ice water 
4 tsp. gin or vodka, or more ice water 

For the custard and assembly 
2 ½ cup (500 g) sugar 
1 cup water 
9 large egg yolks 
2 large eggs 
¼ tsp. almond extract (optional, but why would you skip it?) 
2 ½ cups (240 g) ground almond flour or meal 
1 tsp. Diamond Crystal or ½ tsp. Morton kosher salt 


For the crust 
Grease a 9-inch deep pie dish with unsalted butter, then lightly dust with all-purpose flour, shaking out excess. Whisk 1 tsp. Diamond Crystal or ½ tsp. Morton kosher salt, 1 tsp. sugar, and 2½ cups (313 g) all-purpose flour in a large bowl to combine. Add 1 cup (2 sticks) chilled lactose-free butter, cut into small pieces, and toss to coat. Working quickly and aggressively, rub and smash butter into dry ingredients with your fingers to create shaggy pieces (you want some that are flat and thin and some that are pea-size). 

Combine 4 tsp. ice water and 4 tsp. gin or vodka or more ice water in a small bowl; drizzle over flour mixture, stirring with a fork to evenly distribute. Knead dough in bowl until it starts to come together (it will still look a little dry). Turn dough out onto a surface and knead 1 or 2 more times to incorporate shaggy edges. Press into a 1"-thick disk. Wrap tightly in plastic and chill at least 1 hour. 

Roll out disk of dough on a lightly floured surface to ¼" thick. Carefully transfer to pie dish. Lift up edges and allow dough to slump down into dish. Gently press into edges of dish if needed. Trim overhang so dough is flush with edges of pan. Freeze crust at least 1 hour and up to 1 week. 

For the custard and assembly 
Place a rack in middle of oven; preheat to 375 °F. Heat 2½ cups (500 g) sugar and 1 cup water in a medium saucepan over medium, whisking occasionally, until sugar is dissolved, about 5 minutes. Transfer syrup to a small bowl and let cool. 

Meanwhile, remove crust from freezer and prick bottom in several places with a fork. Line with parchment paper or foil, leaving overhang; fill with pie weights or dried beans. Bake until set and edges are barely golden, 13–17 minutes. Remove crust from oven and, using overhang, lift out parchment paper and pie weights. 

Whisk 9 large egg yolks and 1 large egg in a large bowl to combine. Add cooled syrup and ¼ tsp. almond extract (if using) and whisk to combine. Add 2½ cups (240 g) ground almond flour or meal and 1 tsp. Diamond Crystal or ½ tsp. Morton kosher salt and whisk again to combine. Transfer mixture to a blender and blend on high until very smooth and airy, about 1 minute. Pour filling into crust. 

Lightly beat remaining 1 large egg in a small bowl and brush crust with egg. 

Reduce oven temperature to 350 °F and bake pie 30 minutes. Reduce oven temperature to 300 °F and continue to bake pie until crust is deeply browned and top of filling is dark brown and set around the edges (a little jiggle in the center is okay), about 40 minutes. Transfer pie to a wire rack and let cool before slicing (if you cut pie while it is still warm, the slices will fall apart). The pie can be baked a day ahead; simply cover and chill.